Friday, April 6, 2012

Star Wars Cup Cake Toppers for Star Wars Birthday Party


For the party, I decided I would make some cupcakes. I thought about making cupcake wrappers with my Silhouette, but then I thought that might be too much work and use up a lot of paper. So then I decided on just making cupcake toppers. Jin Yong from Under a Cherry Tree has taught me pretty much everything I have learned about my Cameo. If you have a Silhouette, you should definitely check out her blog... She has some really good tutorials, and I referred to this one when I made these cupcake toppers.

I Googled Star War images and came across some really cute ones, I then opened up the image in the Silhouette Studio Designer Edition and followed Jin's tutorial for the rest.

Star Wars Cup Cake Toppers for Star Wars Birthday Party by ilovedoingallthingscrafty.com

Here is what I had once they were all cut up. For the toppers, I just used hot glue and toothpicks.

Star Wars Cup Cake Toppers for Star Wars Birthday Party by ilovedoingallthingscrafty.com

On the reverse side of the topper place a large enough glob of glue.

Star Wars Cup Cake Toppers for Star Wars Birthday Party by ilovedoingallthingscrafty.com

Fold in half and align with the bottom part of the topper. Press together. 

Star Wars Cup Cake Toppers for Star Wars Birthday Party by ilovedoingallthingscrafty.com

All ready for the cupcakes!

Now time to get started on the cupcakes, cake pops, and the cake!

Thanks for visiting!
Ilda :)

DIY Star Wars Dessert Table Galaxy Backdrop for Star Wars Birthday Party

I plan on having a dessert table for my son's Star Wars-themed party but wanted to make some sort of backdrop. So my initial thought was foam board and wrapping paper, easy enough I thought... but I had such a hard time finding wrapping paper that was space-themed, then I thought fabric and still no luck (mind you I didn't go looking in every store). So I thought I would just make my own. I purchased all of my supplies at the Dollar Store (under $8!).  And here is what I did...

DIY Star Wars Dessert Table Galaxy Backdrop for Star Wars Birthday Partyby ilovedoingallthingscrafty.com

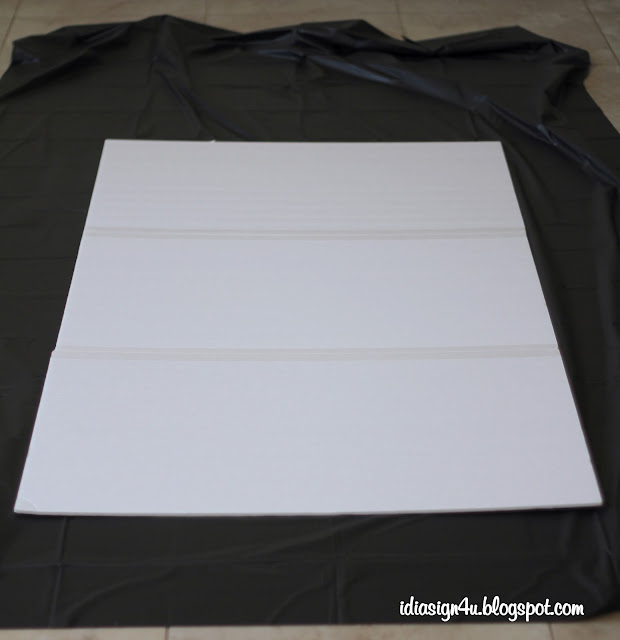
I used 3 foam poster boards.

DIY Star Wars Dessert Table Galaxy Backdrop for Star Wars Birthday Partyby ilovedoingallthingscrafty.com

Used packing tape to tape them to each other.

DIY Star Wars Dessert Table Galaxy Backdrop for Star Wars Birthday Partyby ilovedoingallthingscrafty.com

So instead of paper, I used a plastic table cover.

DIY Star Wars Dessert Table Galaxy Backdrop for Star Wars Birthday Partyby ilovedoingallthingscrafty.com

I then wrapped it up like you would a present, making sure that the plastic was pulled taught and then secured it with tape.

DIY Star Wars Dessert Table Galaxy Backdrop for Star Wars Birthday Partyby ilovedoingallthingscrafty.com

So I also picked up some silver glitter glue and some foam rollers.

DIY Star Wars Dessert Table Galaxy Backdrop for Star Wars Birthday Partyby ilovedoingallthingscrafty.com

So to make it look "spacey" I thought I would just smear silver glitter glue all over.

DIY Star Wars Dessert Table Galaxy Backdrop for Star Wars Birthday Partyby ilovedoingallthingscrafty.com

Once I was done I placed in a sunny area to let it dry.

DIY Star Wars Dessert Table Galaxy Backdrop for Star Wars Birthday Party by ilovedoingallthingscrafty.com

It's now ready... the perfect "spacey" looking backdrop! I have glow in the dark wall stickers that I also bought to place on the board... you'll just have to come back for the dessert table reveal! 

Imagine the possibilities, how easy to make your own backdrops.... paper, fabric or in this case plastic!

Hope you liked this idea!
Ilda :)

Thursday, April 5, 2012

DIY Star Wars Personalized T-shirt for Start Wars Birthday Boy


As part of my son's present I thought I would make him a personalized Star Wars T-Shirt. I have been wanting to try this out for a while, but never had a good reason to. I knew that Silhouette sold heat transfer vinyl, but living in Canada there are not very many places that carry Silhouette products, so I turned to Micheals. I had seen some iron-on printer transfer sheets there before so I went there this past weekend with a 50% off coupon and bought a package.

DIY Star Wars Personalized T-shirt for Start Wars Birthday Boy by ilovedoingallthingscrafty.com

I've been to Dollar Store so often recently for all the party supplies and look at what I found there! A Fruit of the Loom T-shirt... Only $2!

DIY Star Wars Personalized T-shirt for Start Wars Birthday Boy by ilovedoingallthingscrafty.com

I then began designing the T-shirt logo on the Silhouette Studio Designer Edition. I didn't have Star Wars font but I found the font for free here! You don't need the Silhouette to make this T-shirt but I wanted the Cameo to cut around the edges for me.  

DIY Star Wars Personalized T-shirt for Start Wars Birthday Boy by ilovedoingallthingscrafty.com

Here is what it looked like on-screen before I sent it to the printer. To use these transfer sheets you must use an inkjet printer, NOT laser printer! I learned that the hard way... we had to pull out our old printer for this.

DIY Star Wars Personalized T-shirt for Start Wars Birthday Boy by ilovedoingallthingscrafty.com

After it was printed, I then cut out the images with the Cameo.

DIY Star Wars Personalized T-shirt for Start Wars Birthday Boy by ilovedoingallthingscrafty.com

On the back of the T-Shirt, I ironed on the little Star Wars logo (centered under the neckline).

DIY Star Wars Personalized T-shirt for Start Wars Birthday Boy by ilovedoingallthingscrafty.com


Finally, I placed the image on the front of the T-shirt and followed the directions on the transfer package. Seconds later the image fused and now I have a T-shirt that my son is surely going to love! Next time you see this shirt it will be finished and on my son :)

Thanks for coming by!
Ilda :)

Wednesday, April 4, 2012

DIY Trooper Trash Cans for Star Wars Birthday Party

While I was at the dollar store I came across some trash cans that I thought I could make look like storm trooper heads.

Here is what I did...

DIY Trooper Trash Cans for Star Wars Birthday Party  by ilovedoingallthingscrafty.com

I used these two plastic trash containers, black duct tape, blue electrical tape, scissors, (foil tape and parchment paper not pictured here).

DIY Trooper Trash Cans for Star Wars Birthday Party  by ilovedoingallthingscrafty.com

I tried cutting the shapes I needed for the face of the troopers but the tape kept sticking to the scissors, so I had a light bulb moment... parchment paper! Nothing sticks to that stuff! So that is what I used. I drew out my shapes and then just cut them out.

DIY Trooper Trash Cans for Star Wars Birthday Party  by ilovedoingallthingscrafty.com

I used my punch to cut out again perfect circles.

DIY Trooper Trash Cans for Star Wars Birthday Party  by ilovedoingallthingscrafty.com

I then took a dry erase black marker and just drew the shadowing under the eyes.


They make perfect containers for the lightsabres. Aren't they just so cool, my son was so excited when he saw what I was working on! 

DIY Trooper Trash Cans for Star Wars Birthday Party  by ilovedoingallthingscrafty.com

Click here on how I made the lightsabres.

Alright enough blogging, have to get more Star Wars stuff done!


Ilda :)

DIY Lightsabers for Star Wars Birthday Party


Welcome back... if you have a little boy you sure are going to love this post! (hopefully)

My son's request for this year's birthday party theme was Star Wars. Thankfully there are lots out there for you. Being a crazy crafter I always want to make most of my decor myself! What a task... one idea always leads to another, and it feels never-ending! As long as everything is ready for Saturday I'll be happy :)

So this first post I will share with you how I made my lightsabers.

DIY Lightsabers for Star Wars Birthday Party by ilovedoingallthingscrafty.com

Here is what I used... Water noodles, black duct tape and foil tape, and scissors. These were all purchased at the Dollar Store! With the noodles, I cut each one of them in half.

DIY Lightsabers for Star Wars Birthday Party by ilovedoingallthingscrafty.com

Next, I covered one of the ends with black duct tape and folded down the excess tape.

DIY Lightsabers for Star Wars Birthday Party by ilovedoingallthingscrafty.com

Then I added a strip of tape to the top of the noodle, ensuring that I was wrapping around it pretty straight.

DIY Lightsabers for Star Wars Birthday Party by ilovedoingallthingscrafty.com

Repeated the last step to make a wider handle.

DIY Lightsabers for Star Wars Birthday Party by ilovedoingallthingscrafty.com

With my one inch punch, I cut out a piece of foil tape This tape comes with a backing that peels of before you adhere it.

DIY Lightsabers for Star Wars Birthday Party by ilovedoingallthingscrafty.com

Peeled off the backing and added it to the handle.

DIY Lightsabers for Star Wars Birthday Party by ilovedoingallthingscrafty.com

To embellish the handle, I cut the foil tape lengthwise to create some strips.

DIY Lightsabers for Star Wars Birthday Party by ilovedoingallthingscrafty.com

Wrapped it around the base of the handle.

DIY Lightsabers for Star Wars Birthday Party by ilovedoingallthingscrafty.com

And there you go homemade lightsabers, that the kids can enjoy (hopefully they won't hurt each other too badly!)


Thanks for visiting,
Ilda :)

Tuesday, April 3, 2012

3D Paper Letters - SADIE | & DIY Glass Buttons | SVGCuts


Wow... It feels like a while since my last post! I have been crazy busy... between work, life and planning my sons birthday party for this weekend, I am ready to pull my hair out :(  I'll have posts on my sons "Star Wars" themed birthday crafts hopefully within the next few days! Stay tuned if you are a Star Wars fan :)

But first... I want to share with you the 3D paper name I made last week for my cousins' friend.

3D Paper Letters - SADIE | & DIY Glass Buttons by ilovedoingallthingscrafty.com

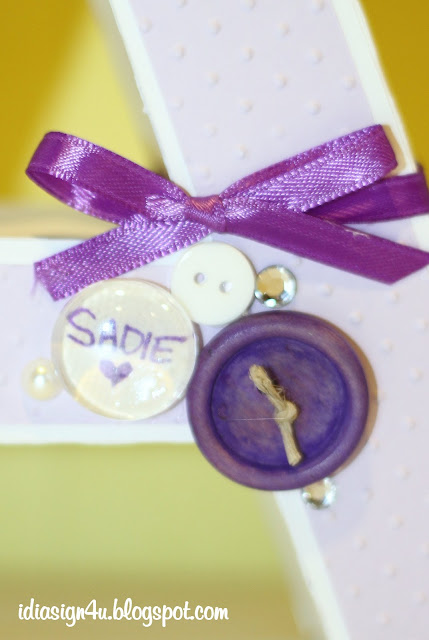
These paper 3D letters stand about 6.5" tall. They were filled with some dried beans to keep them from toppling over. The 3D letters are from SVG Cuts 3D letter kit. The butterfly is from the SCAL library. Added some buttons, bows and a silk flower to dot the "I". Boy did I have a tough time making the "S"... I have made a few of these names in the past but never had to make an "S", maybe next time it will be easier!  The "A" and the "I" were embossed with the Cuttlebug (hard to see in this picture). The paper I purchased at Micheal's in the open card stock paper section, sorry don't have the exact company names for them :(

Here are a few more close-ups.

3D Paper Letters - SADIE | & DIY Glass Buttons by ilovedoingallthingscrafty.com


3D Paper Letters - SADIE | & DIY Glass Buttons by ilovedoingallthingscrafty.com

I don't have an Epiphany Craft button make, but I really do like the look... I did though have glass beads and hot glue, so I made due! I think it turned out pretty cute and so simple. I found this idea on Pinterest here, so I knew I had to try it! 

So here is what I did...

3D Paper Letters - SADIE | & DIY Glass Buttons by ilovedoingallthingscrafty.com

 You need scissors, hot glue, paper, pen, and a flattened glass bead.

3D Paper Letters - SADIE | & DIY Glass Buttons by ilovedoingallthingscrafty.com

Write your message on a scrap piece of paper, and place a fair amount of glue on the back of the glass bead.

3D Paper Letters - SADIE | & DIY Glass Buttons by ilovedoingallthingscrafty.com

Press the glass bead centered on the message.

3D Paper Letters - SADIE | & DIY Glass Buttons by ilovedoingallthingscrafty.com

Cut around the bead.

3D Paper Letters - SADIE | & DIY Glass Buttons by ilovedoingallthingscrafty.com

And there you have a new glass button to embellish your project! Hope you liked this, I love how easy it was and I'm sure I'll be making more of these!

Happy crafting!
Ilda :)

Wednesday, March 28, 2012

Spring Garden Bird Cage Canvas | Mixed Media Project for SVGCuts Challenge


Yeah!!! I see I have a few more followers today... how exciting! Welcome to my little blog of happiness!

Today I'm going to share with you a project I've been thinking about and working on for a while. SVG Cuts has its Facebook Spring Challenge going on right now, so I thought I would enter. Wish me luck, it's going to be tough there are some really great entries... go check them out! 

So here is my "Spring Garden Bird Cage" hope you like it :)

Spring Garden Bird Cage Canvas | Mixed Media Project for SVGCuts Challenge

I used files from SVG Cuts Playful Parlour, 3D Flowers Part 1, 3D Mums and Fall Flowers, Happy Bday You, and Amilie's Accessories Kits! Cut them all out with my Cameo using Recollections card stock.

I then glued all of the beautiful paperwork onto a 16X20 canvas that I had painted with sky blue acrylic paint. I used some twigs that I cut from my yard around the frame... and voila, my spring masterpiece! I think it will look great in our Solarium :) 

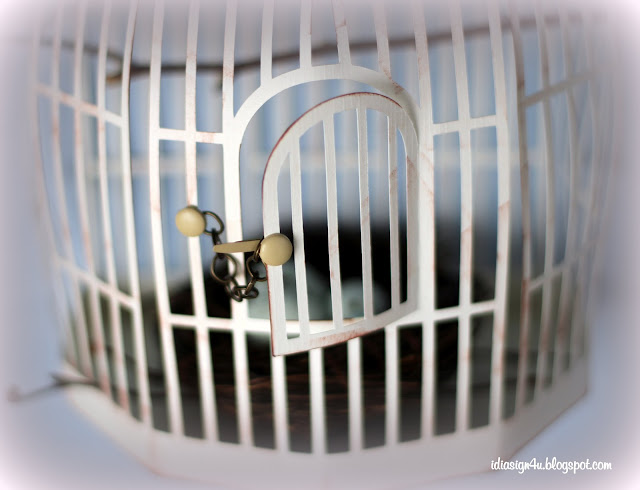
and here close-ups...

Spring Garden Bird Cage Canvas | Mixed Media Project for SVGCuts Challenge


Spring Garden Bird Cage Canvas | Mixed Media Project for SVGCuts Challenge

Spring Garden Bird Cage Canvas | Mixed Media Project for SVGCuts Challenge


Spring Garden Bird Cage Canvas | Mixed Media Project for SVGCuts Challenge


Thanks for stopping by, come again soon!
Ilda :)
This post was shared at:


Craft Junkie Too Friend

Friday, March 23, 2012

Flower Pot Pocket Card Freebie

Yeah, it's the weekend! Happy Friday everyone!

Flower Pot Pocket Card Freebie by ilovedoingallthingscrafty.com

Here as promised yesterday is my Flower Pot Pocket Card SVG file... hope you love it...  Just open it up in SCAL and cut away! Very quick and easy to make. A perfect card for Mother's Day!

Have a great weekend!
Ilda :)

My free files RULES!!!

  1. If you choose to download all I ask is you become a follower.
  2. Note my files are for personal use only! (Personal use means... only for you to use (no trading, or sharing of my files... let me do that!) 
  3. If you want to share, send your friends over to my blog for the download. 
  4. I'm OK with people sharing my files on their own sites as long as there is a direct link back to this blog...Give credit where credit is due! (a message to me would also be appreciated)
If you would like to donate, (click the 👉DONATE button on the sidebar) I will happily accept any amount you see fit. No pressure at all either :) It will just make my day that someone wants to support my passion.

Thursday, March 22, 2012

Flower Pot Pocket Card - Free File


Over at Just Us Girls Challenge, they are having a color challenge this week. So I thought I should enter a card that I just made...

Flower Pot Pocket Card - Free File by ilovedoingallthingscrafty.com

Cute, isn't it? So "Springy!" I love how it turned out.

All the files I used were created with the SCAL3 program and cut with my Cameo. I also used my Cuttlebug to emboss the bottom of the flower pot.

The card stock I used is from Recollections, the stamp is an i.clear stamp from studio G, the button and twine are from my leftover stash!  

I will be posting the files for this card, hopefully, tomorrow for all my crafty friends! Sorry, no time today :(  

Have a wonderful and creative day!
Ilda :)

Click here to find the file!