Showing posts with label paper crafting. Show all posts

Friday, February 28, 2025

Tail Wagger Birthday Card | Pet-Tastic Release Sneak Peek | Honey Bee Stamps

A handmade birthday card featuring a stamped and colored bulldog sitting in a blue dog bed with a small bone. The card has a plaid background, scalloped edges, and a sentiment that reads, "Anyone can be cool, awesome takes practice!" It is decorated with small gold gems and a paper party hat with white polka dots.

Hello, crafty friends! Today, I'm excited to share a sneak peek at the Pet-Tastic Release from Honey Bee Stamps with this adorable dog-themed card. If you love crafting for pet lovers, this release is a must-have! Please note links will go live after the release party tonight Feb 28, 8 pm EST.


CARD RECIPE
Tail Waggers Rubber Stamps 
Foam Ball

This card features the Tail Waggers Rubber Stamp Set and Coordinating Dies. I colored the bulldog using Copic markers, giving it a realistic look. To add a little extra shine and dimension, I applied glossy accents to the eyes and nose.

The cozy dog bed and cute bone come from the Lovely Layers: Dog Beds Honey Cuts. The layers add beautiful depth to the design. I also used patterned paper from the "Free Bee" A2 card stock set (free with a qualifying purchase of $100) to create the background.

The sentiment, "Anyone can be cool, awesome takes practice!" is from the You've Got a Friend Stamp Set and is stamped in Bee Creative Intense Black Ink. I framed the design using an A2 Scallop Rectangle Frame, which adds a lovely touch.

For a pop of sparkle, I used gems from the Simply Spring Sticker Set. The party hat was a fun DIY addition—I cut a small triangle from the same colored paper as the bed and added white gel pen dots for decoration. A foam ball tops it off for an extra festive touch!

A close-up of a handmade birthday card showing a detailed bulldog illustration with glossy accents on the eyes and nose. The bulldog sits in a textured dog bed with a layered blue cushion. A small white bone is placed on the edge of the bed. The party hat is made from patterned paper with a foam ball on top. The card’s sentiment is in mixed script and print fonts.

I hope you love this fun, pet-themed card as much as I do! Stay tuned for more inspiration from the Pet-Tastic Release. Thank you for stopping by and until next time... Happy crafting!
Ilda 🐾✨

To make supplies easy for you to find, I have linked them above. If something is no longer available I will link to a similar product. Affiliate links may be used depending on the product linked. Please help support my blog by using these links while shopping at no additional cost to you. For more information about the affiliates I use, please visit my disclaimer here. Thanks so much for all your support!

Sunday, December 22, 2024

Reindeer New Year Card with Bokeh Design | Honey Bee Stamps

Handmade New Year card with bokeh background, die-cut reindeer, layered greenery, 'Happy' sentiment, '2025' numbers, pearl accents, glitter details, and a scalloped frame design. Honey Bee Stamps

Hello crafty friends! Can you believe it, 2024 is coming to an end? Where did the time go!?

Today I’m excited to share a festive New Year card featuring adorable Honey Bee Stamps products. If you’re looking for inspiration to create a card that shines and spreads cheer, this design combines layered die cuts, a glowing bokeh background, and elegant embellishments.

CARD RECIPE

1. Creating the Bokeh Background
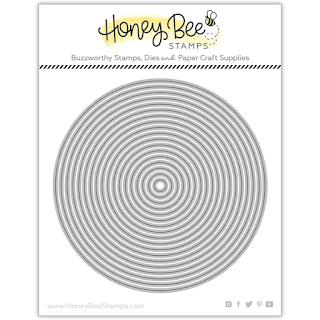
To start, I created a stencil template using the Sweet Stacks: Circles - Honey Cuts. With my template in place, I blended white and silver pigment inks onto a dark cardstock background using my Blender Brushes. This created a soft and glowing bokeh light effect that adds depth and magic.

Handmade New Year card with bokeh background, die-cut reindeer, layered greenery, 'Happy' sentiment, '2025' numbers, pearl accents, glitter details, and a scalloped frame design. Honey Bee Stamps

2. Die Cutting the Frame and Focal Elements
I then die cut the elegant scalloped frame using the Lovely Layouts: Party Frames - Honey Cuts. For the centerpiece, I die cut the Vintage Reindeer in layers and pieced it together, bringing this cute character to life.

I added festive greenery using the Mini Holiday Florals dies, which I enhanced with Prisma Glitter for an icy sparkle.

Handmade New Year card with bokeh background, die-cut reindeer, layered greenery, 'Happy' sentiment, '2025' numbers, pearl accents, glitter details, and a scalloped frame design. Honey Bee Stamps

3. Assembling the Sentiments
For the “Happy” sentiment and the year “2025,” I used Great Greetings: Holiday and Bee Narrow Uppercase Alpha dies. To add dimension, I die cut two additional black layers for each element, stacked them together, and adhered them to the card. This extra layering really makes the sentiments pop!

4. Finishing Touches
For sparkle and shine: 
I brushed glue onto the fern-like greenery and sprinkled it with Prisma Glitter.
I added Cool Pearl Stickers for a touch of dimension and elegance.
To complete the reindeer’s adorable look, I added Glossy Accents to the nose and eye for a shiny finish.

I hope you’re inspired to create your own version of this card. If you do, I’d love to see what you make—be sure to tag me and share your projects. Let’s ring in the new year with creativity and sparkle!

Happy crafting and Happy New Year! 
Ilda 🎉

To make supplies easy for you to find, I have linked them above. If something is no longer available I will link to a similar product. Affiliate links may be used depending on the product linked. Please help support my blog by using these links while shopping at no additional cost to you. For more information about the affiliates I use, please visit my disclaimer here. Thanks so much for all your support!

Enjoyed this post? Never miss out on future posts by Following this Blog

Monday, October 14, 2024

Happy Meowloween Light-Up Card | Honey Bee Stamps

Halloween Card, Light-Up Card, Interactive Card, DIY Halloween Crafts, Cardmaking Tutorial, Handmade Cards, Honey Bee Stamps, Lovely Layers Scaredy Cat, Sweet Halloween Collection, EZ-Lights Card, Fall Cardmaking, Paper Crafting, Stamping Techniques, Distress Oxide Inks, Ink Blending

***Please note links in the post are no longer active, if you are looking for something specific use this link here to HONEY BEE STAMPS and search for the product listed. My apologies for the inconvenience ***

Hello Friends!

Halloween is just around the corner, and I couldn’t be more excited to share this purr-fectly spooky project featuring the Lovely Layers: Scaredy Cat Dies from Honey Bee Stamps! This fun and interactive card lights up, adding a magical touch to any Halloween greeting.

CARD RECIPE

Critters - Lovely Layers: Scaredy Cat Dies

Sentiment - Sweet Halloween Stamps and Dies

Moon - Sweet Stacks: Circles Dies

Background Paper - Sweet & Spooky Paper Pad

Gems - Fall Is In The Air  and Sweet & Spooky Gem Stickers


Halloween Card, Light-Up Card, Interactive Card, DIY Halloween Crafts, Cardmaking Tutorial, Handmade Cards, Honey Bee Stamps, Lovely Layers Scaredy Cat, Sweet Halloween Collection, EZ-Lights Card, Fall Cardmaking, Paper Crafting, Stamping Techniques, Distress Oxide Inks, Ink Blending

Creating the Background

To set the spooky scene, I began by ink blending the night sky using Distress Oxide Inks in Black Soot and Prize Ribbon, followed by spritzing with Distress Spritz - Uncharted Mariner to give the sky that eerie, starry texture. The moonlight was added with a circle die cut from the Sweet Stacks: Circles Dies and a layer of vellum, which diffuses the light beautifully when the card is illuminated.

Light-Up Feature

To bring the card to life, I incorporated an EZ-Light - 3-Light Strand. This was easily hidden behind the vellum circle to give that perfect glowing moon effect. When you press on the pumpkin, the card lights up, making it an enchanting surprise for the recipient!

Halloween Card, Light-Up Card, Interactive Card, DIY Halloween Crafts, Cardmaking Tutorial, Handmade Cards, Honey Bee Stamps, Lovely Layers Scaredy Cat, Sweet Halloween Collection, EZ-Lights Card, Fall Cardmaking, Paper Crafting, Stamping Techniques, Distress Oxide Inks, Ink Blending

The Main Elements

The focal point of the card is the adorable black cat, crafted with the Lovely Layers: Scaredy Cat Dies. I love how the die cuts give dimension to the cat, making it pop off the card. I paired it with a vibrant pumpkin and I added shading to using detail blending brushes

The bat flying above adds a playful touch, while the witch's hat on the cat (cut from the Sweet & Spooky Paper Pad) and the striped background panel from the same collection add coordinating patterns and colors, tying the design together.

Finishing Touches

For a little extra sparkle, I used both the Fall Is In The Air Gem Stickers and Sweet & Spooky Gem Stickers to add some extra details to the background. I also couldn’t resist adding highlights using a White Gelly Roller Pen for that extra pop.

The sentiment, "Happy Meowloween!" from the Sweet Halloween Stamps, finishes the card on a playful note.

Halloween Card, Light-Up Card, Interactive Card, DIY Halloween Crafts, Cardmaking Tutorial, Handmade Cards, Honey Bee Stamps, Lovely Layers Scaredy Cat, Sweet Halloween Collection, EZ-Lights Card, Fall Cardmaking, Paper Crafting, Stamping Techniques, Distress Oxide Inks, Ink Blending

This light-up Halloween card was so much fun to make, and the EZ-Lights added a simple yet magical touch that brings the whole design together. Honey Bee Stamps' products make it easy to create interactive and festive cards, perfect for Halloween or any spooky season project!

If you’ve never tried making a light-up card, this project is a great place to start, and with Halloween right around the corner, it’s the perfect time to experiment with fun new techniques!

Thank you for stopping by and until next time... Happy Crafting!
Ilda 🐈

SUPPLIES
Lovely Layers: Scaredy Cat Dies
Shop at:
SSS | SB | HBS
Sweet Halloween Stamps
Shop at:
SSS | SB | HBS
Sweet Halloween Dies
Shop at:
SSS | SB | HBS
Sweet Stacks: Circles Dies
Shop at:
SSS | SB | HBS
Sweet & Spooky Paper Pad
Shop at:
SSS | SB | HBS
Fall Is In The Air Gem Stickers
Shop at:
SSS | SB | HBS
Sweet & Spooky Gem Stickers
Shop at:
SSS | SB | HBS
Bee Creative Bitty Buzz Cutter
Shop at:
HBS
Background Blender Brushes
Shop at:
SSS | HBS
Beeluxe Detail Blending Brushes Size 10
Shop at:
SSS | SB | HBS
Beeluxe Detail Blending Brushes Size 5
Shop at:
SSS | SB | HBS
Beeluxe Detail Blending Brushes Size 7
Shop at:
SSS | SB | HBS
Bee Creative Brilliant White Pigment Ink
Shop at:
SSS | SB | HBS
Stamping Pressure Tool
Shop at:
HBS
Black Foam Dots 1/4
Black Foam Dots 1/4"
Shop at:
HBS
Honey Bee Reverse Tweezers
Shop at:
HBS
Platinum 6 Die Cutting Platform
Shop at:
SSS | SB | HBS
Vellum Value Pack
Vellum Value Pack
Shop at:
SSS | AMZ
New Mini Misti
New Mini Misti
Shop at:
SSS | SB | HBS
Paper Inking Palette - 5x6
Shop at:
SSS | SB | PFS
Oxide Ink Pad BLACK SOOT
Shop at:
SSS | SB | HBS
Prize Ribbon Oxide Ink
Shop at:
SSS | SB | HBS
Distress Spritz - Uncharted Mariner
Shop at:
SSS | SB | HBS
Copic Opaque White Pigment
Shop at:
SSS | AMZ
Bearly Art Precision Glue
Shop at:
SSS | AMZ | HBS
White Gelly Roller Pen
Shop at:
SSS | SB | HBS
EZ-Light - 3-Light Strand
Shop at:
SSS | HBS
To make supplies easy for you to find, I have linked them above. If something is no longer available I will link to a similar product. Affiliate links may be used depending on the product linked. Please help support my blog by using these links while shopping at no additional cost to you. For more information about the affiliates I use, please visit my disclaimer here. Thanks so much for all your support!

Enjoyed this post? Never miss out on future posts by Following this Blog

Monday, September 30, 2024

Happy Fall Wreath Pop Up Card | Honey Bee Stamps

Honey Bee Stamps, Falloween Release, Fall Wreath Pop-Up Card, Handmade Cards, Fall Crafts, Cardmaking Tutorial, Seasonal Cards, Lovely Layers Mini Fall Florals, Seasonal Signs Dies, Woodgrain Texture, Fall Is In The Air Paper Pad, Pop-Up Card Techniques, Embellishments, Cardmaking Ideas, Paper Crafting, ilovedoingallthingscrafty

***Please note links in the post are no longer active, if you are looking for something specific use this link here to 👉 HONEY BEE STAMPS and search for the product listed. My apologies for the inconvenience ***
Hello, crafty friends! 🍂 Fall is finally here, and with it comes the perfect opportunity to create cozy, seasonal cards. Today, I’m sharing a delightful Fall Wreath pop-up card featuring products from the Honey Bee Stamps Falloween Releasethat is sure to bring a warm smile to anyone’s face. I used a variety of dies, stencils, and embellishments to craft this wreath, complete with vibrant sunflowers, a cute pumpkin, and layers of fall florals. Let's dive into the details of how I put this card together!

The Design

I began by die-cutting all the key elements from the Seasonal Signs Dies, including the circle for the wood frame, the red bow, the pumpkin, and the hanger. These pieces formed the base of my wreath, giving it structure and dimension.

Next, I moved on to inking the word "Fall" using the Seasonal Signs Stencil. After blending the ink onto the circle die-cut, I ran it through my die-cutting machine with the Woodgrain 3D Embossing Folder to create a realistic wood grain texture. To make this texture stand out even more, I blended Hickory Smoke Oxide Ink over the raised areas, giving the wood a weathered, rustic look.

To complete the wooden frame effect, I used my Scor-Pal Mini Scor-Buddy to press horizontal lines into the paper, mimicking planks of wood. With the help of a ruler and a Copic marker, I drew over these embossed lines, enhancing the realistic wood grain feel.

Once the wood frame was complete, I started building up the wreath with floral and decorative elements. The lovely sunflowers and fall leaves were cut using the Lovely Layers: Mini Fall Florals Dies, which added vibrant pops of color to the design. I used various distress oxide inks to blend colors onto the die-cuts, bringing life to the florals and leaves.

Honey Bee Stamps, Falloween Release, Fall Wreath Pop-Up Card, Handmade Cards, Fall Crafts, Cardmaking Tutorial, Seasonal Cards, Lovely Layers Mini Fall Florals, Seasonal Signs Dies, Woodgrain Texture, Fall Is In The Air Paper Pad, Pop-Up Card Techniques, Embellishments, Cardmaking Ideas, Paper Crafting, ilovedoingallthingscrafty

Floral and Wreath Details

The flowers are the highlight of this wreath, and I created them with the Lovely Layers: Mini Fall Florals Dies. The sunflowers, with their bright yellow petals and gem-encrusted centers, were a real show-stopper. I used Fall Is In The Air Pearl Stickers and Fall Is In The Air Gem Stickers for extra sparkle and shine.

To add even more depth to the wreath, I arranged the die-cut leaves around the sunflowers and tucked in a small pumpkin die-cut at the bottom of the wreath, keeping everything cohesive and full of autumn charm.

Assembly

To create the pop-up frame for my card, I first cut out the top frame using the second-largest square from the Double Stitched Square Dies, cutting it from a 5.5-inch square piece of cardstock. This would frame the wreath beautifully.

Next, I cut two pieces of cardstock measuring 5.5 inches by 2 inches and scored each piece at every half inch. I folded these pieces accordion-style to create springs, which I then attached to the back of the square top frame. These springs added the perfect pop-up dimension for the card.

For extra dimension behind the wreath, I created another pop-up spring. This piece measured 2.5 inches by 5 inches, and I scored it every half inch, three times, before folding it. I glued this piece directly behind the wreath to make it stand out even more.

Once the springs were in place, I adhered the entire top frame and wreath onto the card base, where I had already glued a piece of patterned paper from the Fall Is In The Air Paper Pad. This patterned background added a cozy, autumnal feel to complement the dimensional elements of the wreath.

Finishing Touches

To complete the design, I added some white gel pen details to enhance the die-cut elements, giving them extra highlights and depth. For added dimension and shine, I applied Glossy Accents to the "Happy" die-cut from the Great Greetings: Everyday Dies and to the pumpkin stem, making those areas pop and stand out against the rest of the design.


Honey Bee Stamps, Falloween Release, Fall Wreath Pop-Up Card, Handmade Cards, Fall Crafts, Cardmaking Tutorial, Seasonal Cards, Lovely Layers Mini Fall Florals, Seasonal Signs Dies, Woodgrain Texture, Fall Is In The Air Paper Pad, Pop-Up Card Techniques, Embellishments, Cardmaking Ideas, Paper Crafting, ilovedoingallthingscrafty

This Fall Wreath pop-up card is one of my favorite fall projects so far using the latest Honey Bee Stamps Falloween Release! The combination of woodgrain texture, bright florals, and warm autumn hues makes it the perfect seasonal greeting card. I hope you’ll give it a try and enjoy making your own festive creations.

Thank you for stopping by and until next time... Happy Crafting!
Ilda 🍂

SUPPLIES
Seasonal Signs Dies
Seasonal Signs Dies
Shop at:
SSS | SB | HBS
Seasonal Signs Stencil
Shop at:
SSS | SB | HBS
Lovely Layers: Mini Fall Florals Dies
Shop at:
SSS | SB | HBS
Great Greetings: Everyday Dies
Shop at:
SSS | SB | HBS
DOUBLE STITCHED SQUARE DIES
Shop at:
SSS | SB | HBS
Woodgrain 3D embossing folder
Shop at:
SSS | SB | HBS
Fall Is In The Air Paper Pad
Shop at:
SSS | SB | HBS
Fall Is In The Air Pearl Stickers
Shop at:
SSS | SB | HBS
Fall Is In The Air Gem Stickers
Shop at:
SSS | SB | HBS
Beeluxe Detail Blending Brushes Size 5
Shop at:
SSS | SB | HBS
Black Foam Dots 1/4
Black Foam Dots 1/4"
Shop at:
HBS
Foam Dots
Foam Dots
Shop at:
HBS
Honey Bee Reverse Tweezers
Shop at:
HBS
Bee Creative Bitty Buzz Cutter
Shop at:
HBS
Stamping Pressure Tool
Shop at:
HBS
Beeluxe Detail Blending Brushes Size 10
Shop at:
SSS | SB | HBS
Beeluxe Detail Blending Brushes Size 7
Shop at:
SSS | SB | HBS
Oxide Ink Pad PICKED RASPBERRY
Shop at:
SSS | SB
Oxide Ink Pad BARN DOOR
Shop at:
SSS | SB
SPICED MARMALADE DISTRESS OXIDE
Shop at:
SSS | SB
MUSTARD SEED DISTRESS OXIDE
Shop at:
SSS | SB
Oxide Ink Pad FOREST MOSS
Shop at:
SSS | SB
Ground Expresso Distress Oxide Ink
Shop at:
SSS | SB
Oxide Ink Pad HICKORY SMOKE
Shop at:
SSS | SB
Scor-Pal Mini Scor-Buddy
Shop at:
SSS | HBS
Platinum 6 Die Cutting Platform
Shop at:
SSS | SB | HBS
White Gelly Roller Pen
Shop at:
SSS | SB | HBS
Bearly Art Precision Glue
Shop at:
SSS | AMZ | HBS
Glossy Accents
Glossy Accents
Shop at:
SSS | AMZ | SB | HBS
To make supplies easy for you to find, I have linked them above. If something is no longer available I will link to a similar product. Affiliate links may be used depending on the product linked. Please help support my blog by using these links while shopping at no additional cost to you. For more information about the affiliates I use, please visit my disclaimer here. Thanks so much for all your support!

Enjoyed this post? Never miss out on future posts by Following this Blog