Sunday, January 20, 2013

Heart Shaped Macaroons and Recipe for Valentines Day


Are you all in a Valentine's mood yet? I sure am... I got hearts in my mind! 

The last time I made macaroons I was so excited that they actually turned out, that I just had to try making them again... this time since Valentine's Day is around the corner I thought I would make them in the shape of a heart. 

Aren't they adorable? To make the heart, I just piped them out in a "V" shape.

Heart Shaped Macaroons and Recipe for Valentines Day

Seriously could they be any cuter? This time I used a chocolate ganache filling.... sooooo yummy! 

Heart Shaped Macaroons and Recipe for Valentines Day

Here is the recipe I used:

4 large egg whites (or 5 small – 140g (4.94 ounces))
1/3 cup caster sugar (70g (2.47 ounces))
1 1/2 cups icing sugar (230g (8.11 ounces))
1 cup almond meal (120g (4.23 ounces))
2g (0.07 ounces) salt (tiny pinch)
gel food coloring (optional)


Click here to see where the recipe came from and all the tips and tricks to make the perfect French Macaroon. Ann walks you through every possibility!

Hope you enjoyed my heart mac's, I know I did! 

Monday, January 14, 2013

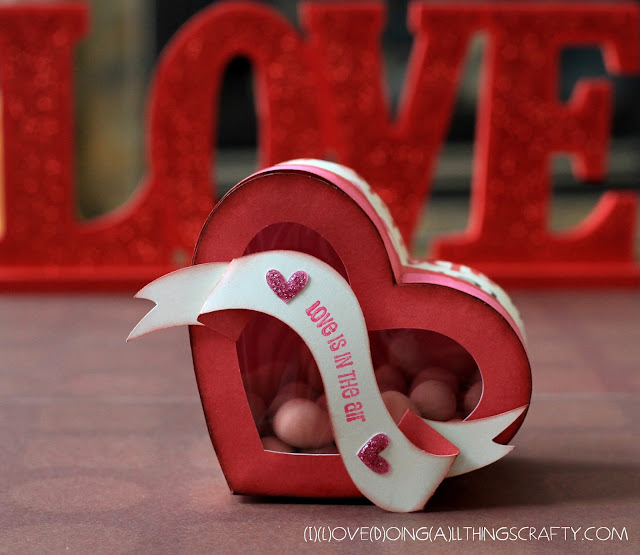
Heart Shaped Treat Box | SVGCuts


This past weekend I finally finished packing up all of my Christmas stuff... Boy does the house ever look empty now 😞

Well, I guess it's time to start thinking about Valentine's anyway... so to get me in that mood I thought I would make a Valentine Heart Shaped Treat Box

here it is...

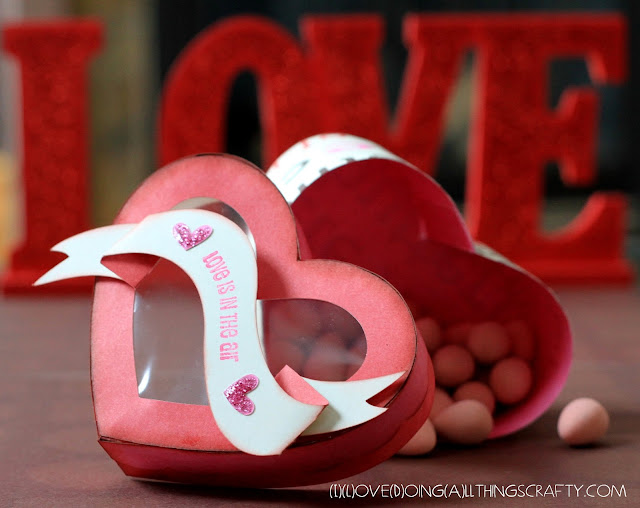
Heart Shaped Treat Box | SVGCuts

So easy to make and yet so pretty... LOVE how it turned out! Absolutely LOVE SVGCuts files!

Heart Shaped Treat Box | SVGCuts

This box comes from SVG Cuts, For my Valentine SVG Kit

Heart Shaped Treat Box | SVGCuts

Supply roll:
These files were cut using my Silhouette Cameo
Paper from Memory Store
Stamp from Studio G, I clear 
Glitter Glue


Check out the rest of the gorgeous files that come in this Kit!

Thanks for stopping by!
Happy Crafting :)

Tuesday, January 8, 2013

DIY Christmas Ornaments | Turning Old Christmas Post Cards into Ornaments


Are you all done taking down your Christmas decor... I'm slowly starting on mine. I sure am going to miss the twinkle lights all around the house 😔

I hate to admit this, but I have kept all the Christmas cards since we have been married... That's 14 years worth! I swear I'm not a hoarder, craft supplies don't count!  I just hate to throw them out only because so many of them are personal picture greeting cards. There is something wrong about throwing other people's picture away! Or is that just me! So finally I figured out what to do with them all. I've seen many of these ornaments all over Pinterest and figured this would be the perfect way to save those picture greeting cards for many years to come.

DIY Christmas Ornaments | Turning Old Christmas Post Cards into Ornaments

Today I will share with you a pictorial of how I made my ornament with the greeting cards we received this year.

DIY Christmas Ornaments | Turning Old Christmas Post Cards into Ornaments

I used a 2.5-inch diameter circle punch for my circle cutouts.

DIY Christmas Ornaments | Turning Old Christmas Post Cards into Ornaments

DIY Christmas Ornaments | Turning Old Christmas Post Cards into Ornaments

DIY Christmas Ornaments | Turning Old Christmas Post Cards into Ornaments

I used my Scotch-Advanced-Tape-Glider to glue the ornament together. Regular white glue was taking too long to dry, so I wiped it off. Worked way easier with the double-sided tape.

DIY Christmas Ornaments | Turning Old Christmas Post Cards into Ornaments

DIY Christmas Ornaments | Turning Old Christmas Post Cards into Ornaments

Now I need to find time to make another 13 years worth... Wish me luck, hopefully, I'll be done by next Christmas! Thanks for stopping by :)

Happy Crafting!

Monday, January 7, 2013

DIY Button Rack | Recycled Spice Rack


I bet many of you have the same old expired spice rack somewhere in your pantry! I know I did for years... I used maybe 3 or 4 of the spices on it and the rest... yuck... expired! All it did was take up room and collected grease and dust! I think I'm a pretty good cook but some of these spices I hadn't even heard of! So just before I was about to get rid of it I thought why not repurpose it?! It makes the perfect place for all my buttons... So out with the spices and in with the buttons!
DIY Button Rack | Recycled Spice Rack

After a good cleaning, I sorted all the buttons I had by color.  Before my buttons were in little baggies and out of sight, now I can see all the pretty colors! I also peeled off all the greasy spice labels and glued on the top of the bottles a black circle that I cut out with a punch. I haven't decided whether or not yet to glue a coordinating button on the outside yet... we shall see :)

Hope you like the spice rack makeover... what is your spice rack doing? This would also be a great idea for all those little crafty/office supplies, or maybe even for hubby's garage nails... Ok, only if your feeling really generous, lol!

Happy Crafting everyone, 
Thanks for stopping by!

Tuesday, January 1, 2013

KEEP CALM AND CRAFT ON | DIY Peg Board Painting

HAPPY NEW YEAR EVERYONE!!!

I hope you all are enjoying the first day of 2013! I can't believe how fast 2012 went for me... what a ride!

Today I want to share with you something I had been wanting to make for a very long time. Probably ever since I first heard the phrase "Keep Calm and Craft on". So a few weeks ago when all the Christmas chaos was happening,  I decided to make a pegboard painting for my craft room! 

I had been working on a baby announcement painting at the time and since all my supplies were out I thought I would kill two birds with the same paintbrush, lol! I was so busy though I completely forgot to photograph the baby announcement painting to show you  :'( 

Here it is! Isn't it awesome!!! I love how it turned out and how it keeps my stuff pretty and organized all in plain sight for easy access! I think it's one of my best ideas yet! 

KEEP CALM AND CRAFT ON | DIY Peg Board Painting

 To make my pegboard painting I first painted the canvas. Click here for a tutorial of how I make my word art paintings. 

KEEP CALM AND CRAFT ON | DIY Peg Board Painting

Once the painting was dry, I hammered in 2-inch nails all around the frame of the canvas. Yes, of course damaging the painting... I had mixed feelings at this point cause I really liked how the painting turned out... but got over it pretty quick once I saw how functional it became!

KEEP CALM AND CRAFT ON | DIY Peg Board Painting

Here it is all nailed up before my supplies were all hung.

KEEP CALM AND CRAFT ON | DIY Peg Board Painting

Hope you liked this tutorial/idea... maybe it will inspire you to create one for your craft room! I hope this painting will keep me calm in 2013 while I continue to craft on!

Thanks for stopping by!
Happy Crafting :)