Thursday, July 28, 2022

Hi Greeting Cards | July Release | Studio Katia

Hi, Greeting Cards,Studio Katia, Mini Balloon Dog Stamp,Botanical 'Hi' Stamp,Card Making, Stamping, Die Cutting, handmade card, ilovedoingallthingscrafty, Stamps, how to, birthday,Floral Card,

Hello, my friends! Hope you are having a wonderful week.

Today I am back with some new projects featuring products from Studio Katia's July release. Plus stay tuned on how you can enter to win $20 Gift Card from Studio Katia!

This mini release has some of the cutest sets that I think you will love. Plus the new Paper Pad measures 6x8.5" the perfect size for mini and regular Slimline cards. Check them out👇 

JULY RELEASE
Mini Balloon Dog Stamp
Shop at:
SK
Mini Balloon Dog Dies
Shop at:
SK
Simply 'Hi' Stamp
Simply 'Hi' Stamp
Shop at:
SK
Hi Hot Foil Plate
Hi Hot Foil Plate
Shop at:
SK
Simply 'Hi' Dies
Simply 'Hi' Dies
Shop at:
SK
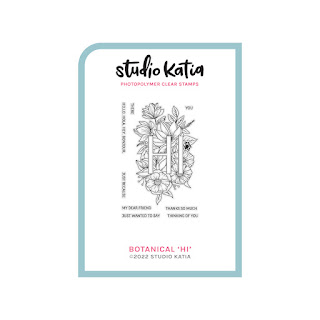
Botanical 'Hi' Stamp
Shop at:
SK
Mini Sending Greetings
Shop at:
SK
Black on White 6x8.5
Black on White 6x8.5" Paper Set
Shop at:
SK


 I kept both cards fairly simple. So let's take a look at my projects!

CARD #1 RECIPE
  • On Bristol paper I stamped out the Botanical 'Hi' Stamp using the Misti. When I water color, I like to restamp over the colored image to darken the lines afterward so leave the stamp in place.
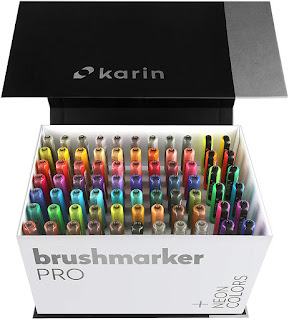
  • I used Karen brush makers to add color to this floral image. First I wet the paper and gave the entire image a rainbow gradient with the watered down colors from the markers.
  • Once the first layer was done I went back and added more layers of color to the floral image to add some depth and dimension.
Hi, Greeting Cards,Studio Katia, Mini Balloon Dog Stamp,Botanical 'Hi' Stamp,Card Making, Stamping, Die Cutting, handmade card, ilovedoingallthingscrafty, Stamps, how to, birthday,Floral Card,

  • The "Hi" was colored with a solid black marker. 
  • At this point I placed the colored image back in to the Misti and restamped it for crisper finish.
  • Cover the floral image with a mask and add splatters of color.
  • To make the sparkly "Hi" I added glossy accents to the letters and sprinkled it using Sparkle Glitter while it was still wet. Set aside to dry.
  • Trim and glue to card base.
Hi, Greeting Cards,Studio Katia, Mini Balloon Dog Stamp,Botanical 'Hi' Stamp,Card Making, Stamping, Die Cutting, handmade card, ilovedoingallthingscrafty, Stamps, how to, birthday,Floral Card,

CARD #2 RECIPE
Hi, Greeting Cards,Studio Katia, Mini Balloon Dog Stamp,Botanical 'Hi' Stamp,Card Making, Stamping, Die Cutting, handmade card, ilovedoingallthingscrafty, Stamps, how to, birthday,Floral Card,

  • Use a fine tip black marker to draw a string for the balloon, I looped it around the foiled hi. 
  • Add foam tape to back of the Balloon and glue it in place.
  • Add a Amethyst Pearl to the dot of the "i"
  • Trim the striped piece of paper from the Black on White 6x8.5" Paper Set to A2 size and glue the panel to the card base.
Hi, Greeting Cards,Studio Katia, Mini Balloon Dog Stamp,Botanical 'Hi' Stamp,Card Making, Stamping, Die Cutting, handmade card, ilovedoingallthingscrafty, Stamps, how to, birthday,Floral Card,

GIVEAWAY

Join me over on Instagram as I will be giving away a $20 Gift Card to the Studio Katia Shop. Hop on over there for more details on how to win!

I hope you enjoyed both these "Hi" greeting cards from this fun Mini Release. Thank you for stopping by and until next time... Happy Crafting!

Ilda 💜

SUPPLIES
Mini Balloon Dog Stamp
Shop at:
SK
Mini Balloon Dog Dies
Shop at:
SK
Hi Hot Foil Plate
Hi Hot Foil Plate
Shop at:
SK
Simply 'Hi' Dies
Simply 'Hi' Dies
Shop at:
SK
Botanical 'Hi' Stamp
Shop at:
SK
Black on White 6x8.5
Black on White 6x8.5" Paper Set
Shop at:
SK
Sparkle Glitter
Sparkle Glitter
Shop at:
SSS | SK
Amethyst Pearls
Amethyst Pearls
Shop at:
SSS | SK
Black Triangle Tray
Black Triangle Tray
Shop at:
SSS | SK
Embellishment Wand
Embellishment Wand
Shop at:
SSS | SK
SK Glue
SK Glue
Shop at:
SSS | SK
SK Foam Tape
SK Foam Tape
Shop at:
SSS | SK
Bristol Paper
Bristol Paper
Shop at:
SSS | AMZ
New Mini Misti
New Mini Misti
Shop at:
SSS | SB | HBS
Intense Black Ink
Intense Black Ink
Shop at:
SSS | SB | HBS
KARIN BRUSHMARKER PRO
Shop at:
SSS | AMZ | HBS
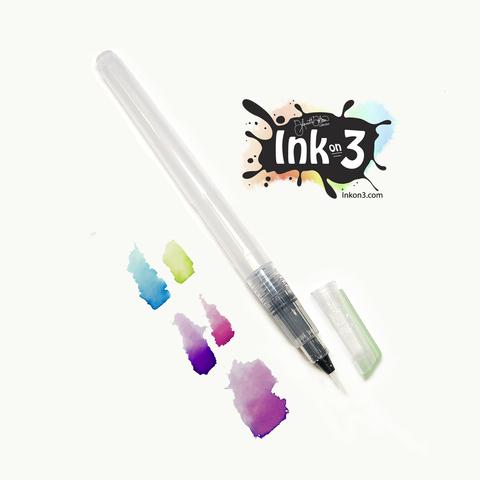
SMALL TIP WATER BRUSH PEN
Shop at:
SSS | IO3
Platinum 6 Die Cutting Platform
Shop at:
SSS | SB | SB
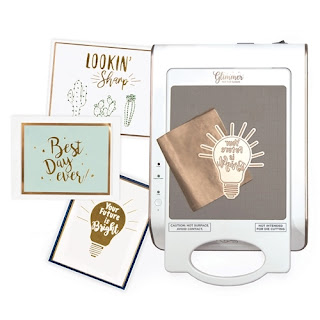
Hot Foil System
Hot Foil System
Shop at:
SSS | SB | SB
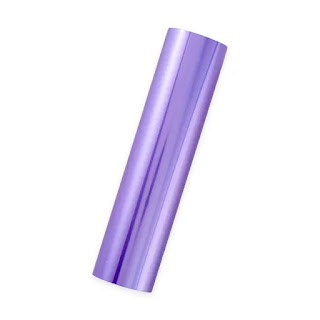
Lavender Petal Glimmer Foil
Shop at:
SSS | SB | SB
White Gelly Roller Pen
Shop at:
SSS | AMZ | SB | HBS
Micron Pens
Micron Pens
Shop at:
SSS
Glossy Accents
Glossy Accents
Shop at:
SSS | AMZ | SB | HBS
To make supplies easy for you to find, I have linked them above. If something is no longer available I will link to a similar product. Affiliate links may be used depending on the product linked. Please help support my blog by using these links while shopping at no additional cost to you. For more information about the affiliates I use, please visit my disclaimer here. Thanks so much for all your support!

Monday, July 25, 2022

Ocean Scene Shadow Box Card | Honey Bee Stamps

Ocean Scene, Shadow Box Card,Honey Bee Stamps, Card Making, Stamping, Die Cutting, handmade card, ilovedoingallthingscrafty, Stamps, how to, Under water, birthday, retirement

Hello friends! 

Hope you are enjoyng the beautiful warm weather, and hopefully you aren't in a place where the temperatures are extremely hot at the moment. Thankfully here in Edmonton, the weather has wonderful. Even still I wish we lived closer to the beach so I could go dive into the ocean just like todays card reminds me of.

CARD RECIPE

  • Die cut all the ocean pieces you want to use from the Ocean Deep Scene Builder Dies. With Copic markers and gel pen add details to the die cuts. Set them aside.
  • Die cut the pieces for the shadow box card. I used the A2 Scene Builder Card Base Dies to create the skeleton for this shadow box card. I die cut the front of this die set 3 times using progressively darker shades of blue card stock. This die cuts an opening for the card scene, but because I want to create the ocean wave layers I had to cut 3 pieces of the same colored cardstock to cover up the opening which measured 4.5 x 4.25 inches. I then die cut the ocean waves into each layer from largest to smallest, lightest to darkest color. 

Ocean Scene, Shadow Box Card,Honey Bee Stamps, Card Making, Stamping, Die Cutting, handmade card, ilovedoingallthingscrafty, Stamps, how to, Under water, birthday, retirement
  • Glue the ocean layer onto the coordinating front card die-cut frame. 
  • Cut the side panels to 1/4 inch on each side of the frames, you will use these tabs to glue later to form the layers of the card.
  • To the back panel of the card base (black layer), I stamped out the sentiment from the Seas The Day stamp set. 

Ocean Scene, Shadow Box Card,Honey Bee Stamps, Card Making, Stamping, Die Cutting, handmade card, ilovedoingallthingscrafty, Stamps, how to, Under water, birthday, retirement
  • Attach the 2 middle layers of the scene to the card base. I used red line tape and attached one side first and then the other side, ensuring they fold flat in both directions.
  • For the top layer of the ocean frame, I used the Layered Waves Stencils to add more interest to the front of the card by blending out Salty Ocean Distress Oxide ink. 
  • Start gluing the pieces to create the ocean scene. 
  • Once you are happy glue one side of the card to the base and then fold and line up to glue the other side of the card. 
  • Finish by adding gel pen details and gem stickers.
Ocean Scene, Shadow Box Card,Honey Bee Stamps, Card Making, Stamping, Die Cutting, handmade card, ilovedoingallthingscrafty, Stamps, how to, Under water, birthday, retirement

To the back, I glued a white card panel and left it blank. I think this card would make a great retirement, birthday, or Bon Voyage card. 

Fold flat into an A2-sized envelope and mail it to a friend. 

I hope this Ocean Scene Shadow Box Card inspired you today. Thank you for stopping by and until next time... Happy Crafting!

Ilda 🐟🐠

SUPPLIES
Ocean Deep Scene Builder Dies
Shop at:
SSS | SB | HBS
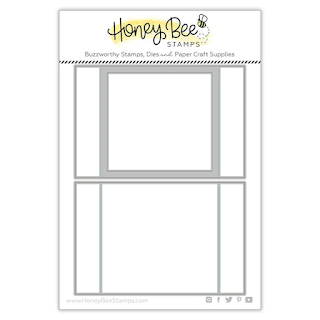
A2 Scene Builder Card Base Dies
Shop at:
SSS | SB | HBS
Seas The Day
Seas The Day
Shop at:
SSS | SB | HBS
Layered Waves Stencils
Shop at:
SSS | SB | HBS
Bitty Buzz Cutter
Bitty Buzz Cutter
Shop at:
HBS
Sticky Red Tape 1/4
Sticky Red Tape 1/4"
Shop at:
HBS
Detail Blender Brushes
Shop at:
SSS | HBS
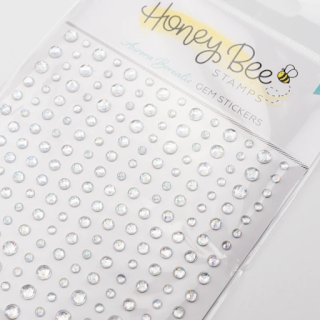
Aurora Borealis Gem Stickers
Shop at:
SSS | HBS
Oxide Ink Pad SALTY OCEAN
Shop at:
SSS | AMZ | HBS
New Mini Misti
New Mini Misti
Shop at:
SSS | SB | HBS
Platinum 6 Die Cutting Platform
Shop at:
SSS | SB | SB
Shark Tooth White Atelier Ink
Shop at:
SSS | IO3
Arctic White Emb.Pwd.
Shop at:
SSS | IO3
Bearly Art Precision Glue
Shop at:
SSS | AMZ
White Gelly Roller Pen
Shop at:
SSS | AMZ | SB | HBS
To make supplies easy for you to find, I have linked them above. If something is no longer available I will link to a similar product. Affiliate links may be used depending on the product linked. Please help support my blog by using these links while shopping at no additional cost to you. For more information about the affiliates I use, please visit my disclaimer here. Thanks so much for all your support!

Wednesday, July 13, 2022

Furry Birthday Dreams Mini Slimline Card | Studio Katia

Furry Dreams, Card Making, Stamping, Die Cutting, handmade card, ilovedoingallthingscrafty, Stamps, how to,  Mini Slimline Card,Studio Katia, dog, birthday, rainbow

Hello, my friends!

Today I have the cutest birthday card for a furry friend or dog lover featuring the Furry Dream sets from Studio Katia.

CARD RECIPE

  • Stamp out your images from the FURRY DREAMS set using Copic safe ink and color them in.
  • Die-cut them using the coordinating FURRY DREAMS DIES.
  • Ink blend the background using pink, yellow, and blue inks to create a rainbow blended background.
  • To add sparkle to the background, I applied a generous layer of SK glue to the stencil and then removed it and while the glue was still wet poured on SPARKLE GLITTER.
  • Once the background was dry I trimmed and glued it to the scalloped frame from the MINI SLIMLINE: SET ONE that I glued onto a mini slimline card base popped up with FOAM tape.
  • Stamp out the sentiment from the FURRY DREAMS set using white ink and embossing pwd. on black cardstock.
  • Die-cut the sentiment with one of the banners from the PEONY TRIMMINGS DIES.
  • Add the stamped elements to the card front.
  • Finish with white gel pen details and add the cutest star to the birthday hat from the PUFFY STARS - MIX.


Furry Dreams, Card Making, Stamping, Die Cutting, handmade card, ilovedoingallthingscrafty, Stamps, how to,  Mini Slimline Card,Studio Katia, dog, birthday, rainbow

Here is what I stamped on the inside of the card.

Furry Dreams, Card Making, Stamping, Die Cutting, handmade card, ilovedoingallthingscrafty, Stamps, how to,  Mini Slimline Card,Studio Katia, dog, birthday, rainbow

I hope this darling Furry Birthday Dreams Mini Slimline Card made you smile today. I think it turned out so cute, maybe I'm biased cause I made it look like our little fur baby Ruby🐶


Thank you for stopping by and until next time... Happy Crafting!
Ilda 💗🐕

SUPPLIES
FURRY DREAMS
FURRY DREAMS
Shop at:
SSS | SK
FURRY DREAMS DIES
FURRY DREAMS DIES
Shop at:
SSS | SK
FURRY PAWS STENCIL
FURRY PAWS STENCIL
Shop at:
SSS | SK
MINI SLIMLINE: SET ONE
Shop at:
SSS | SK
PEONY TRIMMINGS DIES
Shop at:
SK
Ink Blender Brushes
Ink Blender Brushes
Shop at:
SSS | SK
PUFFY STARS - MIX
PUFFY STARS - MIX
Shop at:
SSS | SK
Black Triangle Tray
Black Triangle Tray
Shop at:
SSS | SK
Embellishment Wand
Embellishment Wand
Shop at:
SSS | SK
SK Glue
SK Glue
Shop at:
SSS | SK
Sparkle Glitter
Sparkle Glitter
Shop at:
SSS | SK
SK Foam Tape
SK Foam Tape
Shop at:
SSS | SK
Platinum 6 Die Cutting Platform
Shop at:
SSS | SB | SB
Atelier Ink Sweet Petunia
Shop at:
SSS | IO3
Atelier Ink Bee Sting Yellow
Shop at:
SSS | IO3
Atelier Ink Peacock Blue
Shop at:
SSS | IO3
Shark Tooth White Atelier Ink
Shop at:
SSS | IO3
Arctic White Emb.Pwd.
Shop at:
SSS | IO3
Media Spatulas
Media Spatulas
Shop at:
SSS | SB | HBS | TS US | HA
White Gelly Roller Pen
Shop at:
SSS | AMZ | SB | HBS
To make supplies easy for you to find, I have linked them above. If something is no longer available I will link to a similar product. Affiliate links may be used depending on the product linked. Please help support my blog by using these links while shopping at no additional cost to you. For more information about the affiliates I use, please visit my disclaimer here. Thanks so much for all your support!