Monday, September 19, 2022

Rainbow Mums Teapot Arrangement Card | Honey Bee Stamps

Rainbow, Mums, Teapot, Floral Arrangement, Card, Honey Bee Stamps,Card Making, Stamping, Die Cutting, handmade card, ilovedoingallthingscrafty, Stamps, how to,  ink blending,Friendship Card,Spooktacular,

Hello friends and Happy Monday! I hope you all had a wonderful weekend. I was able to get away for a girl's Spa weekend to celebrate my beautiful Sister-in-law's 40th Birthday. I didn't realize how much I need that 😜

Anyways, on to today's card. As you can see I can't stay away from making rainbows whenever I can. This card features all new goodies from the Honey Bee Stamp Spooktacular Release.

CARD RECIPE

  • Die cut all the pieces for the Lovely Layers Mum Dies from white card stock. I die cut an extra small Mum for this arrangement.
  • Ink Blend each layer of the Mum in a different color of the rainbow. Try to go in rainbow order. I used Atelier Inks from Inkon3 for my rainbow colors. 
  • Curl petal ends slightly, assemble and glue flowers together. Use foam in between layers for extra dimension.
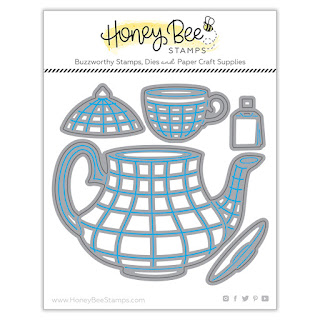
  • Die cut the Tea Pot base. I used gold foil cardstock as I didn't want it to compete with any other color.
Rainbow, Mums, Teapot, Floral Arrangement, Card, Honey Bee Stamps,Card Making, Stamping, Die Cutting, handmade card, ilovedoingallthingscrafty, Stamps, how to,  ink blending,Friendship Card,Spooktacular,
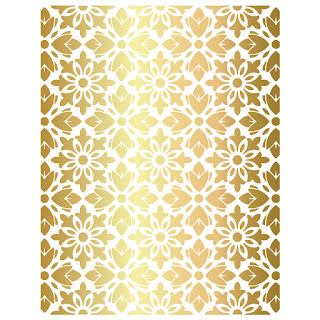
  • For the background, I used the Fanciful A2 Foil Plate to create a dry embossed textured panel by running it through my Die Cutter with the impression mat. I then trimmed it and added it to an A2 size card base.
  • Next, I glued the Teapot and flower arrangement to the card front.
Rainbow, Mums, Teapot, Floral Arrangement, Card, Honey Bee Stamps,Card Making, Stamping, Die Cutting, handmade card, ilovedoingallthingscrafty, Stamps, how to,  ink blending,Friendship Card,Spooktacular,
I hope this firenship card of Rainbow Mums in a Teapot brightened your day! Thank you for stopping by and until next time... Happy Crafting!

Ilda 🌈⁕🍵

SUPPLIES
Fanciful A2 Foil Plate
Shop at:
SSS | SB | HBS
Lovely Layers Mum Dies
Shop at:
SSS | SB | HBS
Teapot and Cup Dies
Teapot and Cup Dies
Shop at:
SSS | SB | HBS
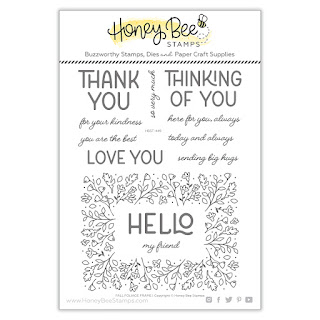
Fall Foliage Frame
Fall Foliage Frame
Shop at:
SSS | SB | HBS
Fall Foliage Frame Dies
Shop at:
SSS | SB | HBS
Detail Blender Brushes
Shop at:
SSS | HBS
Background Blender Brushes
Shop at:
SSS | HBS
Intense Black Ink
Intense Black Ink
Shop at:
SSS | SB | HBS
Bee Creative Clear Embossing Ink
Shop at:
SB | HBS
Stamping Pressure Tool
Shop at:
HBS
Bee Creative Glue
Bee Creative Glue
Shop at:
SSS | SB | HBS
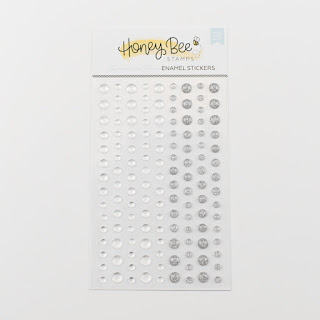
Shimmer and Shine Enamel Stickers
Shop at:
SSS | SB | HBS
Atelier Inks
Atelier Inks
Shop at:
IO3
Bristol Paper
Bristol Paper
Shop at:
SSS | AMZ
New Mini Misti
New Mini Misti
Shop at:
SSS | SB | HBS
Gold Mirror Cardstock
Shop at:
SSS | TS US | HA
Vellum Value Pack
Vellum Value Pack
Shop at:
SSS | AMZ
Arctic White Emb.Pwd.
Shop at:
SSS | IO3
Platinum 6 Die Cutting Platform
Shop at:
SSS | SB | SB
Foam Squares
Foam Squares
Shop at:
SSS | HBS
Sakura Quickie Glue Pen
Shop at:
SSS | AMZ
PRISMA GLITTER
PRISMA GLITTER
Shop at:
SSS
To make supplies easy for you to find, I have linked them above. If something is no longer available I will link to a similar product. Affiliate links may be used depending on the product linked. Please help support my blog by using these links while shopping at no additional cost to you. For more information about the affiliates I use, please visit my disclaimer here. Thanks so much for all your support!

Thursday, September 15, 2022

Alex Syberia Designs Kickstarter Campaign | Blog Hop 1 & Giveaway

The moment has arrived!! Alex Syberia Designs Kickstarter Campaign is live!
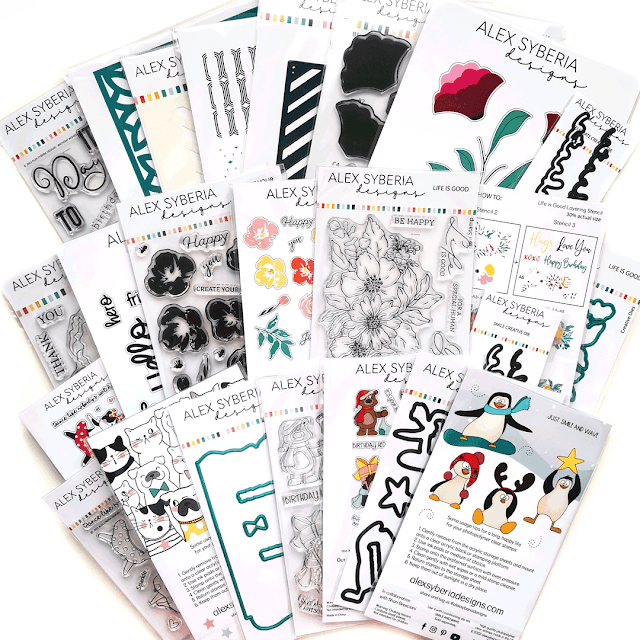
Today, we are celebrating the launch of Alex Syberia Designs' very first collection of physical products through their Kickstarter Campaign! With clear stamps, dies and stencils, there's something for everyone to love!

To look at all of the designs in detail (including videos!), the exclusive offers they have for you, and see how you can support them, make sure you check their Kickstarter Campaign Page.

Winter Fun, Partial Clear Bag See Through Shaker Cards,Alex Syberia Designs,flat shaker,Card Making, Stamping, Die Cutting, handmade card, ilovedoingallthingscrafty, Stamps, how to, Smile and Wave

I am so happy for Alex and her new venture. And even more excited to be a part of this journey of hers as I have been a fan of hers for the longest time.

Both my cards feature a couple of adorable cuties from the new Smile and Wave Stamp and Die Set. If you have been following me you know I have a thing for shaker cards and love to come up with different ways to make them. For these two cards, I used my clear bag shaker technique to create two Partial See Through Cards. I won't go into all the how-to details here, but if you are interested in creating cards like these, click HERE for the complete tutorial!

Winter Fun, Partial Clear Bag See Through Shaker Cards,Alex Syberia Designs,flat shaker,Card Making, Stamping, Die Cutting, handmade card, ilovedoingallthingscrafty, Stamps, how to, Smile and Wave
With both cards, I stamped out the critters using Copic-friendly black ink and then colored them in using Copic markers. I then die-cut the images using the coordinating dies. For some of them, I also cut out another blank die cut to use on the backside to cover up any visible ink that could be seen through the see-through card panel.
Winter Fun, Partial Clear Bag See Through Shaker Cards,Alex Syberia Designs,flat shaker,Card Making, Stamping, Die Cutting, handmade card, ilovedoingallthingscrafty, Stamps, how to, Smile and Wave
For the background, I actually used leftover ink from ink blending done using the Modern Stripes Stencil that I sprayed down with water and pressed into the stencil, resulting in a watercolor transfer. I then split the panel in half to create two cards.
On the inside of the cards, I stamped out a sentiment from the Smile and Wave set. For shaker filler, I used Pastel Rainbow Sequins.
Winter Fun, Partial Clear Bag See Through Shaker Cards,Alex Syberia Designs,flat shaker,Card Making, Stamping, Die Cutting, handmade card, ilovedoingallthingscrafty, Stamps, how to, Smile and Wave
As you can see below, this second card was done pretty much like the first one. I used the excess of the previous background panel to create the "mountain" for my penguin to climb. 
Winter Fun, Partial Clear Bag See Through Shaker Cards,Alex Syberia Designs,flat shaker,Card Making, Stamping, Die Cutting, handmade card, ilovedoingallthingscrafty, Stamps, how to, Smile and Wave
For the previous card the critter was glued to the inside of the shaker pocket, but for this one below the stamped images are glued to the outside of the panel. For this shaker filler, I used Pastel Rainbow Confetti. The flatter the filler the better for sending these types of cards through the mail.
Winter Fun, Partial Clear Bag See Through Shaker Cards,Alex Syberia Designs,flat shaker,Card Making, Stamping, Die Cutting, handmade card, ilovedoingallthingscrafty, Stamps, how to, Smile and Wave
Here is what they look like when the cards are opened up. To keep your written message from being seen from the front you just have to write it on the bottom half of the card.
Winter Fun, Partial Clear Bag See Through Shaker Cards,Alex Syberia Designs,flat shaker,Card Making, Stamping, Die Cutting, handmade card, ilovedoingallthingscrafty, Stamps, how to, Smile and Wave
And just so you can get another visual of the see-through shaker panel, here are my fingers behind the front panel of the card.
Winter Fun, Partial Clear Bag See Through Shaker Cards,Alex Syberia Designs,flat shaker,Card Making, Stamping, Die Cutting, handmade card, ilovedoingallthingscrafty, Stamps, how to, Smile and Wave

I hope you enjoyed these fun see-through shaker cards, and give them a try. They are actually quite easy to make. Now let's get back to the blog hop details and the amazing giveaways!

Their Kickstarter Campaign, full of incredible discounts for you, will run from the 15th of September to the 16th of October 2022.  

This great milestone called for some big celebrations! Throughout the duration of the Kickstarter CampaignAlex Syberia Designs will be hosting 4 hops:

  • 15 September 2022 - Hop 1: Blog hop
  • 23 September 2022 - Hop 2: Instagram hop
  • 5 October 2022 - Hop 3: Blog hop
  • 13 October 2022 - Hop 4: Instagram hop

GIVEAWAY PRIZES | OVER £1000/$1200 IN TOTAL


Alex Syberia Designs is giving away some fantastic prizes; their full September Release and two of their gorgeous Floral Bundle or Critter Bundle to choose from. There are also amazing companies and crafty friends who are celebrating with us. Here's the complete list of awesome prizes:

Check the Kickstarter Campaign for more info

That's a total of 15 prizes for 15 lucky winners! To be in with a chance to win one of these amazing prizes all you have to do is play along with each of the four hops! Alex Syberia Designs will draw winners from those entrants that have played along the hops by 16th October 2022. 

Our first hop is a blog hop and it couldn't be easier to enter. All you have to do is leave a comment on this blog post as well as those of the other amazing designers in this hop. You can see the full list, with links to each blog, below.

Winners will be announced on the Alex Syberia Designs blog on the 23rd of October 2022.

BLOG HOP 1 | DESIGNERS LIST

Below is the complete list of the super talented designers who are sharing their creations with us today:

Thank you for stopping by and until next time... Happy Hopping!
Ilda 💗

Wednesday, September 14, 2022

Hello Fall Floral Card | Studio Katia

Hello, Fall Floral Card,Studio Katia, Daisy Bunch, Simply 'Hi' Stamp,copics,Ink Blending,Card Making, Stamping, Die Cutting, handmade card, ilovedoingallthingscrafty, Stamps, how to,

Hello, my friends 👋

It's my favorite time of year when all the leaves start to change colors and you can smell the warm pumpkin spice in the air 😋

So for today's card, I wanted to create a fall-inspired Daisy hello card with this beautiful Daisy Bunch Set from Studio Katia, done in yellow these remind me of Black Eyed Susans.

CARD RECIPE
Hello, Fall Floral Card,Studio Katia, Daisy Bunch, Simply 'Hi' Stamp,copics,Ink Blending,Card Making, Stamping, Die Cutting, handmade card, ilovedoingallthingscrafty, Stamps, how to,

Hello, Fall Floral Card,Studio Katia, Daisy Bunch, Simply 'Hi' Stamp,copics,Ink Blending,Card Making, Stamping, Die Cutting, handmade card, ilovedoingallthingscrafty, Stamps, how to,
  • Stamp the inside with a sentiment from the Daisy Bunch set and add daisies along the bottom edge of the card.
Hello, Fall Floral Card,Studio Katia, Daisy Bunch, Simply 'Hi' Stamp,copics,Ink Blending,Card Making, Stamping, Die Cutting, handmade card, ilovedoingallthingscrafty, Stamps, how to,

I hope you have enjoyed today's Hello Fall Daisies Card. Now go enjoy the beautiful Fall weather while you can, especially if your seasons are short like ours.

Thank you for stopping by and until next time... Happy Crafting!
Ilda 🌼

Watch it come together HERE👇


SUPPLIES
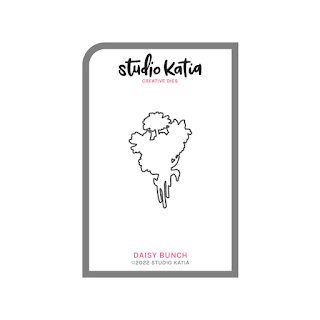
Daisy Bunch
Daisy Bunch
Shop at:
SSS | SK
Daisy Bunch Dies
Daisy Bunch Dies
Shop at:
SSS | SK
Simply 'Hi' Stamp
Simply 'Hi' Stamp
Shop at:
SSS | SK
Simply 'Hi' Dies
Simply 'Hi' Dies
Shop at:
SSS | SK
Grid Stencil
Grid Stencil
Shop at:
SK
Ink Blender Brushes
Ink Blender Brushes
Shop at:
SSS | SK
Black Triangle Tray
Black Triangle Tray
Shop at:
SSS | SK
Satin Lemon Pearls
Satin Lemon Pearls
Shop at:
SSS | SK
Embellishment Wand
Embellishment Wand
Shop at:
SSS | SK
SK Glue
SK Glue
Shop at:
SSS | SK
Sparkle Glitter
Sparkle Glitter
Shop at:
SK
Foam Strips 1/8th
Foam Strips 1/8th
Shop at:
SSS | SK
SK Foam Tape
SK Foam Tape
Shop at:
SSS | SK
Bone Folder
Bone Folder
Shop at:
SSS | SK
New Mini Misti
New Mini Misti
Shop at:
SSS | SB | HBS
Blackout Ink
Blackout Ink
Shop at:
SSS | HBS | IO3
Atelier Ink Bee Sting Yellow
Shop at:
SSS | IO3
Platinum 6 Die Cutting Platform
Shop at:
SSS | SB | SB
Copic Sketch Markers
Shop at:
SSS | AMZ
Sakura Quickie Glue Pen
Shop at:
SSS | AMZ | SK
White Gelly Roller Pen
Shop at:
SSS | AMZ | SB | HBS
To make supplies easy for you to find, I have linked them above. If something is no longer available I will link to a similar product. Affiliate links may be used depending on the product linked. Please help support my blog by using these links while shopping at no additional cost to you. For more information about the affiliates I use, please visit my disclaimer here. Thanks so much for all your support!

Friday, September 9, 2022

Thankful for You Floral Arrangement Card | Studio Katia - STAMPtember Exclusive Stamp Set

Thankful for You, Floral Arrangement Card, Studio Katia, STAMPtember, Grateful Florals,Simon Says Stamp,Card Making, Stamping, Die Cutting, handmade card, ilovedoingallthingscrafty, Stamps, how to,Prismacolor pencils,

Hello, my friends! 

It is time to reveal the STAMPtember Studio Katia Exclusive set for Simon Says Stamp. It is a gorgeous Fall Floral arrangement set called Grateful Florals, you can buy the stamp set alone, or if you like get them with the coordinating dies!

CARD RECIPE


Here is how this card came together:

  • On Kraft cardstock, I stamped out the Grateful Florals using Blackout Ink. Leave the stamp in the Stamp positioner as you need it for re-stamping later.
  • Next, I colored in the floral arrangement using Prisma Colored pencils.
  • I then placed the finished colored image back into the Misti and restamped it with the Blackout Ink. Make sure the ink is completely dry before moving on to the next step. (Blackout ink dries quickly)
  • I then blended out a few distress Oxide Inks using the Autumn Leaves Stencil to the background. (see links below in the supply list below) 
  • OPTIONAL: Create a mask for the arrangement and or ink blend background first.  I didn't mask this as I could see where not to blend over through the stencil and I didn't want to risk pulling off or tearing anything with a mask.

Thankful for You, Floral Arrangement Card, Studio Katia, STAMPtember, Grateful Florals,Simon Says Stamp,Card Making, Stamping, Die Cutting, handmade card, ilovedoingallthingscrafty, Stamps, how to,Prismacolor pencils,

  • Once the stenciled background was dry I added the heat embossed sentiment using Gold Rush Emb. Powder. To make the sentiment stand out a bit more I added a shadow layer to the sentiment by slightly moving the position of the stamp. 
  • Next, I trimmed up the panel and added a gold shadow layer behind it before attaching it with foam tape to the kraft card base. 
  • To finish off this beauty I added some Satin Gold Pearls.
Thankful for You, Floral Arrangement Card, Studio Katia, STAMPtember, Grateful Florals,Simon Says Stamp,Card Making, Stamping, Die Cutting, handmade card, ilovedoingallthingscrafty, Stamps, how to,Prismacolor pencils,

I'm thankful for you all and I hope you were inspired by this beautiful Fall Floral Arrangement Card💖

Thankful for You, Floral Arrangement Card, Studio Katia, STAMPtember, Grateful Florals,Simon Says Stamp,Card Making, Stamping, Die Cutting, handmade card, ilovedoingallthingscrafty, Stamps, how to,Prismacolor pencils,

Happy Crafting my friends and have a wonderful weekend!
Ilda 🍂

SUPPLIES
Grateful Florals
Grateful Florals
Shop at:
SSS
Grateful Florals Stamp and Die
Shop at:
SSS
Autumn Leaves Stencil
Shop at:
SK
Ink Blender Brushes
Ink Blender Brushes
Shop at:
SSS | SK
Bone Folder
Bone Folder
Shop at:
SSS | SK
Satin Gold Pearls
Satin Gold Pearls
Shop at:
SSS | SK
Black Triangle Tray
Black Triangle Tray
Shop at:
SSS | SK
Embellishment Wand
Embellishment Wand
Shop at:
SSS | SK
SK Glue
SK Glue
Shop at:
SSS | SK
SK Foam Tape
SK Foam Tape
Shop at:
SSS | SK
New Mini Misti
New Mini Misti
Shop at:
SSS | SB | HBS
Blackout Ink
Blackout Ink
Shop at:
SSS | HBS | IO3
Juicy Ink
Juicy Ink
Shop at:
SSS | HBS | IO3
Gold Rush Emb. Pwd.
Gold Rush Emb. Pwd.
Shop at:
SSS | IO3
Crushed Olive Distress Oxide Ink
Shop at:
SSS | HBS
Ground Expresso Distress Oxide Ink
Shop at:
SSS | HBS
Crackling Campfire Distress Oxide Ink
Shop at:
SSS | HBS
Gold Mirror Cardstock
Shop at:
SSS | TS US | HA
To make supplies easy for you to find, I have linked them above. If something is no longer available I will link to a similar product. Affiliate links may be used depending on the product linked. Please help support my blog by using these links while shopping at no additional cost to you. For more information about the affiliates I use, please visit my disclaimer here. Thanks so much for all your support!