Thursday, October 29, 2020

New Atelier Inks - Rainbow Butterfly Card | Ink On 3


It's inspiration week for Ink On 3's New Ink Release. Make sure to stop by BLOG to enter the giveaways there all week long.

The new inks are so pretty and they make such a great addition to the gorgeous colors of the Ink On 3 Rainbow. Welcome, ATELIER SHARK TOOTH WHITE, ATELIER TRINITY TEAL and the ATELIER SWEET PETUNIA INKS.


CARD DETAILS

For my card today, I wanted to showcase how these colors blended and fit into the rainbow. So of course I had to make a rainbow card (my favorite kind). I began by blending out SWEET PETUNIA, MARILYN RED, MARIGOLD ORANGE, BEE STING YELLOW, GODDESS GREEN, TRINITY TEAL, PEACOCK BLUE, and MY PURPLE JAM Atelier Inks onto a piece of Bristol paper. I then sprayed the background with water and picked up the water droplets with a paper towel,


Once the paper was dry, I used an antistatic powder bag to prepare the paper for embossing. I then stamped out the inside details of the butterfly wings from the SHINE BRIGHT set using the ATELIER SHARK TOOTH White ink, and heat set it by adding some ARCTIC WHITE POWDER

Next, I stamped the outer image of the butterfly using BLACKOUT INK. To the inside of each butterfly, I then painted on some LIQUID PIXIE DUST.


To finish off this colorful card I stamped the sentiment onto a black banner once again using the ATELIER SHARK TOOTH White ink, and heat set it using some ARCTIC WHITE POWDER

I hope you were inspired by this rainbow creation using a wider range of Ink On 3 Inks. Don't forget to stop by the INK ON 3 BLOG for more inspiration and Giveaways.

Thank you for stopping by and until next time... Happy Crafting!


SUPPLIES
SHINE BRIGHT
SHINE BRIGHT
Shop at:
IO3
ATELIER SWEET PETUNIA
Shop at:
IO3
ATELIER MARILYN RED
ATELIER MARILYN RED
Shop at:
SSS | HBS | IO3
ATELIER MARIGOLD ORANGE
Shop at:
SSS | HBS | IO3
ATELIER BEE STING YELLOW
Shop at:
SSS | HBS | IO3
ATELIER GODDESS GREEN
Shop at:
SSS | HBS | IO3
ATELIER TRINITY TEAL
Shop at:
IO3
ATELIER PEACOCK BLUE
Shop at:
SSS | HBS | IO3
ATELIER MY PURPLE JAM
Shop at:
SSS | IO3
ATELIER SHARK TOOTH
ATELIER SHARK TOOTH
Shop at:
IO3
BLACKOUT INK
BLACKOUT INK
Shop at:
SSS | HBS | IO3
LIQUID PIXIE DUST
LIQUID PIXIE DUST
Shop at:
SSS | IO3
ARCTIC WHITE POWDER
ARCTIC WHITE POWDER
Shop at:
SSS | IO3
BRISTOL PAPER
BRISTOL PAPER
Shop at:
SSS | AMZ
INK BLENDER BRUSHES
INK BLENDER BRUSHES
Shop at:
SSS | SK
ORIGINAL MISTI
ORIGINAL MISTI
Shop at:
SSS | AMZ | SB | HBS
Embossing Magic Bag
Embossing Magic Bag
Shop at:
SSS | AMZ
IRIDESCENT BUBBLES
IRIDESCENT BUBBLES
Shop at:
SSS | SK
STUDIO KATIA GLUE
STUDIO KATIA GLUE
Shop at:
SSS | SK
FOAM TAPE - WHITE
FOAM TAPE - WHITE
Shop at:
SSS | SK
To make supplies easy for you to find, I have linked them above. If something is no longer available I will link to a similar product. Affiliate links may be used depending on the product linked. Please help support my blog by using these links while shopping at no additional cost to you. For more information about the affiliates I use, please visit my disclaimer here. Thanks so much for all your support!

Wednesday, October 28, 2020

Let It Snow - Snowflake Card | Studio Katia


Card Making, Stamping, Die Cutting, handmade card, ilovedoingallthingscrafty, Stamps, how to,  Let It Snow, Snowflake Card, Studio Katia, Atelier Inks, Ink Blending,


Hello Friends, hope you are having a wonderful week so far.
 
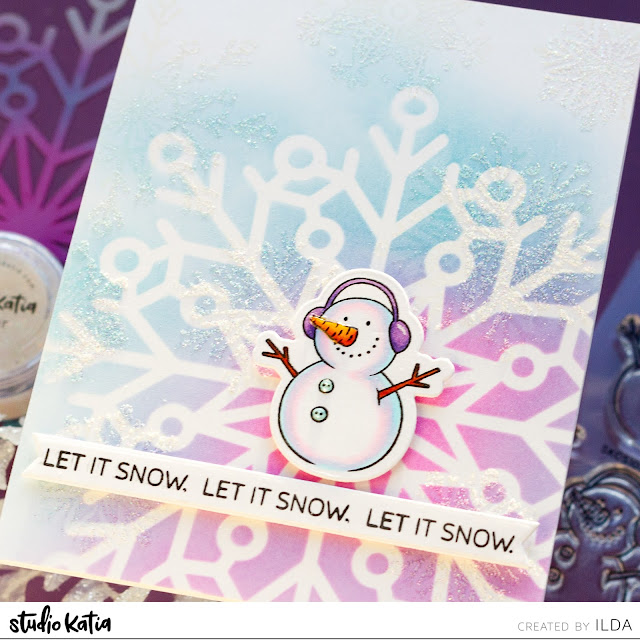
Have you had your first snowfall yet? Here in Edmonton, we have and it looks like it may be here to stay. So as the song goes "Let it snow, let it snow, let it snow!" and as you can see it was my inspiration for today's card.

CARD DETAILS

To begin, I began by blending out the background using the SNOWFLAKE STENCIL and a few inks from Ink On 3  with the INK BLENDER BRUSHES

Let It Snow - Snowflake Card | Studio Katia

Next, I stamped out the SNOWFLAKES in a random pattern onto the background using a Sticky Embossing Powder and sprinkled the SPARKLE GLITTER to stick to the areas. 

Let It Snow - Snowflake Card | Studio Katia

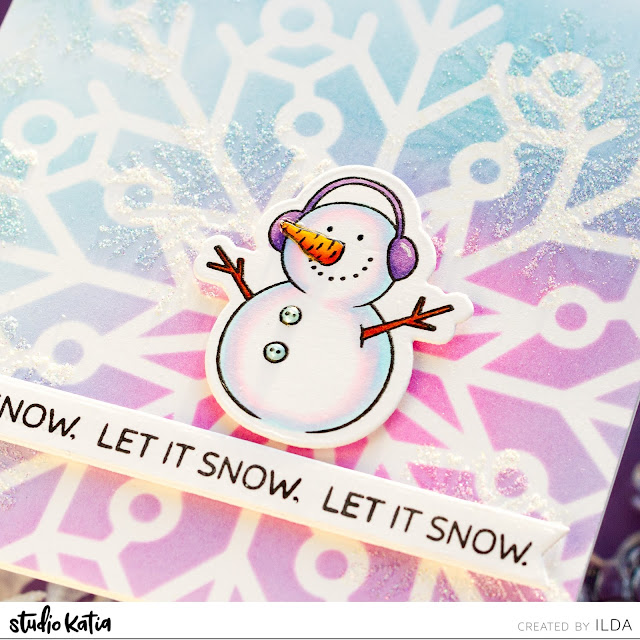
Now that the background was done, I then stamped out one of the cute snowmen from the HAPPY SNOWMEN colored him in using Copics, and then die cut him out using the coordinating dies

Let It Snow - Snowflake Card | Studio Katia

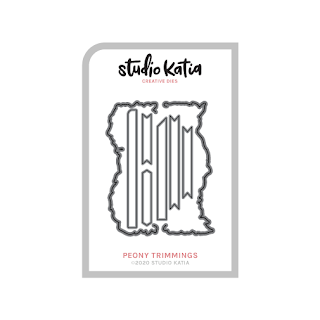
To finish this Happy Card I repeat stamped the sentiment and then die cut it with one of the banners from the PEONY TRIMMINGS DIES, added some glossy accents to the button and the nose.

Hope this cute winter card inspired you today. Thank you for stopping by and until next time... Happy Crafting!


SUPPLIES
SNOWFLAKE STENCIL
SNOWFLAKE STENCIL
Shop at:
SSS | SK
SNOWFLAKES
SNOWFLAKES
Shop at:
SSS | SK
HAPPY SNOWMEN
HAPPY SNOWMEN
Shop at:
SSS | SK
HAPPY SNOWMEN DIES
HAPPY SNOWMEN DIES
Shop at:
SSS | SK
PEONY TRIMMINGS DIES
Shop at:
SSS | SK
INK BLENDER BRUSHES
INK BLENDER BRUSHES
Shop at:
SSS | SK
SPARKLE GLITTER
SPARKLE GLITTER
Shop at:
SSS | SK
STUDIO KATIA GLUE
STUDIO KATIA GLUE
Shop at:
SSS | SK
FOAM TAPE - WHITE
FOAM TAPE - WHITE
Shop at:
SSS | SK
ORIGINAL MISTI
ORIGINAL MISTI
Shop at:
SSS | AMZ | SB | HBS
Neenah  80 LB SOLAR WHITE
Neenah 80 LB SOLAR WHITE
Shop at:
SSS | AMZ
BLACKOUT INK
BLACKOUT INK
Shop at:
SSS | HBS | IO3
COPIC SKETCH
COPIC SKETCH
Shop at:
AMZ
GEMINI JR. DIE CUTTER
Shop at:
SSS | AMZ | SB
Sticky Embossing Powder
Shop at:
SSS | AMZ | SB
ATELIER TRINITY TEAL
Shop at:
IO3
ATELIER SWEET PETUNIA
Shop at:
IO3
GLOSSY ACCENTS
GLOSSY ACCENTS
Shop at:
SSS |  SB | HBS
To make supplies easy for you to find, I have linked them above. If something is no longer available I will link to a similar product. Affiliate links may be used depending on the product linked. Please help support my blog by using these links while shopping at no additional cost to you. For more information about the affiliates I use, please visit my disclaimer here. Thanks so much for all your support!

Wednesday, October 14, 2020

One Background Three Slimline Holiday Cards | Studio Katia

Snowflakes, Background, Slimline, Holiday Cards, Studio Katia,Christmas,Hanukkah, Happy Celebrations, Card Making, Stamping, Die Cutting, handmade card, ilovedoingallthingscrafty, Stamps, how to,  blue, gold,Chunky Alphabet,

Hello, my friends! Have you started on your Holiday Cards yet? Today I'm sharing 3 Holiday cards made from one background. My examples include a Hanukkah card, and Winter Card, and a Christmas Card, just to make sure I have all my friends covered this festive season.

CARD DETAILS

All of these cards began with creating a simple snowflake patterned background using the SNOWFLAKES stamp set with a gold emb. pwd. onto an 8.5 x11 piece of dark blue cardstock. I then sliced the paper into 3 equal parts and then die cut each panel using the large frame from the DOTTED SLIMLINE - SET 2

On this first card, I die cut all the letters using the CHUNKY ALPHABET to spell out Christmas. I then used the same gold embossing powder to add some thickness to the letters. Next, I die cut a piece of vellum using the scalloped slimline frame from the DOTTED SLIMLINE - SET 2 to soften the background and to add my sentiments too. I then stamped the Merry from the POINSETTIA BORDER set and heat embossed it as well.

Snowflakes, Background, Slimline, Holiday Cards, Studio Katia,Christmas,Hanukkah, Happy Celebrations, Card Making, Stamping, Die Cutting, handmade card, ilovedoingallthingscrafty, Stamps, how to,  blue, gold,Chunky Alphabet,

As a finishing touch, I added a few GOLD FOIL PEARLS, and this first card is done!

Snowflakes, Background, Slimline, Holiday Cards, Studio Katia,Christmas,Hanukkah, Happy Celebrations, Card Making, Stamping, Die Cutting, handmade card, ilovedoingallthingscrafty, Stamps, how to,  blue, gold,Chunky Alphabet,

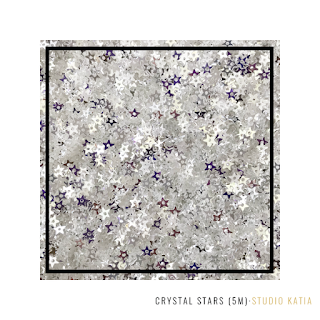
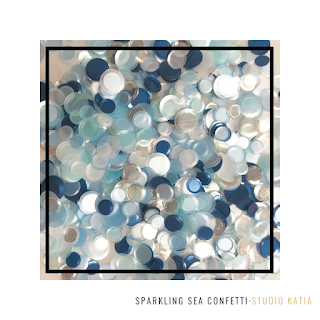
For this next winter slimline, I die cut the center of the panel using a frame from the DOTTED SLIMLINE - SET 2 to create a window for the shaker card. To the back of the panel, I added a piece of acetate and then created a border using BLACK FOAM TAPE and then filled the area using CRYSTAL STARS and SPARKLING SEA CONFETTI MIX

Snowflakes, Background, Slimline, Holiday Cards, Studio Katia,Christmas,Hanukkah, Happy Celebrations, Card Making, Stamping, Die Cutting, handmade card, ilovedoingallthingscrafty, Stamps, how to,  blue, gold,Chunky Alphabet,

On a piece of white cardstock, cut slightly smaller than the front panel I stamped the sentiments celebrate winter using stamps from the POINSETTIA BORDER set. I then closed the shaker window using the stamped sentiment panel and then glued that finished piece to the card base. Once again I used the GOLD FOIL PEARLS as a finishing detail.

Snowflakes, Background, Slimline, Holiday Cards, Studio Katia,Christmas,Hanukkah, Happy Celebrations, Card Making, Stamping, Die Cutting, handmade card, ilovedoingallthingscrafty, Stamps, how to,  blue, gold,Chunky Alphabet,

For my final Hanukkah Card, I die cut the oval frame from the snowflake panel using the DOTTED SLIMLINE - SET 1 and glued the oval to the card base. I then stamped out the sentiments using stamps from the HAPPY CELEBRATIONS set and centered it over the oval that I had glued onto on the card base. I then glued the snowflake slimline panel in place to finish the card. 

Snowflakes, Background, Slimline, Holiday Cards, Studio Katia,Christmas,Hanukkah, Happy Celebrations, Card Making, Stamping, Die Cutting, handmade card, ilovedoingallthingscrafty, Stamps, how to,  blue, gold,Chunky Alphabet,

As a final touch, I added a few GOLD SPARKLE CRYSTALS.

Snowflakes, Background, Slimline, Holiday Cards, Studio Katia,Christmas,Hanukkah, Happy Celebrations, Card Making, Stamping, Die Cutting, handmade card, ilovedoingallthingscrafty, Stamps, how to,  blue, gold,Chunky Alphabet,

I hope you were inspired by this snowflake slimline Holiday Set of Cards. There are so many possibilities you can take this idea using different stamps and different colors. If you aren't into the Slimline Cards you could use the same idea to create 4 backgrounds for A2 sized cards.

Thank you for stopping by and until next time... Happy Crafting!


SUPPLIES
SNOWFLAKES
SNOWFLAKES
Shop at:
SSS | SK
HAPPY CELEBRATIONS
HAPPY CELEBRATIONS
Shop at:
SSS | SK
POINSETTIA BORDER
POINSETTIA BORDER
Shop at:
SSS | SK
DOTTED SLIMLINE - SET 1
Shop at:
SSS | SK
DOTTED SLIMLINE - SET 2
Shop at:
SSS | SK
CHUNKY ALPHABET
CHUNKY ALPHABET
Shop at:
SSS | SK
CLEAR ACETATE SHEETS
Shop at:
SSS | SK
Vellum Value Pack
Vellum Value Pack
Shop at:
SSS | AMZ
CRYSTAL STARS
CRYSTAL STARS
Shop at:
SSS | SK
SPARKLING SEA CONFETTI MIX
Shop at:
SSS | SK
GOLD SPARKLE CRYSTALS
Shop at:
SSS | SK
GOLD FOIL PEARLS
GOLD FOIL PEARLS
Shop at:
SSS | SK
TRIANGLE TRAY
TRIANGLE TRAY
Shop at:
SSS | SK
EMBELLISHMENT WAND
EMBELLISHMENT WAND
Shop at:
SSS | SK
STUDIO KATIA GLUE
STUDIO KATIA GLUE
Shop at:
SSS | SK
BLACK FOAM TAPE
BLACK FOAM TAPE
Shop at:
SSS | SK
JUICY INK
JUICY INK
Shop at:
SSS | HBS | IO3
GOLD RUSH EMB. PWD.
GOLD RUSH EMB. PWD.
Shop at:
SSS | IO3
BLACKOUT INK
BLACKOUT INK
Shop at:
SSS | HBS | IO3
GEMINI JR. DIE CUTTER
Shop at:
SSS | AMZ | SB
ORIGINAL MISTI
ORIGINAL MISTI
Shop at:
SSS | AMZ | HBS
SSS 2.5 Inch ACRYLIC BLOCK
Shop at:
SSS
SSS 3.5 Inch ACRYLIC BLOCK
Shop at:
SSS

To make supplies easy for you to find, I have linked them above. If something is no longer available I will link to a similar product. Affiliate links may be used depending on the product linked. Please help support my blog by using these links while shopping at no additional cost to you. For more information about the affiliates I use, please visit my disclaimer here. Thanks so much for all your support!