Monday, February 28, 2022

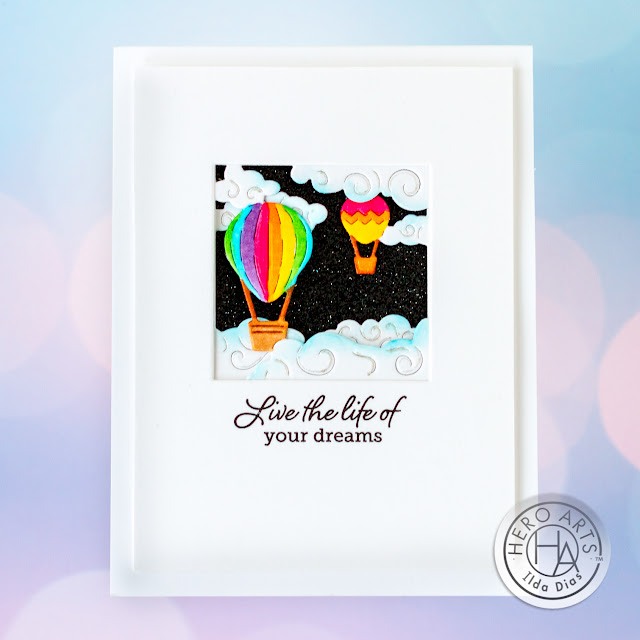
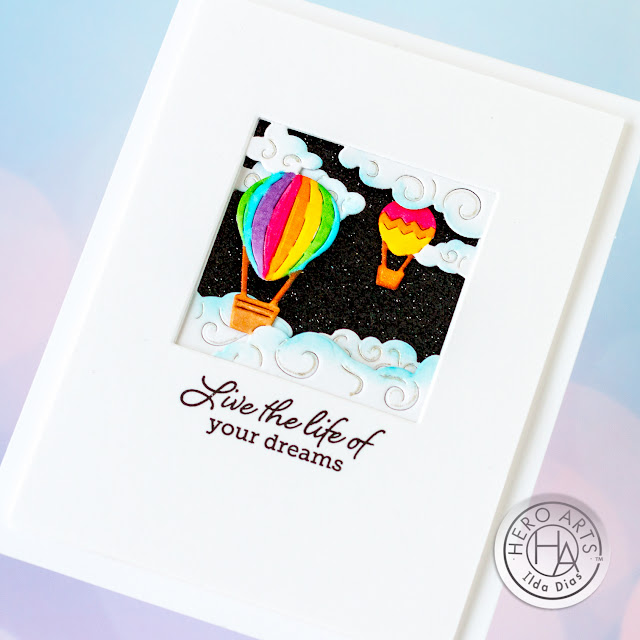
Hot Air Balloon Dream Card | Hero Arts | MMHK 02/22

Looking Glass Hot Air Balloons, Hot Air Balloon Dream Card , Hero Arts, Card Making, Stamping, Die Cutting, handmade card, ilovedoingallthingscrafty, Stamps, how to, My Monthly Hero Kit,February 2022,

Hello friends and happy Monday!

Have you ever taken a Hot Air Balloon ride? I haven't but it is definitely something I would love to do someday. Hopefully, I will as the sentiment says "live the life of [my]dreams"

CARD RECIPE


Today's card comes from a few of the Add On sets from this month's My Monthly Hero Kit. This Hot Air Balloon Looking Glass die set is so pretty. Once I had die cut all the layers, I colored the balloons in Rainbow colors using Copic Markers and then added some ink blending using Splash ink to the edges of the clouds. The rest is so simple, stack all the layers together and add a piece of Black glitter paper to the background. I wanted this to look like the Hot air balloons were floating in the starry night sky. How dreamy, right!?


Looking Glass Hot Air Balloons, Hot Air Balloon Dream Card , Hero Arts, Card Making, Stamping, Die Cutting, handmade card, ilovedoingallthingscrafty, Stamps, how to, My Monthly Hero Kit,February 2022,

Wishing you all a wonderful day. Thank you for stopping by and until next time... Happy Crafting!


Ilda🎈

SUPPLIES
Looking Glass Hot Air Balloons
Shop at:
SSS | SB | HA
Glitter Paper Basics
Shop at:
SSS | SB | HA
Intens-ified Black Ink Pad
Shop at:
SSS | SB | HA
Sea Palette Reactive Cubes
Shop at:
SSS | HA
Neenah Solar White 110lbs
Shop at:
SSS | AMZ | HBS
Hero Tools Ink Blending Brush Small
Shop at:
SSS | HA
Gemini Jr. Die-Cutter
Shop at:
SSS | SB
New Mini Misti
New Mini Misti
Shop at:
SSS | SB
SK Foam Tape
SK Foam Tape
Shop at:
SSS | SK
Gelly Roll Stardust Pen
Shop at:
SSS | AMZ | SB
To make supplies easy for you to find, I have linked them above. If something is no longer available I will link to a similar product. Affiliate links may be used depending on the product linked. Please help support my blog by using these links while shopping at no additional cost to you. For more information about the affiliates I use, please visit my disclaimer here. Thanks so much for all your support!

Thursday, February 24, 2022

Foiled Tulip Thank You Card | Honey Bee Stamps

Card Making, Stamping, Die Cutting, handmade card, ilovedoingallthingscrafty, Stamps, how to, Lovely Layers: Tulips,Lovely Layers: Greenery,Hot Foil Plates, Foil stamping, Foiled Tulip Thank You Card, Honey Bee Stamps

Hello, again my crafty friends,

This has been a busy crafty week for me, so I hope you aren't tired of all the posts, lol! I promise it is the last blog post for this week. 

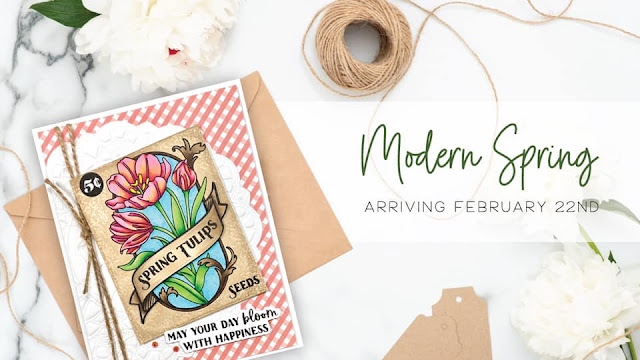
Today's foiled beauty is part of Honey Bee Stamps Modern Spring Release Instagram Hop. So if you would like to take part, hop along for a chance at winning one of two $25 Gift Cards to the Honey Bee Stamps Shop. Click 👉HERE to hop.

CARD RECIPE


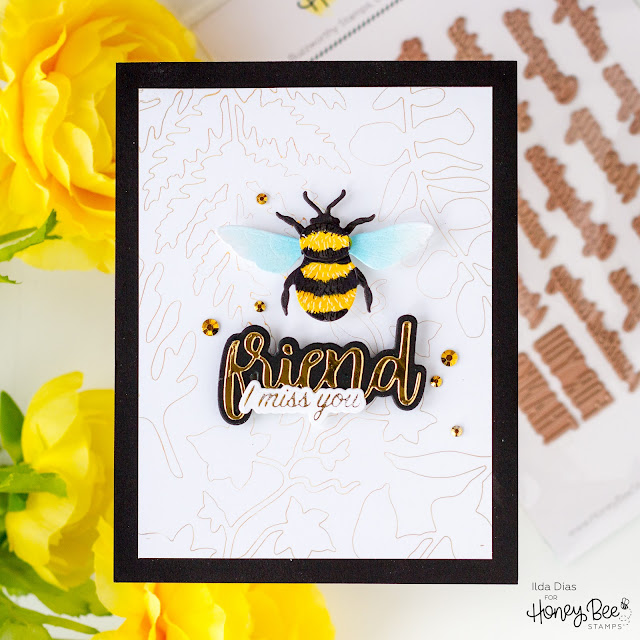
If you saw my last card from the release, the one with the bee, you would have seen I foiled the background using the Lovely Layers: Greenery | Honey Cuts with the Hot Foil System. Here is a quick video in case you missed it, or see the previous post for more 👉here.


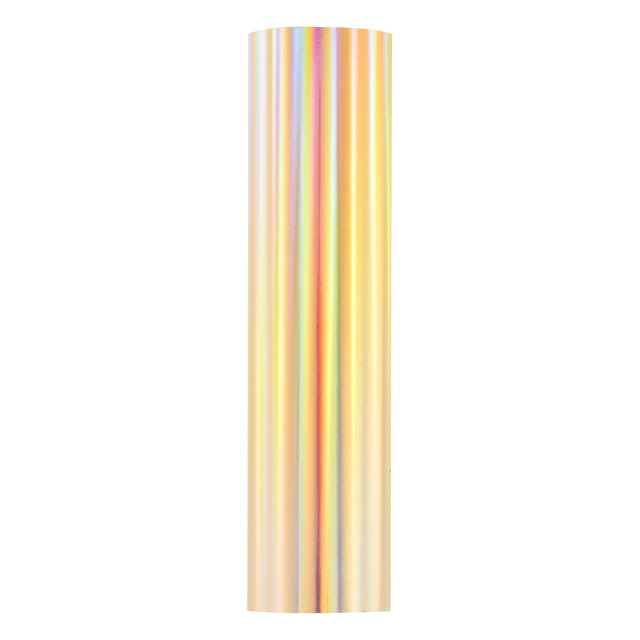
Always keep the negative scraps of your foil so that you can use it to make another background as I did here for this shiny background. To do that you will need a solid foil plate SSS|SB and a hot foil system SB and I used the Aura Glimmer foil. Once my panel was foiled, I trimmed it to 3.75 X 5 inches and glued it to the card base. 

Card Making, Stamping, Die Cutting, handmade card, ilovedoingallthingscrafty, Stamps, how to, Lovely Layers: Tulips,Lovely Layers: Greenery,Hot Foil Plates, Foil stamping, Foiled Tulip Thank You Card, Honey Bee Stamps

I then die-cut all the pieces for the Lovely Layers: Tulips | Honey Cuts and pieced them together. For the center of the tulip, I also added Aura foil, by adding a layer of glue (wait for it to dry until it is tacky but not wet using a Zig Glue pen) to the stamen and brandishing it with a piece of glimmer foil scrap.

Next, I foiled the Thanks sentiment from the Small Card, Big Hug Foil Plates on Black cardstock using the same foil. Cut it and glued it in place.

Card Making, Stamping, Die Cutting, handmade card, ilovedoingallthingscrafty, Stamps, how to, Lovely Layers: Tulips,Lovely Layers: Greenery,Hot Foil Plates, Foil stamping, Foiled Tulip Thank You Card, Honey Bee Stamps

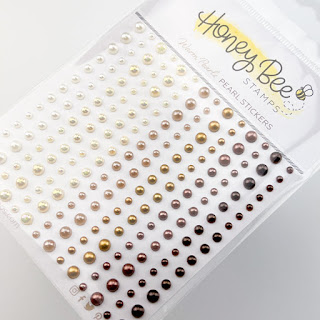
To embellish the card I added a foiled ribbon tied in a bow to one of the stems and added some Warm Pearls Stickers

I hope this simple and yet so elegant foiled card inspired you. This card was a challenge to photograph because of the ever-changing colors from the foil, but it is so so pretty in real life.


Thank you for stopping by and until next time... Happy Crafting!
Ilda 🌷

SUPPLIES
Lovely Layers: Tulips | Honey Cuts
Shop at:
SSS | SB | HBS
Lovely Layers: Greenery | Honey Cuts
Shop at:
SSS | SB | HBS
Small Card Hot Foil Plates
Shop at:
SSS | SB | HBS
Warm Pearls Stickers
Shop at:
SSS | SB | HBS
White Foam Dots With Tab
Shop at:
HBS
Bee Creative Glue
Bee Creative Glue
Shop at:
SSS | SB | HBS
Hot Foil System
Hot Foil System
Shop at:
SSS | SB | SB
Platinum 6 Die Cutting Platform
Shop at:
SSS | SB | SB
Solid Foil Plate
Solid Foil Plate
Shop at:
SSS | SB
AURA Glimmer Foil
AURA Glimmer Foil
Shop at:
SSS | SB | HBS | SB
Neenah Solar White 110lbs
Shop at:
SSS | AMZ | HBS
ZIG Glue Pen
ZIG Glue Pen
Shop at:
SSS | HBS
Foam Squares
Foam Squares
Shop at:
SSS | HBS
To make supplies easy for you to find, I have linked them above. If something is no longer available I will link to a similar product. Affiliate links may be used depending on the product linked. Please help support my blog by using these links while shopping at no additional cost to you. For more information about the affiliates I use, please visit my disclaimer here. Thanks so much for all your support!

Tuesday, February 22, 2022

Dreams Come True See Through Shaker Card | Hero Arts Global Team Blog Hop

Dreams Come True, See Through Shaker Card,Hero Arts, Global Team, Blog Hop, Card Making, Stamping, Die Cutting, handmade card, ilovedoingallthingscrafty, Stamps, how to,

Hello again my friends, and welcome to the Hero Arts Global Team Blog Hop. Today our design team is sharing inspiration featuring February's Hero Art Releases. If you have started to hop already you may have come from my friend Erica's Blog and you are on the right track. I will share more about the giveaway and the hop list at the end of the post.

CARD RECIPE

To create a see-through front panel card like this you will need a cello bag the width of your card (usually used to store finished cards) to create the panel. This bag is the closest I have found to A2 size.
  •  Next cut a piece of acetate slightly smaller than A2 size to slide into the sleeve. This will give the panel the rigidity and strength it needs to stand. 
  • Pour your sequins/confetti bits into the sleeve ( I like to make sure they are on top of the acetate to decrease the bulk). 
  • Cut off the top of the bag, leaving it about one inch taller than the panel (6.5 inches for an A2 vertical card). The top of the bag will create the hinge for the back panel.

Dreams Come True, See Through Shaker Card,Hero Arts, Global Team, Blog Hop, Card Making, Stamping, Die Cutting, handmade card, ilovedoingallthingscrafty, Stamps, how to,

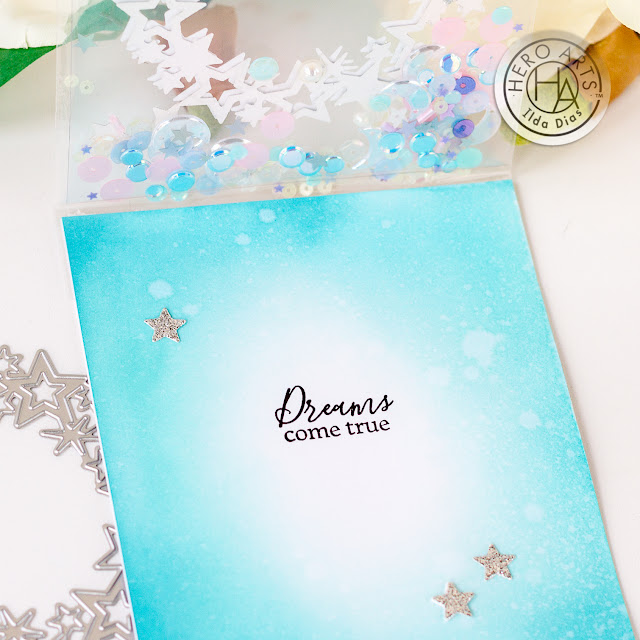
I used a card base and blended out mermaid lagoon oxide ink to the bottom of the panel (masked off the top of the panel at the scoreline). I then spritzed it with water and picked up the drops with a paper towel.
  • Fold the overhang of the Cello Bag (1 Inch) over the top of the upside-down card base and crease the Clear Bag fold with your fingernails. This will create the flap that you will be sandwiched between the card base. 
  • Cut the corners off the top of each side of the clear bag. Make sure to cut above the line that you just creased. 
  • Add two strips of double-sided tape to the card base. One just under the edge of the card base and one ½’ below that one. 
  • Remove the protective piece from the double-sided tape. Center and align the Clear Bag in front of the upside-down card front and press the cello flap down onto the double-sided tape. 
  • Just above the creased area of the cello bag add another strip of double-sided tape to seal it up and keep sequins from falling out of the bag. For extra insurance, you can add a piece of tape over the edge of the flap.
  • Add glue or double-sided tape along the edges of the front panel to glue the card base together.
You could also use two-card panels, one that you have added ink blending to and a plain white one, and just sandwich the top of the bag in between them. Using a card base just saves a step and makes it easier to align. 

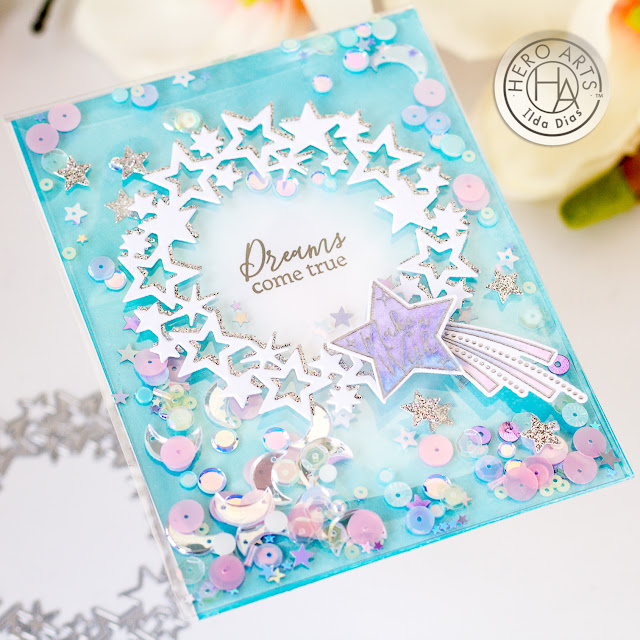
To finish the see-through panel, I die-cut two layers of Star Wreath, one die-cut from white cardstock and the other from Silver Sparkle Glitter Paper. Glued them together and then glued them to the card front. I also used the negative die cut silver stars to add on top of the panel and on the inside of the card. 

To the wreath, I also added another star and trailing tail that comes from the You Sparkle sets. I heat embossed it in silver and colored it using purple and blue Copic marker.

Dreams Come True, See Through Shaker Card,Hero Arts, Global Team, Blog Hop, Card Making, Stamping, Die Cutting, handmade card, ilovedoingallthingscrafty, Stamps, how to,

On the inside, I stamped out the "Dreams come true" sentiment using Intens-ified Black Ink from the You Sparkle stamp set.

Dreams Come True, See Through Shaker Card,Hero Arts, Global Team, Blog Hop, Card Making, Stamping, Die Cutting, handmade card, ilovedoingallthingscrafty, Stamps, how to,

If you have been following me, you will know I have made many of these see-through cards in the past as I came up with this technique.  If you want to see other versions of them including quick videos, click 👉here or here for similar versions to previous posts. 


GIVEAWAY

To enter the giveaway make sure you leave a comment on every stop of the hop to win a $25 Gift card to Hero Arts. The deadline to leave a comment is Feb 26th and the winner will be announced on the Hero Arts Blog on Feb 27th.


HOP LINE UP

Anna Celdran Mahtani

Daniel Diaz

Erica A B Andersson

Ilda Dias You are here 👈👋

Jen Kray

Lisa Tilson

Michelle Lupton

Sandi MacIver


Thank you for stopping by and until next time... Happy hopping!

Ilda 🌟

SUPPLIES
Star Wreath
Star Wreath
Shop at:
SSS | SB | HA
You Sparkle Bundle
You Sparkle Bundle
Shop at:
SSS | SB | HA
Acetate Card Panels
Acetate Card Panels
Shop at:
SSS | SB | HA
Glitter Paper Holiday Sparkle
Shop at:
SSS | SB | HA
Clear Embossing & Watermark Ink
Shop at:
SSS | SB | HA
Silver Embossing Powder
Shop at:
SSS | HA
Ink Blending Brushes
Shop at:
SSS | SB | HA
Intens-ified Black Ink Pad
Shop at:
SSS | SB | HA
Precision Glue
Precision Glue
Shop at:
SSS | SB | HA
Gemini Jr. Die-Cutter
Shop at:
SSS | SB
Neenah Solar White 110lbs
Shop at:
SSS | AMZ | HBS
Mermaid Lagoon Oxide Ink
Shop at:
SSS | AMZ | SB | HBS
Slimline Cello Bags
Slimline Cello Bags
Shop at:
HBS
Scor-Pal Tape
Scor-Pal Tape
Shop at:
SSS | AMZ | HBS
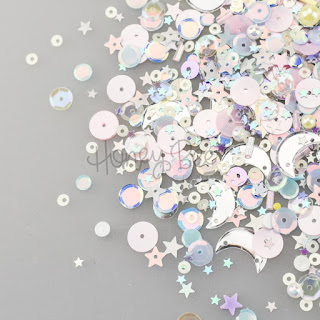
Bedtime Stories Sequin Mix
Shop at:
HBS
To make supplies easy for you to find, I have linked them above. If something is no longer available I will link to a similar product. Affiliate links may be used depending on the product linked. Please help support my blog by using these links while shopping at no additional cost to you. For more information about the affiliates I use, please visit my disclaimer here. Thanks so much for all your support!

Modern Spring Release Day 4 Sneak Peeks | Honey Bee Stamps

Modern Spring, Honey Bee Stamps, Bee, card making,Small Card Hot Foil Plate, foil stamping, Lovely Layers: Greenery, Lovely Layers: Bugs,stamping,Die cutting,handmade card,ilovedoingallthingscrafty,Stamps,how to,

Hello and happy 2/22/22!!! Welcome to the final day of sneak peeks for the Modern Spring release from Honey Bee Stamps. Make sure you stop by the Honey Bee Stamps Blog for more inspiration from the Design Team featuring more day 4 product reveals! Please note that new links will not be active until the Release goes live on February 22nd, 2021 @9pm CST.


This BEE-autiful card features a ton of new products mostly revealed from day 3, except for the latest foil plates from the new Small Card Hot Foil Plates.

So here is a list of the new products I used:
Older products used:
Modern Spring, Honey Bee Stamps, Bee, card making,Small Card Hot Foil Plate, foil stamping, Lovely Layers: Greenery, Lovely Layers: Bugs,stamping,Die cutting,handmade card,ilovedoingallthingscrafty,Stamps,how to,

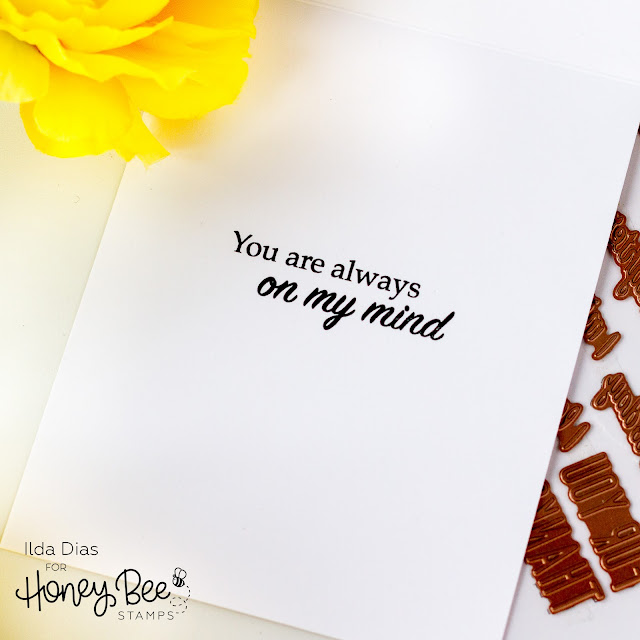
You are always on my mind, stamped on the inside of the card using Intense Black Ink. Oh no, now I have Willie Nelson's song playing in my head... always on my mind😆 Sorry for the earworm, lol!

Modern Spring, Honey Bee Stamps, Bee, card making,Small Card Hot Foil Plate, foil stamping, Lovely Layers: Greenery, Lovely Layers: Bugs,stamping,Die cutting,handmade card,ilovedoingallthingscrafty,Stamps,how to,

Well, the wait is almost over... the release will go live tonight after the lives with Honey Bee Stamps on Instagram and Facebook. Make sure to tune in as there is always a giveaway!


I hope my sneak peeks inspired you, can't wait to see what you all make with the new goodies! I'll be sharing more throughout the coming weeks, plus later this week the DT will celebrate with an Instagram Hop and YouTube Hop.

Thank you for stopping by and until next time... Happy Crafting!
Ilda👋

SHOP new release ➤ Modern Spring

For more Modern Spring Inspiration click the images below.

Day1👇


Day2👇


Day3👇


Monday, February 21, 2022

Modern Spring Release Day 3 Sneak Peeks | Honey Bee Stamps

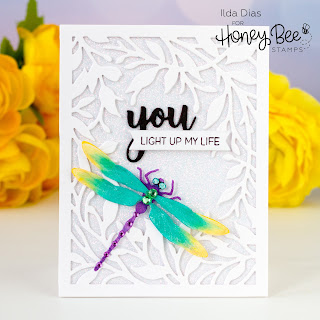
Modern Spring, Honey Bee Stamps, Secret GardenCover Plate,Bitty Buzzwords: Bloom, Lovely Layers: Bugs, Dragonfly, how to,handmade card,Stamps,ilovedoingallthingscrafty,stamping,Die cutting,card making,

Welcome back to Day 3 of the Honey Bee Stamps Modern Spring Release. Make sure you visit the Honey Bee Blog for more Day 3 inspiration from the Design Team. Please note that new links will not be active until the Release goes live on February 22nd, 2021 @9pm CST.


Today's card is so sparkly, I wish you could see it in real life. 

Modern Spring, Honey Bee Stamps, Secret GardenCover Plate,Bitty Buzzwords: Bloom, Lovely Layers: Bugs, Dragonfly, how to,handmade card,Stamps,ilovedoingallthingscrafty,stamping,Die cutting,card making,

This sparkly creation features the new:

Older supplies include:
Dragonfly was colored using Copic markers.

Here is a close-up.


Modern Spring, Honey Bee Stamps, Secret GardenCover Plate,Bitty Buzzwords: Bloom, Lovely Layers: Bugs, Dragonfly, how to,handmade card,Stamps,ilovedoingallthingscrafty,stamping,Die cutting,card making,


Thank you for stopping by and I will see you back here tomorrow for day 4 sneak peeks... Until then, Happy Crafting!

Ilda 💖

Sunday, February 20, 2022

Modern Spring Release Day 2 Sneak Peeks | Honey Bee Stamps

Modern Spring, St. Patty's, Sweet Spring Mice, Kind Buzzword, Spring Leaves Coverplate, clover, how ,to,handmade card,Stamps,ilovedoingallthingscrafty,stamping,Die cutting,card making, rainbow

Hello again, and welcome back to Day 2 of the Modern Spring Release for Honey Bee Stamps. Don't forget to check out the Honey Bee Stamps Blog for more Day 2 inspiration from the Design Team. Please note that new links will not be active until the Release goes live on February 22nd, 2021 @9pm CST.


This cute St. Patty's inspired card features the new:
And older supplies:
The stamped images were colored using Copic Markers as well as the shadow layer for the Kind Buzzword. White gel pen used for highlights. Sentiments stamped and heat embossed using white ink and embossing powder.

Modern Spring, St. Patty's, Sweet Spring Mice, Kind Buzzword, Spring Leaves Coverplate, clover, how ,to,handmade card,Stamps,ilovedoingallthingscrafty,stamping,Die cutting,card making, rainbow

Thank you for stopping by and I will see you back here tomorrow for day 3 sneak peeks... Happy Crafting!


Ilda🍀🌈🐭


Saturday, February 19, 2022

Modern Spring Release Day 1 Sneak Peeks | Honey Bee Stamps

Modern Spring, Honey Bee Stamps, Sweet Spring Mice,how to,handmade card,Stamps,ilovedoingallthingscrafty,stamping,Die cutting,card making,

With Spring around the corner it is time yet again for another Honey Bee Stamps Release, and today the Design Team is showcasing Day 1 Sneak Peeks for the Modern Spring Release. Please note that new links will not be active until the Release goes live on February 22nd, 2021 @9pm CST.


This cute card features the new:
I also used a few older supplies:
These stamped images were colored using Copic Markers. Ink blending is done using Atelier Inks. White gel pen details were used for highlights.

Modern Spring, Honey Bee Stamps, Sweet Spring Mice,how to,handmade card,Stamps,ilovedoingallthingscrafty,stamping,Die cutting,card making,

Well, that wraps it up for Day 1 Modern Spring sneak peeks from me. Thank you for stopping by and I will see you back here tomorrow for day 2 sneak peeks... Happy Crafting!


Ilda🐭

Monday, February 14, 2022

Bibi’s Butterflies Collection Cards | Spellbinders


Hello, my friends. Happy Monday and Happy Valentine's Day! Can you feel the Spring in the air yet? Everything has been melting around here, we have had the strangest winter this year. I hope it's a sign that spring is near for us. We always have such long winters.

Today I have three cards to share with you featuring my friend Bibi's Butterflies Collection. I am so happy for Bibi and love the creative collection she designed, perfect for so many occasions as you will see here.

CARD RECIPE


This first card features the gorgeous Delicate Butterflies Etched Dies. To make this pretty card I die cut from white cardstock two of each of the butterflies from the set. To create the I then rainbow layer of the butterfly, I ink blended a whole panel first mixing yellow, pink, and blue ink to create a rainbow blend. I then die cut the base of the wings from the panel and then assembled each butterfly. 


To the top layer of the wings, I add sparkle using Liquid Pixie Dust. Hard to see from the photo but they are so pretty in real life. For the bodies, I added a top layer that I die cut using gold foil paper. Next, I created the gold foiled sentiment using the Everyday Sentiments II with the Hot Foil System. The rest was assembling it all together onto the card panel and adding gold foil pearls.


For this next card, I used the Butterfly Card Creator Etched Dies. Onto an A2 side folding card base I glued half of the body of the butterfly that was scored down the middle of the butterfly and folded back. This card displays beautifully as you can see below. It will fold flat but it does have a bit of bulk to it and you will need to use a larger envelope as half the body of the butterfly hangs over the edge.

I created the rainbow flowers the same as I did with the previous butterflies. I then used green ink to blend out the leaves. I finished the flower centers using gold pearls, and also added them to the tiny antenna tops. Here again, I used the Everyday Sentiment II to add my foiled greeting.


Once you open up the card, you are surprised with the pop-up butterfly surprise. This was done using another one of Bibi's sets, Pop-Up Butterfly Etched Dies. So fun to see it pop from the center when you open up this card!


Here again, I used the same three inks to blend out the wings. I also used the same foiled sentiment set and added the sentiment strip to the tip of the wing to also make it pop off the paper.


For this third and final card, I used Bibi's So Many Butterflies Etched Dies to create this frameless shaker card or edge-to-edge card as some call them. To each wing layer, I blended out a different color on the wings. On the pink layer, I applied some glimmer paste using the dot design from the Geometric Butterfly Stencil. The white detail wing layer comes from the Pop-Up Butterfly Etched Dies, I just cut the center tabs off. I love how this whole collection works so well together!


To the card panel, I gold foiled the frame using the Essential Duo Lines Rectangles Foil Plates. I then created the shaker pocket using clear packaging and filled it with tiny star sequins I had in my stash. Watch this video if you want to see how these pockets are made 👉HERE.


To finish this card, I then added all the elements to the front of the shaker panel using a strong adhesive, and then once again added a sentiment from the same Everyday Sentiment II foil plates.


I hope these beautiful Spring rainbow-inspired cards made you smile. I had so much fun playing with this collection and hopefully, they inspired you. A special thank you to Bibi Cameron and Spellbinders for inviting me to create with her gorgeous collection!


Thank you for stopping by and until next time... Happy Crafting!
Ilda 🦋

SUPPLIES
Delicate Butterflies Etched Dies
Shop at:
SSS | SB | SB
Butterfly Card Creator Etched Dies
Shop at:
SSS | SB | SB
Pop-Up Butterfly Etched Dies
Shop at:
SSS | SB | SB
So Many Butterflies Etched Dies
Shop at:
SSS | SB | SB
Geometric Butterfly Stencil
Shop at:
SSS | SB | SB
Platinum 6 Die Cutting Platform
Shop at:
SSS | SB | SB
Hot Foil System
Hot Foil System
Shop at:
SSS | SB | SB
EVERYDAY SENTIMENTS II
Shop at:
SSS | SB
Essential Duo Lines Rectangles Foil Plates
Shop at:
SSS | SB | SB
POLISHED BRASS - Glimmer Foil
Shop at:
SSS | SB | SB
Ink Blender Brushes
Ink Blender Brushes
Shop at:
SSS | SK
ATELIER BEE STING YELLOW
Shop at:
SSS | IO3
ATELIER SWEET PETUNIA
Shop at:
SSS | IO3
ATELIER PEACOCK BLUE
Shop at:
SSS | IO3
ATELIER GODDESS GREEN
Shop at:
SSS | IO3
Neenah Solar White 110lbs
Shop at:
SSS | AMZ | HBS
Gold Hearted Paper Pad
Shop at:
TS US | HA
Gold Foil Pearls
Gold Foil Pearls
Shop at:
SSS | SK
Black Triangle Tray
Black Triangle Tray
Shop at:
SSS | SK
Embellishment Wand
Embellishment Wand
Shop at:
SSS | SK
BEARLY ART PRECISION GLUE
Shop at:
SSS | AMZ
LIQUID PIXIE DUST
LIQUID PIXIE DUST
Shop at:
SSS | HBS | IO3
Scor-Pal Tape
Scor-Pal Tape
Shop at:
SSS | AMZ | HBS
Scor-Pal Mini Scor-Buddy
Shop at:
SSS | HBS
Moonstone Glimmer Paste
Shop at:
SSS | AMZ | SB | HBS | TS US | HA
Media Spatulas
Media Spatulas
Shop at:
SSS | SB | HBS | TS US | HA
To make supplies easy for you to find, I have linked them above. If something is no longer available I will link to a similar product. Affiliate links may be used depending on the product linked. Please help support my blog by using these links while shopping at no additional cost to you. For more information about the affiliates I use, please visit my disclaimer here. Thanks so much for all your support!