Monday, December 25, 2023

Happy Holiday Full Panel Shakers | Honey Bee Stamps

Holiday Full Panel Shakers, Honey Bee Stamps, Frameless, Flat, Edge to Edge, pattern Paper, Shaker pockets, DIY, how to,handmade card, Stamps, ilovedoingallthingscrafty, stamping, die cutting, cardmaking

Merry Christmas my Crafty Friends and Happy New Year as this will be my last post of the year!

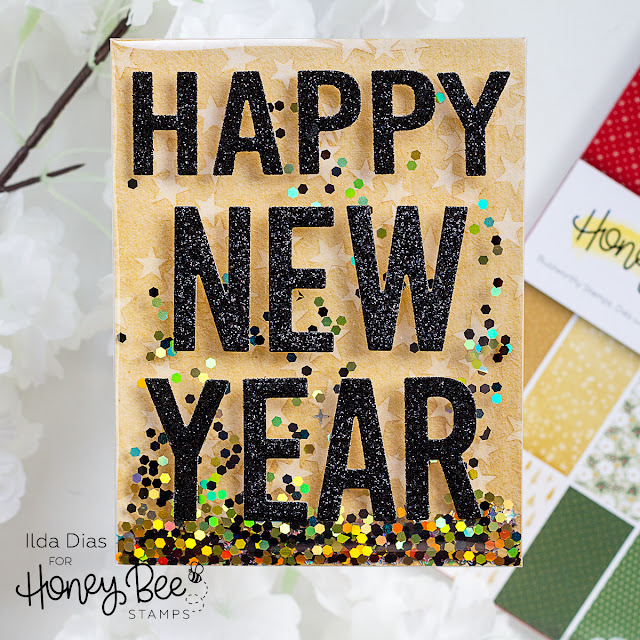
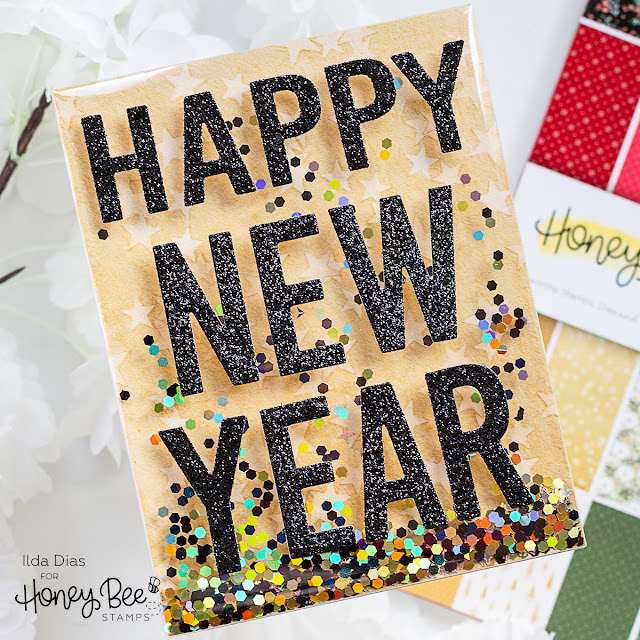
For today's post, I have a few fun shakers to share featuring goodies from Honey Bee Stamps inspired by the latest Holiday Wishes Paper Pad.

CARD RECIPE

Background - Holiday Wishes Paper Pad

HAPPY - Happy Happy Happy A2 Cover Plate 

NEW YEAR - Bee Bold Alphabet Dies

Shaker Pocket Panel - DIY from Acetate or use plastic wrapping 

(watch the video of the original DIY Full Panel Shaker

Shaker Bits - Mixed from supply stash to coordinate


Holiday Full Panel Shakers, Honey Bee Stamps, Frameless, Flat, Edge to Edge, pattern Paper, Shaker pockets, DIY, how to,handmade card, Stamps, ilovedoingallthingscrafty, stamping, die cutting, cardmaking
  • Trim your background panel to A2 size. I used the pattern paper from the Holiday Wishes Paper Pad but you can definitely create your own.
  • Place the panel into the acetate shaker panel with the pattern side facing down and the adhesive tabs facing up (if you don't have a pre-made acetate cover you can DIY your own with acetate or some recycled plastic from old packaging).
  • Secure 3 of the sides to the panel to create the shaker pocket using strong adhesive tape
  • Fill with your shaker pocket with bits and bling and seal the last tab. 
  • Adhere the panel to a card base using a strong adhesive.
  • Add the die cuts to the front of the panel.
Here are a few more examples. Using the MERRY and a sentiment from the Mini Messages: Holiday Stamps die cut using the Mini Messages Dies

Holiday Full Panel Shakers, Honey Bee Stamps, Frameless, Flat, Edge to Edge, pattern Paper, Shaker pockets, DIY, how to,handmade card, Stamps, ilovedoingallthingscrafty, stamping, die cutting, cardmaking

This next Christmas Shaker features the Merry Christmas from the Bitty Buzzwords: Holidays Dies and the greenery from the Lovely Layers: Candy Cane Dies and Decorative Star Layering Frames Dies.

Holiday Full Panel Shakers, Honey Bee Stamps, Frameless, Flat, Edge to Edge, pattern Paper, Shaker pockets, DIY, how to,handmade card, Stamps, ilovedoingallthingscrafty, stamping, die cutting, cardmaking

Making shakers this way is much easier than using foam tape. The hardest part is actually photographing them as they are so reflective, lol!

Wishing you all a very restful and Happy Holiday Season. I will try and do the same 😉 Thank you for stopping by and until next year... Happy Crafting!
Ilda 💖

To make supplies easy for you to find, I have linked them above. If something is no longer available I will link to a similar product. Affiliate links may be used depending on the product linked. Please help support my blog by using these links while shopping at no additional cost to you. For more information about the affiliates I use, please visit my disclaimer here. Thanks so much for all your support!

Enjoyed this post? Never miss out on future posts by Following this Blog

Monday, December 11, 2023

Snowflake Spinner Card | Honey Bee Stamps

Snowflake, Spinner Card, Honey Bee Stamps,interactive, christmas,how to,handmade card,Stamps,ilovedoingallthingscrafty,stamping, diecutting,cardmaking,Lovely Layers Large Snowflakes,

Hello Crafty Friends!

Today I have an interactive card to share with you. It's been quite a while since I made a spinner card and thought the new Lovely Layers Large Snowflakes would be perfect for this type of card. You will have to check it out in motion on my Instagram, it is so pretty in action.

CARD RECIPE

Snowflakes - 2 of each size dies - Lovely Layers Large Snowflakes

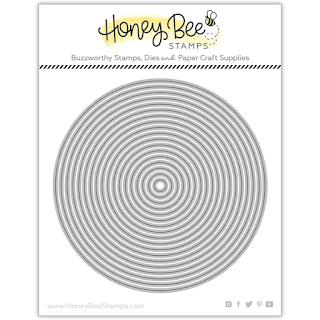
Circle - Window and frame - Sweet Stacks: Circles Dies

Sentiment - Mini Messages: Holiday Stamps

Paper - Holiday Wishes Paper Pad

Ink - Bee Creative Intense Black Ink Pad

Gems - Holiday Wishes Gem Stickers


Die cut the snowflakes. Assemble the 3 sizes together to create the front snowflake. To the back of the snowflake secure a clear thread along its center and sandwich the remaining 3 snowflakes on top. Set aside to create the window for the spinner.


Layer the pattern paper over the card base front and use the smaller circle to die cut through both layers. This will make the front window match the card base front perfectly.  Set the pattern piece aside.

Find the center of the circle that is now die-cut from the card front. Affix the clear thread to the top and bottom of the card base. To make this easier I used low tack tape to stretch out the thread first and then added a little drop of glue to the tread followed by tape to each end. For extra securement, I then pulled the thread to another area of the card base and secured that end with another piece of tape, I then snipped off any excess thread. 

Place the pattern paper piece over the card front to cover up all the thread and tape and secure everything in place. Finish the window by adding a frame to the circle. I used two stacking circle dies.

Stamp out the sentiment and finish the card with some gems to match. Behold, your spinner masterpiece is now complete!

Snowflake, Spinner Card, Honey Bee Stamps,interactive, christmas,how to,handmade card,Stamps,ilovedoingallthingscrafty,stamping, diecutting,cardmaking,Lovely Layers Large Snowflakes,

With a flick of the hand, watch the magic unfold. Twirl the snowflake around and then lay the card flat and insert it into your envelope. Once the recipient removes it from the envelope and opens it up to read it will surprise them with a spin.

Hope you enjoyed today's handmade spinner card. Thank you for stopping by and until next time... Happy Crafting!
Ilda ❅❄❆

SUPPLIES
Lovely Layers Large Snowflakes
Shop at:
SSS | SB | HBS
Sweet Stacks: Circles Dies
Shop at:
SSS | SB | HBS
Mini Messages: Holiday Stamps
Shop at:
SSS | SB | HBS
Holiday Wishes Paper Pad
Shop at:
SSS | SB | HBS
Bee Creative Intense Black Ink Pad
Shop at:
SSS | SB | HBS
Stamping Pressure Tool
Shop at:
HBS
Bee Creative Bitty Buzz Cutter
Shop at:
HBS
Holiday Wishes Gem Stickers
Shop at:
SSS | SB | HBS
Bee Creative Glue
Bee Creative Glue
Shop at:
SSS | SB | HBS
Honey Bee Reverse Tweezers
Shop at:
SSS | HBS
Platinum 6 Die Cutting Platform
Shop at:
SSS | SB | SB
New Mini Misti
New Mini Misti
Shop at:
SSS | SB | HBS
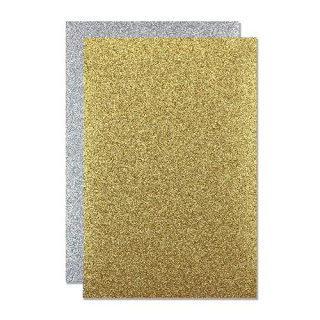
Glitter Paper Holiday Sparkle
Shop at:
SSS | SB | HA
Holographic Cardstock
Shop at:
SB | HA
To make supplies easy for you to find, I have linked them above. If something is no longer available I will link to a similar product. Affiliate links may be used depending on the product linked. Please help support my blog by using these links while shopping at no additional cost to you. For more information about the affiliates I use, please visit my disclaimer here. Thanks so much for all your support!

Enjoyed this post? Never miss out on future posts by Following this Blog

Watch the magic unfold 👇

Thursday, December 7, 2023

Angel Paw Sympathy Card

Angel, Paw, Sympathy Card, Heart - Die-namics Blueprints 32 MFT,Birthday Message Cover Plate, Bee Narrow Upper Case Alpha Dies, Inside Sentiments Comfort, handmade card,Stamps,stamping, diecutting,cardmaking

Recently a friend of mine lost her fur baby, and I just had to make her a sympathy card 💙😢

I can't imagine how hard that must be as I have yet to experience that emotion as a fur mom. I pray that won't happen any time soon. 

I had an idea of what I wanted to make but no specific dies to make them. So I searched through my stash and this is what I came up with. I love how it turned out and hope you do too.

CARD RECIPE

Heart - Die-namics Blueprints 32 MFT (no longer available)

Paw Pads - the "O's" from the Birthday Message Cover Plate HA| SBCSSS

Halo - "O" from Bee Narrow Upper Case Alpha Dies

Sentiment - Inside Sentiments Comfort


Angel, Paw, Sympathy Card, Heart - Die-namics Blueprints 32 MFT,Birthday Message Cover Plate, Bee Narrow Upper Case Alpha Dies, Inside Sentiments Comfort, handmade card,Stamps,stamping, diecutting,cardmaking

Sometimes the best cards are created from your imagination and a combination of supplies you already have 💙

Angel, Paw, Sympathy Card, Heart - Die-namics Blueprints 32 MFT,Birthday Message Cover Plate, Bee Narrow Upper Case Alpha Dies, Inside Sentiments Comfort, handmade card,Stamps,stamping, diecutting,cardmaking

I hope this simple card has inspired you, but hopefully you won't need a card like this for a while.

Thank you for stopping by and until next time... Happy Crafting!
Ilda 🐾

To make supplies easy for you to find, I have linked them above. If something is no longer available I will link to a similar product. Affiliate links may be used depending on the product linked. Please help support my blog by using these links while shopping at no additional cost to you. For more information about the affiliates I use, please visit my disclaimer here. Thanks so much for all your support!

Enjoyed this post? Never miss out on future posts by Following this Blog

Monday, November 27, 2023

Peaceful Doves Christmas Card | Honey Bee Stamps

Peace, Lovely Layers Doves, Christmas Card, Honey Bee Stamps, dies, how to,handmade card,Stamps,ilovedoingallthingscrafty,stamping, diecutting,cardmaking,Holiday Wishes,

Hello and happy Monday friends! Hope you had a wonderful and crafty weekend. 

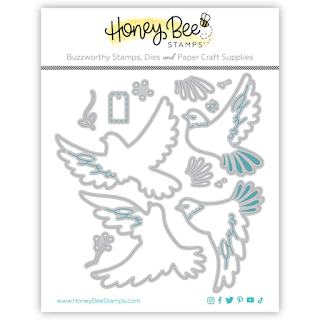
Today's card features the Lovely Layers: Doves Dies from Honey Bee Stamps, perfect for this Christmas card-making season. Crafting a handmade card is not just about combining materials; it's about weaving a story of joy, peace, and winter enchantment.

Peace, Lovely Layers Doves, Christmas Card, Honey Bee Stamps, dies, how to,handmade card,Stamps,ilovedoingallthingscrafty,stamping, diecutting,cardmaking,Holiday Wishes,


Peace, Lovely Layers Doves, Christmas Card, Honey Bee Stamps, dies, how to,handmade card,Stamps,ilovedoingallthingscrafty,stamping, diecutting,cardmaking,Holiday Wishes,

I hope you were inspired by this Peaceful Doves Christmas Card. Remember that the true magic lies in the thought, effort, and love poured into each handmade detail. May your day be as warm and delightful as the cards you create!

Thank you for stopping by and until next time... Happy Crafting!
Ilda 🕊

SUPPLIES
Lovely Layers: Doves Dies
Shop at:
SSS | SB | HBS
SnowFlakes 3D Embossing Folder
Shop at:
SSS | SB | HBS
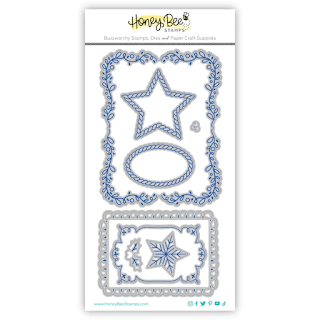
Decorative Star Layering Frames Dies
Shop at:
SSS | SB | HBS
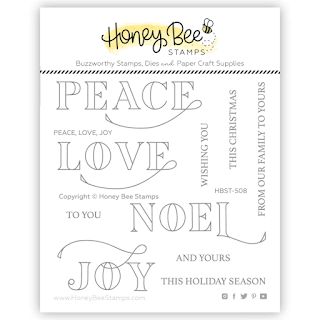
Peace, Love, Joy Stamps
Shop at:
SSS | SB | HBS
Peace, Love, Joy Stamps Dies
Shop at:
SSS | SB | HBS
Mini Messages: Holiday Stamps
Shop at:
SSS | SB | HBS
Winter Wonder Paper Pad
Shop at:
SB | HBS
Winter Pearls
Winter Pearls
Shop at:
SB | HBS
Bee Creative Brilliant White Pigment Ink
Shop at:
SSS | SB | HBS
Bee Creative Intense Black Ink Pad
Shop at:
SSS | SB | HBS
Stamping Pressure Tool
Shop at:
HBS
White Foam Dots
White Foam Dots
Shop at:
HBS
Bee Creative Glue
Bee Creative Glue
Shop at:
SSS | SB | HBS
Honey Bee Reverse Tweezers
Shop at:
SSS | HBS
Platinum 6 Die Cutting Platform
Shop at:
SSS | SB | SB
New Mini Misti
New Mini Misti
Shop at:
SSS | SB | HBS
Copic Sketch Markers
Shop at:
SSS | AMZ | HBS
Magic Powder Bag
Magic Powder Bag
Shop at:
SSS
Arctic White Emb.Pwd.
Shop at:
SSS | IO3
To make supplies easy for you to find, I have linked them above. If something is no longer available I will link to a similar product. Affiliate links may be used depending on the product linked. Please help support my blog by using these links while shopping at no additional cost to you. For more information about the affiliates I use, please visit my disclaimer here. Thanks so much for all your support!

Enjoyed this post? Never miss out on future posts by Following this Blog

Wednesday, November 22, 2023

Alex Syberia Designs November Release | Instagram Hop and Giveaway

Glamorous Foiled Shaker Cards,Alex Syberia Designs, November Release,Instagram Hop, how to,handmade card,Stamps,ilovedoingallthingscrafty,stamping, diecutting,cardmaking

Hello friends and Happy Wednesday!

Today I am taking part in an Instagram hop to celebrate Alex Syberia's November Release. Make sure you join me over on Instagram for a chance to win some amazing prizes to their shop! Click👉 HERE to join me.


For my projects today I have created two glamorous shaker cards! To create the foiled backgrounds you will need a Foil system. I used the Spellbinders Hot Foil System along with the Platinum 6 Die Cutting Platform. For negative foil transfers, you will need a solid foil plate. I also find I get the best results with smooth or glossy cardstock.

Glamorous Foiled Shaker Cards,Alex Syberia Designs, November Release,Instagram Hop, how to,handmade card,Stamps,ilovedoingallthingscrafty,stamping, diecutting,cardmaking

CARD RECIPE

Background - Brilliant Burst Hot Foil Plate

Sentiment - Feliz Navidad Hot Foil Plate (fussy cut) 

There is a Feliz Navidad Die Set too which I didn't have.

Foil - Aura Glimmer Foil


Glamorous Foiled Shaker Cards,Alex Syberia Designs, November Release,Instagram Hop, how to,handmade card,Stamps,ilovedoingallthingscrafty,stamping, diecutting,cardmaking

Rather than throwing out the negative of the foil piece I used for my first card, I used it with the solid foil plate to foil onto another piece of glossy black cardstock resulting in another gorgeous background for my second card. 

CARD RECIPE

Background - Brilliant Burst Hot Foil Plate

Sentiment - Noel Hot Foil Plate & Die Set

Foil - Aura Glimmer Foil (negative)


Glamorous Foiled Shaker Cards,Alex Syberia Designs, November Release,Instagram Hop, how to,handmade card,Stamps,ilovedoingallthingscrafty,stamping, diecutting,cardmaking

I created these shakers using these pockets. If you don't have any pre-made ones, (which by the way I helped bring to market 😉, but the A2s are sold out nearly everywhere) you can make my DIY version with some clear plastic or thin acetate. Click HERE to watch the original frameless/infinity shaker.

Glamorous Foiled Shaker Cards,Alex Syberia Designs, November Release,Instagram Hop, how to,handmade card,Stamps,ilovedoingallthingscrafty,stamping, diecutting,cardmaking

These cards would also make gorgeous New Year's Eve cards, simply by changing the sentiment. I chose to make these Christmas cards as the background also reminds me of the twinkling holiday lights, but they definitely could be New Year's fireworks too!

Glamorous Foiled Shaker Cards,Alex Syberia Designs, November Release,Instagram Hop, how to,handmade card,Stamps,ilovedoingallthingscrafty,stamping, diecutting,cardmaking

I hope you enjoyed today's glamorous Christmas Shakers. Please join me on Instagram for more Alex Syberia Designs' November Release inspiration and their Instagram Hop.
 
Thank you for stopping by and until next time... Happy Crafting!
Ilda✨

To make supplies easy for you to find, I have linked them above. If something is no longer available I will link to a similar product. Affiliate links may be used depending on the product linked. Please help support my blog by using these links while shopping at no additional cost to you. For more information about the affiliates I use, please visit my disclaimer here. Thanks so much for all your support!

Enjoyed this post? Never miss out on future posts by Following this Blog

Monday, November 20, 2023

Alex Syberia Designs November Release | Blog Hop and Giveaway

Alex Syberia Designs, Christmas,Glimmer Hot Foil,Poinsettia,Instagram Hop, Noel, Feliz Navidad, Ink blending, how to,handmade card,Stamps,ilovedoingallthingscrafty,stamping, diecutting,cardmaking

Hello friends!  

Today I am excited to be taking part in a Blog hop featuring the November Alex Syberia Release. Make sure you leave a comment here and the rest of the stops to qualify for a chance to win some fabulous prizes! If you already started hopping you have just come from Hannelie 's Blog. Stay tuned to find out more about the giveaway and where to Hop next!


So let's dive into the projects I am sharing today.

To create the foiled images you will need a Foil system. I used the Spellbinders Hot Foil System along with the Platinum 6 Die Cutting Platform. For negative foil transfers, you will need a solid foil plate. I also find I get the best results with this cardstock.

CARD RECIPE

Background - Brilliant Burst Hot Foil Plate

Wreath - Holiday Wreath and Branch Stencil and Die Set

Sentiment - Feliz Navidad Hot Foil Plate (fussy cut)

Foil - Aura Glimmer Foil


I absolutely love how this card turned out. It is definitely a lot more glamorous in person. Pictures do not do this card justice as the Aura Glimmer foil gives it so much sparkle and shine!


Alex Syberia Designs, Christmas,Glimmer Hot Foil,Poinsettia,Instagram Hop, Noel, Feliz Navidad, Ink blending, how to,handmade card,Stamps,ilovedoingallthingscrafty,stamping, diecutting,cardmaking

This next card features the show-stopping Joyful Poinsettia Die Set! It is absolutely gorgeous😍


Alex Syberia Designs, Christmas,Glimmer Hot Foil,Poinsettia,Instagram Hop, Noel, Feliz Navidad, Ink blending, how to,handmade card,Stamps,ilovedoingallthingscrafty,stamping, diecutting,cardmaking

Just look at this gorgeous Poinsettia Bloom! I used 5 different shades of cardstock and ink-blended the tips of the petals with pink ink. I then added a mist of pink splatters to them. I also added foam in between the layers to give it dimension and curled the tips of the petals.

Alex Syberia Designs, Christmas,Glimmer Hot Foil,Poinsettia,Instagram Hop, Noel, Feliz Navidad, Ink blending, how to,handmade card,Stamps,ilovedoingallthingscrafty,stamping, diecutting,cardmaking

With the negative of the foiled background from my first card, I was able to use it to create this poinsettia tag. 

TAG RECIPE
Background - Brilliant Burst Hot Foil Plate (Negative)

Alex Syberia Designs, Christmas,Glimmer Hot Foil,Poinsettia,Instagram Hop, Noel, Feliz Navidad, Ink blending, how to,handmade card,Stamps,ilovedoingallthingscrafty,stamping, diecutting,cardmaking

To create the die I just cut the panel into 4x3 rectangle and added the poinsetta to the top. I did not use the last layer of the poinsettia to make it slightly smaller, I then punched a hole through one of the petals and added a ribbon through it to tie on a gift later.

Alex Syberia Designs, Christmas,Glimmer Hot Foil,Poinsettia,Instagram Hop, Noel, Feliz Navidad, Ink blending, how to,handmade card,Stamps,ilovedoingallthingscrafty,stamping, diecutting,cardmaking

Make sure you check out the Release as I have only showcased a few of the products here today.

GIVEAWAY

Alex Syberia Designs is giving away a £85 ($100) gift certificate to 1 lucky winner and a £15 ($18) gift card to 5 winners. Open internationally. All 6 winners will be drawn from the entrants that have played along with this Blog hop by midnight BST on November 26th, 2023. Winners will be announced on the Alex Syberia Designs blog 'Giveaway Winners' page on November 27th, 2023.


BLOG HOP ORDER


Thank you for stopping by and until next time... Happy Hopping!
Ilda 💖

To make supplies easy for you to find, I have linked them above. If something is no longer available I will link to a similar product. Affiliate links may be used depending on the product linked. Please help support my blog by using these links while shopping at no additional cost to you. For more information about the affiliates I use, please visit my disclaimer here. Thanks so much for all your support!

Enjoyed this post? Never miss out on future posts by Following this Blog