Showing posts with label DIY. Show all posts

Monday, March 4, 2024

DIY Four Leaf Clover Card | Honey Bee Stamps

DIY, Four Leaf Clover, Card, Honey Bee Stamps, Lucky, how to, hand made card, Stamps, stamping, die cutting, card making, ilovedoingallthingscrafty, Lace Heart Layering Frames Dies,pattern Paper,

Happy March, everyone!

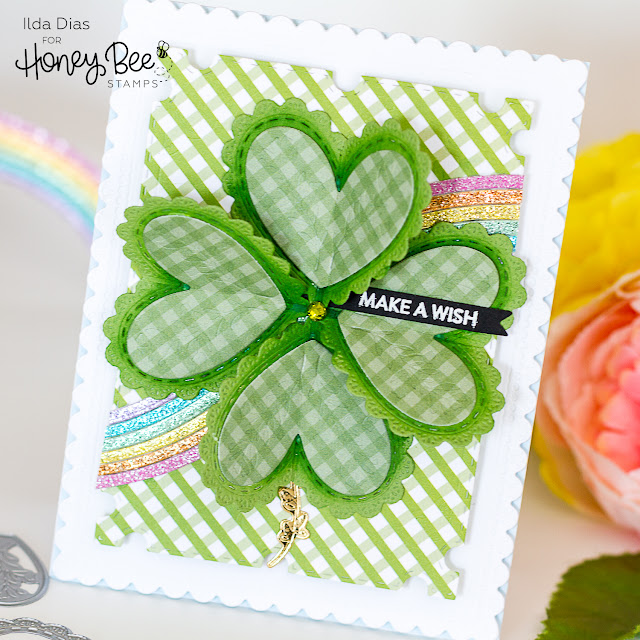
With St. Patrick's Day just around the corner, I felt inspired to create a four-leaf clover card using Honey Bee Stamp supplies. Crafting it from scratch is always a joy for me, as I get to explore new ways to use my supplies creatively and develop unique designs. Although I had a few moments of doubt during the process, I'm pleased with the end result. Let me walk you through the process.

CARD RECIPE

Pattern papers - Giddy for Gingham Paper Pad, Gingham Happy Hearts Paper Pad

Glitter Paper - Recollections Spring Glitter Paper Pad

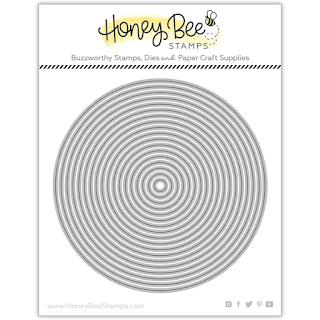
Frames, Heart Dies - Lace Heart Layering Frames Dies

Rainbow Dies - Sweet Stacks Ovals

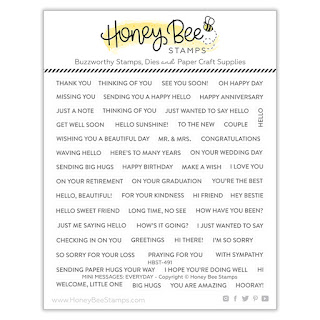
Sentiment - Mini Messages Stamps

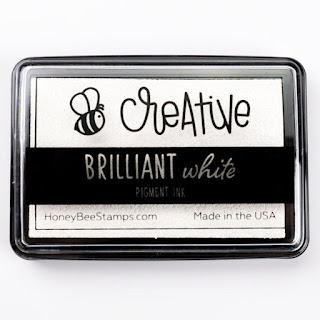
Ink - Bee Creative Brilliant White Pigment Ink

Banner - Mini Messages Dies

Gem - Simply Spring Gem Stickers 


Creating the Rainbow:


To form the rainbow, I began by die-cutting the largest oval from the Sweet Stacks Ovals set. Then, I used progressively smaller oval dies to cut the previous die cuts, layering them to create the rainbow effect. After aligning the thin rainbow cuts and securing them together, I sliced them into smaller pieces. These pieces were then arranged onto the pattern paper layer frame, ensuring the ends met in the center behind the clover.


DIY, Four Leaf Clover, Card, Honey Bee Stamps, Lucky, how to, hand made card, Stamps, stamping, die cutting, card making, ilovedoingallthingscrafty, Lace Heart Layering Frames Dies,pattern Paper,

Crafting the Clover:

For the clover, I cut out four medium scalloped hearts from the Lace Heart Layering Frames Dies, scored them down the center, and glued only the left side of each heart. This technique gave the clover dimension while still allowing it to fold flat inside an envelope. I initially hadn't planned on adding the pattern paper heart layer, but in the end, I am glad I did because I had to cover up the mess I had made underneath. I tried adding white gel pen details and I also tried some ink blending to give the plain green petals life, but it looked so terrible. Although I encountered some challenges with the design, adding the pattern paper heart layer helped enhance the overall look.

DIY, Four Leaf Clover, Card, Honey Bee Stamps, Lucky, how to, hand made card, Stamps, stamping, die cutting, card making, ilovedoingallthingscrafty, Lace Heart Layering Frames Dies,pattern Paper,

Finishing Touches:

To complete the card, I stamped out the sentiment using Bee Creative Brilliant White Pigment Ink, then heat set it with white embossing powder. I then used a banner die from the Mini Messages Dies to cut out the sentiment and then glued it in place. 
For one final touch of sparkle, I added a green gem to the center of the clover from the Simply Spring Gem Stickers


DIY, Four Leaf Clover, Card, Honey Bee Stamps, Lucky, how to, hand made card, Stamps, stamping, die cutting, card making, ilovedoingallthingscrafty, Lace Heart Layering Frames Dies,pattern Paper,

Thank you for joining me on this crafting journey, and until next time, happy crafting!

Ilda 🍀


SUPPLIES
Lace Heart Layering Frames Dies
Shop at:
SSS | SB | HBS
Sweet Stacks Ovals
Sweet Stacks Ovals
Shop at:
SSS | SB | HBS
Mini Messages Stamps
Shop at:
SSS | SB | HBS
Mini Messages Dies
Mini Messages Dies
Shop at:
SSS | SB | HBS
Gingham Happy Hearts Paper Pad
Shop at:
SSS | SB | HBS
Giddy for Gingham Paper Pad
Shop at:
SSS | SB | HBS
Simply Spring Gem Stickers
Shop at:
SSS | SB | HBS
Bee Creative Brilliant White Pigment Ink
Shop at:
SSS | SB | HBS
Stamping Pressure Tool
Shop at:
HBS
Bee Creative Bitty Buzz Cutter
Shop at:
HBS
Bee Creative Glue
Bee Creative Glue
Shop at:
SSS | SB | HBS
Honey Bee Reverse Tweezers
Shop at:
HBS
New Mini Misti
New Mini Misti
Shop at:
SSS | SB | HBS
ATELIER GODDESS GREEN
Shop at:
SSS | IO3
Platinum 6 Die Cutting Platform
Shop at:
SSS | SB | SB
Arctic White Emb.Pwd.
Shop at:
SSS | IO3
Heat Gun
Heat Gun
Shop at:
AMZ
To make supplies easy for you to find, I have linked them above. If something is no longer available I will link to a similar product. Affiliate links may be used depending on the product linked. Please help support my blog by using these links while shopping at no additional cost to you. For more information about the affiliates I use, please visit my disclaimer here. Thanks so much for all your support!

Enjoyed this post? Never miss out on future posts by Following this Blog

Monday, December 25, 2023

Happy Holiday Full Panel Shakers | Honey Bee Stamps

Holiday Full Panel Shakers, Honey Bee Stamps, Frameless, Flat, Edge to Edge, pattern Paper, Shaker pockets, DIY, how to,handmade card, Stamps, ilovedoingallthingscrafty, stamping, die cutting, cardmaking

Merry Christmas my Crafty Friends and Happy New Year as this will be my last post of the year!

For today's post, I have a few fun shakers to share featuring goodies from Honey Bee Stamps inspired by the latest Holiday Wishes Paper Pad.

CARD RECIPE

Background - Holiday Wishes Paper Pad

HAPPY - Happy Happy Happy A2 Cover Plate 

NEW YEAR - Bee Bold Alphabet Dies

Shaker Pocket Panel - DIY from Acetate or use plastic wrapping 

(watch the video of the original DIY Full Panel Shaker

Shaker Bits - Mixed from supply stash to coordinate


Holiday Full Panel Shakers, Honey Bee Stamps, Frameless, Flat, Edge to Edge, pattern Paper, Shaker pockets, DIY, how to,handmade card, Stamps, ilovedoingallthingscrafty, stamping, die cutting, cardmaking
  • Trim your background panel to A2 size. I used the pattern paper from the Holiday Wishes Paper Pad but you can definitely create your own.
  • Place the panel into the acetate shaker panel with the pattern side facing down and the adhesive tabs facing up (if you don't have a pre-made acetate cover you can DIY your own with acetate or some recycled plastic from old packaging).
  • Secure 3 of the sides to the panel to create the shaker pocket using strong adhesive tape
  • Fill with your shaker pocket with bits and bling and seal the last tab. 
  • Adhere the panel to a card base using a strong adhesive.
  • Add the die cuts to the front of the panel.
Here are a few more examples. Using the MERRY and a sentiment from the Mini Messages: Holiday Stamps die cut using the Mini Messages Dies

Holiday Full Panel Shakers, Honey Bee Stamps, Frameless, Flat, Edge to Edge, pattern Paper, Shaker pockets, DIY, how to,handmade card, Stamps, ilovedoingallthingscrafty, stamping, die cutting, cardmaking

This next Christmas Shaker features the Merry Christmas from the Bitty Buzzwords: Holidays Dies and the greenery from the Lovely Layers: Candy Cane Dies and Decorative Star Layering Frames Dies.

Holiday Full Panel Shakers, Honey Bee Stamps, Frameless, Flat, Edge to Edge, pattern Paper, Shaker pockets, DIY, how to,handmade card, Stamps, ilovedoingallthingscrafty, stamping, die cutting, cardmaking

Making shakers this way is much easier than using foam tape. The hardest part is actually photographing them as they are so reflective, lol!

Wishing you all a very restful and Happy Holiday Season. I will try and do the same 😉 Thank you for stopping by and until next year... Happy Crafting!
Ilda 💖

To make supplies easy for you to find, I have linked them above. If something is no longer available I will link to a similar product. Affiliate links may be used depending on the product linked. Please help support my blog by using these links while shopping at no additional cost to you. For more information about the affiliates I use, please visit my disclaimer here. Thanks so much for all your support!

Enjoyed this post? Never miss out on future posts by Following this Blog

Monday, December 7, 2020

Modern Built In Wall Unit - Using the Silhouette Studio Designer Edition to Design Renovation Plans

Modern Built In Wall Unit, Silhouette Studio Designer Edition, Renovation Plans, Silhouette Cameo, Samsung Frame TV, DIY, Interior Design, Focalize Contracting, Cloverdale Paint, Chantilly Lace, Faux Shiplap, Napoleon  Allure Wall Mount Electric Fireplace

Today's post is a little different from my usual card-making post. Did you know that initially when I started this blog years ago I started by sharing my DIY crafts? Since then, it transitioned to 3D papercrafts when I started designing for SVGCuts, a bit of cake decorating, and most recently it has been all about my handmade cards.

BEFORE

Well, today I am sharing something that is totally different for me and something that has been floating in my head for the last couple of years, and had no idea where to start. Here is how it all started...

Modern Built In Wall Unit, Silhouette Studio Designer Edition, Renovation Plans, Silhouette Cameo, Samsung Frame TV, DIY, Interior Design, Focalize Contracting, Cloverdale Paint, Chantilly Lace, Faux Shiplap, Napoleon  Allure Wall Mount Electric Fireplace

As you can see, our built-in wall unit had become outdated, it was time to update it. We built our house in 2003, and since then so much has changed. The colors were too dark, the design was dated and stuck in the 2000s. The original wall unit was designed around a huge flat projection TV that at the time was new. Not sure how many years later it died, which we then replaced with a smaller wall mounted flat screen because it was what we could fit inside the space. Then to cover up the wires that hung down and to fill the empty space beneath it we found this TV console shelf that fit perfectly inside the space. So what do you place on those shelves? Well, yes you clutter it with all the family photos😂.

The gas fireplace was rarely used, it was always an eyesore for me as it wasn't symmetrical in the unit. It all had started to look like a cluttered dust collection. Every time I sat on the couch I wondered what I could do to make this work. I was constantly moving things around and was really never happy the decor. I've known for a long while that something needed to be done but we never had the time for it. 

Also, I had to do was convince my husband. Not sure if it's a guy thing, but for him the unit was fine he said just paint it and it will look better. I knew that wasn't going to be enough for me, so once I showed him my mock-up design with a large TV, he was sold, LOL! One good thing about COVID was that it has allowed my husband to work from home and oversee the project. 

PLANNING

So here's how my planning began. I took many photos of the room and opened them up in the Silhouette Studio Designer Edition Software. You want to use a photo that is pretty level and captures the space head-on. 

For those of you that aren't familiar with a Silhouette, it is an electronic die-cutting machine that connects to a computer. It's about the same size as a small printer and comes with software that enables you to basically create anything and then cut it out on paper, fabric, vinyl, or heat transfer material and so much more. It was actually how I got hooked on papercrafts. The Designer Edition for the Silhouette gives you more tools to work with to create your own designs.

Once I had the picture opened up in the program, I overlayed simple shapes and pictures that I cropped from random photos from the internet to cover up the spaces until I came up with a design I loved. This changed many, many times. The picture below is how it started. The measurements came from the actual wall to figure out the spacing. The great thing about doing something like this is that you have an instant visual of your space that you can manipulate with shapes and colors until you are happy. 

Here is a screenshot of the photo above that was created in the Silhouette Studio software. I am sure you can achieve do similar photo manipulation with other software but for me, this was what I was most familiar with.

Modern Built In Wall Unit, Silhouette Studio Designer Edition, Renovation Plans, Silhouette Cameo, Samsung Frame TV, DIY, Interior Design, Focalize Contracting, Cloverdale Paint, Chantilly Lace, Faux Shiplap, Napoleon  Allure Wall Mount Electric Fireplace

Here is what it looked like using these rough measurements on the wall using painter's tape. 

Modern Built In Wall Unit, Silhouette Studio Designer Edition, Renovation Plans, Silhouette Cameo, Samsung Frame TV, DIY, Interior Design, Focalize Contracting, Cloverdale Paint, Chantilly Lace, Faux Shiplap, Napoleon  Allure Wall Mount Electric Fireplace

As the project progressed, so did the picture I used and the design kept evolving. I won't share them all because there were a lot of them. Unsure of what material to use around the fireplace surround we finally decided to go with a faux shiplap design using MDF boards. This was the more affordable option and if it didn't like it, it would be a lot easier to change in the future. I was hesitant to commit to a stone wall as it was much more of an expense and I was scared it wouldn't like it once it was there.
 
Here is another visual and when I decided on the herringbone design.

Modern Built In Wall Unit, Silhouette Studio Designer Edition, Renovation Plans, Silhouette Cameo, Samsung Frame TV, DIY, Interior Design, Focalize Contracting, Cloverdale Paint, Chantilly Lace, Faux Shiplap, Napoleon  Allure Wall Mount Electric Fireplace

Deciding on color was also hard. I knew I wanted to make the space brighter, and because we have so much maple throughout the house I thought of going with white walls. And yes as scary as that sounds, I think it was a great way to go, it made all the maple stand out and also added warmth to the room. I am so happy with the results. 

We ended up using paint from Cloverdale. On the walls, we used a color match of Chantilly Lace from Benjamin Moore. On the faux shiplap wall, we used Canopy CA212 from Cloverdale. I used the color tool from the Silhouette Studio to add the colors to the image below to give me a better visual of the colors I was contemplating. I downloaded the digital swatches of the paints and then opened them up in the program and then changed colors until I was happy with the visual. 

I am certain I tested out 50 shades of grey before I settled on this one, lol! We did paint other feature walls throughout the house using Canopy and Dark Shadows. 

The shelves and cabinets were made from Oak and stained a dark espresso color.

Modern Built In Wall Unit, Silhouette Studio Designer Edition, Renovation Plans, Silhouette Cameo, Samsung Frame TV, DIY, Interior Design, Focalize Contracting, Cloverdale Paint, Chantilly Lace, Faux Shiplap, Napoleon  Allure Wall Mount Electric Fireplace

Here are some more photos of the construction phase. 

Modern Built In Wall Unit, Silhouette Studio Designer Edition, Renovation Plans, Silhouette Cameo, Samsung Frame TV, DIY, Interior Design, Focalize Contracting, Cloverdale Paint, Chantilly Lace, Faux Shiplap, Napoleon  Allure Wall Mount Electric Fireplace

Modern Built In Wall Unit, Silhouette Studio Designer Edition, Renovation Plans, Silhouette Cameo, Samsung Frame TV, DIY, Interior Design, Focalize Contracting, Cloverdale Paint, Chantilly Lace, Faux Shiplap, Napoleon  Allure Wall Mount Electric Fireplace

Modern Built In Wall Unit, Silhouette Studio Designer Edition, Renovation Plans, Silhouette Cameo, Samsung Frame TV, DIY, Interior Design, Focalize Contracting, Cloverdale Paint, Chantilly Lace, Faux Shiplap, Napoleon  Allure Wall Mount Electric Fireplace

Modern Built In Wall Unit, Silhouette Studio Designer Edition, Renovation Plans, Silhouette Cameo, Samsung Frame TV, DIY, Interior Design, Focalize Contracting, Cloverdale Paint, Chantilly Lace, Faux Shiplap, Napoleon  Allure Wall Mount Electric Fireplace

Modern Built In Wall Unit, Silhouette Studio Designer Edition, Renovation Plans, Silhouette Cameo, Samsung Frame TV, DIY, Interior Design, Focalize Contracting, Cloverdale Paint, Chantilly Lace, Faux Shiplap, Napoleon  Allure Wall Mount Electric Fireplace

We decided to go with a Napoleon Alluravision-NEFL74CHD-Deep Wall Hanging Electric Fireplace.  The assembly and the install was super easy. I love the sleek minimalistic design and that it has a variety of color options to coordinate with your surroundings. Plus if needed it actually can heat up the room! 

Modern Built In Wall Unit, Silhouette Studio Designer Edition, Renovation Plans, Silhouette Cameo, Samsung Frame TV, DIY, Interior Design, Focalize Contracting, Cloverdale Paint, Chantilly Lace, Faux Shiplap, Napoleon  Allure Wall Mount Electric Fireplace

We were lucky to find a finishing contractor that was able to turn my concept into a reality and I think it turned out even better than I had ever hoped. If you live in the Edmonton area, lookup Micheal from Focalize Contracting, his sister Cristina did all of the painting. 

My handy husband did all the electrical, lighting, and home automation wiring. His biggest concern was the TV. In the end, we chose to go with a 75" Samsung Frame TV because of its thin profile and it looks like a picture when it's not in use. The outer frame is also customizable to coordinate with your decor. It honestly is SO cool!

Here is the first photo again as it is all decorated for the Holidays. Doesn't it look so pretty!?!

Modern Built In Wall Unit, Silhouette Studio Designer Edition, Renovation Plans, Silhouette Cameo, Samsung Frame TV, DIY, Interior Design, Focalize Contracting, Cloverdale Paint, Chantilly Lace, Faux Shiplap, Napoleon  Allure Wall Mount Electric Fireplace

I hope this has inspired you to attempt a Do It Your Self Design. I'm sure it would have been easier to hire an interior designer and maybe this room would look even better. But honestly, I am SO happy with the results I got and now we all love to hang out in this space. 

Don't tell my husband but I'm already getting ideas for my next DIY design😆

Thank you for stopping by and until next time... Stay Safe!

PIN IT!
Modern Built In Wall Unit, Designer Edition, Renovation, Silhouette Cameo, Samsung Frame TV, DIY, Interior Design, Cloverdale, Faux Shiplap, Napoleon Allure Electric Fireplace
To make supplies easy for you to find, I have linked them above. If something is no longer available I will link to a similar product. Affiliate links may be used depending on the product linked. Please help support my blog by using these links while shopping at no additional cost to you. For more information about the affiliates I use, please visit my disclaimer here. Thanks so much for all your support!

Thursday, September 3, 2020

Back to School | Chalkola Chalkboard Marker Sign


Back to School, Chalk Marker, Chalkola, DIY, ilovedoingallthingscrafty, Sign,

Today is the first day of back to school for these two kiddos. They were super excited to go and see all their friends and teachers again. I, on the other hand, have mixed feelings about their return to school. I pray for a safe return for all the students and teachers during this crazy pandemic we are living through.

This year's Back to School photo prop is brought to you by Chalkola. The kind people at Chalkola sent me these fun Chalk Markers and Sign to play with. At first, I was going to make a card for you using them (and still may) but I thought this sign was a fun way to celebrate the kid's first day back at school. Keep reading for details on how to buy and save on these fun markers!

Here are my two masked Ninja COVID fighting warriors. Tomás is in Grade 11 this year and Maia in Grade 9.

Back to School, Chalk Marker, Chalkola, DIY, ilovedoingallthingscrafty, Sign,

Love the smiles behind the masked faces.

Back to School, Chalk Marker, Chalkola, DIY, ilovedoingallthingscrafty, Sign,

Had to share Tomás' expression here. He was saying "Really Mom! I'm so thankful I only have to do this one more year." (Little does he know that I plan on taking these pictures even when they go to University, lol!)

Back to School, Chalk Marker, Chalkola, DIY, ilovedoingallthingscrafty, Sign,

Maia is super excited about being a "Grade 9'er", the highest grade in the school where she's been at since Pre-School.

Back to School, Chalk Marker, Chalkola, DIY, ilovedoingallthingscrafty, Sign,

Wishing my babies both a safe return to school. I am thankful Online Schooling is available to them should this return be short-lived. I'm keeping my fingers and toes crossed!

Now, for all my Readers and Followers, Chalkola has provided me a discount code to share with my friends that offers you a 10% discount. Click → ILDA10 for your 10% from the Chalkola Shop.
Use CHALKOLA10 to shop AMAZON US, AMAZON CA, or AMAZON UK.


PRODUCT DETAILS
  • 21 BOLD VIBRANT COLORS to choose from, including a selection of 15 bright liquid chalk pen and 6 cool metallic markers. Chalk Paint markers have water-based ink and are easily washable.
  • THE ULTIMATE FREEDOM OF EXPRESSION. Chalkola’s liquid chalk markers are widely used as a chalk lettering tool and to decorate wedding signs, milestone boards, menus, LED boards, contact paper, car mirrors, wine glasses, and coffee mugs
  • MADE FOR EVERYONE - Whether you're a Teacher, Mom, Student, Artist, Kid, Business, Office, or Restaurant Owners. Our markers make creating beautiful messages effortlessly.
  • COMES OFF EASY - The chalkboard ink pen will work on almost any surface! Will erase off non-porous surfaces; such as blackboard (wet erase), glass & mirrors (dry erase) and Permanent on porous surfaces
  • KID SAFE AND ODOR FREE - These erasable chalk pens are water-based, dustless, wet wipe, non-toxic formula safe for use at home.Time to replace the old dusty chalk with bold neon chalkboard markers.
Thank you for stopping by 😊
Until next time... Happy Crafting 👋


SUPPLIES

CHALK MARKERS
CHALK MARKERS
Shop at:
AMZ | CH
CHALKBOARD SIGN
CHALKBOARD SIGN
Shop at:
AMZ | CH

To make supplies easy for you to find, I have linked them above. If something is no longer available I will link to a similar product. Affiliate links may be used depending on the product linked. Please help support my blog by using these links while shopping at no additional cost to you. For more information about the affiliates I use, please visit my disclaimer here. Thanks so much for all your support!

Thursday, May 23, 2019

DIY Rain Maker Shaker Interactive Card and Video | Studio Katia


Hello Friends!

Today I have a treat for you, well at least I think so!😉 

Today's card was inspired by my friend and Interactive Card Master Laura Dovalo! When she came out with a card creating a rain shaker I was floored and just knew someday I would have to make one. Well, the day finally arrived! Since then Laura has collaborated with MFT and created the Falling From The Clouds Die to make it easier for us to recreate. Unfortunately, I do not yet own the die and so I had to see if I could up with a DIY version of it using supplies I already owned. Fortunately, Studio Katia had just the die I needed! I always love it when I could stretch my supplies, don't you!?

So here is the fun Rain Maker Shaker Card I came up with. The sun, the rainbow colors, and even the rain just make me smile. Plus it is so fun to play with!

DIY Rain Maker Shaker Interactive Card and Video for Studio Katia by ilovedoingallthingscrafty.com

In order to create this version of the Rain Maker Shaker, I used a die meant for stitching which comes from STITCH BORDERS die set. I will let you watch how I used the die to create the mechanism that makes this card interactive. Plus you can see it in action! 
Click → HERE to watch the process video.

Don't forget to → Subscribe to my Channel for future inspiration!

CARD DETAILS

To begin this card I added embossing paste to my background using the LARGE POLKA stencil. Once that was dry I realigned the stencil with the embossed dots and used Distress Oxide Inks to blend out the rainbow colors. I then trimmed the background and glued it to the card base.

Next, I die cut the clouds using the cloud border from the SKY SET DOTTED BORDERS and also die cut the pieces for the sun by using the negative piece from die cutting the FANCY CIRCLE DIES together. I then just sandwiched the vellum piece between the sun rays.

The hello script die-cut comes from the YOU'RE SO RANUNCULUS DIE set which I die cut three times and stacked together. I used Copic markers to blend out the rainbow on the die cut and then finished it off with clear embossing powder for a high gloss finish.

DIY Rain Maker Shaker Interactive Card and Video for Studio Katia by ilovedoingallthingscrafty.com

To the inside of the card, I stamped out the sending you from the A CUP OF THANKS set and the Sunshine my friend comes from the ALOHA set.

DIY Rain Maker Shaker Interactive Card and Video for Studio Katia by ilovedoingallthingscrafty.com

I hope you have been inspired by my version of Laura's Rain Maker Shaker Interactive Card and maybe the next time you don't own that certain die or product you first take a look at what you already do have and use your creative juices to create your own. Experimenting and playing around with your supplies is what makes creating fun!

For more inspiration using Studio Katia products stop by their BLOG

Thank you for stopping by 😊
Until next time... Happy Crafting 👋


SUPPLIES

LARGE POLKA
LARGE POLKA
Shop at:
SSS | SK
STITCH BORDERS
STITCH BORDERS
Shop at:
SSS | SK
FANCY CIRCLE DIES
FANCY CIRCLE DIES
Shop at:
SSS | SK
SKY SET DOTTED BORDERS
Shop at:
SSS | SK
YOU'RE SO RANUNCULUS DIES
Shop at:
SSS | SK
A CUP OF THANKS
A CUP OF THANKS
Shop at:
SSS | SK
ALOHA
ALOHA
Shop at:
SSS | SK
APRIL CRYSTALS
APRIL CRYSTALS
Shop at:
SSS | SK
SILVER DUST | SEED BEADS
Shop at:
SSS | SK
STUDIO KATIA GLUE
STUDIO KATIA GLUE
Shop at:
SSS | SK
TRIANGLE TRAY
TRIANGLE TRAY
Shop at:
SSS | SK
Neenah  80 LB SOLAR WHITE
Neenah 80 LB SOLAR WHITE
Shop at:
SSS | AMZ
Embossing Paste
Embossing Paste
Shop at:
SSS | ALT
BLENDER BRUSH Set
BLENDER BRUSH Set
Shop at:
SSS | AMZ | PF
PICKED RASPBERRY
PICKED RASPBERRY
Shop at:
SSS | SB
FOSSILIZED AMBER
FOSSILIZED AMBER
Shop at:
SSS
 LUCKY CLOVER
LUCKY CLOVER
Shop at:
SSS
MERMAID LAGOON
MERMAID LAGOON
Shop at:
SSS | AMZ
WILTED VIOLET
WILTED VIOLET
Shop at:
SSS
Vellum Value Pack
Vellum Value Pack
Shop at:
SSS | AMZ
Juicy  Ink
Juicy Ink
Shop at:
SSS | IO3
Mini Misti Tool
Mini Misti Tool
Shop at:
SSS | AMZ | SB | SK
Blackout Ink
Blackout Ink
Shop at:
SSS | IO3
Crystal Clear Ultra  Powder
Crystal Clear Ultra Powder
Shop at:
SSS | IO3
Black and Decker  Heat Gun
Black and Decker Heat Gun
Shop at:
AMZ
Foam Mounting Tape
Foam Mounting Tape
Shop at:
AMZ
Double Ended Jewel Picker
Shop at:
SSS | AMZ | HBS
Sakura Quickie Glue Pen
Shop at:
SSS | AMZ | SK
PRISMA GLITTER
PRISMA GLITTER
Shop at:
SSS
EK Success Craft Tweezers
Shop at:
SSS | AMZ
GUILLOTINE PAPER TRIMMER
Shop at:
SSS | AMZ | SB
Scor-Pal MINI SCOR-BUDDY
Shop at:
SSS | HBS
Beadalon Big Eye Curved Needles
Shop at:
AMZ
Clear Nylon Invisible Thread
Shop at:
AMZ

To make supplies easy for you to find, I have linked them above. If something is no longer available I will link to a similar product. Affiliate links may be used depending on the product linked. By shopping through my links you help keep my blog running at no extra cost to you. So thank you in advance for supporting my creations!

PIN IT!
DIY Rain Maker Shaker Interactive Card and Video for Studio Katia by ilovedoingallthingscrafty.com