Showing posts with label Copic Coloring. Show all posts

Thursday, November 14, 2024

Gray Skies Bring Sunny Days - DIY Shaker Card | November Picket Fence Studios Release

Adorable handmade shaker card featuring a bunny and raccoon sharing a colorful umbrella on a rainy day, with sparkly clouds, a stone wall, and shaker sequins, created using Picket Fence Studios November release products.

Hello, crafty friends! I'm excited to share my latest project, a whimsical shaker card featuring the adorable "Bad Weather Friends" from the brand-new November Picket Fence Studios release. This card is part of an Instagram hop to celebrate the release, where you can hop along for some fantastic inspiration. And there's an extra treat—a $50 Gift Card is up for grabs for one lucky winner chosen from the entire hop! Be sure to head over to Instagram to join in the fun and enter.

CARD RECIPE


Background and CloudsFirst I added a light layer of grey ink to the sky. I then began by creating a cloudy background using the Cloudy Day Stencil. The clouds are brought to life with a touch of shimmer from the Twinkle Lights Silver Paper Glaze, applied with a Mixed Media Spatula for a smooth, even finish. This glaze adds a perfect touch of sparkle, making the clouds stand out against the rest of the scene. Set aside to dry.

Stone Wall Texture: The stone wall at the bottom was created using the new Beyond Basics A2 Vintage Rectangles and Cover Plates. Distress Oxide Inks helped achieve a realistic stone texture, which grounds the scene and adds a cozy, rainy-day feel. I trimmed the piece and added it to the bottom of the scene.


Adorable handmade shaker card featuring a bunny and raccoon sharing a colorful umbrella on a rainy day, with sparkly clouds, a stone wall, and shaker sequins, created using Picket Fence Studios November release products.

Critters and Sentiment: The little critters sharing an umbrella are from the Bad Weather Friends Stamp Set. I stamped them with PFS Black Hybrid Ink for a sharp, clear image, then colored them with Copic Markers for a vibrant, cheerful look, and added white gel pen details for highlights. I then used the coordinating dies to cut out the critters. The sentiment "Gray Skies Bring Sunny Days" is stamped to the side, echoing the card’s theme of hope and resilience.

Adorable handmade shaker card featuring a bunny and raccoon sharing a colorful umbrella on a rainy day, with sparkly clouds, a stone wall, and shaker sequins, created using Picket Fence Studios November release products.

Shaker Elements: To make this a shaker card, I used DIY Shaker Sheets to create the shaker pocket. Inside, I added a mix of Iridescent Moonshine Sequins for a bit of sparkle, and Day and Night Gems to represent raindrops. The result is a dynamic, interactive element that adds extra fun to the card.

Finishing Touches: Glue the critters to the top of the shaker window, and then glue the shaker panel to a Beyond Basics A2 Vintage Rectangle Frame. Finally, attach it to a card base. 

Adorable handmade shaker card featuring a bunny and raccoon sharing a colorful umbrella on a rainy day, with sparkly clouds, a stone wall, and shaker sequins, created using Picket Fence Studios November release products.

Don’t miss your chance to win a $50 Gift Card from Picket Fence Studios! Head over to Instagram and follow along with the hop for loads of inspiration from the November release. Just leave a comment on each post in the hop to enter. Good luck, and I hope this card brings a little sunshine to your day, even if it's cloudy outside!☔

Thank you for stopping by and until next time... Happy Crafting!
Ilda 🌈

To make supplies easy for you to find, I have linked them above. If something is no longer available I will link to a similar product. Affiliate links may be used depending on the product linked. Please help support my blog by using these links while shopping at no additional cost to you. For more information about the affiliates I use, please visit my disclaimer here. Thanks so much for all your support!

Enjoyed this post? Never miss out on future posts by Following this Blog

Sunday, February 5, 2023

Rainbow Gladiolus Bouquet Card | Studio Katia | New Release

Rainbow, Gladiolus, Bouquet, Card,Studio Katia,New Release,Card Making, Stamping, Die Cutting, handmade card, ilovedoingallthingscrafty, Stamps, how to,Copic Coloring,Floral Friendship Card,Hello,

Hello friends and Happy Sunday!

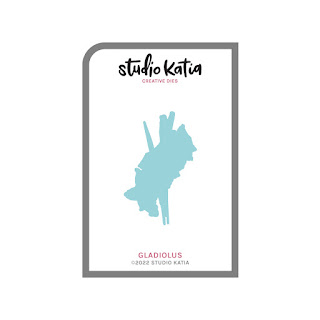
Today Studio Katia is introducing their latest member to their Mini Slimline Collection. This month it is this beautiful Gladiolus Stamp and Coordinating Die.


Realistically coloring my Gladiolus in rainbow colors doesn't make any sense, but hey I am applying artistic freedom here 😉 Make sure to click the link to the Studio Katia Blog for more inspiration from the Design Team and enter the release giveaway.

CARD RECIPE

Making this card was pretty simple, the hardest part was masking, and even with that it was fairly easy!
  • Start by stamping the Gladiolus Stamp in the center of the panel using Copic-friendly ink.
  • Using the coordinating Die, die-cut masking paper. You could also fussy cut the stamped image but this is the lazy way for those that don't like fussy cutting like me!
  • Shift the edge of the masking paper to line up with the stamped image. If you see the stamped line that is perfect as it will overlap the next stamped image connecting the previous stamped lines.
  • Reposition the stamp and repeat stamping the Gladious Stamp to each side of the first stamped image. Reposition the masking before stamping a new area.
  • Remove masking.
  • Draw in lines if any weren't connected using a Copic-friendly pen, I also extended the stems.
  • Color in the Gladiolus using Copic Markers.
Rainbow, Gladiolus, Bouquet, Card,Studio Katia,New Release,Card Making, Stamping, Die Cutting, handmade card, ilovedoingallthingscrafty, Stamps, how to,Copic Coloring,Floral Friendship Card,Hello,
  • Add the die-cut frame from the Darling Ribbons and Frames to frame the colored panel.
  • Using white pigment ink, stamp and heat emboss the sentiment from the Gladioulus Stamp set.
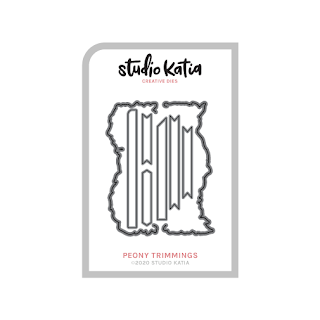
  • Die cut the sentiment using a Die from the Peony Trimmings Set, and add foam to pop it up, trim any excess.
Rainbow, Gladiolus, Bouquet, Card,Studio Katia,New Release,Card Making, Stamping, Die Cutting, handmade card, ilovedoingallthingscrafty, Stamps, how to,Copic Coloring,Floral Friendship Card,Hello,
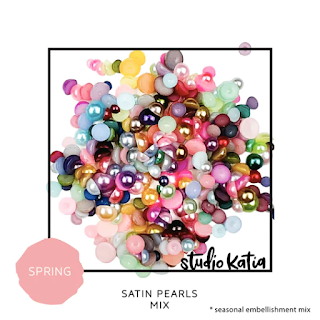
  • Finish by gluing on some coordinating colored pearls. These came from the Satin Pearls Mix.
  • For extra highlights and details use a white gel pen.
I hope this beautiful Rainbow Gladiolus Bouquet Card brightened your day. I love how this one turned out and hope it inspired you as well.

Thank you for stopping by and until next time... Happy Crafting!
Ilda 🌈🎕

SUPPLIES
Gladiolus
Gladiolus
Shop at:
SK
Gladiolus Die
Gladiolus Die
Shop at:
SK
Darling Ribbons and Frames
Shop at:
SK
Peony Trimmings Dies
Shop at:
SK
Satin Pearls Mix
Satin Pearls Mix
Shop at:
SK
Black Triangle Tray
Black Triangle Tray
Shop at:
SSS | SK
Embellishment Wand
Embellishment Wand
Shop at:
SSS | SK
SK Glue
SK Glue
Shop at:
SSS | SK
BLACK FOAM TAPE
BLACK FOAM TAPE
Shop at:
SSS | SK
Blackout Ink
Blackout Ink
Shop at:
SSS | HBS | IO3
Neenah Solar White 110lbs
Shop at:
SSS | AMZ | HBS
Masking Paper
Masking Paper
Shop at:
SSS | ALTN
Platinum 6 Die Cutting Platform
Shop at:
SSS | SB | SB
New Mini Misti
New Mini Misti
Shop at:
SSS | SB | HBS
Copic Sketch Markers
Shop at:
SSS | AMZ
Shark Tooth White Atelier Ink
Shop at:
SSS | IO3
Arctic White Emb.Pwd.
Shop at:
SSS | IO3
Heat Gun
Heat Gun
Shop at:
AMZ
White Gelly Roller Pen
Shop at:
SSS | AMZ | SB | HBS
To make supplies easy for you to find, I have linked them above. If something is no longer available I will link to a similar product. Affiliate links may be used depending on the product linked. Please help support my blog by using these links while shopping at no additional cost to you. For more information about the affiliates I use, please visit my disclaimer here. Thanks so much for all your support!

Watch the magic of a little masking trick!

Monday, April 18, 2022

Happy Bee Day Card | Honey Bee Stamps

Happy Bee Day Card, Honey Bee Stamps, Birthday, Hive, Honeycomb, Card Making, Stamping, Die Cutting, handmade card, ilovedoingallthingscrafty,  how to,  Pun, bee, Copic Coloring

Hello, dear friends, and Happy Easter Monday to those who celebrate Easter 🕇 I hope you all had a lovely weekend. I had to work but was able to enjoy Easter Sunday Dinner with the family.

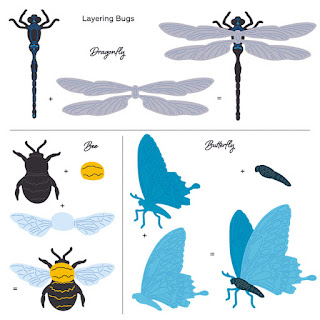
Today's card features the darling bee from the Lovely Layers: Bugs | Honey Cuts. I love this realistic-looking bee only because I know it is paper, lol! This card could either be used as I intended, as a "b-day" card, or it could just be a Happy Day card too.

CARD RECIPE

To begin, I actually started by die-cutting the pieces for the bee. This time I cut out 2 layers of the wings from vellum, not for realistic purposes but for an artistic one. I just thought it would give it more interest and added dimension. I then colored the layers using Copic Markers and added pen details for that extra layer of detail. To give the wings some sparkle I added a layer of liquid pixie dust.

Happy Bee Day Card, Honey Bee Stamps, Birthday, Hive, Honeycomb, Card Making, Stamping, Die Cutting, handmade card, ilovedoingallthingscrafty,  how to,  Pun, bee, Copic Coloring

Next, I die cut the honeycomb, using the HEXAGON BUNCHES Die. To give it the thickness I needed I glued 6 layers together and set it aside. I then worked on the card base. To the front of the card base panel, I used the Spring Leaves A2 Pierced Cover Plate to emboss it. I then ran the card front through the die machine using the HEXAGON BUNCHES Die which created a window. Behind the opening, I used a piece of Gold Mirror Cardstock to close up the window and then glued the finished honeycomb in place. You could also use an acetate piece here if you wanted to leave the card center transparent.

To add all the sparkly bling, I used the Bee Creative Glue to fill in the wells of the honeycomb and then poured the gold glitter on top while the glue was still wet.

Happy Bee Day Card, Honey Bee Stamps, Birthday, Hive, Honeycomb, Card Making, Stamping, Die Cutting, handmade card, ilovedoingallthingscrafty,  how to,  Pun, bee, Copic Coloring

For the sentiment, I used a couple of the dies from the BITTY BUZZWORDS Die set, the happy and birthday. Since I only wanted to use the day from birth"day" I cut off the birth part. I stacked and glued 3 black cardstock layers and then topped it off with the same gold mirror paper for both words and then added it to the black shadow layer. 


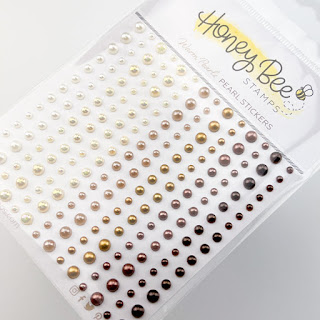
To finish, I used a few of the gold pearls from the Warm Pearls Sticker set


I really love how this card turned out and I hope it inspired you too. Thank you for stopping by and until next time... Happy Crafting!
Ilda 🐝

SUPPLIES
Lovely Layers: Bugs | Honey Cuts
Shop at:
SSS | SB | HBS
Honey Bee HEXAGON BUNCHES Die
Shop at:
SSS | SB | HBS
Spring Leaves A2 Pierced Cover Plate
Shop at:
SSS | SB | HBS
BITTY BUZZWORDS DIES
Shop at:
SSS | SB | HBS
Warm Pearls Stickers
Shop at:
SSS | SB | HBS
Bee Creative Glue
Bee Creative Glue
Shop at:
SSS | SB | HBS
Black Foam Dots 1/4
Black Foam Dots 1/4"
Shop at:
HBS
Honey Bee Reverse Tweezers
Shop at:
SSS | HBS
Die Release Tool
Die Release Tool
Shop at:
SSS | HBS
Gemini Jr. Die-Cutter
Shop at:
SSS | SB
Neenah Solar White 110lbs
Shop at:
SSS | AMZ | HBS
Vellum Value Pack
Vellum Value Pack
Shop at:
SSS | AMZ
Gold Mirror Cardstock
Shop at:
SSS | HBS
ZIG Glue Pen
ZIG Glue Pen
Shop at:
SSS | HBS
Liquid Pixie Dust
Liquid Pixie Dust
Shop at:
SSS | IO3
GOLD FEVER GLITTER
GOLD FEVER GLITTER
Shop at:
SSS | SK
To make supplies easy for you to find, I have linked them above. If something is no longer available I will link to a similar product. Affiliate links may be used depending on the product linked. Please help support my blog by using these links while shopping at no additional cost to you. For more information about the affiliates I use, please visit my disclaimer here. Thanks so much for all your support!

Watch how this card came together!