Showing posts with label Stamps. Show all posts

Friday, August 23, 2024

Falloween Release Sneak Peeks Day 2 | Honey Bee Stamps

how to, hand made card, Stamps, stamping, die cutting, card making, ilovedoingallthingscraftym Falloween Release, Shaker Card, Spider, Interactive, Rainbow, Web,3D Blackout Embossing Folder Technique,

***Please note links in the post are no longer active, if you are looking for something specific use this link here to 👉 HONEY BEE STAMPS and search for the product listed. My apologies for the inconvenience ***
Today is Day 2 of the Falloween Release Sneak Peeks and I'm excited to share a playful and interactive shaker card that I created using some of the latest products. This card is perfect for sending a little Halloween cheer to someone special. Please note links are inactive until the Falloween Release goes live on August 23rd after the Live Release Party on YouTube at 8 pm EST.


CARD RECIPE

Spider - Lovely Layers: Scaredy Cat Dies

Spider Eyes - Sweet and Spooky Pearl Stickers

Background - Spider Web 3D Embossing Folder

Sentiment - Too Cute to Spook Dies

Frame - Layering Vintage Labels Frames

Shaker bits - Black Opal Confetti Mix, Aurora Lights Confetti Mix

Shaker - A2 Shaker Pockets


Background Magic:


I started with the Spider Web 3D Embossing Folder to create the spooky web background. Using the blackout technique, I blended yellow, pink, and blue inks from Inkon3 into the reversed embossed areas of the Tangled Web 3D Embossing Folder. The colors give a vibrant yet eerie glow, perfect for a Halloween-themed card.


Adding the Shaker Element:

To bring in some fun, I created a shaker element using the A2 Shaker Pockets. I filled the shaker with a mix of Black Opal Confetti Mix and Aurora Lights Confetti Mix. The iridescent confetti adds a playful shimmer that catches the light beautifully.

how to, hand made card, Stamps, stamping, die cutting, card making, ilovedoingallthingscraftym Falloween Release, Shaker Card, Spider, Interactive, Rainbow, Web,3D Blackout Embossing Folder Technique,

Focal Point & Sentiment:

The sentiment "Too Cute to Spook" is die-cut using the Too Cute to Spook Dies. I layered the sentiment onto a vellum shadow layer and glued it to the shaker, allowing it to stand out against the vibrant background.

For an extra touch of spookiness, I added a cute spider from the Lovely Layers: Scaredy Cat Dies. I used Sweet and Spooky Pearl Stickers for the spider's eyes, giving it an adorable yet mischievous look.

Framing It All:

Now, to fix a mistake I made I added the frame around the shaker pocket. Sadly I trimmed the background a little too much and you could see some of the adhesive of the pocket. So to salvage this I added a frame that I then used it to hang the Spider off of. The frame ties everything together and also gives the card a polished finished look.

how to, hand made card, Stamps, stamping, die cutting, card making, ilovedoingallthingscraftym Falloween Release, Shaker Card, Spider, Interactive, Rainbow, Web,3D Blackout Embossing Folder Technique,

This card is a delightful mix of spooky and cute, making it perfect for Halloween. The combination of the blackout technique, playful shaker elements, and the charming spider adds a fun and festive vibe to the design. I hope this card inspires you to create your own Falloween-themed projects using Honey Bee Stamps' latest release!


Thank you for stopping by and don't forget to join us for the Falloween Release Party on YouTube at 8 pm EST tonight. Happy Crafting!

Ilda 🕷

To make supplies easy for you to find, I have linked them above. If something is no longer available I will link to a similar product. Affiliate links may be used depending on the product linked. Please help support my blog by using these links while shopping at no additional cost to you. For more information about the affiliates I use, please visit my disclaimer here. Thanks so much for all your support!

Enjoyed this post? Never miss out on future posts by Following this Blog

Thursday, August 22, 2024

Falloween Release Sneak Peeks Day 1 | Honey Bee Stamps

Stamps,ilovedoingallthingscrafty,stamping,Die cutting,hand made card,card making,Honey Bee  how to,Falloween Release,3D Blackout Embossing Folder Technique, Hello, Fall, Colorful

***Please note links in the post are no longer active, if you are looking for something specific use this link here to 👉 HONEY BEE STAMPS and search for the product listed. My apologies for the inconvenience ***
Hello, crafty friends! 🍁 As the leaves start to change, it's the perfect time to create cards that capture the beauty of fall. Today, I'm excited to share a project featuring the blackout technique, where vibrant colors meet dramatic black accents to create a truly eye-catching design. This card is also a Day 1 Sneak Peek for the Honey Bee Stamps Falloween Release. Make sure you stop by the Honey Bee Stamps Blog for more inspiration from the Design Team featuring more day 1 product reveals. Please note links are inactive until the Falloween Release goes live on August 23rd after the Live Release Party on YouTube at 8 pm EST.


CARD RECIPE

Background - Fall Forest 3D Embossing Folder

Hello - Great Greetings Everyday

Pumpkin - Bold Background: Pumpkin Patch Dies

Gems - Sweet & Spooky Gem Stickers

Inks - Atelier Ink Bee Sting Yellow, Atelier Ink Sweet Petunia, Atelier Goddess GreenAtelier My Purple JamAtelier Ink Peacock Blue


For this colorful card, I used the Blackout Technique. Click HERE for a previous card done like this and step-by-step instructions or watch how it was made HERE.


Stamps,ilovedoingallthingscrafty,stamping,Die cutting,hand made card,card making,Honey Bee  how to,Falloween Release,3D Blackout Embossing Folder Technique, Hello

Stamps,ilovedoingallthingscrafty,stamping,Die cutting,hand made card,card making,Honey Bee  how to,Falloween Release,3D Blackout Embossing Folder Technique, Hello

The blackout technique is a wonderful way to add depth and drama to your cards, especially when paired with bright, bold colors. This fall card is perfect for sending warm greetings during the autumn season, and I hope it inspires you to try out the blackout technique in your next project!

Thank you for stopping by and I will see you back here tomorrow for day 2 sneak peeks... Happy Crafting!

Ilda 🍂

To make supplies easy for you to find, I have linked them above. If something is no longer available I will link to a similar product. Affiliate links may be used depending on the product linked. Please help support my blog by using these links while shopping at no additional cost to you. For more information about the affiliates I use, please visit my disclaimer here. Thanks so much for all your support!

Enjoyed this post? Never miss out on future posts by Following this Blog

Monday, July 22, 2024

Beach Waves Retirement Shaker Card | Honey Bee Stamps

Honey Bee Stamps,DIY beach card, shaker card,Shaker Pocket,beach themed, retirement, Paper crafting,how to, hand made card, Stamps, stamping, die cutting, card making, ilovedoingallthingscrafty,

***Please note links in the post are no longer active, if you are looking for something specific use this link here to 👉 HONEY BEE STAMPS and search for the product listed. My apologies for the inconvenience ***

Hello, crafty friends! 

Today, I'm excited to share a special shaker card with you. This beach-themed card was created for a dear friend and colleague, who is a doctor I've had the pleasure of working with for over 26 years. As he moves to a warmer climate, I wanted to send him off with a card that captures the essence of his new sunny surroundings.

CARD RECIPE

Create the Background:

Create the Shaker Element:

Honey Bee Stamps,DIY beach card, shaker card,Shaker Pocket,beach themed, retirement, Paper crafting,how to, hand made card, Stamps, stamping, die cutting, card making, ilovedoingallthingscrafty,

Add Embellishments:
  • Add a thin layer of glue to the edges of the waves and Sprinkle PRISMA GLITTER and Lawn Fawn Chunky Glitter over the wet areas for extra sparkle.

Create the Beach Scene:

  • Use the Lovely Layers At The Beach Dies to cut out the beach umbrella, towel, and flip-flops from Americana Crepe Paper and other colored cardstock.
  • Assemble the pieces and adhere them to the background.
  • To the umbrella add a pearl from the Travel Pearl Stickers set.
Honey Bee Stamps,DIY beach card, shaker card,Shaker Pocket,beach themed, retirement, Paper crafting,how to, hand made card, Stamps, stamping, die cutting, card making, ilovedoingallthingscrafty,

Stamp and Die-Cut Sentiment:


Honey Bee Stamps,DIY beach card, shaker card,Shaker Pocket,beach themed, retirement, Paper crafting,how to, hand made card, Stamps, stamping, die cutting, card making, ilovedoingallthingscrafty,

I hope this card brings a smile to my colleague's face and serves as a small reminder of our many years of working together. Creating this beach-themed card was a joy, and I hope you enjoyed this tutorial and feel inspired to create your own sunny scenes. 

Thanks so much for stopping by and until next time... Happy crafting!
Ilda 🌊

SUPPLIES
Beach Break A2 Cover Plate
Shop at:
SSS | SB | HBS
Beach Break stencils
Shop at:
SSS | SB | HBS
LL At The Beach Dies
Shop at:
SSS | SB | HBS
Rest & Relaxation Stamps
Shop at:
SSS | SB | HBS
Rest & Relaxation Dies
Shop at:
SSS | SB | HBS
Americana Crepe Paper
Shop at:
SSS | SB | HBS
Travel Pearl Stickers
Shop at:
SSS | SB | HBS
Bee Creative A2 Shaker Pockets
Shop at:
SSS | SB | HBS
Red Line Tape 1/4
Red Line Tape 1/4"
Shop at:
SSS | HBS
Bee Creative Intense Black Ink Pad
Shop at:
SSS | SB | HBS
Background Blender Brushes
Shop at:
SSS | HBS
Detail Blender Brushes
Shop at:
SSS | HBS
Bee Creative Glue
Bee Creative Glue
Shop at:
SSS | SB | HBS
Bee Creative Bitty Buzz Cutter
Shop at:
HBS
SUN LIGHT Confetti
SUNLIGHT Confetti
Shop at:
HBS
New Mini Misti
New Mini Misti
Shop at:
SSS | SB | HBS
Platinum 6 Die Cutting Platform
Shop at:
SSS | SB | HBS
Oxide Ink Pad SALTY OCEAN
Shop at:
SSS | AMZ | HBS
Oxide Ink Pad VINTAGE PHOTO
Shop at:
SSS | SB | HBS
Paper Glaze Luxe Twinkle Lights Celebrations Sampler Set
Shop at:
PFS
PRISMA GLITTER
PRISMA GLITTER
Shop at:
SSS
Lawn Fawn Chunky Glitter
Shop at:
SSS | SB
Bearly Art Precision Glue
Shop at:
SSS | AMZ | HBS
To make supplies easy for you to find, I have linked them above. If something is no longer available I will link to a similar product. Affiliate links may be used depending on the product linked. Please help support my blog by using these links while shopping at no additional cost to you. For more information about the affiliates I use, please visit my disclaimer here. Thanks so much for all your support!

Enjoyed this post? Never miss out on future posts by Following this Blog

Monday, July 15, 2024

Hydrangea Wreath Card | Spellbinders

Hydrangea Wreath Card, Spellbinders, Nature's Botanical Garden Collection by Susan Tierney-Cockburn, how to, hand made card, Stamps, stamping, die cutting, card making, ilovedoingallthingscrafty, ink blending

Hello, my friends!

Today I have a card for you featuring some of my favorite flowers. I absolutely love Hydrangeas, especially the colored ones. This card features the HYDRANGEA ETCHED DIES from the Nature's Botanical Garden Collection by Susan Tierney-Cockburn.

CARD RECIPE
 
WREATH:
  • Die-cut the leaves using the HYDRANGEA ETCHED DIES
  • Ink blend the leaves, adding extra shading to the center with a detailed brush.
  • Gently bend the leaves at the center.
  • Using Circle Dies, die cut a frame to adhere the leaves to, covering it completely with the leaves.  
Hydrangea Wreath Card, Spellbinders, Nature's Botanical Garden Collection by Susan Tierney-Cockburn, how to, hand made card, Stamps, stamping, die cutting, card making, ilovedoingallthingscrafty, ink blending

FLOWERS:
  •  Die-cut the flowers using the HYDRANGEA ETCHED DIES. For this project, I used the 2 smaller flower bases to glue the flowers to.
  • Add color to the die cuts by ink blending colors of your choice. For the centers, add additional ink using a detail blending brush. Color the backgrounds of the flowers in the same color as the hydrangeas.
  • To create dimension, lay each flower on a foam pad and press the center with a ball stylus or tool small enough to press in the center. 
  • Glue flowers onto the flower bases and allow them to completely dry.
  • Once dry, add a drop of glue to each center, place a pearl into the wet glue, and let it dry.
SENTIMENT:
  • I had previously foiled this sentiment and saved it from a previous project. Unfortunately, it is no longer available, but it can easily be substituted with any other foiled sentiment or die.
  • Use Polished Brass Glimmer Foil along with the Hot Foil System to create the sentiment
ASSEMBLY:
  • On a square card base (this one measures 5 inches), glue the leaves layer.
  • Add foam to the back of the sentiment strip and center it in the wreath.
  • Glue the hydrangea bunches in place covering up the sentiment strip ends, and use foam for added height. 
Hydrangea Wreath Card, Spellbinders, Nature's Botanical Garden Collection by Susan Tierney-Cockburn, how to, hand made card, Stamps, stamping, die cutting, card making, ilovedoingallthingscrafty, ink blending

I hope you enjoyed today’s Hydrangea Wreath Card tutorial. A creation as special as this deserves to be gifted to someone who will truly appreciate the craftsmanship and love put into it.


Thank you for stopping by and until next time... Happy Crafting!
Ilda 💗

SUPPLIES

HYDRANGEA ETCHED DIES
Shop at:
SSS
SUSAN'S GARDEN ULTIMATE TOOL KIT
Shop at:
SSS
EVERLASTING CIRCLES ETCHED DIES
Shop at:
SSS
EVERYDAY SENTIMENTS II
Shop at:
SSS
POLISHED BRASS - Glimmer Foil
Shop at:
SSS | SB | HBS 
Hot Foil System
Hot Foil System
Shop at:
SSS | SB | HBS 
Platinum 6 Die Cutting Platform
Shop at:
SSS | SB | HBS
Bee Creative Glue
Bee Creative Glue
Shop at:
SSS | SB | HBS
Background Blender Brushes
Shop at:
SSS | HBS
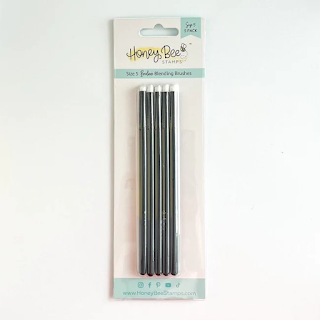
Beeluxe Detail Blending Brushes Size 5
Shop at:
SSS | SB | HBS
Kitsch Flamingo Distress Oxide Ink
Shop at:
SSS | SB
Tumbled Glass Distress Oxide Ink
Shop at:
SSS | SB
Oxide Ink SHADED LILAC
Shop at:
SSS | SB
Mowed Lawn Oxide Ink
Shop at:
SSS | SB
To make supplies easy for you to find, I have linked them above. If something is no longer available I will link to a similar product. Affiliate links may be used depending on the product linked. Please help support my blog by using these links while shopping at no additional cost to you. For more information about the affiliates I use, please visit my disclaimer here. Thanks so much for all your support!

Enjoyed this post? Never miss out on future posts by Following this Blog