***Please note links in the post are no longer active, if you are looking for something specific use this link here to 👉 HONEY BEE STAMPS and search for the product listed. My apologies for the inconvenience and thanks in advance for using my link ***
Hello, dear friends, and Happy Easter Monday to those who celebrate Easter 🕇 I hope you all had a lovely weekend. I had to work but was able to enjoy Easter Sunday Dinner with the family.
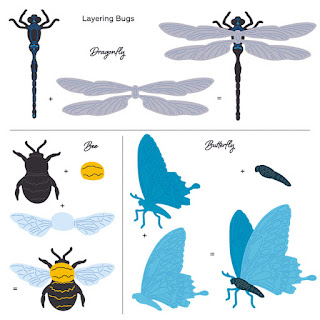
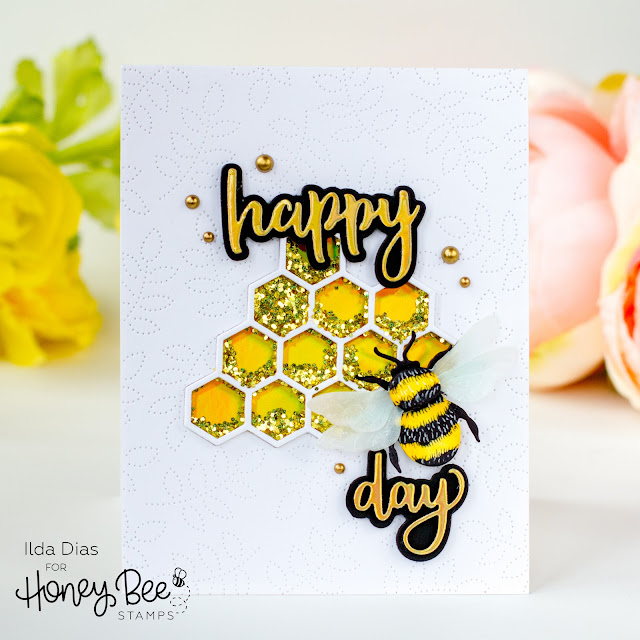
Today's card features the darling bee from the Lovely Layers: Bugs | Honey Cuts. I love this realistic-looking bee only because I know it is paper, lol! This card could either be used as I intended, as a "b-day" card, or it could just be a Happy Day card too.
CARD RECIPE
To begin, I actually started by die-cutting the pieces for the bee. This time I cut out 2 layers of the wings from vellum, not for realistic purposes but for an artistic one. I just thought it would give it more interest and added dimension. I then colored the layers using Copic Markers and added pen details for that extra layer of detail. To give the wings some sparkle I added a layer of liquid pixie dust.
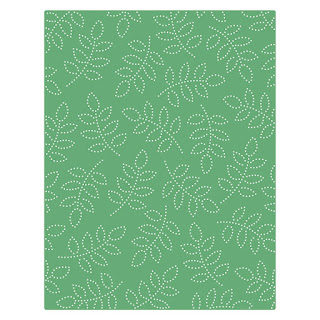
Next, I die cut the honeycomb, using the HEXAGON BUNCHES Die. To give it the thickness I needed I glued 6 layers together and set it aside. I then worked on the card base. To the front of the card base panel, I used the Spring Leaves A2 Pierced Cover Plate to emboss it. I then ran the card front through the die machine using the HEXAGON BUNCHES Die which created a window. Behind the opening, I used a piece of Gold Mirror Cardstock to close up the window and then glued the finished honeycomb in place. You could also use an acetate piece here if you wanted to leave the card center transparent.
To add all the sparkly bling, I used the Bee Creative Glue to fill in the wells of the honeycomb and then poured the gold glitter on top while the glue was still wet.
For the sentiment, I used a couple of the dies from the BITTY BUZZWORDS Die set, the happy and birthday. Since I only wanted to use the day from birth"day" I cut off the birth part. I stacked and glued 3 black cardstock layers and then topped it off with the same gold mirror paper for both words and then added it to the black shadow layer.
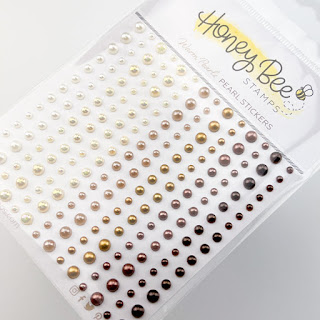
To finish, I used a few of the gold pearls from the Warm Pearls Sticker set.
I really love how this card turned out and I hope it inspired you too. Thank you for stopping by and until next time... Happy Crafting!
Ilda 🐝
SUPPLIES
 Lovely Layers: Bugs | Honey Cuts Shop at: SSS | SB | HBS |
 Honey Bee HEXAGON BUNCHES Die Shop at: SSS | SB | HBS |
 Spring Leaves A2 Pierced Cover Plate Shop at: SSS | SB | HBS |
 BITTY BUZZWORDS DIES Shop at: SSS | SB | HBS |
 Warm Pearls Stickers Shop at: SSS | SB | HBS |
 Bee Creative Glue Shop at: SSS | SB | HBS |
 Black Foam Dots 1/4" Shop at: HBS |
 Honey Bee Reverse Tweezers Shop at: SSS | HBS |
 Die Release Tool Shop at: SSS | HBS |
 Gemini Jr. Die-Cutter Shop at: SSS | SB |
 Neenah Solar White 110lbs Shop at: SSS | AMZ | HBS |
 Vellum Value Pack Shop at: SSS | AMZ |
 Gold Mirror Cardstock Shop at: SSS | HBS |
 ZIG Glue Pen Shop at: SSS | HBS |
 Liquid Pixie Dust Shop at: SSS | IO3 |
 GOLD FEVER GLITTER Shop at: SSS | SK |
To make supplies easy for you to find, I have linked them above. If something is no longer available I will link to a similar product. Affiliate links may be used depending on the product linked. Please help support my blog by using these links while shopping at no additional cost to you. For more information about the affiliates I use, please visit my disclaimer here. Thanks so much for all your support!
Watch how this card came together!


.jpg)
.jpg)
No comments:
Post a Comment
Thanks so much for taking the time and leaving me a comment! I always love hearing from you and I appreciate you stopping by! Hugs, Ilda