Friday, June 8, 2012

3D Paper Log Cabin and Boat Treat Boxes | Father's Day SVGCuts Challenge Entry | Dad's Cabin


how to,Silhouette Cameo,Male gift,ilovedoingallthingscrafty,3D Paper Log Cabin,Gift Box,SVGCuts, Father's Day Challenge,treat boxes,  Fishing, Outdoors,Cricut,

 For the last few weeks, I have been working on my Father's Day project for SVG Cut's Facebook Challenge. I finally finished it today. Yea!!!  Isn't it so, so, so cute! I just love how it all came together :) All the files were cut using my Cameo.

3D Paper Log Cabin and Boat Treat Boxes | Father's Day SVGCuts Challenge Entry | Dad's Cabin

For the cabin, I used the  PEONY COTTAGE SVG KIT

3D Paper Log Cabin and Boat Treat Boxes | Father's Day SVGCuts Challenge Entry | Dad's Cabin

First I embossed the shingles and used a pen to curl them up before I glued them down to the roof.

3D Paper Log Cabin and Boat Treat Boxes | Father's Day SVGCuts by ilovedoingallthingscrafty.com Challenge Entry | Dad's Cabin

Dad peeking through the window comes from  KATE'S SILHOUETTES SVG COLLECTION
For the log look that I created for the cabin, I simply crumpled up some card stock and then scored and inked it. I then used my hot glue gun to adhere to the sides of the box.


3D Paper Log Cabin and Boat Treat Boxes | Father's Day SVGCuts by ilovedoingallthingscrafty.com Challenge Entry | Dad's Cabin

The chimney I added comes from the SCHOOL DAYS SVG KIT

3D Paper Log Cabin and Boat Treat Boxes | Father's Day SVGCuts by ilovedoingallthingscrafty.com Challenge Entry | Dad's Cabin

The dock was created with the files from the crate from the CARAMEL APPLE PIE SVG KIT. For the lantern, I used the CRISP DAYS OF FALL SVG KIT, and simply glued it onto a wooden dowel. 

3D Paper Log Cabin and Boat Treat Boxes | Father's Day SVGCuts by ilovedoingallthingscrafty.com Challenge Entry | Dad's Cabin

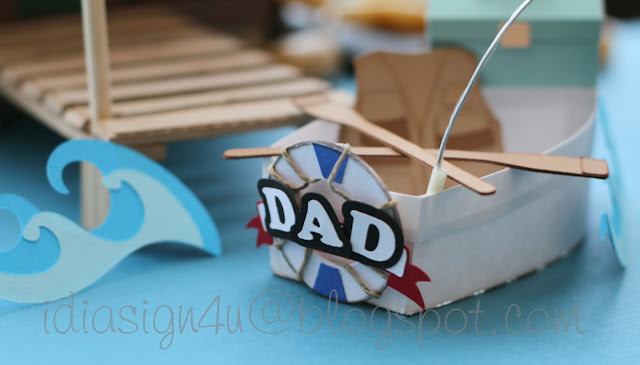
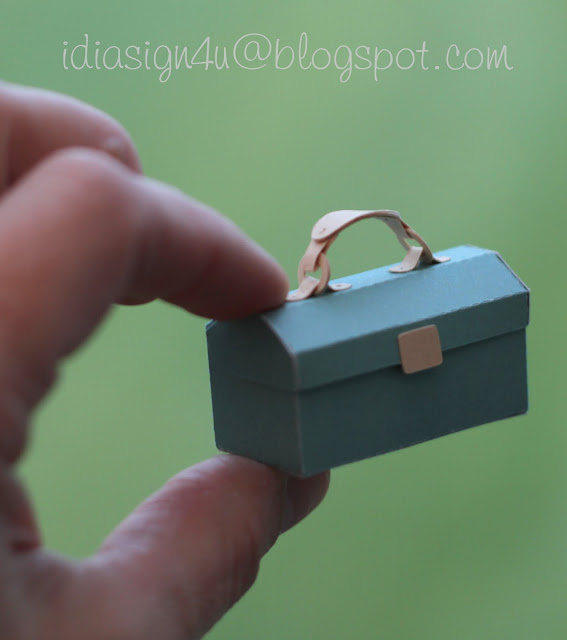
So since I didn't have a boat file, I made one up using the Silhouette Design Studio Edition software. I needed it to carry all of Dad's fishing gear! For his tackle box, I used the toolbox file from MY DAY WITH DAD SVG KIT

Dad's fishing vest, oars, fishing fly and waves are all freebies from the SVG Cuts blog... thanks, Mary! 

3D Paper Log Cabin and Boat Treat Boxes | Father's Day SVGCuts by ilovedoingallthingscrafty.com Challenge Entry | Dad's Cabin

The lifebuoy I created as well with basic shapes with the Silhouette SDE. The banner also comes from MY DAY WITH DAD SVG KIT

3D Paper Log Cabin and Boat Treat Boxes | Father's Day SVGCuts by ilovedoingallthingscrafty.com Challenge Entry | Dad's Cabin

The panfish is also a freebie from the blog. Man, they have great freebies!

3D Paper Log Cabin and Boat Treat Boxes | Father's Day SVGCuts by ilovedoingallthingscrafty.com Challenge Entry | Dad's Cabin

To make my fishing rod I used masking tape for the handle and wound the fishing line around the wire, then glued the fishing fly to the end. Easy!

3D Paper Log Cabin and Boat Treat Boxes | Father's Day SVGCuts by ilovedoingallthingscrafty.com Challenge Entry | Dad's Cabin

Here is a picture to show you the scale. So tiny, but soooo cute! It is definitely is hard to make files this small!!!

3D Paper Log Cabin and Boat Treat Boxes | Father's Day SVGCuts by ilovedoingallthingscrafty.com Challenge Entry | Dad's Cabin

I feel like a GIANT holding a tiny little boat in my hand, lol!

3D Paper Log Cabin and Boat Treat Boxes | Father's Day SVGCuts by ilovedoingallthingscrafty.com Challenge Entry | Dad's Cabin

And it all fits inside the gift box!

Hope you liked my recreation of "Dad's Cabin!" Thanks for stopping by :)

Wednesday, June 6, 2012

DIY Home Organization Station | Wall

While I was at Costco the other day I picked up a whiteboard for a Pinterest inspired project I had in mind... I had been wanting to make a home organization station/wall. Here is the project that inspired me to get organized. Click here to see how Tracy made this. 


WARNING! LOTS OF PICS TO COME!
So here is how I started my wall...

DIY Home Organization Station | Wall by ilovedoingallthingscrafty.com

The wall I am referring to and you will see at the end of the post is the wall next to my fridge in my kitchen. On that wall, I did have a very small, sad-looking eraser board. :(  I wished I had taken a picture of the wall before I took it down, oh well.

DIY Home Organization Station | Wall by ilovedoingallthingscrafty.com

This whiteboard was way too small for my liking so I thought I would turn it into a corkboard. To do this I just used double-sided tape and attached cork board sheets to it. I did have to trim cork to make it fit all together. 

DIY Home Organization Station | Wall by ilovedoingallthingscrafty.com

I had to stack 2 layers of cork together, simply because the cork wasn't thick enough... Haha, I guess I shouldn't complain too much I bought it at the Dollar Store, lol!

DIY Home Organization Station | Wall by ilovedoingallthingscrafty.com

I then covered the board with some leftover white cotton fabric that I had and secured it with hot glue. I could have left it all white but it just looked so boring so I thought I would paint a frame around it. I used some masking tape to outline the frame.

DIY Home Organization Station | Wall by ilovedoingallthingscrafty.com


DIY Home Organization Station | Wall by ilovedoingallthingscrafty.com

Using a foam brush and acrylic black paint I painted all around the board, ensuring to pull in the paint from the masking tape. This will prevent the paint from bleeding underneath the tape.

DIY Home Organization Station | Wall by ilovedoingallthingscrafty.com

The finished corkboard!

DIY Home Organization Station | Wall by ilovedoingallthingscrafty.com

Here is the magnetic whiteboard I picked up at Costco.

DIY Home Organization Station | Wall by ilovedoingallthingscrafty.com

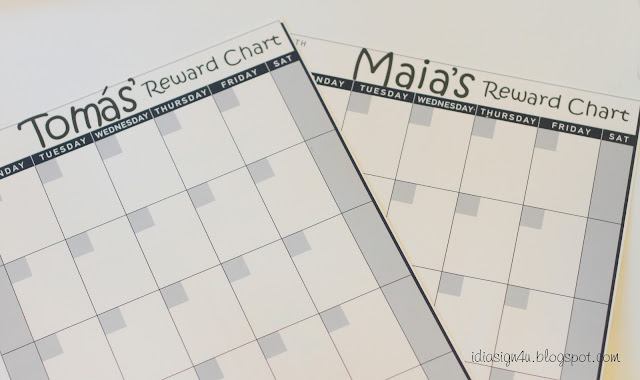
I had these desktop calenders that I turned in to a monthly reward chart for my kids. I used my Cameo to cut the words out of vinyl. I adhered these to my new magnetic whiteboard with double-sided tape.

DIY Home Organization Station | Wall by ilovedoingallthingscrafty.com

So here is what it looked like before I added all papers to it that was on my fridge...

DIY Home Organization Station | Wall by ilovedoingallthingscrafty.com


DIY Home Organization Station | Wall by ilovedoingallthingscrafty.com

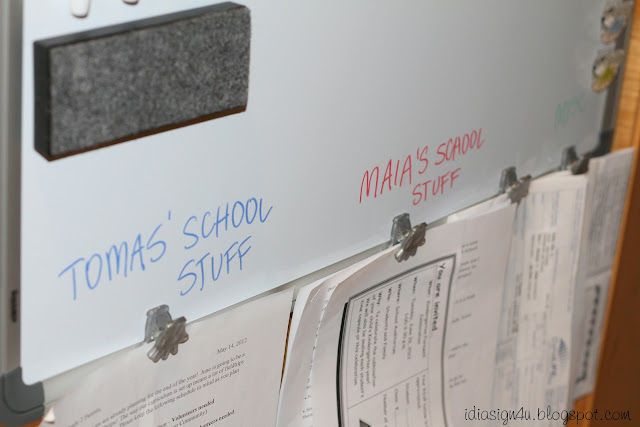
And here is my wall after I added all our important school/house stuff. Not bad... I'm sure it will get a lot messier soon enough! I wished I had done this earlier on in the school year!!!

DIY Home Organization Station | Wall by ilovedoingallthingscrafty.com

Corkboard in use!

DIY Home Organization Station | Wall by ilovedoingallthingscrafty.com

Kids' reward chart!


They can earn up to $1 a day, but they can also lose that money for breaking any rules. I minus 20 cents for each broken rule! So far they haven't gone into the negatives... yet!!! 

DIY Home Organization Station | Wall by ilovedoingallthingscrafty.com

I hot glued some clips to the bottom edge for things I have to deal with.

DIY Home Organization Station | Wall by ilovedoingallthingscrafty.com

To make the pens stick to the board I cut up a small piece magnetic strip and hot glued it to each cap.

DIY Home Organization Station | Wall by ilovedoingallthingscrafty.com

I also added a magnetic strip to the eraser.


The best part is that you can't even see the wall from the kitchen area and my fridge is paper free! 

Hope you like this post and were inspired by it just like I was with Tracy's post! 
Happy crafting!


Friday, June 1, 2012

Hawaiian Barbie Luau Fondant Birthday Cake

Hello everyone! 

Sorry I have been M.I.A. for the last week or so... crazy busy these days with work, house duties and after school activities! 

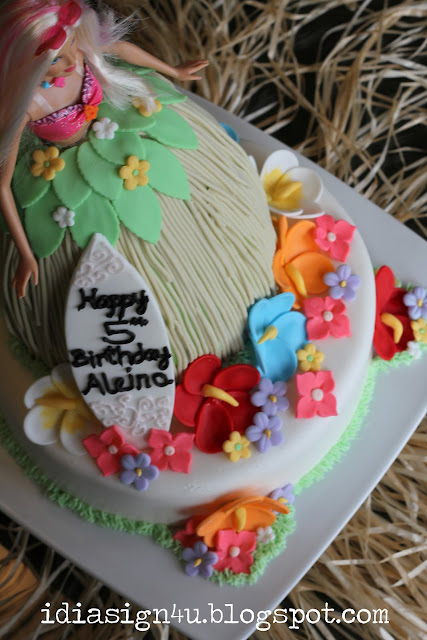
I am soooo excited to share with you all a cake I finished today. It is for my beautiful God Daughter Aleina's Luau Birthday party this weekend.

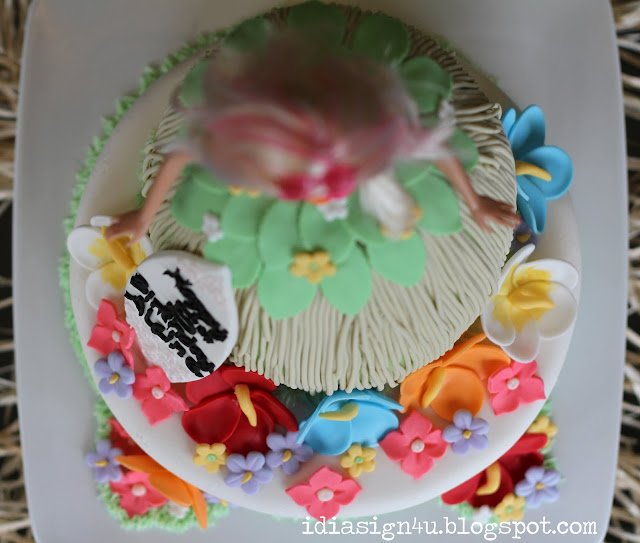
Since she loves Barbie, her mom asked me if I could make her a Luau Barbie Cake. Here are some pictures of the cake. I'm so happy with how it turned out! Thanks to Duff from Ace of Cakes, the Cake Boss and even Youtube for inspiring me to experiment with fondant. Everything I have learned about cakes has been through trial and error. I can safely say I've come a very long way from the first cake that I made when my daughter had her first birthday :)

 Hawaiian Barbie Luau Fondant Birthday Cake by ilovedoingallthingscrafty.com

Isn't it pretty?!?
The skirt part of the cake is a white cake and the round bottom layer is half chocolate and half white, all frosted with American buttercream and covered with fondant.

 Hawaiian Barbie Luau Fondant Birthday Cake by ilovedoingallthingscrafty.com

 Hawaiian Barbie Luau Fondant Birthday Cake by ilovedoingallthingscrafty.com

 Hawaiian Barbie Luau Fondant Birthday Cake by ilovedoingallthingscrafty.com

 Hawaiian Barbie Luau Fondant Birthday Cake by ilovedoingallthingscrafty.com

 Hawaiian Barbie Luau Fondant Birthday Cake by ilovedoingallthingscrafty.com

Love how vibrant these colors look!

 Hawaiian Barbie Luau Fondant Birthday Cake by ilovedoingallthingscrafty.com


 Hawaiian Barbie Luau Fondant Birthday Cake by ilovedoingallthingscrafty.com

 Hawaiian Barbie Luau Fondant Birthday Cake by ilovedoingallthingscrafty.com

Happy Birthday, Aleina! Hope you love your cake :)

Have a great weekend!

Wednesday, May 23, 2012

DIY Hair Accessory Station for Organization | Recycling Tin Cans

If you have a little girl, you must have tons of hair accessories. My 5-year-old daughter Maia has so many,  it was getting harder and harder to find anything! I finally gave up and just started pilling everything in a basket. 😒

DIY Hair Accessory Station for Organization | Recycling Tin Cans by ilovedoingallthingscrafty.com

Messy right?!

I had seen so many different ways on Pinterest to organize hairbands so I thought I should do the same. Jessica from Mom 4 Real was where I first saw the idea. Thanks for the inspiration, Jessica! So here are a few pics of the steps I took.

DIY Hair Accessory Station for Organization | Recycling Tin Cans by ilovedoingallthingscrafty.com

For this project, I used modgepodge, empty tin cans, pretty card stock, foam brush, hot glue gun, and ribbon.

DIY Hair Accessory Station for Organization | Recycling Tin Cans by ilovedoingallthingscrafty.com

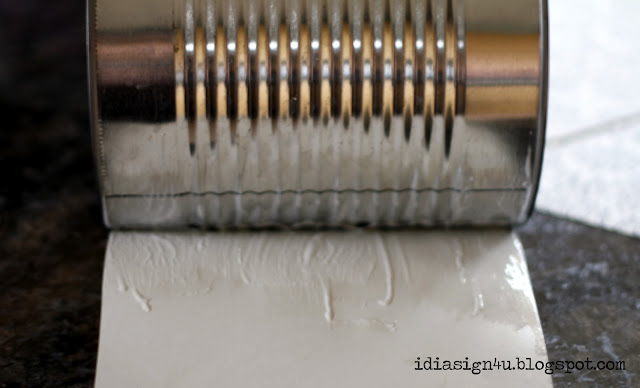
First I cut the length of the paper to the right size, then applied the glue to the back and then the front of the paper.

DIY Hair Accessory Station for Organization | Recycling Tin Cans by ilovedoingallthingscrafty.com

I then let the modgepodge completely dry overnight.

DIY Hair Accessory Station for Organization | Recycling Tin Cans by ilovedoingallthingscrafty.com

To pretty the cans up a little more, I trimmed the edges with ribbon and added a bow to the front to cover up the seem.

DIY Hair Accessory Station for Organization | Recycling Tin Cans by ilovedoingallthingscrafty.com

To finish it off, I added paper to the inside of the can and just used hot glue to secure the top edge in place.

DIY Hair Accessory Station for Organization | Recycling Tin Cans by ilovedoingallthingscrafty.com

One of the small cans is for the hair elastics, another is for combs and brushes, and the big can is for the hair bands. The top of the cans is perfect clipping the hair clips too.

DIY Hair Accessory Station for Organization | Recycling Tin Cans by ilovedoingallthingscrafty.com

And here is what it looks like with all the hair accessories organized. No more mess... well at least not yet!

Hope you enjoyed this! Thanks for stopping by :)


Tuesday, May 15, 2012

DIY Personalized Word Art | Binca's Birth Announcement Painting


Hi everyone! I hope you are all having a great week. 

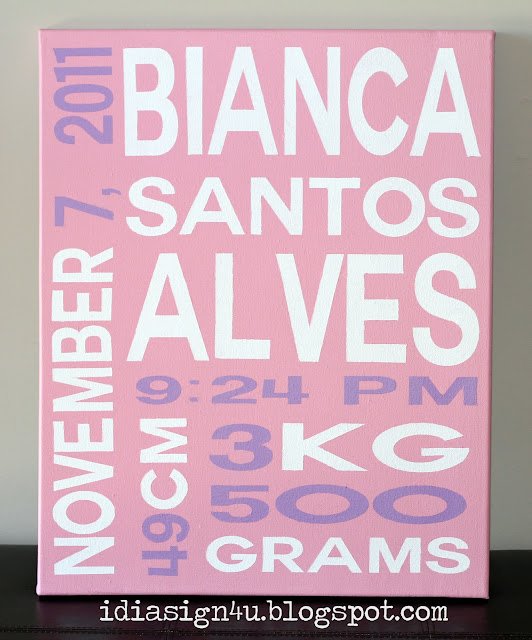
For today's post, I wanted to share with you a birth announcement I was asked to make for a friend. I love how it turned out. It's going to look amazing in little Bianca's nursery! 

Here are the supplies I used...

DIY Personalized Word Art | Binca's Birth Announcement Painting by ilovedoingallthingscrafty.com

a 16x20 canvas, acrylic paint, spray water bottle, foam rollers/brush, and sealer. 
For how I did the painting click here for the tutorial. The only difference was that I used a roller brush this time. 

DIY Personalized Word Art | Binca's Birth Announcement Painting by ilovedoingallthingscrafty.com

If you make your own painting, have any more tips... send me your link, I would love to see it.

Thanks for stopping by!

Have a great week :)


Sunday, May 13, 2012

3D Paper Watering Can Treat Boxes | SVGCuts

Happy Mothers Day!!! 

This post was written earlier during the week...  as I, sadly have to work today... boohoo, me :( Oh well, shouldn't complain too much, I did have the week off last week!

So today I wanted to share with you all the watering cans that I made for my "moms". (Mother and Mother in law)

3D Paper Watering Can Treat Boxes | SVGCuts by ilovedoingallthingscrafty.com

Aren't they pretty!? So "Springy!" I love how they turned out. These files come from SVG cuts MOTHERS GARDEN SVG KIT and cut with my Silhouette Cameo. The paper I used comes from the We R Memory Keepers, the Madame Royale Collection. 

3D Paper Watering Can Treat Boxes | SVGCuts by ilovedoingallthingscrafty.com

3D Paper Watering Can Treat Boxes | SVGCuts by ilovedoingallthingscrafty.com

Here is a closer look... The Cameo cut these intricate butterflies so well!

3D Paper Watering Can Treat Boxes | SVGCuts by ilovedoingallthingscrafty.com

I hope all the Mothers out there are having a wonderful day today! 


Thanks for visiting,