Showing posts with label organization. Show all posts

Thursday, October 6, 2016

DIY Customized Foam Core Shelving for Markers

Hi guys,
Today I'm getting organized with you all!

Since discovering the world of stamping and card making I have been looking for ways to neatly organize my markers, but couldn't find anything that really worked for my space. So as a DIY'er, I thought I could come up with something that worked for me. And, I absolutely LOVE the results and had to share it with you all of course.

This shelving/storage unit measures ~ 8 inches high, 16 inches wide and has a depth of 5.5 inches.
Super easy and inexpensive to make!

You could use the same principles I used in creating this one and customize it for your space. Organize your stamp blocks and ink pads, washi tapes, ribbon... the possibilities are endless!


For those of you that want the written instructions for this unit,
(this includes the supplies used and the exact measurements).
Click on the link below!
FREE - Instructional PDF

If you would like to donate, (click the đŸ‘‰DONATE button on the sidebar) I will happily accept any amount you see fit. No pressure at all either :) It will just make my day that someone wants to support my passion.

For those that like visual instructions, I have also created a process video.
To watch it on You Tube click →HERE
Don't forget to subscribe to my channel ;)


Hope this inspires you to create the perfect organizational storage unit for your crafty space.


Thanks for stopping by!
Happy Crafting  :)


Monday, August 4, 2014

Laundry Room Bin Organizers

Hello my crafty friends!

It's been a while since my last post. Just seems I can't get any crafting done while the kids are home for the summer. I did manage to do a quick home organizational project and thought I would share it with you all. Check out my new Laundry Room Bin Organizers!

A few years ago we installed this floating shelf above the counter in our laundry just so that the counter would stay clear of clutter when I needed the counter space for folding and ironing my laundry. For a while everyone in the house had a different coloured fabric box that sat on the shelf. With all the abuse they got, the boxes started falling apart and becoming an eye sore. Last week I found these great plastic bins at the Dollar Store. They were the perfect sized containers to store all the little seasonal accessories. The only problem I had was that they were all red and difficult to distinguish between whose bin was whose?

Vinyl to the rescue!


Here's a few pics of my process.

First, I cut out my vinyl words on the Silhouette Cameo. Then I weeded the negative space around the words. For those interested the font I used was called Kayleigh.


I didn't have any transfer paper but I did have some painters tape handy.
I placed the tape directly over the wording and pressed it just enough to lift the word off.


Below is what the wording should look like once removed from the paper backing.


I then centred the word as best as possible on the plastic bin, and voila!
Super quick and easy, and if you shop like me super cheap too!!!
(I actually bought my vinyl at the Dollar Store too, woohoo!)


Love how doing something so simple can make a space look and work better!


Hope that these Laundry Room Bin Organizers have inspired you to organize your own space with a little vinyl!

Thanks for stopping by!
Happy Crafting  :)

Saturday, August 17, 2013

DIY Desk Organizers | Recycled Tin Cans


One of my most popular posts was this desk organizer I made for my craft room. Click HERE to check it out! So with back to school around the corner, I thought I would make a few more and get the kids coloring supplies organized.


This project is super simple and quick to make! The two I made below must have taken me less then 15 minutes make. All you need is a few tin cans, decorative duct tape, hot glue, and ribbon if you like. Make them with as many cans as you like... so easy! Click here for instructions.
Here is the hot pink zebra-patterned organizer I made for my daughter.


And here is the one I made for my son with the mustache pattern. 


Hopefully, this will get my kids back into school mode (fingers crossed). Well if it doesn't, hopefully at least it inspires you to create your own. Something like this would also be perfect in the kitchen or the bathroom... Hmmm, getting more ideas... better keep saving those cans!

Thanks so much for stopping by! 
Happy Crafting :)

Monday, January 7, 2013

DIY Button Rack | Recycled Spice Rack


I bet many of you have the same old expired spice rack somewhere in your pantry! I know I did for years... I used maybe 3 or 4 of the spices on it and the rest... yuck... expired! All it did was take up room and collected grease and dust! I think I'm a pretty good cook but some of these spices I hadn't even heard of! So just before I was about to get rid of it I thought why not repurpose it?! It makes the perfect place for all my buttons... So out with the spices and in with the buttons!
DIY Button Rack | Recycled Spice Rack

After a good cleaning, I sorted all the buttons I had by color.  Before my buttons were in little baggies and out of sight, now I can see all the pretty colors! I also peeled off all the greasy spice labels and glued on the top of the bottles a black circle that I cut out with a punch. I haven't decided whether or not yet to glue a coordinating button on the outside yet... we shall see :)

Hope you like the spice rack makeover... what is your spice rack doing? This would also be a great idea for all those little crafty/office supplies, or maybe even for hubby's garage nails... Ok, only if your feeling really generous, lol!

Happy Crafting everyone, 
Thanks for stopping by!

Wednesday, June 6, 2012

DIY Home Organization Station | Wall

While I was at Costco the other day I picked up a whiteboard for a Pinterest inspired project I had in mind... I had been wanting to make a home organization station/wall. Here is the project that inspired me to get organized. Click here to see how Tracy made this. 


WARNING! LOTS OF PICS TO COME!
So here is how I started my wall...

DIY Home Organization Station | Wall by ilovedoingallthingscrafty.com

The wall I am referring to and you will see at the end of the post is the wall next to my fridge in my kitchen. On that wall, I did have a very small, sad-looking eraser board. :(  I wished I had taken a picture of the wall before I took it down, oh well.

DIY Home Organization Station | Wall by ilovedoingallthingscrafty.com

This whiteboard was way too small for my liking so I thought I would turn it into a corkboard. To do this I just used double-sided tape and attached cork board sheets to it. I did have to trim cork to make it fit all together. 

DIY Home Organization Station | Wall by ilovedoingallthingscrafty.com

I had to stack 2 layers of cork together, simply because the cork wasn't thick enough... Haha, I guess I shouldn't complain too much I bought it at the Dollar Store, lol!

DIY Home Organization Station | Wall by ilovedoingallthingscrafty.com

I then covered the board with some leftover white cotton fabric that I had and secured it with hot glue. I could have left it all white but it just looked so boring so I thought I would paint a frame around it. I used some masking tape to outline the frame.

DIY Home Organization Station | Wall by ilovedoingallthingscrafty.com


DIY Home Organization Station | Wall by ilovedoingallthingscrafty.com

Using a foam brush and acrylic black paint I painted all around the board, ensuring to pull in the paint from the masking tape. This will prevent the paint from bleeding underneath the tape.

DIY Home Organization Station | Wall by ilovedoingallthingscrafty.com

The finished corkboard!

DIY Home Organization Station | Wall by ilovedoingallthingscrafty.com

Here is the magnetic whiteboard I picked up at Costco.

DIY Home Organization Station | Wall by ilovedoingallthingscrafty.com

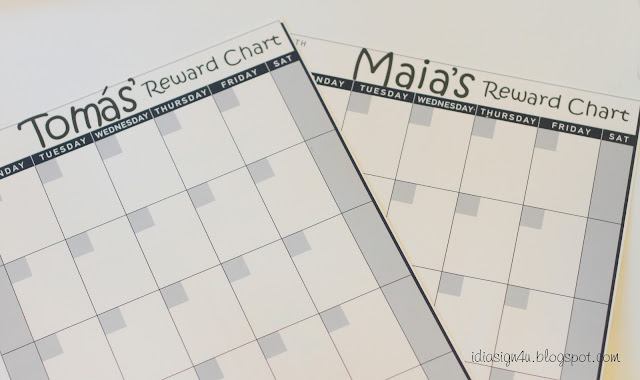
I had these desktop calenders that I turned in to a monthly reward chart for my kids. I used my Cameo to cut the words out of vinyl. I adhered these to my new magnetic whiteboard with double-sided tape.

DIY Home Organization Station | Wall by ilovedoingallthingscrafty.com

So here is what it looked like before I added all papers to it that was on my fridge...

DIY Home Organization Station | Wall by ilovedoingallthingscrafty.com


DIY Home Organization Station | Wall by ilovedoingallthingscrafty.com

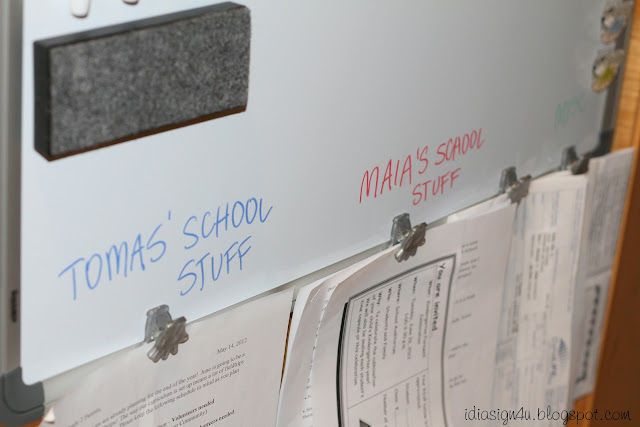
And here is my wall after I added all our important school/house stuff. Not bad... I'm sure it will get a lot messier soon enough! I wished I had done this earlier on in the school year!!!

DIY Home Organization Station | Wall by ilovedoingallthingscrafty.com

Corkboard in use!

DIY Home Organization Station | Wall by ilovedoingallthingscrafty.com

Kids' reward chart!


They can earn up to $1 a day, but they can also lose that money for breaking any rules. I minus 20 cents for each broken rule! So far they haven't gone into the negatives... yet!!! 

DIY Home Organization Station | Wall by ilovedoingallthingscrafty.com

I hot glued some clips to the bottom edge for things I have to deal with.

DIY Home Organization Station | Wall by ilovedoingallthingscrafty.com

To make the pens stick to the board I cut up a small piece magnetic strip and hot glued it to each cap.

DIY Home Organization Station | Wall by ilovedoingallthingscrafty.com

I also added a magnetic strip to the eraser.


The best part is that you can't even see the wall from the kitchen area and my fridge is paper free! 

Hope you like this post and were inspired by it just like I was with Tracy's post! 
Happy crafting!


Wednesday, May 23, 2012

DIY Hair Accessory Station for Organization | Recycling Tin Cans

If you have a little girl, you must have tons of hair accessories. My 5-year-old daughter Maia has so many,  it was getting harder and harder to find anything! I finally gave up and just started pilling everything in a basket. đŸ˜’

DIY Hair Accessory Station for Organization | Recycling Tin Cans by ilovedoingallthingscrafty.com

Messy right?!

I had seen so many different ways on Pinterest to organize hairbands so I thought I should do the same. Jessica from Mom 4 Real was where I first saw the idea. Thanks for the inspiration, Jessica! So here are a few pics of the steps I took.

DIY Hair Accessory Station for Organization | Recycling Tin Cans by ilovedoingallthingscrafty.com

For this project, I used modgepodge, empty tin cans, pretty card stock, foam brush, hot glue gun, and ribbon.

DIY Hair Accessory Station for Organization | Recycling Tin Cans by ilovedoingallthingscrafty.com

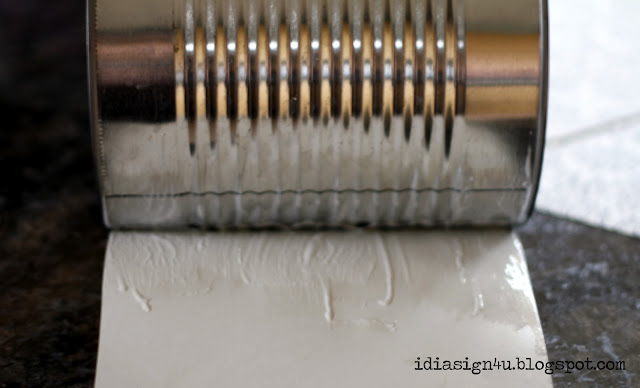
First I cut the length of the paper to the right size, then applied the glue to the back and then the front of the paper.

DIY Hair Accessory Station for Organization | Recycling Tin Cans by ilovedoingallthingscrafty.com

I then let the modgepodge completely dry overnight.

DIY Hair Accessory Station for Organization | Recycling Tin Cans by ilovedoingallthingscrafty.com

To pretty the cans up a little more, I trimmed the edges with ribbon and added a bow to the front to cover up the seem.

DIY Hair Accessory Station for Organization | Recycling Tin Cans by ilovedoingallthingscrafty.com

To finish it off, I added paper to the inside of the can and just used hot glue to secure the top edge in place.

DIY Hair Accessory Station for Organization | Recycling Tin Cans by ilovedoingallthingscrafty.com

One of the small cans is for the hair elastics, another is for combs and brushes, and the big can is for the hair bands. The top of the cans is perfect clipping the hair clips too.

DIY Hair Accessory Station for Organization | Recycling Tin Cans by ilovedoingallthingscrafty.com

And here is what it looks like with all the hair accessories organized. No more mess... well at least not yet!

Hope you enjoyed this! Thanks for stopping by :)