Showing posts with label tutorial. Show all posts

Tuesday, January 10, 2017

DIY Christmas Greeting Card Keepsake Ornament


So what do you do with all the Christmas Greeting cards you received? 

I can't bring myself to throwing them out, after all I feel like they are little gifts when you open the mail. Especially those that are so personal and have pictures of friends and family on them. 

 So, for today's post I want to share with you how I re-purpose the cards and turn them into keepsake ornaments. Here is 2016's Christmas Keepsake Ornament.


Pictured below are a few other examples of the ornaments I have made from previous years using the same technique. You can make these any shape you want as long as you can fold them in half.


Watch how I create one of these yearly Greeting Card Keepsake Ornaments in my latest YouTube video. I will have a links to all the supplies I used below this blog post and in the video description. 

Click -> HERE to watch in HD


For another unique way of creating a keepsake ornament, click HERE to see how I made my 2012 ornament. I really love how this one turned out, but to be honest it was a little more work and it is why I have been doing them like I am showing you today ;)


Hope you have been inspired today and start creating some of your own Christmas Greeting Card Keepsake Ornaments. Remember you can use this idea and create ornaments to represent any occasion and then hang them as memories of the years on your Christmas tree!


Thanks for stopping by!
Happy Crafting  :)

SUPPLIES 
To make supplies easy to find, I have linked them below. If something I used is no longer available I will link to a similar product. Affiliate links may be used depending on the product. Your purchases help keep my blog running, so thanks in advance for the support!

Wednesday, October 19, 2016

Happy 70th Birthday Card for my MIL


Hi All!

If you follow me on Instagram you will know that it was my MIL's 70th Birthday this past weekend.
So today I have the card I made for her to share with you guys!

Simple, elegant and sweet was what I was going for ;)


Here is a close up of the stamped cake and back ground. 
For those interested I have a supply list below.


I also have another process video for those who love to watch how I made it :)
To watch the video in HD click → HERE

Hope this sweet birthday card has inspired you today, and as always...
Thanks for stopping by!
Happy Crafting  :)

SUPPLIES

To make supplies easy to find, I have linked them below. If something I used is no longer available I will link to a similar product. Affiliate links may be used depending on the product. Your purchases help keep my blog running, so thanks in advance for the support!

SSS SWEET CAKES
SSS SWEET CAKES
Shop at:
SSS
SSS HANDWRITTEN BORDERS
Shop at:
SSS
Canson XL WATERCOLOR PAPER 9x12 140lb Pad
Shop at:
SSS | AMZ
Neenah 110 LB SOLAR WHITE Paper
Shop at:
SSS | AMZ
Fiskars Easy LARGE STAMPING PRESS Stamp
Shop at:
SSS | AMZ
Tim Holtz Detailer Water Brush
Shop at:
SSS | AMZ
Kuretake Zig CLEAN COLOR 60+ 80 SET Real Brush
Shop at:
SSS | AMZ
Inkadinkado Embossing Magic
Shop at:
SSS | AMZ
VersaMark Watermark Stamp Pad
Shop at:
SSS | AMZ
WOW! Embossing Powder Clear Gloss
Shop at:
AMZ
Pack COFFEE FILTERS
Pack COFFEE FILTERS
Shop at:
SSS | AMZ
Black & Decker HG1300 Dual Temperature Heat Gun
Shop at:
AMZ
WOW Embossing Powder GOLD RICH ULTRA HIGH
Shop at:
SSS | AMZ
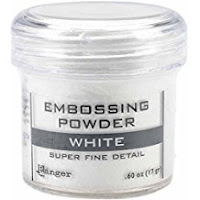
Ranger Embossing Powder, .60 oz, White
Shop at:
AMZ
Simon Says Stamp STITCHED RECTANGLES Wafer Dies
Shop at:
SSS
MFT STITCHED NUMBERS Die-Namics
Shop at:
SSS
Sizzix Big Shot
Sizzix Big Shot
Shop at:
SSS | AMZ
Sizzix Big Shot Kick STANDARD CUTTING PADS
Shop at:
SSS
Sizzix Big Shot Magnetic Platform
Shop at:
AMZ
Silhouette Pick Me Up Tool
Shop at:
SSS | AMZ
Scotch Quick-Drying Tacky Glue 4Oz
Shop at:
SSS | AMZ
3M Scotch 1/2-Inch Double-Sided Foam Tape
Shop at:
SSS | AMZ
EK Success Craft Tweezers
Shop at:
SSS | AMZ
ZIG Wink of Stella GLITTER CLEAR Brush Tip Marker
Shop at:
SSS | AMZ
Craft Smith Metallic Foil 12x12 Inch Paper Pad
Shop at:
AMZ
Heidi Swapp CHRISTMAS Glitter Paper Pad
Shop at:
AMZ
Pretty Pink Posh SPARKLING CLEAR MIX
Shop at:
SSS
Elmers X-Acto 12” Base Guillotine
Shop at:
AMZ
Martha Stewart Crafts Scoring Board 12x12
Shop at:
AMZ

Friday, October 14, 2016

Bride to Be Free - Silhouette .studio file


Hello Everyone!

Today I have a FREE Silhouette .studio file to share with you all. That means it is only Silhouette machine compatible. Sorry don't have an SVG for it! But, if you like... watch my video HERE as I explain how to I created it and you may be able to do something similar as well.

As you can see this is for a Bride To Be Wedding Shower Cake topper that I recently made for some one and since I know how expensive these events can get, I thought I would share it with all the DIYers out there for FREE!


All I ask before you download... 
is to read and follow my free files RULES!
  1. If you choose to download all I ask is you become a follower. (Any social media link to the right of this pg would be appreciated)
  2. Note my files are for personal use only! (Personal use means... only for you to use (no trading, or sharing of my files... let me do that!) 
  3. If you want to share, send your friends over to my blog for the download. 
  4. I'm OK with people sharing my files on their own sites as long as there is a direct link back to this blog...Please give credit where credit is due! (a message to me would also be appreciated)
If you would like to donate, (click the 👉DONATE button on the sidebar) I will happily accept any amount you see fit. No pressure at all either :) It will just make my day that someone wants to support my passion.

So here you go, ENJOY!
Bride To Be Cake Topper Silhouette .studio file

TIPS:
  • Make sure you avoid using sparklers or candles nearby as it is paper and totally flammable! 
  • If you are using this on top of buttercream icing (or any other moist type of icing) insert the topper just before revealing the cake as paper can absorb any grease that the icing may contain, or just have it barely touch the top of the cake. I have used these toppers on fondant-covered cakes, and there has been no grease transfer.


If you create one of these Cake toppers I would love to see how they look on your cake.
Share them on my FB page, tag me on Instagram or just email me your photos :)
Always fun to see what you do with them!


Thanks for stopping by!
Happy Crafting  :)


Thursday, October 6, 2016

DIY Customized Foam Core Shelving for Markers

Hi guys,
Today I'm getting organized with you all!

Since discovering the world of stamping and card making I have been looking for ways to neatly organize my markers, but couldn't find anything that really worked for my space. So as a DIY'er, I thought I could come up with something that worked for me. And, I absolutely LOVE the results and had to share it with you all of course.

This shelving/storage unit measures ~ 8 inches high, 16 inches wide and has a depth of 5.5 inches.
Super easy and inexpensive to make!

You could use the same principles I used in creating this one and customize it for your space. Organize your stamp blocks and ink pads, washi tapes, ribbon... the possibilities are endless!


For those of you that want the written instructions for this unit,
(this includes the supplies used and the exact measurements).
Click on the link below!
FREE - Instructional PDF

If you would like to donate, (click the 👉DONATE button on the sidebar) I will happily accept any amount you see fit. No pressure at all either :) It will just make my day that someone wants to support my passion.

For those that like visual instructions, I have also created a process video.
To watch it on You Tube click →HERE
Don't forget to subscribe to my channel ;)


Hope this inspires you to create the perfect organizational storage unit for your crafty space.


Thanks for stopping by!
Happy Crafting  :)