Showing posts with label word art. Show all posts

Tuesday, October 22, 2013

Faux Woodblock Halloween Signs | SVGCuts


Are you all ready for Halloween yet? I thought I was, but then I had another idea for a Halloween Decoration. Then, I also remembered I still wanted to make some treat containers for the kids. These ideas in my head are never-ending, lol!

For today's project, the woodblock signs that you see all over Pinterest were my inspiration. I didn't have wood handy but I had lots of paper! 

Here it is...  "Happy HallowEEK!" 
I thought this was the perfect Halloween Phrase (a combo of files from a few SVGCuts Kits).
Like someone had scared you all of a sudden...  maybe a great big spider!

Faux Woodblock Halloween Signs | SVGCuts Files

I have been wanting to do this since SVGCuts released Catacomb Manor SVG Kit. I knew I could turn the tall gift bag into a block. 

When I was planning the design, I also knew I wanted to make it light up with some battery-operated tea lights. The  "happy hallow" design comes from Maple Manor SVG Kit here, "EEK" and web from Catacomb Manor SVG Kit here, and the itsy bitsy spider hanging from some trendy twine comes from Spooky Cuties SVG Collection here.

Faux Woodblock Halloween Signs | SVGCuts Files

To turn the bag into a block, I removed the holes that would have been for the handle. Then I created the top tabs on the box by using the point editing tool. (Making it look just like the bottom of the bag) I also created 2 circle cutouts for where I would be inserting the tea lights. 

You can make your blocks as long or as short as you like, by using the stretch function in the Silhouette Design Studio.

Faux Woodblock Halloween Signs | SVGCuts Files

To create the outline for my glowing letters I made an offset. (Pictured above at the bottom of the screen capture) 

I also wanted some light to shine through the back of the EEK block letters. To do this I just cut the letters out underneath. Pop dots were used to elevate the block letters on the vellum, allowing light to filter through. NOTE: If I did this project again I would have created an offset of the EEK. I would have liked a little more light to glow around the block letters, next time :(


Once I had the word cut out from the panels, I glued vellum to the inside.

Faux Woodblock Halloween Signs | SVGCuts Files

Here is what it looks like in the dark!  EEEEEK! 
Is that not COOL?

Faux Woodblock Halloween Signs | SVGCuts Files

Thanks so much for stopping by, hope you like this idea and maybe even been a little inspired to make your own faux woodblock signs!

 I think I might be making so many more of these for other holidays, oh the possibilities!

Happy Crafting :)

Tuesday, January 1, 2013

KEEP CALM AND CRAFT ON | DIY Peg Board Painting

HAPPY NEW YEAR EVERYONE!!!

I hope you all are enjoying the first day of 2013! I can't believe how fast 2012 went for me... what a ride!

Today I want to share with you something I had been wanting to make for a very long time. Probably ever since I first heard the phrase "Keep Calm and Craft on". So a few weeks ago when all the Christmas chaos was happening,  I decided to make a pegboard painting for my craft room! 

I had been working on a baby announcement painting at the time and since all my supplies were out I thought I would kill two birds with the same paintbrush, lol! I was so busy though I completely forgot to photograph the baby announcement painting to show you  :'( 

Here it is! Isn't it awesome!!! I love how it turned out and how it keeps my stuff pretty and organized all in plain sight for easy access! I think it's one of my best ideas yet! 

KEEP CALM AND CRAFT ON | DIY Peg Board Painting

 To make my pegboard painting I first painted the canvas. Click here for a tutorial of how I make my word art paintings. 

KEEP CALM AND CRAFT ON | DIY Peg Board Painting

Once the painting was dry, I hammered in 2-inch nails all around the frame of the canvas. Yes, of course damaging the painting... I had mixed feelings at this point cause I really liked how the painting turned out... but got over it pretty quick once I saw how functional it became!

KEEP CALM AND CRAFT ON | DIY Peg Board Painting

Here it is all nailed up before my supplies were all hung.

KEEP CALM AND CRAFT ON | DIY Peg Board Painting

Hope you liked this tutorial/idea... maybe it will inspire you to create one for your craft room! I hope this painting will keep me calm in 2013 while I continue to craft on!

Thanks for stopping by!
Happy Crafting :)

Tuesday, May 15, 2012

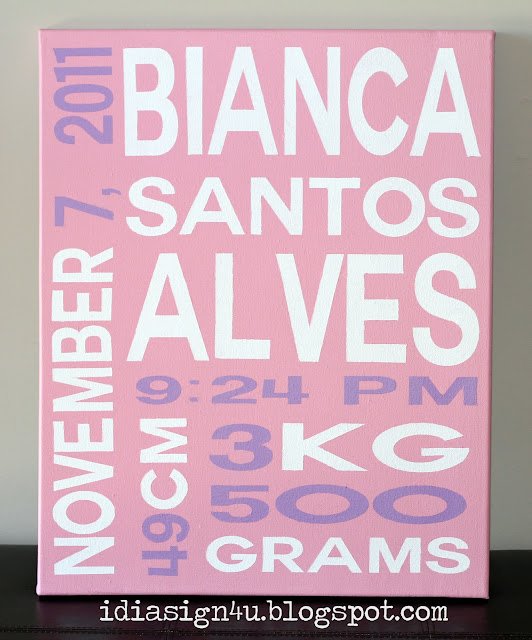
DIY Personalized Word Art | Binca's Birth Announcement Painting


Hi everyone! I hope you are all having a great week. 

For today's post, I wanted to share with you a birth announcement I was asked to make for a friend. I love how it turned out. It's going to look amazing in little Bianca's nursery! 

Here are the supplies I used...

DIY Personalized Word Art | Binca's Birth Announcement Painting by ilovedoingallthingscrafty.com

a 16x20 canvas, acrylic paint, spray water bottle, foam rollers/brush, and sealer. 
For how I did the painting click here for the tutorial. The only difference was that I used a roller brush this time. 

DIY Personalized Word Art | Binca's Birth Announcement Painting by ilovedoingallthingscrafty.com

If you make your own painting, have any more tips... send me your link, I would love to see it.

Thanks for stopping by!

Have a great week :)


Wednesday, May 2, 2012

DIY Personalized Word Art Paintings


It's my very good friend's birthday today, which also happens to be my oldest friend as well. We have been friends since 1983... Whoa, that's almost 30 years! Happy Birthday Suzie!!!

So for Suzie's birthday, I thought I would surprise her with one of my paintings. For a while, I used to sell them on my Etsy store, but now I just make them for friends and family. Suzie had mentioned she would like me to paint some word art for her a while ago. I normally would ask her for a whole bunch of words that she would like that described her and her family. I'll make her subway art painting for next time when I know what words she would like. But, since I wanted it to be a surprise I thought instead of making the typical subway art type painting, I would make it look like a word search. The circled words would be her family names. I love how it turned out. I hope she will too!

DIY Personalized Word Art Paintings by ilovedoingallthingscrafty.com

Here is how I make my word art paintings. I've seen many different ways of doing this on Pinterest, so I thought I would share how I make mine.

The first thing you want to do is decide on your words. I use my Silhouette to out my word, fonts, layout. I then cut out my letters. Instead of using vinyl which is expensive and you are just going to discard it, I use contact paper. I then remove the letters from the contact paper leaving behind the negative of the letters.


Next, prepare the canvas. For this project, I chose a 16X20 frame. I like to wet down the canvas first just with water and roll it on with a foam roller.


Now it's time to give your canvas some color. I used acrylic paints. Give the canvas at least 2 coats of color.


Once the canvas is dry remove the backing on the contact paper and as straight as possible lay it on your canvas. Try to smooth it out as much as possible.


Time to start painting in your words. For this painting, I used a foam brush and dabbed the paint on a little at a time. In the past, I have just a foam roller to roll it on. (If the contact paper isn't very tacky, it's probably better not to use a roller, or the paint might bleed under your stencil)


This is what it looked like prior to the big reveal.


For this painting, I just freehanded the circled words.


Once all the paint has dried I give the painting a protective clear coating with a paint sealer. 

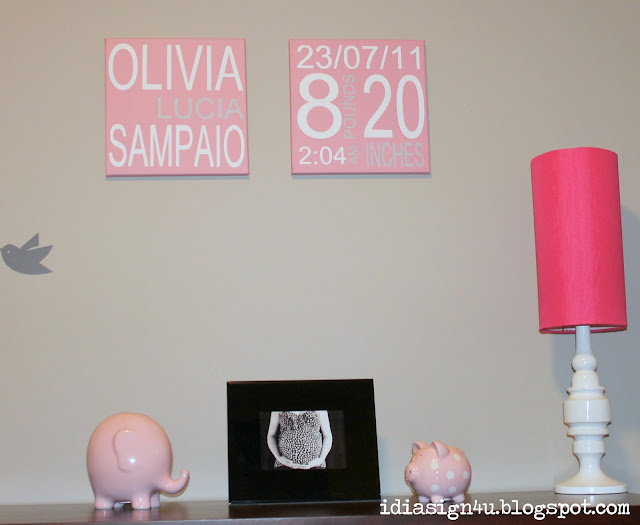
Here are a few more of the paintings I have made in the past for myself, friends and family. Enjoy!

DIY Personalized Word Art Paintings by ilovedoingallthingscrafty.com


DIY Personalized Word Art Paintings by ilovedoingallthingscrafty.com


DIY Personalized Word Art Paintings by ilovedoingallthingscrafty.com


DIY Personalized Word Art Paintings by ilovedoingallthingscrafty.com


DIY Personalized Word Art Paintings by ilovedoingallthingscrafty.com


Hope you've enjoyed my word art paintings! Maybe I've inspired you to make your own!

Thanks for visiting,