Showing posts with label painting. Show all posts

Monday, December 29, 2014

DIY Laundry Sign

Happy Holidays Everyone!

This year 14 of our family members and friends spent Christmas in Cuba! I do have to say I think Cuban beaches must be some of the most beautiful in the world and am SO happy we got to spend our week there. I miss the beach already! 

Here is a picture of how Santa came to Cuba! Check out that crystal clear water... sigh!!!


Sadly once the vacation is over, reality always sets in and loads of laundry need to be done. Not sure about you all but every article of clothing I pack needs to be washed (even if unworn) especially when coming from a humid climate. So for the last few days I have been tackling my least favorite chore, LAUNDRY!

Here is an iphone pic of what my laundry room looks like today :( 
And there is still more to fold in the dryer!


So lets get to the reason for today's post!!! 

Over the last few months I have been tackling various parts of my house by painting, cleaning, purging and even redecorating. Today I want to share with you the sign I made for my Laundry Room/Mud Room. Honestly I think the Laundry Room is my least favorite room in the house. Mostly because doing it is my least favorite thing to do! So I thought maybe if I prettied it up, I might enjoy the time I spend in there, well maybe a little!

Having seen various laundry signs all over Pinterest, I thought I could make my own... of course I did! Isn't that what everyone that looks on Pinterest does? LOL!  Well I am SO happy with the results! I took ideas from various signs and combined them to make my own! Well what do you think? SO true, right!?!


I used the PVPP technique to create this sign. For those that don't know what that means it's Paint, Vinyl, Paint, and Peel. Lots of tutorials on line for those of you interested. Basically I painted white a 12x24 wood board (bought at Micheal's). Cut out my Vinyl using the Silhouette Cameo, and transferred it to my board. Then, once the letters were all down I painted with the black all over the entire board. Once the paint dried, I peeled off the vinyl to reveal the white letters. I then took sandpaper and lightly sanded the edges and the top to distress it. Voila, that easy! 

The whole process took less then 30 min to make! To speed the drying time I used a blow dryer... hey what can I say, sometimes I can be a little impatient! 

TIP: If you want to avoid the bleeding of the letters, once you apply the vinyl add another white coat first, this will seal the edges around the letters. Then add the black coat. I didn't really want perfect letters as I wanted it to look more vintage and distressed!


 For all those interested in creating one for yourselves I am giving away the .studio file that I created to make the sign for FREE! Maybe it will help you enjoy the laundry room a little more as well! Enjoy!!!

Before you download...

My free files RULES!
  1. If you choose to download all I ask is you become a follower.
  2. Note my files are for personal use only! (Personal use means... only for you to use (no trading, or sharing of my files... let me do that!) 
  3. If you want to share, send your friends over to my blog for the download. 
  4. I'm OK with people sharing my files on their own sites as long as there is a direct link back to this blog...Give credit where credit is due! (a message to me would also be appreciated)
Click on the links below for your FREE download! 

Laundry Sign

If you would like to donate, (click the đŸ‘‰DONATE button on the sidebar) I will happily accept any amount you see fit. No pressure at all either :) It will just make my day that someone wants to support my passion.

Click HERE to see the Laundry Bins I made earlier this year! I like when my laundry room looks this clean. Hopefully by tomorrow it will again ;)


Well this will be my last post for 2014, so I would like to wish everyone a Happy New Year!!! Here is to an amazing 2015!!! Cheers!

Thanks for stopping by!
Happy Crafting  :)


Monday, August 6, 2012

Maia's Room Make Over - Sneak Peak - Part 2

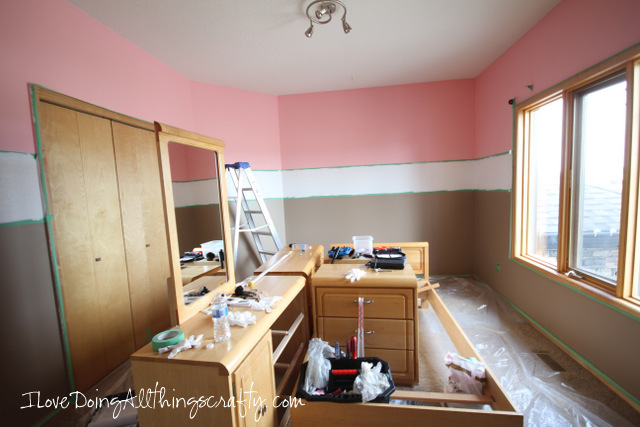
As you know we have been working on updating my daughter's room. She wasn't a "baby" anymore, so it was time for a room makeover!

Maia's Room Make Over - Sneak Peak - Part 2

Here is Maia, excited for what was about to happen to her room! Although after the first few hours she kept asking when it was all going to be done, lol!

Maia's Room Make Over - Sneak Peak - Part 2

And here is a  peak of the colors we chose, kinda reminds me of Neapolitan Ice cream, doesn't it?!
It was a lot of work covering up the permanent black marker, but it was actually easier than what I had anticipated. Thanks to the Kilz Clean start primer


Then to do the 3 colors was also challenging. The pink was the first color painted, then the brown. Once they were both dry then we painted the white stripe along the middle.  The funniest part was pulling off the tape, only a few spots needed touching up because of bleeding under the tape. Overall, I was happy with my first ever paint job!

Happy crafting "painting" everyone :)


Tuesday, May 15, 2012

DIY Personalized Word Art | Binca's Birth Announcement Painting


Hi everyone! I hope you are all having a great week. 

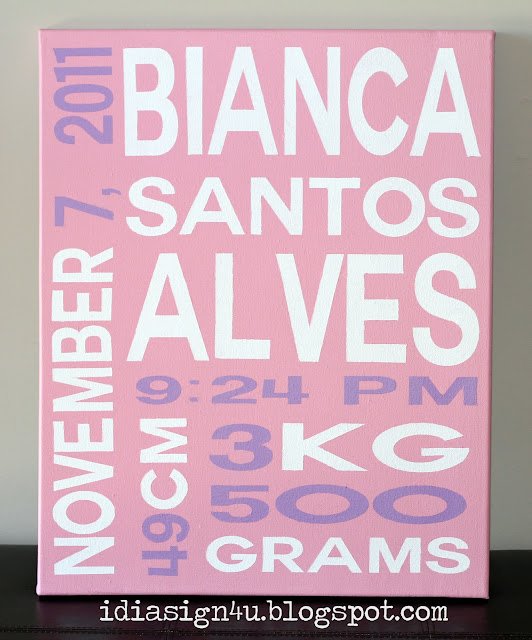
For today's post, I wanted to share with you a birth announcement I was asked to make for a friend. I love how it turned out. It's going to look amazing in little Bianca's nursery! 

Here are the supplies I used...

DIY Personalized Word Art | Binca's Birth Announcement Painting by ilovedoingallthingscrafty.com

a 16x20 canvas, acrylic paint, spray water bottle, foam rollers/brush, and sealer. 
For how I did the painting click here for the tutorial. The only difference was that I used a roller brush this time. 

DIY Personalized Word Art | Binca's Birth Announcement Painting by ilovedoingallthingscrafty.com

If you make your own painting, have any more tips... send me your link, I would love to see it.

Thanks for stopping by!

Have a great week :)


Wednesday, May 2, 2012

DIY Personalized Word Art Paintings


It's my very good friend's birthday today, which also happens to be my oldest friend as well. We have been friends since 1983... Whoa, that's almost 30 years! Happy Birthday Suzie!!!

So for Suzie's birthday, I thought I would surprise her with one of my paintings. For a while, I used to sell them on my Etsy store, but now I just make them for friends and family. Suzie had mentioned she would like me to paint some word art for her a while ago. I normally would ask her for a whole bunch of words that she would like that described her and her family. I'll make her subway art painting for next time when I know what words she would like. But, since I wanted it to be a surprise I thought instead of making the typical subway art type painting, I would make it look like a word search. The circled words would be her family names. I love how it turned out. I hope she will too!

DIY Personalized Word Art Paintings by ilovedoingallthingscrafty.com

Here is how I make my word art paintings. I've seen many different ways of doing this on Pinterest, so I thought I would share how I make mine.

The first thing you want to do is decide on your words. I use my Silhouette to out my word, fonts, layout. I then cut out my letters. Instead of using vinyl which is expensive and you are just going to discard it, I use contact paper. I then remove the letters from the contact paper leaving behind the negative of the letters.


Next, prepare the canvas. For this project, I chose a 16X20 frame. I like to wet down the canvas first just with water and roll it on with a foam roller.


Now it's time to give your canvas some color. I used acrylic paints. Give the canvas at least 2 coats of color.


Once the canvas is dry remove the backing on the contact paper and as straight as possible lay it on your canvas. Try to smooth it out as much as possible.


Time to start painting in your words. For this painting, I used a foam brush and dabbed the paint on a little at a time. In the past, I have just a foam roller to roll it on. (If the contact paper isn't very tacky, it's probably better not to use a roller, or the paint might bleed under your stencil)


This is what it looked like prior to the big reveal.


For this painting, I just freehanded the circled words.


Once all the paint has dried I give the painting a protective clear coating with a paint sealer. 

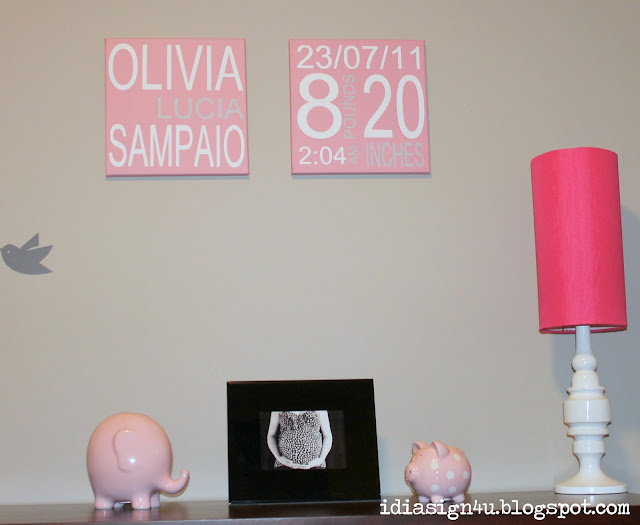
Here are a few more of the paintings I have made in the past for myself, friends and family. Enjoy!

DIY Personalized Word Art Paintings by ilovedoingallthingscrafty.com


DIY Personalized Word Art Paintings by ilovedoingallthingscrafty.com


DIY Personalized Word Art Paintings by ilovedoingallthingscrafty.com


DIY Personalized Word Art Paintings by ilovedoingallthingscrafty.com


DIY Personalized Word Art Paintings by ilovedoingallthingscrafty.com


Hope you've enjoyed my word art paintings! Maybe I've inspired you to make your own!

Thanks for visiting,