Hello friends! Today I am so excited to join some very talented Heffy Doodlers on the Heffy Doodle Friends Blog Hop. If you have already started hopping along and you have arrived from Michelle's Blog you are on the right track. Stay tuned to find out where to Hop next at the end of this post.
My cards today feature some really cute stamps, stencils and dies from the latest release that I hope will inspire you.
CARD DETAILS
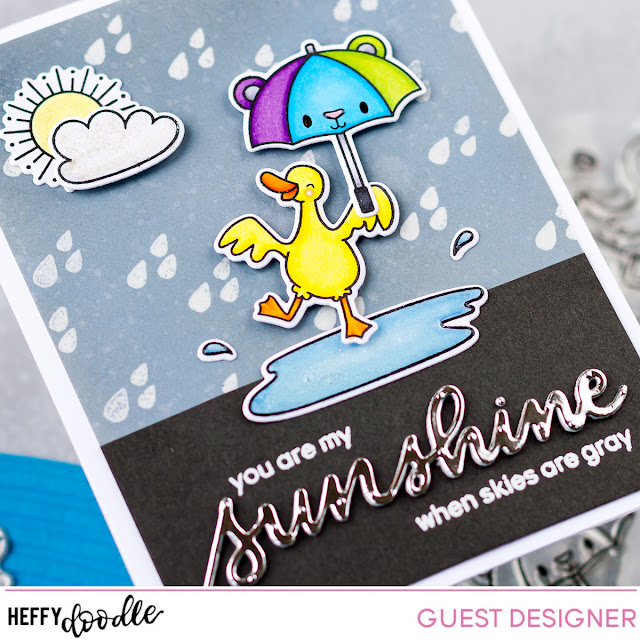
To create the rainy background, I stamped out the raindrops and then heat set them using white embossing powder. I then used Stormy Sky Distress Oxide ink and Black Soot to blend out and create some grey skies. I then spritzed the sky with water to add more texture and used a paper towel to pick up the water droplets and wipe off the ink from the embossed raindrops.
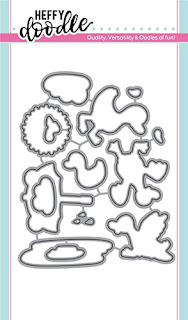
The sentiments come from the Quack Me Up Set (SSS | SB | HD), that I paired with the Sunshine Heffy Cut Die (SSS | SB | HD).
To embellish I used Liquid Pixie Dust on the clouds and the water puddles and then added glossy accents for added dimension and shine.
Here is an image of the Copics used on the Sunshine Card.
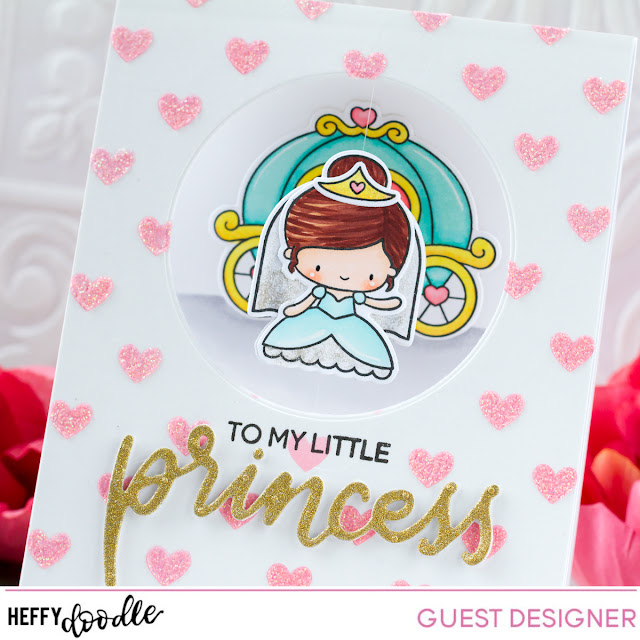
For this card, once again I stamped out the images from the Happily Ever Crafter set (SSS | SB | HD) that I was going to use and colored them in using Copic marker and then die cut them using the coordinating Happily Ever Crafter Dies (SSS | SB | HD). Since I wanted to make this a spinner I actually stamped out two little princesses and two veils. Usually, for spinners, you need to do mirror stamping but since the bottom of her dress was pretty symmetrical I was able two get away from mirror stamping and actually create a backside for the image.
I then glued the veil facing forward on what would be the front-facing princess and then taped and glued a clear thread down the center of the back of her. Next, I sandwiched the tread with the backside princess and covered most of her up by gluing the veil over her face covering up her arms and face, creating the illusion of her backside. I then secured the ends of the clear thread the front of a card panel that I had die cut a circle opening from.
To create the glittered heart panel, I first die cut the circular window to line up with the card base. I then used the Steady Heart Stencil (SSS | SB | HD) to blend out some pink hearts using Worn Lipstick Distress Oxide ink. Before adding my glimmer paste to the stencil and the card panel I stamped out the "to my little" sentiment under the window opening. Had I added the glimmer paste first I probably wouldn't have been able to stamp out the greeting like I had? I then glued the heart panel onto the card base which also sandwiched in the thread in between the two layers.
To finish off the front sentiment, I used the Princess Heffy Cut die (SSS | SB | HD) from a gold glitter piece of cardstock that I had added foam to give it more dimension.
Watch this little clip to see the princess in action!
SUPPLIES
 Quack Me Up Stamps Shop at: SSS | SB | HD |
 Quack Me Up Dies Shop at: SSS | SB | HD |
 Sunshine - Heffy Cuts Shop at: SSS | SB | HD |
 Happily Ever Crafter Stamps Shop at: SSS | SB | HD |
 Happily Ever Crafter Dies Shop at: SSS | SB | HD |
 Princess - Heffy Cuts Shop at: SSS | SB | HD |
 Steady Heart Stencil Shop at: SSS | SB | HD |
 Nested Circle Dies Shop at: SSS |
 Neenah 80 LB SOLAR WHITE Shop at: SSS | AMZ |
 Mini Misti Tool Shop at: SSS | AMZ | SB | SK |
 Blackout Ink Shop at: SSS | IO3 |
 Gemini Jr Die Cutting/Embossing Machine Shop at: SSS | AMZ | SB |
 Oxide Ink Pad WORN LIPSTICK Shop at: SSS | SB | HBS |
 Oxide Ink Pad STORMY SKY Shop at: SSS | SB | HBS |
 Oxide Ink Pad BLACK SOOT Shop at: SSS | SB | HBS |
 BLENDER BRUSH Set Shop at: SSS | AMZ | SB | PF |
 Juicy Ink Shop at: SSS | IO3 |
 Arctic White Ultra Powder Shop at: SSS | IO3 |
 Glimmer Paste | Moonstone Shop at: SSS | AMZ | HBS |
 Liquid Pixie Dust Shop at: SSS | IO3 |
 WHITE Gelly Roll Pens Set Shop at: SSS | AMZ | SB |
 Glossy Accents Shop at: SSS | AMZ | SB | HBS |
 GUILLOTINE PAPER TRIMMER Shop at: SSS | AMZ | SB |
 Double-Sided Foam Tape Shop at: SSS | AMZ |
 Clear Nylon Invisible Thread Shop at: AMZ |
To make supplies easy for you to find, I have linked them above. If something is no longer available I will link to a similar product. Affiliate links may be used depending on the product linked. By shopping through my links you help keep my blog running at no extra cost to you. So thank you in advance for supporting my creations!
GIVEAWAY
Make sure you leave a comment on each stop as a random winner will be selected to receive a £50 voucher to the Heffy Doodle store. Winner will be announced on Monday, August 5, 2019, on the Heffy Doodle Blog.
BLOG HOP
Ilda Dias ← You are HERE👋
Hope you were inspired by my cards today, I am thrilled you stopped by and until next time... Happy Hopping 👋


These are so fun! I Love the duck dancing in the rain and what a beautiful background for the princess! Love those glitter hearts!
ReplyDeleteSuch adorable cards! :) Really love the little duck.
ReplyDeleteAww that duck is so darling and sweet!! Love your rain scene! <3 And the spinning princess card is fantastic! <3
ReplyDeleteCards are so cute. Great for kids birthday and stuff.
ReplyDeleteThat veil on the princess is so cleverly done! This is a set I'm going to have to get...
ReplyDeleteDarling cards! The
ReplyDeletedancing duck is so
cute and love your
Princess spinner card!
Carla from Utah
The happy duck is so cute! I love his colorful umbrella...
ReplyDeleteWhat fantastic cards! That spinner is amazing, love it so much - thanks for the fab inspiration!
ReplyDeleteBoth are adorable. The duck is so happy. Thanks for sharing how to make a spinner with the princess image. Very clever.
ReplyDeleteHe's singin' and dancin' in the rain, and loving it. Very cute.
ReplyDeleteThe duck in the rain with the rainbow umbrella is adorable!
ReplyDeleteI got a smile on my face when I
ReplyDeletesaw the duck playing in the
puddle. Darling card.
the princess and her carriage
are a clever idea. thanks
for sharing.
txmlhl(at)yahoo(dot)com
Both cards are so precious and sweet! Love that sweet duck and his fun umbrella. And the princess is so pretty; just beautiful!
ReplyDeleteaww - love these cards - the twirling fairy is so darn CUTE!!!!
ReplyDeleteLove the fun scenes you created with these adorable images! The duck and umbrella are so cute, and the princess card is darling! Love that it's a spinner card!
ReplyDeleteI absolutely LOVE what you have created.
ReplyDeleteyour cards are so darling! love them!
ReplyDeleteIt’s a spinner!! So cute! What a sweet card!
ReplyDeleteHow super cute is that dancing duck with the cute brolly, adorable & I loved the princess card idea. The spinner really tops this card design, awesome inspiration, thank you x
ReplyDeleteI love your adorable duck. Such fun colors!! Your princess card is precious. I love the spinning veil and the carriage. Fabulous cards!!
ReplyDeleteGreat card. That duck set is so stinkin’ cute lol
ReplyDeleteI loved the backgrounds you have created on both the cards ,first one is fun while second one darn adorable with a spinning fairy !
ReplyDeleteYour cards.. wow.. I love the duck but I just can't get enough of that Princess.. aren't you a genius!! Too good to be true Ilda.
ReplyDeleteYour cards are beautiful! That duck with umbrella is so adorable, and I just love how you created the princess for the spinner card. :)
ReplyDeleteWonderful cards...love the spinner you created with the cute princess.
ReplyDeleteSuper adorable! The spinner card is amazing!
ReplyDeleteCute duck card and clever and pretty princess spinner.
ReplyDeleteBeautiful cards, this duck seem to be very happy under the rain 😊💛
ReplyDeleteYour cards are so sweet! I really love the princess.
ReplyDeleteYour cards are so sweet! I really love the princess.
ReplyDeleteLove your Magnificent Creations.
ReplyDeleteMarisela Delgado said: Cute card. mariandmonsterd@yahoo.com
ReplyDelete