Showing posts with label Poinsettia. Show all posts

Monday, November 20, 2023

Alex Syberia Designs November Release | Blog Hop and Giveaway

Alex Syberia Designs, Christmas,Glimmer Hot Foil,Poinsettia,Instagram Hop, Noel, Feliz Navidad, Ink blending, how to,handmade card,Stamps,ilovedoingallthingscrafty,stamping, diecutting,cardmaking

Hello friends!  

Today I am excited to be taking part in a Blog hop featuring the November Alex Syberia Release. Make sure you leave a comment here and the rest of the stops to qualify for a chance to win some fabulous prizes! If you already started hopping you have just come from Hannelie 's Blog. Stay tuned to find out more about the giveaway and where to Hop next!


So let's dive into the projects I am sharing today.

To create the foiled images you will need a Foil system. I used the Spellbinders Hot Foil System along with the Platinum 6 Die Cutting Platform. For negative foil transfers, you will need a solid foil plate. I also find I get the best results with this cardstock.

CARD RECIPE

Background - Brilliant Burst Hot Foil Plate

Wreath - Holiday Wreath and Branch Stencil and Die Set

Sentiment - Feliz Navidad Hot Foil Plate (fussy cut)

Foil - Aura Glimmer Foil


I absolutely love how this card turned out. It is definitely a lot more glamorous in person. Pictures do not do this card justice as the Aura Glimmer foil gives it so much sparkle and shine!


Alex Syberia Designs, Christmas,Glimmer Hot Foil,Poinsettia,Instagram Hop, Noel, Feliz Navidad, Ink blending, how to,handmade card,Stamps,ilovedoingallthingscrafty,stamping, diecutting,cardmaking

This next card features the show-stopping Joyful Poinsettia Die Set! It is absolutely gorgeous๐Ÿ˜


Alex Syberia Designs, Christmas,Glimmer Hot Foil,Poinsettia,Instagram Hop, Noel, Feliz Navidad, Ink blending, how to,handmade card,Stamps,ilovedoingallthingscrafty,stamping, diecutting,cardmaking

Just look at this gorgeous Poinsettia Bloom! I used 5 different shades of cardstock and ink-blended the tips of the petals with pink ink. I then added a mist of pink splatters to them. I also added foam in between the layers to give it dimension and curled the tips of the petals.

Alex Syberia Designs, Christmas,Glimmer Hot Foil,Poinsettia,Instagram Hop, Noel, Feliz Navidad, Ink blending, how to,handmade card,Stamps,ilovedoingallthingscrafty,stamping, diecutting,cardmaking

With the negative of the foiled background from my first card, I was able to use it to create this poinsettia tag. 

TAG RECIPE
Background - Brilliant Burst Hot Foil Plate (Negative)

Alex Syberia Designs, Christmas,Glimmer Hot Foil,Poinsettia,Instagram Hop, Noel, Feliz Navidad, Ink blending, how to,handmade card,Stamps,ilovedoingallthingscrafty,stamping, diecutting,cardmaking

To create the die I just cut the panel into 4x3 rectangle and added the poinsetta to the top. I did not use the last layer of the poinsettia to make it slightly smaller, I then punched a hole through one of the petals and added a ribbon through it to tie on a gift later.

Alex Syberia Designs, Christmas,Glimmer Hot Foil,Poinsettia,Instagram Hop, Noel, Feliz Navidad, Ink blending, how to,handmade card,Stamps,ilovedoingallthingscrafty,stamping, diecutting,cardmaking

Make sure you check out the Release as I have only showcased a few of the products here today.

GIVEAWAY

Alex Syberia Designs is giving away a £85 ($100) gift certificate to 1 lucky winner and a £15 ($18) gift card to 5 winners. Open internationally. All 6 winners will be drawn from the entrants that have played along with this Blog hop by midnight BST on November 26th, 2023. Winners will be announced on the Alex Syberia Designs blog 'Giveaway Winners' page on November 27th, 2023.


BLOG HOP ORDER


Thank you for stopping by and until next time... Happy Hopping!
Ilda ๐Ÿ’–

To make supplies easy for you to find, I have linked them above. If something is no longer available I will link to a similar product. Affiliate links may be used depending on the product linked. Please help support my blog by using these links while shopping at no additional cost to you. For more information about the affiliates I use, please visit my disclaimer here. Thanks so much for all your support!

Enjoyed this post? Never miss out on future posts by Following this Blog

Friday, October 21, 2022

Happy Holidays Floral Slimline Card | Make it Merry Release | Honey Bee Stamps

Happy Holidays, Floral, Slimline Card,Make it Merry Release,Honey Bee Stamps,Poinsettia,Lovely Layers,Card Making, Stamping, Die Cutting, handmade card, ilovedoingallthingscrafty, Stamps, how to,

Happy Friday Friends and Happy Release Day!

Tonight you will be able to shop the Make it Merry Release from Honey Bee Stamps. If you love making Holiday cards, you must check out this release. Please note some Links to supplies will only go live after tonight's Release Party around 8:15 CST.


As you may already know I am a FAN of the Lovely Layers Die Collection and there are some new ones in this release that I just had to play with first! This card is all about the details and all the extras to take your cardmaking to the next level.

CARD RECIPE
Happy Holidays, Floral, Slimline Card,Make it Merry Release,Honey Bee Stamps,Poinsettia,Lovely Layers,Card Making, Stamping, Die Cutting, handmade card, ilovedoingallthingscrafty, Stamps, how to,
  • Arrange the greenery to create a floral arrangement as you like and glue it to the card panel.
  • Add glitter glue to the tips of flowers and greenery. I also added more sparkle by sprinkling on Prisma glitter while the glue was still wet.
  • For even more sparkle add some gems. These ruby-colored ones come from the new Make It Merry Gem Stickers.
Happy Holidays, Floral, Slimline Card,Make it Merry Release,Honey Bee Stamps,Poinsettia,Lovely Layers,Card Making, Stamping, Die Cutting, handmade card, ilovedoingallthingscrafty, Stamps, how to,

To finish this card, I used the new Foil Script: Holiday Hot Foil Plate and Dies done in BLACK Glimmer Foil. Not pictured is the sentiment I added inside from the new Home For The Holidays Stamp set.

Stay tuned and follow me along on my Instagram as I will show you how I added all the extra details to make this extra card special in a Reel tonight. And yes, this card would not do well sent through the mail. This is a card that you would either hand deliver or package inside your gift!


SHOP Make it Merry RELEASE ๐Ÿ‘‰HERE


Thank you for stopping by and until next time... Happy Crafting!

Monday, November 4, 2019

Poinsettia Petal Gatefold Christmas Card | Honey Bee Stamps


Poinsettia Petal Gatefold Christmas Card | Honey Bee Stamps by ilovedoingallthingscrafty.com

Hello, my friends and welcome back to my blog!

If you love to die cut and paper piece, this is a great card for you as there was no coloring involved unless you count some ink blending. I think this design and the gatefold surprise element would wow anyone receiving it!

  CARD DETAILS

To start off this card I began by die cutting the card base and a few of the other pieces from the FLOWER PETAL CARD DIE set. I did not cut out any petals from the set as I wanted to create my own petals using the Poinsettia dies.

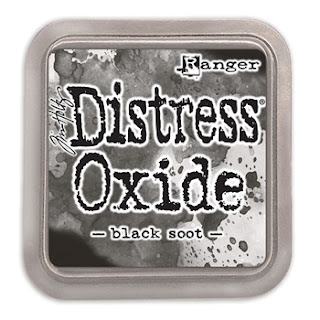
I then used the circle die cut piece as a guide for how large to make my poinsettia. To start the poinsettia I began by die cutting the poinsettia layers for the center of the card using the WINTER BOUQUET DIES. I used the DETAIL BLENDER BRUSH, to ink up the tips of each petal using Black Soot Distress Oxide ink. I then stacked and glued the initial layers of the flower using foam tape in between to add some dimension to the center. To add even more dimension I slightly squeezed each petal to lift the edges making it look more realistic.

To enlarge the poinsettia and cover up the circle that I had die cut previously, I die cut the largest poinsettia about 5 more times to create the petals I needed to build out the flower. I first inked up the petals and then snipped each petal off by cutting toward the center of the flower. See the image below. Each poinsettia gave me 5 large petals to use.

I then flipped the poinsettia center that I had previously glued together and began filling and gluing petals along the outer edge of the flower until I had enough to cover up the circle. This ended up being about 3 more outer layers. Once that was done I glued the poinsettia down to the circle and set it aside to work on the rest of the card.

Poinsettia Petal Gatefold Christmas Card | Honey Bee Stamps by ilovedoingallthingscrafty.com

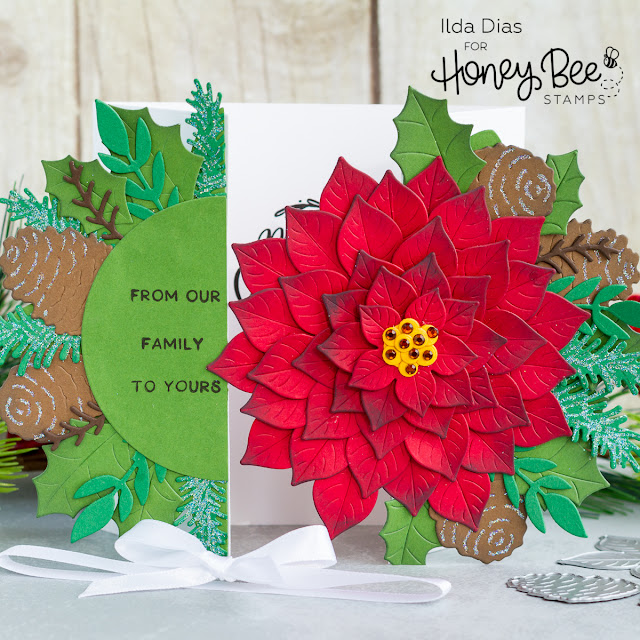
The FLOWER PETAL CARD DIES include the shape of a flower petal flap that I had die cut using green cardstock and glued to each side. Since I wasn't using the petals that were meant to cover up the die cut piece, I just die cut winter foliage using various dies from the WINTER BOUQUET DIES and glued those pieces along the petal edge instead. To the pine cones and to the evergreen bunches I used a Quickie glue pen to add fine glue lines to the paper and then sprinkled on some glitter.

I then glued the poinsettia that I had previously made onto the right side of the card finishing off the right flap. To complete the left side, I die-cut a circle using green cardstock to cover up the edges of the foliage on the left flap and then trimmed off the excess that hung over the edge.

Poinsettia Petal Gatefold Christmas Card | Honey Bee Stamps by ilovedoingallthingscrafty.com

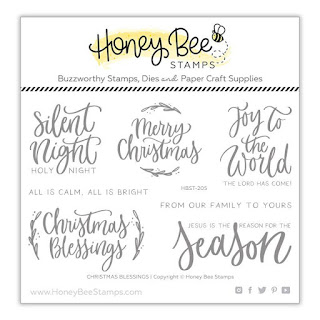
Next,  I stamped out a partial greeting on the left side using a stamp from the CHRISTMAS BLESSINGS stamp set. In hindsight, I wish I had stamped my sentiment first before gluing this piece in place as I had a hard time stamping it out afterward. It was just awkward to place the bulky card in the stamp positioner at this point.
Poinsettia Petal Gatefold Christmas Card | Honey Bee Stamps by ilovedoingallthingscrafty.com

Once both flaps of the card are pulled open, you finally see the Christmas Greeting on the inside of the card. The Merry Christmas stamp I used here also comes from the CHRISTMAS BLESSINGS stamp set.

Poinsettia Petal Gatefold Christmas Card | Honey Bee Stamps by ilovedoingallthingscrafty.com

When the card is closed it lays pretty flat, but because of all the layers, it likes to spring up a little. To solve that and to give it that extra element of surprise I just tied a satin ribbon around the bottom of the card creating a little belly band.

I hope you were inspired by this Poinsettia Petal Gatefold Christmas Card. I would love to see more versions of flowers made using the same FLOWER PETAL CARD DIES. For more inspiration using these products visit Honey Bee Stamps.

Thank you for stopping by ๐Ÿ˜Š
Until next time... Happy Crafting ๐Ÿ‘‹


SUPPLIES
WINTER BOUQUET DIES
WINTER BOUQUET DIES
Shop at:
SSS | SBC | HBS
CHRISTMAS BLESSINGS
CHRISTMAS BLESSINGS
Shop at:
SSS | SBC | HBS
FLOWER PETAL CARD DIES
Shop at:
SSS | HBS
RAW HONEY GEM STICKERS
Shop at:
SSS | SBC | HBS
DETAIL BLENDER BRUSHES
Shop at:
SSS | HBS
NEENAH SOLAR WHITE 110
Shop at:
SSS | AMZ | HBS
MINI MISTI
MINI MISTI
Shop at:
SSS | AMZ | SBC | SK
BLACKOUT INK
BLACKOUT INK
Shop at:
SSS | IO3
Gemini Jr Die Cutting/Embossing Machine
Shop at:
SSS | AMZ | SBC
Oxide Ink Pad VINTAGE PHOTO
Shop at:
SSS | SBC | HBS
Oxide Ink Pad BLACK SOOT
Shop at:
SSS | SBC | HBS
Sakura Quickie Glue Pen
Shop at:
SSS | AMZ | SK
STUDIO KATIA GLUE
STUDIO KATIA GLUE
Shop at:
SSS | SK
SPARKLE GLITTER
SPARKLE GLITTER
Shop at:
SSS | SK

To make supplies easy for you to find, I have linked them above. If something is no longer available I will link to a similar product. Affiliate links may be used depending on the product linked. 
Please help support my blog by using these links while shopping at no additional cost to you. For more information about the affiliates I use, please visit my disclaimer here. Thanks so much for all your support!

Friday, September 20, 2019

Fall Blessings | Ink On 3


Fall Blessings for Ink On 3 by ilovedoingallthingscrafty.com

Hello Friends!

In a few days it will be Fall officially. Spring and Fall are definitely my favorite seasons of the year. I think it may have to do with how short the seasons are here in Canada and how quickly the leaves change everywhere. I love the warm colors of Fall and they are the inspiration for my card today.

CARD DETAILS

I began by stamping the images out using Blackout Ink and masking the beaver from the Platy-rific Pondies in the center of the card I then die cut a mask for it so that I could add the leaves around him using the die from Platy-rific Pondies Coordinating dies. Since the die cuts leave a white space around the stamp, I later will connect any lines afterward to finish the image.

For the pile of leaves, I used leaves from Heels To You and the Poinsettia set. I also die cut a few of each using the dies from the coordinating sets Heels To You and Poinsettia. Behind the beaver I also stamped out some pond greens that also come from the Platy-rific Pondies set.

To color these images in I used Copic markers. Under the pile of leaves, I stamped out the script blessings from the Blessings set using Blackout Ink.

Once the coloring was complete I die cut the panel using a Rectangle Stitched Die Frame and glued onto a Kraft Cardstock panel that I eventually glued on my card base.

Fall Blessings for Ink On 3 by ilovedoingallthingscrafty.com

Next, I die cut the letters out for "HAPPY FALL" using the Phat Alphanumeric Dies. To color them in I stuck them to the sticky side of a strip of washi tape to hold them in place while I colored them in using Copics.

I then used foam tape to pop the letters onto the card front. Next, I used a water brush pen filled with Liquid Pixie Dust to paint the shine onto each letter. Once it was dry I added a layer of glossy accents to seal in the sparkly shine and make them look like bubble letters.

Fall Blessings for Ink On 3 by ilovedoingallthingscrafty.com

Hope this cute Fall Blessings card inspired you to stretch out your stamps by pulling elements as I have with this card to create a totally different scene other then what the stamp sets were initially designed for.

Thank you for stopping by ๐Ÿ˜Š
Until next time... Happy Crafting ๐Ÿ‘‹


SUPPLIES
Platy-rific Pondies
Platy-rific Pondies
Shop at:
SSS | IO3
Platy-rific Pondies Coordinating dies
Shop at:
SSS | IO3
Phat Alphanumeric Dies
Shop at:
SSS | IO3
Heels To You
Heels To You
Shop at:
SSS | IO3
Heels To You Coordinating Dies
Shop at:
SSS | IO3
Poinsettia
Poinsettia
Shop at:
SSS | IO3
Poinsettia Coordinating Dies
Shop at:
SSS | IO3
Blessings
Blessings
Shop at:
SSS | IO3
Blackout Ink
Blackout Ink
Shop at:
SSS | IO3
Small Fine Tip Water Brush Pen
Shop at:
IO3
Liquid Pixie Dust
Liquid Pixie Dust
Shop at:
SSS | IO3
Neenah  80 LB SOLAR WHITE
Neenah 80 LB SOLAR WHITE
Shop at:
SSS | AMZ
Mini Misti Tool
Mini Misti Tool
Shop at:
SSS | AMZ | SB | SK
Gemini Jr Die Cutting/Embossing Machine
Shop at:
SSS | AMZ | SB
STITCHED RECTANGLES Dies
Shop at:
SSS
STUDIO KATIA GLUE
STUDIO KATIA GLUE
Shop at:
SSS | SK
Double-Sided Foam Tape
Shop at:
SSS | AMZ
Gelly Roll Gel Pen Set, Fine, Black
Shop at:
AMZ
WHITE Gelly Roll Pens Set
Shop at:
SSS | AMZ | SB
Glossy Accents
Glossy Accents
Shop at:
SSS | AMZ | SB | HBS
To make supplies easy for you to find, I have linked them above. If something is no longer available I will link to a similar product. Affiliate links may be used depending on the product linked. By shopping through my links you help keep my blog running at no extra cost to you. So thank you in advance for supporting my creations!

Monday, December 10, 2018

Liquid Pixie Dust on Poinsettia Blessings Card | Ink On 3


Hello! 

I'm not sure about you all but this month is just flying by in a few weeks Christmas will be here!

Today I'm popping in to share this simple Christmas Poinsettia Blessings card I made using a few of Ink On 3's goodies. 

Liquid Pixie Dust on Poinsettia Blessings Card by ilovedoingallthingscrafty.com

I really wanted to showcase the new Liquid Pixie Dust because it is awesome especially if you like to add shimmer to your cards. It is so hard to capture it on camera but I added it to the poinsettias on the card. So much sparklier in person! 

Liquid Pixie Dust on Poinsettia Blessings Card by ilovedoingallthingscrafty.com

For this card, I stamped on a sheet of vellum using Juicy Ink the Poinsettia set and then heat set it using Chrome embossing powder. I then colored the images in using Copic markers. If I were to do this card over I would have colored the poinsettias on the other side of the vellum and just added the Liquid Pixie Dust to the top as the alcohol markers do color the embossing if you are really careful to stay in the lines, which I obviously wasn't. I then added the little banner to the top using a few sentiments from the Blessings set.

Liquid Pixie Dust on Poinsettia Blessings Card by ilovedoingallthingscrafty.com

I hope you were inspired by this simple Christmas card today. For more information on the Liquid Pixie Dust stop by Ink On 3. They are having a hard time keeping this stuff in stock!   

Thank you for stopping by ๐Ÿ˜Š
Until next time... Happy Crafting ๐Ÿ‘‹

SUPPLIES
To make supplies easy to find, I have linked them below. If something I used is no longer available I will link to a similar product.
Affiliate links may be used depending on the product. Your purchases help keep my blog running, so thanks in advance for the support!
Poinsettia
Poinsettia
Shop at:
SSS | IO3
Blessings
Blessings
Shop at:
SSS | IO3
Juicy  Ink
Juicy Ink
Shop at:
SSS | IO3
Chrome Ultra Fine Embossing Powder
Shop at:
SSS | IO3
Blackout Ink
Blackout Ink
Shop at:
SSS | IO3
Liquid Pixie Dust
Liquid Pixie Dust
Shop at:
IO3
Inkadinkado Embossing Magic
Shop at:
SSS | AMZ
Vellum Value Pack
Vellum Value Pack
Shop at:
AMZ
Neenah  80 LB SOLAR WHITE
Neenah 80 LB SOLAR WHITE
Shop at:
SSS | AMZ
Mini Misti Tool
Mini Misti Tool
Shop at:
SSS | AMZ | SB | SK
Tim Holtz Detailer Water Brush
Shop at:
SSS | AMZ
Black and Decker  Heat Gun
Black and Decker Heat Gun
Shop at:
AMZ
JULY | CRYSTALS
JULY | CRYSTALS
Shop at:
SSS | SK
Double Ended Jewel Picker
Shop at:
SSS | AMZ | HBS
STUDIO KATIA GLUE
STUDIO KATIA GLUE
Shop at:
SSS | SK