Hello, my friends and welcome back to my blog!
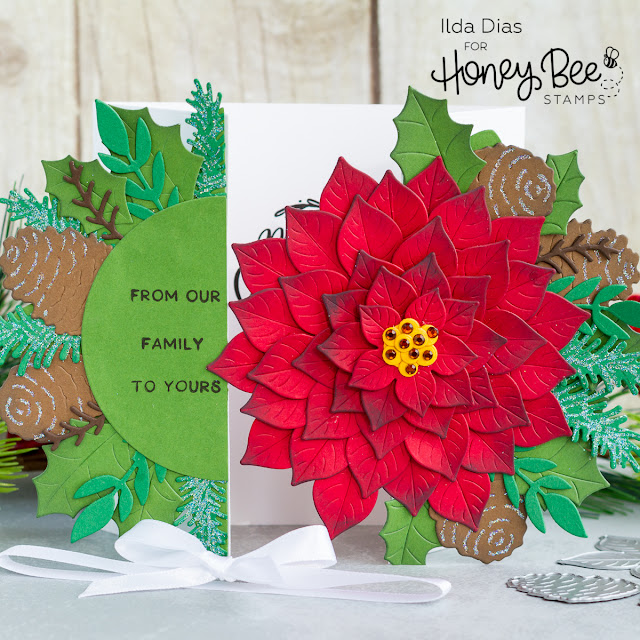
If you love to die cut and paper piece, this is a great card for you as there was no coloring involved unless you count some ink blending. I think this design and the gatefold surprise element would wow anyone receiving it!
To start off this card I began by die cutting the card base and a few of the other pieces from the FLOWER PETAL CARD DIE set. I did not cut out any petals from the set as I wanted to create my own petals using the Poinsettia dies.
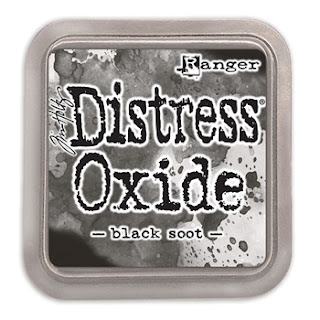
I then used the circle die cut piece as a guide for how large to make my poinsettia. To start the poinsettia I began by die cutting the poinsettia layers for the center of the card using the WINTER BOUQUET DIES. I used the DETAIL BLENDER BRUSH, to ink up the tips of each petal using Black Soot Distress Oxide ink. I then stacked and glued the initial layers of the flower using foam tape in between to add some dimension to the center. To add even more dimension I slightly squeezed each petal to lift the edges making it look more realistic.
To enlarge the poinsettia and cover up the circle that I had die cut previously, I die cut the largest poinsettia about 5 more times to create the petals I needed to build out the flower. I first inked up the petals and then snipped each petal off by cutting toward the center of the flower. See the image below. Each poinsettia gave me 5 large petals to use.
I then flipped the poinsettia center that I had previously glued together and began filling and gluing petals along the outer edge of the flower until I had enough to cover up the circle. This ended up being about 3 more outer layers. Once that was done I glued the poinsettia down to the circle and set it aside to work on the rest of the card.
The FLOWER PETAL CARD DIES include the shape of a flower petal flap that I had die cut using green cardstock and glued to each side. Since I wasn't using the petals that were meant to cover up the die cut piece, I just die cut winter foliage using various dies from the WINTER BOUQUET DIES and glued those pieces along the petal edge instead. To the pine cones and to the evergreen bunches I used a Quickie glue pen to add fine glue lines to the paper and then sprinkled on some glitter.
I then glued the poinsettia that I had previously made onto the right side of the card finishing off the right flap. To complete the left side, I die-cut a circle using green cardstock to cover up the edges of the foliage on the left flap and then trimmed off the excess that hung over the edge.
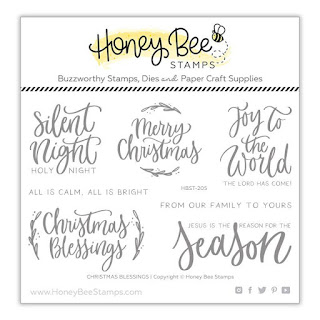
Next, I stamped out a partial greeting on the left side using a stamp from the CHRISTMAS BLESSINGS stamp set. In hindsight, I wish I had stamped my sentiment first before gluing this piece in place as I had a hard time stamping it out afterward. It was just awkward to place the bulky card in the stamp positioner at this point.
Once both flaps of the card are pulled open, you finally see the Christmas Greeting on the inside of the card. The Merry Christmas stamp I used here also comes from the CHRISTMAS BLESSINGS stamp set.
When the card is closed it lays pretty flat, but because of all the layers, it likes to spring up a little. To solve that and to give it that extra element of surprise I just tied a satin ribbon around the bottom of the card creating a little belly band.
I hope you were inspired by this Poinsettia Petal Gatefold Christmas Card. I would love to see more versions of flowers made using the same FLOWER PETAL CARD DIES. For more inspiration using these products visit Honey Bee Stamps.
Thank you for stopping by 😊
Until next time... Happy Crafting 👋

SUPPLIES
 WINTER BOUQUET DIES Shop at: SSS | SBC | HBS |
 CHRISTMAS BLESSINGS Shop at: SSS | SBC | HBS |
 FLOWER PETAL CARD DIES Shop at: SSS | HBS |
 RAW HONEY GEM STICKERS Shop at: SSS | SBC | HBS |
 DETAIL BLENDER BRUSHES Shop at: SSS | HBS |
 NEENAH SOLAR WHITE 110 Shop at: SSS | AMZ | HBS |
 MINI MISTI Shop at: SSS | AMZ | SBC | SK |
 BLACKOUT INK Shop at: SSS | IO3 |
 Gemini Jr Die Cutting/Embossing Machine Shop at: SSS | AMZ | SBC |
 Oxide Ink Pad VINTAGE PHOTO Shop at: SSS | SBC | HBS |
 Oxide Ink Pad BLACK SOOT Shop at: SSS | SBC | HBS |
 Sakura Quickie Glue Pen Shop at: SSS | AMZ | SK |
 STUDIO KATIA GLUE Shop at: SSS | SK |
 SPARKLE GLITTER Shop at: SSS | SK |
To make supplies easy for you to find, I have linked them above. If something is no longer available I will link to a similar product. Affiliate links may be used depending on the product linked. Please help support my blog by using these links while shopping at no additional cost to you. For more information about the affiliates I use, please visit my disclaimer here. Thanks so much for all your support!


No comments:
Post a Comment
Thanks so much for taking the time and leaving me a comment! I always love hearing from you and I appreciate you stopping by! Hugs, Ilda