Showing posts with label Christmas. Show all posts

Saturday, November 2, 2024

Cozy Christmas Window Scene Bridge Card | Honey Bee Stamps

Handmade Christmas card featuring a cozy winter window scene, created with Honey Bee Stamps Cozy Christmas release products. The card has a 3D bridge design with an arched window decorated with poinsettias, holly, and icicles, along with a Christmas tree inside adorned with red pearl stickers as ornaments. A white brick embossed background enhances the cozy look, with a glittery snow effect on the roof. The sentiment reads 'Merry Christmas to all and to all a good night' in festive red script.

Hello, crafty friends! Today, I’m excited to share a special Christmas card featuring some beautiful new products from Honey Bee Stamps’ Cozy Christmas release. Inspired by Jennifer McGuire, I created this dimensional bridge card with a cozy winter window scene, perfect for spreading holiday cheer.

And there’s more exciting news! This card is part of an Instagram hop with two $50 gift cards up for grabs! Head over to my Instagram page to hop along and enter for a chance to win.

SUPPLIES

  • Lovely Layers: Window - Honey Cuts (Window and Balcony)
  • Lovely Layers: Window Holiday Add-On - Honey Cuts (Christmas Details)
  • Wonder Of Christmas Stamp Set (Sentiment)
  • Wonder Of Christmas - Honey Cuts (Sentiment Dies)
  • Wood Planks - 3D Embossing Folder (Embossed Background Details)
  • Gingerbread - Pearl Stickers (Christmas Balls)
  • Fine Prisma Glitter and Chunky Glitter (for the snowy details)
  • Inks - Hickory Smoke Distress Oxide Inks (ink blending), Picked Raspberry Distress Ink (sentiment)
  • Dimension - Glossy Accents (balls) Foam Dots (elevate window)
  • How to Create This Card

    Creating the Bridge Card Base
    To start, I cut a piece of cardstock to 5.5 x 5.5 inches for the card base. I then scored each side at the 1-inch mark and again at 1.75 inches on each side. This scoring creates the bridge card structure, which stands up beautifully and folds flat for easy mailing. After folding along the score lines, I set it aside while preparing the other elements.

    Embossed Background Panel
    I wanted the background to resemble the outside of a cozy, snow-covered house, so I used the Wood Planks - 3D Embossing Folder to add woodgrain texture to a piece of cardstock. Before cutting this panel to fit each layer of the card base, I lightly ink-blended Hickory Smoke Distress Oxide Ink over the embossed areas. This added a touch of depth and helped the texture pop! I then cut and attached the embossed background panels to the various layers of the card base, creating a complete and cohesive scene.

    Handmade Christmas card featuring a cozy winter window scene, created with Honey Bee Stamps Cozy Christmas release products. The card has a 3D bridge design with an arched window decorated with poinsettias, holly, and icicles, along with a Christmas tree inside adorned with red pearl stickers as ornaments. A white brick embossed background enhances the cozy look, with a glittery snow effect on the roof. The sentiment reads 'Merry Christmas to all and to all a good night' in festive red script.

    Building the Window Scene
    The centerpiece of this card is, of course, the beautiful window scene. I die-cut the window and balcony using the Lovely Layers: Window - Honey Cuts. The intricate details of the balcony add so much elegance, while the layered design of the window provides a realistic, cozy look. For the Christmas decor, I used the Lovely Layers: Window Holiday Add-On dies, which include holly leaves, poinsettias, and other festive elements to adorn the window and balcony.

    Adding Snowy and Sparkly Details
    To bring a touch of winter magic, I used a combination of Fine Prisma Glitter on the lights and Chunky Glitter along the icicles and window trim, creating the look of fresh snow. The shimmer adds such a festive touch! The Christmas balls on the tree were created using Gingerbread Pearl Stickers, giving the appearance of ornaments that reflect the warm glow from the inside.

    Adding the Sentiment
    I used the Wonder Of Christmas Stamp Set for the sentiment, "Merry Christmas to all, and to all a good night," and die cut it with the coordinating Wonder Of Christmas - Honey Cuts. I love how this sentiment ties together the cozy, classic Christmas vibe of the card.


    Handmade Christmas card featuring a cozy winter window scene, created with Honey Bee Stamps Cozy Christmas release products. The card has a 3D bridge design with an arched window decorated with poinsettias, holly, and icicles, along with a Christmas tree inside adorned with red pearl stickers as ornaments. A white brick embossed background enhances the cozy look, with a glittery snow effect on the roof. The sentiment reads 'Merry Christmas to all and to all a good night' in festive red script.

    6. Assembling the Card
    Once all the pieces were ready, I adhered the window edges to each side of the bridge card base. This allowed the window to "pop" as the focal point of the card and gave the design a three-dimensional look.

    Handmade Christmas card featuring a cozy winter window scene, created with Honey Bee Stamps Cozy Christmas release products. The card has a 3D bridge design with an arched window decorated with poinsettias, holly, and icicles, along with a Christmas tree inside adorned with red pearl stickers as ornaments. A white brick embossed background enhances the cozy look, with a glittery snow effect on the roof. The sentiment reads 'Merry Christmas to all and to all a good night' in festive red script.

    This card stands up nicely, making it perfect for displaying, but it also folds flat, which is great for mailing. I love how this cozy Christmas window scene turned out – it’s almost like peeking into a festive winter night!

    Thank you for stopping by today! Don’t forget to head over to my Instagram page to join the hop – two $50 gift cards are up for grabs. Good luck!

    Thank you for stopping by and until next time... Happy Crafting!
    Ilda 🎄

    To make supplies easy for you to find, I have linked them above. If something is no longer available I will link to a similar product. Affiliate links may be used depending on the product linked. Please help support my blog by using these links while shopping at no additional cost to you. For more information about the affiliates I use, please visit my disclaimer here. Thanks so much for all your support!

    Enjoyed this post? Never miss out on future posts by Following this Blog

    Monday, December 11, 2023

    Snowflake Spinner Card | Honey Bee Stamps

    Snowflake, Spinner Card, Honey Bee Stamps,interactive, christmas,how to,handmade card,Stamps,ilovedoingallthingscrafty,stamping, diecutting,cardmaking,Lovely Layers Large Snowflakes,

    Hello Crafty Friends!

    Today I have an interactive card to share with you. It's been quite a while since I made a spinner card and thought the new Lovely Layers Large Snowflakes would be perfect for this type of card. You will have to check it out in motion on my Instagram, it is so pretty in action.

    CARD RECIPE

    Snowflakes - 2 of each size dies - Lovely Layers Large Snowflakes

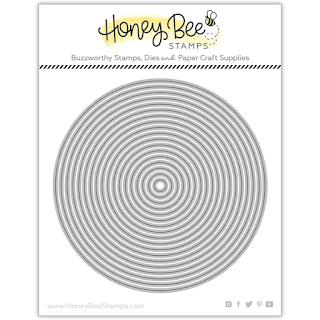
    Circle - Window and frame - Sweet Stacks: Circles Dies

    Sentiment - Mini Messages: Holiday Stamps

    Paper - Holiday Wishes Paper Pad

    Ink - Bee Creative Intense Black Ink Pad

    Gems - Holiday Wishes Gem Stickers


    Die cut the snowflakes. Assemble the 3 sizes together to create the front snowflake. To the back of the snowflake secure a clear thread along its center and sandwich the remaining 3 snowflakes on top. Set aside to create the window for the spinner.


    Layer the pattern paper over the card base front and use the smaller circle to die cut through both layers. This will make the front window match the card base front perfectly.  Set the pattern piece aside.

    Find the center of the circle that is now die-cut from the card front. Affix the clear thread to the top and bottom of the card base. To make this easier I used low tack tape to stretch out the thread first and then added a little drop of glue to the tread followed by tape to each end. For extra securement, I then pulled the thread to another area of the card base and secured that end with another piece of tape, I then snipped off any excess thread. 

    Place the pattern paper piece over the card front to cover up all the thread and tape and secure everything in place. Finish the window by adding a frame to the circle. I used two stacking circle dies.

    Stamp out the sentiment and finish the card with some gems to match. Behold, your spinner masterpiece is now complete!

    Snowflake, Spinner Card, Honey Bee Stamps,interactive, christmas,how to,handmade card,Stamps,ilovedoingallthingscrafty,stamping, diecutting,cardmaking,Lovely Layers Large Snowflakes,

    With a flick of the hand, watch the magic unfold. Twirl the snowflake around and then lay the card flat and insert it into your envelope. Once the recipient removes it from the envelope and opens it up to read it will surprise them with a spin.

    Hope you enjoyed today's handmade spinner card. Thank you for stopping by and until next time... Happy Crafting!
    Ilda ❅❄❆

    SUPPLIES
    Lovely Layers Large Snowflakes
    Lovely Layers Large Snowflakes
    Shop at:
    SSS | SB | HBS
    Sweet Stacks: Circles Dies
    Sweet Stacks: Circles Dies
    Shop at:
    SSS | SB | HBS
    Mini Messages: Holiday Stamps
    Mini Messages: Holiday Stamps
    Shop at:
    SSS | SB | HBS
    Holiday Wishes Paper Pad
    Holiday Wishes Paper Pad
    Shop at:
    SSS | SB | HBS
    Bee Creative Intense Black Ink Pad
    Bee Creative Intense Black Ink Pad
    Shop at:
    SSS | SB | HBS
    Stamping Pressure Tool
    Stamping Pressure Tool
    Shop at:
    HBS
    Bee Creative Bitty Buzz Cutter
    Bee Creative Bitty Buzz Cutter
    Shop at:
    HBS
    Holiday Wishes Gem Stickers
    Holiday Wishes Gem Stickers
    Shop at:
    SSS | SB | HBS
    Bee Creative Glue
    Bee Creative Glue
    Shop at:
    SSS | SB | HBS
    Honey Bee Reverse Tweezers
    Honey Bee Reverse Tweezers
    Shop at:
    SSS | HBS
    Platinum 6 Die Cutting Platform
    Platinum 6 Die Cutting Platform
    Shop at:
    SSS | SB | SB
    New Mini Misti
    New Mini Misti
    Shop at:
    SSS | SB | HBS
    Glitter Paper Holiday Sparkle
    Glitter Paper Holiday Sparkle
    Shop at:
    SSS | SB | HA
    Holographic Cardstock
    Holographic Cardstock
    Shop at:
    SB | HA
    To make supplies easy for you to find, I have linked them above. If something is no longer available I will link to a similar product. Affiliate links may be used depending on the product linked. Please help support my blog by using these links while shopping at no additional cost to you. For more information about the affiliates I use, please visit my disclaimer here. Thanks so much for all your support!

    Enjoyed this post? Never miss out on future posts by Following this Blog

    Watch the magic unfold 👇

    Monday, November 20, 2023

    Alex Syberia Designs November Release | Blog Hop and Giveaway

    Alex Syberia Designs, Christmas,Glimmer Hot Foil,Poinsettia,Instagram Hop, Noel, Feliz Navidad, Ink blending, how to,handmade card,Stamps,ilovedoingallthingscrafty,stamping, diecutting,cardmaking

    Hello friends!  

    Today I am excited to be taking part in a Blog hop featuring the November Alex Syberia Release. Make sure you leave a comment here and the rest of the stops to qualify for a chance to win some fabulous prizes! If you already started hopping you have just come from Hannelie 's Blog. Stay tuned to find out more about the giveaway and where to Hop next!


    So let's dive into the projects I am sharing today.

    To create the foiled images you will need a Foil system. I used the Spellbinders Hot Foil System along with the Platinum 6 Die Cutting Platform. For negative foil transfers, you will need a solid foil plate. I also find I get the best results with this cardstock.

    CARD RECIPE

    Background - Brilliant Burst Hot Foil Plate

    Wreath - Holiday Wreath and Branch Stencil and Die Set

    Sentiment - Feliz Navidad Hot Foil Plate (fussy cut)

    Foil - Aura Glimmer Foil


    I absolutely love how this card turned out. It is definitely a lot more glamorous in person. Pictures do not do this card justice as the Aura Glimmer foil gives it so much sparkle and shine!


    Alex Syberia Designs, Christmas,Glimmer Hot Foil,Poinsettia,Instagram Hop, Noel, Feliz Navidad, Ink blending, how to,handmade card,Stamps,ilovedoingallthingscrafty,stamping, diecutting,cardmaking

    This next card features the show-stopping Joyful Poinsettia Die Set! It is absolutely gorgeous😍


    Alex Syberia Designs, Christmas,Glimmer Hot Foil,Poinsettia,Instagram Hop, Noel, Feliz Navidad, Ink blending, how to,handmade card,Stamps,ilovedoingallthingscrafty,stamping, diecutting,cardmaking

    Just look at this gorgeous Poinsettia Bloom! I used 5 different shades of cardstock and ink-blended the tips of the petals with pink ink. I then added a mist of pink splatters to them. I also added foam in between the layers to give it dimension and curled the tips of the petals.

    Alex Syberia Designs, Christmas,Glimmer Hot Foil,Poinsettia,Instagram Hop, Noel, Feliz Navidad, Ink blending, how to,handmade card,Stamps,ilovedoingallthingscrafty,stamping, diecutting,cardmaking

    With the negative of the foiled background from my first card, I was able to use it to create this poinsettia tag. 

    TAG RECIPE
    Background - Brilliant Burst Hot Foil Plate (Negative)

    Alex Syberia Designs, Christmas,Glimmer Hot Foil,Poinsettia,Instagram Hop, Noel, Feliz Navidad, Ink blending, how to,handmade card,Stamps,ilovedoingallthingscrafty,stamping, diecutting,cardmaking

    To create the die I just cut the panel into 4x3 rectangle and added the poinsetta to the top. I did not use the last layer of the poinsettia to make it slightly smaller, I then punched a hole through one of the petals and added a ribbon through it to tie on a gift later.

    Alex Syberia Designs, Christmas,Glimmer Hot Foil,Poinsettia,Instagram Hop, Noel, Feliz Navidad, Ink blending, how to,handmade card,Stamps,ilovedoingallthingscrafty,stamping, diecutting,cardmaking

    Make sure you check out the Release as I have only showcased a few of the products here today.

    GIVEAWAY

    Alex Syberia Designs is giving away a £85 ($100) gift certificate to 1 lucky winner and a £15 ($18) gift card to 5 winners. Open internationally. All 6 winners will be drawn from the entrants that have played along with this Blog hop by midnight BST on November 26th, 2023. Winners will be announced on the Alex Syberia Designs blog 'Giveaway Winners' page on November 27th, 2023.


    BLOG HOP ORDER


    Thank you for stopping by and until next time... Happy Hopping!
    Ilda 💖

    To make supplies easy for you to find, I have linked them above. If something is no longer available I will link to a similar product. Affiliate links may be used depending on the product linked. Please help support my blog by using these links while shopping at no additional cost to you. For more information about the affiliates I use, please visit my disclaimer here. Thanks so much for all your support!

    Enjoyed this post? Never miss out on future posts by Following this Blog

    Wednesday, October 18, 2023

    Jingle Jewel Cards | Crafty Meraki #Merakicraftober

    Jingle Jewel Cards, Crafty Meraki, #Merakicraftober,how to,handmade card,Stamps,ilovedoingallthingscrafty,stamping, diecutting,cardmaking, christmas, holiday cards, Effortless Artistry Paper,Gilded Holiday Greetings,

    Hello friends!

    Today I am celebrating Crafty Meraki's #merakicraftober Christmas Extravaganza over on Instagram where I feature the process of making these cards. Make sure to click this link 👉HERE to watch and enter the HOP and Giveaway!


    CARD RECIPE
    • To start, first I die cut the Jingle Jewels EAP (Effortless Artistry Paper) using the coordinating Jingle Jewels Para-Dies.
    • Next, I hot-foiled a ton of sentiments using the Gilded Holiday Greetings Foil Plate in a few foil colors and then used the Gilded Holiday Greetings Dies to cut them out. 
    • I then used the Under the Mistletoe Meraki Shimmer to do some dry embossing on the background papers, and then ink blended the edges of the panels with a coordinating ink color.
    • Once all the pieces are done all you need to do is assemble each card. First I arranged the Jingle Jewels on the the front of the panel and then used Press and Seal to pick them up and flip them over. For each ornament, I used gilded thread and added it to the top using a little piece of tape. 
    • Add glue or foam to the back of the ornaments and stick them onto the front panel. 
    • Straighten and secure the gilded thread behind the panel with tape, sandwiching them between the card front panel and the card base.
    • Add your Gilded Holiday Greetings to the front of the card and finish by adding Meraki Sparkle Gold for some sparkle.
    Jingle Jewel Cards, Crafty Meraki, #Merakicraftober,how to,handmade card,Stamps,ilovedoingallthingscrafty,stamping, diecutting,cardmaking, christmas, holiday cards, Effortless Artistry Paper,Gilded Holiday Greetings,

    As you can see this card was done the same way, only using different colors.

    Jingle Jewel Cards, Crafty Meraki, #Merakicraftober,how to,handmade card,Stamps,ilovedoingallthingscrafty,stamping, diecutting,cardmaking, christmas, holiday cards, Effortless Artistry Paper,Gilded Holiday Greetings,

    If you love mass-producing and sending out Christmas cards but don't have time to spend coloring them all, these Effortless Artistry Papers (EAPs) are the way to go! Crafty Meraki has so many variations of them now you can skip the card-making steps you like doing the least.

    Jingle Jewel Cards, Crafty Meraki, #Merakicraftober,how to,handmade card,Stamps,ilovedoingallthingscrafty,stamping, diecutting,cardmaking, christmas, holiday cards, Effortless Artistry Paper,Gilded Holiday Greetings,

    For this last card, I just turned it into a shaker card using some plastic packaging and glued the Jingle Jewels on the front of the plastic panel.


    Jingle Jewel Cards, Crafty Meraki, #Merakicraftober,how to,handmade card,Stamps,ilovedoingallthingscrafty,stamping, diecutting,cardmaking, christmas, holiday cards, Effortless Artistry Paper,Gilded Holiday Greetings,

    I think this one may be my favorite!

    Jingle Jewel Cards, Crafty Meraki, #Merakicraftober,how to,handmade card,Stamps,ilovedoingallthingscrafty,stamping, diecutting,cardmaking, christmas, holiday cards, Effortless Artistry Paper,Gilded Holiday Greetings,

    I hope these fun and super easy Jingle Jewel Cards inspired you to get started on your Holiday Cards. 

    Thank you for stopping by, don't forget to Hop on over to my Instagram for the IG Reels Hop and until next time... Happy Crafting!
    Ilda 🎄

    To make supplies easy for you to find, I have linked them above. If something is no longer available I will link to a similar product. Affiliate links may be used depending on the product linked. Please help support my blog by using these links while shopping at no additional cost to you. For more information about the affiliates I use, please visit my disclaimer here. Thanks so much for all your support!

    Enjoyed this post? Never miss out on future posts by Following this Blog

    Monday, November 28, 2022

    Christmas Cardinal Scene Pop-Up Frame Card | Honey Bee Stamps

    Christmas, Cardinal, Scene, Pop-Up, Frame, Card,Honey Bee Stamps, Jingle Bells,Jennifer McGuire Inspired,Card Making, Stamping, Die Cutting, handmade card, ilovedoingallthingscrafty, Stamps, how to,

    Hello, my friends, and happy Monday. To all my American friends, I hope you had a wonderful Thanksgiving weekend. I am thankful for YOU! 

    Today I have a special card inspired by the amazing Jennifer McGuire. She shared this Pop-Up Frame technique a few months ago and I thought it was brilliant and had to give it a try with the gorgeous Make It Merry Release from Honey Bee Stamps.

    CARD RECIPE

    Christmas, Cardinal, Scene, Pop-Up, Frame, Card,Honey Bee Stamps, Jingle Bells,Jennifer McGuire Inspired,Card Making, Stamping, Die Cutting, handmade card, ilovedoingallthingscrafty, Stamps, how to,
    • To create the pop-up, I cut 2 pieces of paper that measured 5.5x1 inches and scored them at every 1/4 inch. Then accordion fold each piece and glue them to the sides of the back of the frame. These will create the springs for the pop-up card.
    • For the background, I used the Kaleidoscope 3D Embossing Folder and then added some splatters using the Bee Shimmery Liquid
    Christmas, Cardinal, Scene, Pop-Up, Frame, Card,Honey Bee Stamps, Jingle Bells,Jennifer McGuire Inspired,Card Making, Stamping, Die Cutting, handmade card, ilovedoingallthingscrafty, Stamps, how to,
    • Glue the springs onto the background, and once dry add the background to a card base.
    • Stamp the greeting from the Home for the Holidays set in white ink and heat set it.
    • Pop it onto the card front.
    Christmas, Cardinal, Scene, Pop-Up, Frame, Card,Honey Bee Stamps, Jingle Bells,Jennifer McGuire Inspired,Card Making, Stamping, Die Cutting, handmade card, ilovedoingallthingscrafty, Stamps, how to,
    Christmas, Cardinal, Scene, Pop-Up, Frame, Card,Honey Bee Stamps, Jingle Bells,Jennifer McGuire Inspired,Card Making, Stamping, Die Cutting, handmade card, ilovedoingallthingscrafty, Stamps, how to,

    The cool thing about these pop-ups is that they do press down nicely and can be mailed. This one is a bit bulky so I am sure it will require extra postage. 

    I hope you were inspired by my Christmas Cardinal Scene Pop-Up Frame Card. Thank you to my uber-talented friend Jennifer McGuire for this inspiration. I am sure I will be making more of these pop-ups in the future!

    Thanks for stopping by and until next time... Happy Crafting!
    Ilda 🐦

    SUPPLIES
    Layering Bells Dies
    Layering Bells Dies
    Shop at:
    SSS | SB | HBS
    Lovely Layers Winter Birds
    Lovely Layers Winter Birds
    Shop at:
    SSS | SB | HBS
    Lovely Layers Winter Greenery
    Lovely Layers Winter Greenery
    Shop at:
    SSS | SB | HBS
    Layering Vintage Labels A2 Frame Dies
    Layering Vintage Labels A2 Frame Dies
    Shop at:
    SSS | SB | HBS
    Home for the Holidays
    Home for the Holidays
    Shop at:
    SSS | SB | HBS
    Home for the Holidays Dies
    Home for the Holidays Dies
    Shop at:
    SSS | SB | HBS
    Kaleidoscope 3D Embossing Folder
    Kaleidoscope 3D Embossing Folder
    Shop at:
    SSS | SB | HBS
    Make it Merry Gems
    Make it Merry Gems
    Shop at:
    SSS | SB | HBS
    True Pearl Stickers
    True Pearl Stickers
    Shop at:
    SSS | SB | HBS
    Honey Bee Reverse Tweezers
    Honey Bee Reverse Tweezers
    Shop at:
    SSS | HBS
    Bee Shimmery Liquid
    Bee Shimmery Liquid
    Shop at:
    SSS | SB | HBS
    Bee Creative Brilliant White Ink Pad
    Bee Creative Brilliant White Ink Pad
    Shop at:
    SSS | SB | HBS
    Stamping Pressure Tool
    Stamping Pressure Tool
    Shop at:
    HBS
    White Foam Dots With Tab
    White Foam Dots With Tab
    Shop at:
    HBS
    Bee Creative Bitty Buzz Cutter
    Bee Creative Bitty Buzz Cutter
    Shop at:
    HBS
    Original Misti
    Original Misti
    Shop at:
    SSS | AMZ | SB | HBS
    Neenah Solar White 110lbs
    Neenah Solar White 110lbs
    Shop at:
    SSS | AMZ | HBS
    Arctic White Emb.Pwd.
    Arctic White Emb.Pwd.
    Shop at:
    SSS | IO3
    White Gelly Roller Pen
    White Gelly Roller Pen
    Shop at:
    SSS | AMZ | SB | HBS
    Sakura Quickie Glue Pen
    Sakura Quickie Glue Pen
    Shop at:
    SSS | AMZ | SK
    PRISMA GLITTER
    PRISMA GLITTER
    Shop at:
    SSS
    Black Triangle Tray
    Black Triangle Tray
    Shop at:
    SSS | SK
    Glossy Accents
    Glossy Accents
    Shop at:
    SSS | AMZ | SB | HBS
    To make supplies easy for you to find, I have linked them above. If something is no longer available I will link to a similar product. Affiliate links may be used depending on the product linked. Please help support my blog by using these links while shopping at no additional cost to you. For more information about the affiliates I use, please visit my disclaimer here. Thanks so much for all your support!

    Watch this card come alive. Click to watch Reels below.