Showing posts with label interactive. Show all posts

Friday, August 23, 2024

Falloween Release Sneak Peeks Day 2 | Honey Bee Stamps

how to, hand made card, Stamps, stamping, die cutting, card making, ilovedoingallthingscraftym Falloween Release, Shaker Card, Spider, Interactive, Rainbow, Web,3D Blackout Embossing Folder Technique,

Today is Day 2 of the Falloween Release Sneak Peeks and I'm excited to share a playful and interactive shaker card that I created using some of the latest products. This card is perfect for sending a little Halloween cheer to someone special. Please note links are inactive until the Falloween Release goes live on August 23rd after the Live Release Party on YouTube at 8 pm EST.


CARD RECIPE

Spider - Lovely Layers: Scaredy Cat Dies

Spider Eyes - Sweet and Spooky Pearl Stickers

Background - Spider Web 3D Embossing Folder

Sentiment - Too Cute to Spook Dies

Frame - Layering Vintage Labels Frames

Shaker bits - Black Opal Confetti Mix, Aurora Lights Confetti Mix

Shaker - A2 Shaker Pockets


Background Magic:


I started with the Spider Web 3D Embossing Folder to create the spooky web background. Using the blackout technique, I blended yellow, pink, and blue inks from Inkon3 into the reversed embossed areas of the Tangled Web 3D Embossing Folder. The colors give a vibrant yet eerie glow, perfect for a Halloween-themed card.


Adding the Shaker Element:

To bring in some fun, I created a shaker element using the A2 Shaker Pockets. I filled the shaker with a mix of Black Opal Confetti Mix and Aurora Lights Confetti Mix. The iridescent confetti adds a playful shimmer that catches the light beautifully.

how to, hand made card, Stamps, stamping, die cutting, card making, ilovedoingallthingscraftym Falloween Release, Shaker Card, Spider, Interactive, Rainbow, Web,3D Blackout Embossing Folder Technique,

Focal Point & Sentiment:

The sentiment "Too Cute to Spook" is die-cut using the Too Cute to Spook Dies. I layered the sentiment onto a vellum shadow layer and glued it to the shaker, allowing it to stand out against the vibrant background.

For an extra touch of spookiness, I added a cute spider from the Lovely Layers: Scaredy Cat Dies. I used Sweet and Spooky Pearl Stickers for the spider's eyes, giving it an adorable yet mischievous look.

Framing It All:

Now, to fix a mistake I made I added the frame around the shaker pocket. Sadly I trimmed the background a little too much and you could see some of the adhesive of the pocket. So to salvage this I added a frame that I then used it to hang the Spider off of. The frame ties everything together and also gives the card a polished finished look.

how to, hand made card, Stamps, stamping, die cutting, card making, ilovedoingallthingscraftym Falloween Release, Shaker Card, Spider, Interactive, Rainbow, Web,3D Blackout Embossing Folder Technique,

This card is a delightful mix of spooky and cute, making it perfect for Halloween. The combination of the blackout technique, playful shaker elements, and the charming spider adds a fun and festive vibe to the design. I hope this card inspires you to create your own Falloween-themed projects using Honey Bee Stamps' latest release!


Thank you for stopping by and don't forget to join us for the Falloween Release Party on YouTube at 8 pm EST tonight. Happy Crafting!

Ilda 🕷

To make supplies easy for you to find, I have linked them above. If something is no longer available I will link to a similar product. Affiliate links may be used depending on the product linked. Please help support my blog by using these links while shopping at no additional cost to you. For more information about the affiliates I use, please visit my disclaimer here. Thanks so much for all your support!

Enjoyed this post? Never miss out on future posts by Following this Blog

Monday, December 11, 2023

Snowflake Spinner Card | Honey Bee Stamps

Snowflake, Spinner Card, Honey Bee Stamps,interactive, christmas,how to,handmade card,Stamps,ilovedoingallthingscrafty,stamping, diecutting,cardmaking,Lovely Layers Large Snowflakes,

Hello Crafty Friends!

Today I have an interactive card to share with you. It's been quite a while since I made a spinner card and thought the new Lovely Layers Large Snowflakes would be perfect for this type of card. You will have to check it out in motion on my Instagram, it is so pretty in action.

CARD RECIPE

Snowflakes - 2 of each size dies - Lovely Layers Large Snowflakes

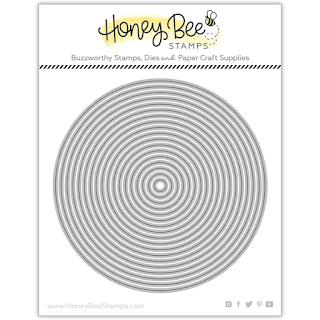
Circle - Window and frame - Sweet Stacks: Circles Dies

Sentiment - Mini Messages: Holiday Stamps

Paper - Holiday Wishes Paper Pad

Ink - Bee Creative Intense Black Ink Pad

Gems - Holiday Wishes Gem Stickers


Die cut the snowflakes. Assemble the 3 sizes together to create the front snowflake. To the back of the snowflake secure a clear thread along its center and sandwich the remaining 3 snowflakes on top. Set aside to create the window for the spinner.


Layer the pattern paper over the card base front and use the smaller circle to die cut through both layers. This will make the front window match the card base front perfectly.  Set the pattern piece aside.

Find the center of the circle that is now die-cut from the card front. Affix the clear thread to the top and bottom of the card base. To make this easier I used low tack tape to stretch out the thread first and then added a little drop of glue to the tread followed by tape to each end. For extra securement, I then pulled the thread to another area of the card base and secured that end with another piece of tape, I then snipped off any excess thread. 

Place the pattern paper piece over the card front to cover up all the thread and tape and secure everything in place. Finish the window by adding a frame to the circle. I used two stacking circle dies.

Stamp out the sentiment and finish the card with some gems to match. Behold, your spinner masterpiece is now complete!

Snowflake, Spinner Card, Honey Bee Stamps,interactive, christmas,how to,handmade card,Stamps,ilovedoingallthingscrafty,stamping, diecutting,cardmaking,Lovely Layers Large Snowflakes,

With a flick of the hand, watch the magic unfold. Twirl the snowflake around and then lay the card flat and insert it into your envelope. Once the recipient removes it from the envelope and opens it up to read it will surprise them with a spin.

Hope you enjoyed today's handmade spinner card. Thank you for stopping by and until next time... Happy Crafting!
Ilda ❅❄❆

SUPPLIES
Lovely Layers Large Snowflakes
Shop at:
SSS | SB | HBS
Sweet Stacks: Circles Dies
Shop at:
SSS | SB | HBS
Mini Messages: Holiday Stamps
Shop at:
SSS | SB | HBS
Holiday Wishes Paper Pad
Shop at:
SSS | SB | HBS
Bee Creative Intense Black Ink Pad
Shop at:
SSS | SB | HBS
Stamping Pressure Tool
Shop at:
HBS
Bee Creative Bitty Buzz Cutter
Shop at:
HBS
Holiday Wishes Gem Stickers
Shop at:
SSS | SB | HBS
Bee Creative Glue
Bee Creative Glue
Shop at:
SSS | SB | HBS
Honey Bee Reverse Tweezers
Shop at:
SSS | HBS
Platinum 6 Die Cutting Platform
Shop at:
SSS | SB | SB
New Mini Misti
New Mini Misti
Shop at:
SSS | SB | HBS
Glitter Paper Holiday Sparkle
Shop at:
SSS | SB | HA
Holographic Cardstock
Shop at:
SB | HA
To make supplies easy for you to find, I have linked them above. If something is no longer available I will link to a similar product. Affiliate links may be used depending on the product linked. Please help support my blog by using these links while shopping at no additional cost to you. For more information about the affiliates I use, please visit my disclaimer here. Thanks so much for all your support!

Enjoyed this post? Never miss out on future posts by Following this Blog

Watch the magic unfold 👇

Monday, July 24, 2023

Hooked on You Interactive Shaker/Slider Card | Honey Bee Stamps

Hooked on You, Interactive, Shaker,Slider, Card,Honey Bee Stamps, Fishing, lures, how to,handmade card,Stamps,ilovedoingallthingscrafty,stamping, diecutting,cardmaking

In the world of crafting, there's always something new and exciting to try. If you're a fan of creating interactive and eye-catching cards, then you're in for a treat! Not only is this card a shaker, but it also is a slider.

CARD RECIPE

Let's explore the features of this card, along with the new products from Honey Bee Stamps that will take your card-making game to new heights!


1. Start by die-cutting and piecing one of the Lovely Layers Lures

2. To the end of the lure, I attached the cute little earthworm from the Spring Meadow and Dies.

3. Next, attach a clear thread and secure it to the back of the lure. Also (I wished I had done this, hindsight is 20/20) glue a penny or a button to the back of the lure and set it aside to work on the flat shaker.


Hooked on You, Interactive, Shaker,Slider, Card,Honey Bee Stamps, Fishing, lures, how to,handmade card,Stamps,ilovedoingallthingscrafty,stamping, diecutting,cardmaking

4. Cut a piece of pattern paper for the background of the shaker. This paper comes from the Vitamin Sea Paper Pad and create the shaker pocket. Before attaching the plastic to the panel, pierce a tiny hole near the top center of the front of the plastic pocket. Thread the end of the clear thread you attached to the lure earlier,  from inside the pocket leaving excess line outside the pocket for later use. 

(You can create the pocket either by using scrap plastic and wrapping it around the panel or using a premade shaker pocket (yes, the same ones I developed 😉) Click HERE if you need further instruction on this). 


Hooked on You, Interactive, Shaker,Slider, Card,Honey Bee Stamps, Fishing, lures, how to,handmade card,Stamps,ilovedoingallthingscrafty,stamping, diecutting,cardmaking

5. Once the pocket is made, fill it with your shaker bits. I used AURORA LIGHTS Confetti Mix and close up the pocket. Attach the pocket to a card base.

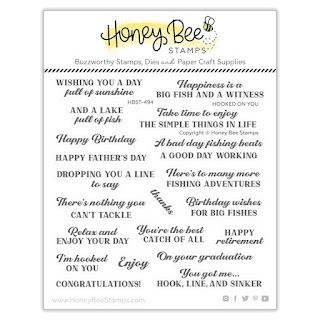
6. Stamp out and heat emboss in white your sentiment strip using the Hooked On You Stamps and Dies.

7. Shorten the thread that is dangling outside the pocket and attach the sentiment to the clear thread by sandwiching the thread between a few layers of the die-cuts. If done correctly the weight of the lure will pull the sentiment to snug up against the pierced hole you created. (My lure didn't have enough weight and so it didn't work as smoothly as I would have liked it to, but this is how you learn right!?)


Hooked on You, Interactive, Shaker,Slider, Card,Honey Bee Stamps, Fishing, lures, how to,handmade card,Stamps,ilovedoingallthingscrafty,stamping, diecutting,cardmaking

8. Finish the outside of the shaker panel by adding some seagrasses. I used some from the Ocean Deep Scene Builder Dies.

9. To embellish a little more I added some fun "water bubbles" using Ombre Pearls- Pearl Stickers.


By following these steps, you can create a unique and interactive flat shaker hooked on your slider lure card that will amaze and delight the recipient. Experiment with different color combinations, patterns, and shaker fillings to customize the card to your liking.


Remember, crafting is all about learning and trying new techniques, so don't worry if everything doesn't go perfectly the first time. Embrace the process and have fun with it! Thank you for stopping by and until next time... Happy Crafting!


Ilda 🎣🐟

SUPPLIES
Lovely Layers Lures
Lovely Layers Lures
Shop at:
SSS | SB | HBS
Spring Meadow
Spring Meadow
Shop at:
SSS | SB | HBS
Spring Meadow Dies
Spring Meadow Dies
Shop at:
SSS | SB | HBS
Hooked On You Stamps
Shop at:
SSS | SB | HBS
Hooked On You Dies
Hooked On You Dies
Shop at:
SSS | SB | HBS
Ocean Deep Scene Builder Dies
Shop at:
SSS | SB | HBS
Vitamin Sea Paper Pad
Shop at:
SSS | SB | HBS
AURORA LIGHTS Confetti Mix
Shop at:
HBS
Intense Black Ink Pad
Shop at:
SSS | SB | HBS
Bee Creative Brilliant White Pigment Ink
Shop at:
SSS | SB | HBS
Stamping Pressure Tool
Shop at:
HBS
Bee Creative Bitty Buzz Cutter
Shop at:
HBS
Die Release Tool
Die Release Tool
Shop at:
SSS | HBS
Honey Bee Reverse Tweezers
Shop at:
SSS | HBS
A2 Shaker Pockets
A2 Shaker Pockets
Shop at:
SSS | SK
Magic Powder Bag
Magic Powder Bag
Shop at:
SSS
New Mini Misti
New Mini Misti
Shop at:
SSS | SB | HBS
Platinum 6 Die Cutting Platform
Shop at:
SSS | SB | SB
Arctic White Emb.Pwd.
Shop at:
SSS | IO3
Heat Gun
Heat Gun
Shop at:
AMZ
Clear Nylon Invisible Thread
Shop at:
AMZ
To make supplies easy for you to find, I have linked them above. If something is no longer available I will link to a similar product. Affiliate links may be used depending on the product linked. Please help support my blog by using these links while shopping at no additional cost to you. For more information about the affiliates I use, please visit my disclaimer here. Thanks so much for all your support!

Enjoyed this post? Never miss out on future posts by Following this Blog

Wednesday, April 12, 2023

Double-sided Interactive See-Through Birthday Shaker Card | Studio Katia

Double-sided, Interactive, See-Through, Shaker Card, Studio Katia, how to,handmade card,Stamps,ilovedoingallthingscrafty,stamping, diecutting,cardmaking, infinity card, frameless shaker, shaker pocket card,

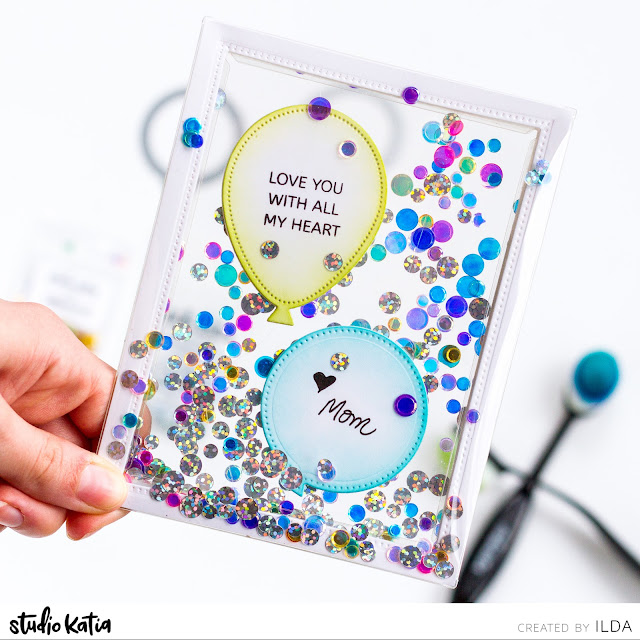
Do you want to create a card that will blow your friends and family away? Look no further than this see-through double-sided interactive shaker card featuring the A2 Shaker Pockets from Studio Katia. As the creator of these pockets, I thought it would be fun to try something new and different. Plus I thought this design would make a stunning creation for my son's 19th birthday, and which I'm thrilled to share it with you today in hopes of inspiring your own card-making adventures.

Double-sided, Interactive, See-Through, Shaker Card, Studio Katia, how to,handmade card,Stamps,ilovedoingallthingscrafty,stamping, diecutting,cardmaking, infinity card, frameless shaker, shaker pocket card,

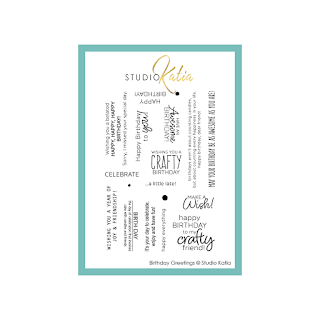
To start, you'll need to double up on the Dotted Balloons Dies and the Shaker Balloon Die to create both the front and back of the balloons. Then, add a personal touch by stamping the Birthday Greetings and Mini Love Greetings Stamp set onto the balloons. I even wrote 💗mom, one of them!

Double-sided, Interactive, See-Through, Shaker Card, Studio Katia, how to,handmade card,Stamps,ilovedoingallthingscrafty,stamping, diecutting,cardmaking, infinity card, frameless shaker, shaker pocket card,

To create the shaker pocket, I adhered two A2 Shaker Pockets together using double-sided tape and added a frame from the Dotted Pattern Set 1 to both sides. Then, I secured a clear thread between the balloons before attaching them together. The final step is to fill the pocket with dazzling Crystal Rainbow Confetti and Silver Fever Foil Discs before sealing the pocket shut.

Double-sided, Interactive, See-Through, Shaker Card, Studio Katia, how to,handmade card,Stamps,ilovedoingallthingscrafty,stamping, diecutting,cardmaking, infinity card, frameless shaker, shaker pocket card,

If you look close enough you will see that some of the acetate from the tabs are still visible. To solve for this you can trim them first, or just use a wider frame. Nevertheless, the result is a stunning card that is sure to impress anyone who receives it.

Double-sided, Interactive, See-Through, Shaker Card, Studio Katia, how to,handmade card,Stamps,ilovedoingallthingscrafty,stamping, diecutting,cardmaking, infinity card, frameless shaker, shaker pocket card,

With a little creativity and the right tools, you too can create a show-stopping card that will be treasured for years to come. So, let your imagination run wild and make your own Double-sided Interactive See-Through Shaker Card!

Don't forget to follow along on my Instagram account as I will also share the how-to Reels so you can see it all come together.

Thank you for stopping by and until next time... Happy Crafting!
Ilda 🎈

SUPPLIES
A2 Shaker Pockets
A2 Shaker Pockets
Shop at:
SSS | SK
Dotted Pattern Set 1
Shop at:
SSS | SK
Dotted Balloons Dies
Shop at:
SSS | SK
Shaker Balloon Die
Shaker Balloon Die
Shop at:
SSS | SK
Birthday Greetings
Birthday Greetings
Shop at:
SSS | SK
Mini Love Greetings Stamp
Shop at:
SSS | SK
SK Glue
SK Glue
Shop at:
SSS | SK
Ink Blender Brushes
Ink Blender Brushes
Shop at:
SSS | SK
Crystal Rainbow Confetti
Shop at:
SSS | SK
Silver Fever Foil Discs
Shop at:
SSS | SK
Black Triangle Tray
Black Triangle Tray
Shop at:
SSS | SK
Bone Folder
Bone Folder
Shop at:
SSS | SK
Platinum 6 Die Cutting Platform
Shop at:
SSS | SB | SB
Neenah Solar White 110lbs
Shop at:
SSS | AMZ | HBS
Bee Creative Intense Black Ink
Shop at:
SSS | SB | HBS
New Mini Misti
New Mini Misti
Shop at:
SSS | SB | HBS
Oxide Ink Pad TWISTED CITRON
Shop at:
SSS | SB | HBS
Oxide Ink Pad PEACOCK FEATHERS
Shop at:
SSS | SB | HBS
Clear Nylon Invisible Thread
Shop at:
AMZ
Scor-Pal Tape
Scor-Pal Tape
Shop at:
SSS | AMZ | HBS
To make supplies easy for you to find, I have linked them above. If something is no longer available I will link to a similar product. Affiliate links may be used depending on the product linked. Please help support my blog by using these links while shopping at no additional cost to you. For more information about the affiliates I use, please visit my disclaimer here. Thanks so much for all your support!