Showing posts with label Spinner Card. Show all posts

Monday, February 24, 2025

Quacktastic Wheel Spinner Card | Picket Fence Studios

Quacktastic Wheel Spinner Card, Picket Fence Studios, February Release, Interactive Card, Spinner Card, Handmade Card, Stamping, Die Cutting, Ink Blending, Cardmaking, Crafting, DIY Cards, Duck Stamps

Hello, crafty friends! Today, I am thrilled to share a super fun interactive card featuring the February release from Picket Fence Studios. This Quacktastic Wheel Spinner Card brings an extra touch of whimsy with adorable ducklings that spin around a central sentiment.

For a detailed guide on how I stamp multiple images efficiently, be sure to check out my previous blog post: Lucky Ducky Greetings with Picket Fence Studios. I used the leftover stamped images from that project to create this one! To watch this card in action head on over to my Instagram Reels for the latest video.

CARD RECIPE
You are Quacktastic Stamps - Stamped images
2.0" Connected Circles Shaker Creator Die - To create rings/top circle for the Spinner wheel
2.5" Connected Circles Shaker Creator Die - To create rings for the Spinner wheel
Ink Pallets - For stabilizing paper while stamping/ink blending

Other Supplies
Button
Circle Die - slightly larger then the button

Quacktastic Wheel Spinner Card, Picket Fence Studios, February Release, Interactive Card, Spinner Card, Handmade Card, Stamping, Die Cutting, Ink Blending, Cardmaking, Crafting, DIY Cards, Duck Stamps

Creating the Spinner Wheel
  • Blending the Background – Using the Scene Building A2 Stencil Set, I blended out the background to create a soft sky effect with fluffy clouds and grassy fields using Distress Oxide Inks.
  • Marking the Center – I used a T-Square Ruler to find the center of my card, ensuring smooth spinning action. 
  • Adding the Button – The button acts as the pivot point where the rings spin. Use a small circle die (slightly bigger than the button) to die-cut the opening. Glue the background to the card base. Then glue the button to the opening, and set aside to dry completely.
  • Cutting the Circles & Rings – I die-cut two rings using the same smaller circle die from the previous step and a couple of large circle dies, the 2.0" and the 2.5" Connected Circles Shaker Creator Die. The larger ring is what the Duckies are Glued to and the smaller ring is to elevate the spinner mechanism. In hindsight, they could have been the same size.
Quacktastic Wheel Spinner Card, Picket Fence Studios, February Release, Interactive Card, Spinner Card, Handmade Card, Stamping, Die Cutting, Ink Blending, Cardmaking, Crafting, DIY Cards, Duck Stamps
  • Layering the Ducklings – Once I glued the Duckies to the larger ring, I then die-cut and adhered a blank coordinating die behind each duck to add strength and rigidity. This helps them spin smoothly without bending.
  • Assembling the Spinner – Glue the smaller ring behind the duck layer to lift the spinner mechanism, allowing for a seamless rotation. Place the spinner opening over the button.
  • Hiding the Button – To cover the center button, I die-cut a final circle, decorated it with stamped elements, and added the sentiment, "You Are Quacktastic" and glued it to the button.
Quacktastic Wheel Spinner Card, Picket Fence Studios, February Release, Interactive Card, Spinner Card, Handmade Card, Stamping, Die Cutting, Ink Blending, Cardmaking, Crafting, DIY Cards, Duck Stamps

Inside the card, I stamped the phrase "Have a Lucky Ducky Birthday" to complement the cheerful front. This makes for a delightful interactive birthday card that is sure to bring a smile to anyone’s face!

A handmade interactive spinner card featuring adorable ducklings from Picket Fence Studios' "You Are Quacktastic" stamp set. The card has a blue sky background with clouds, grass, and a central spinning wheel with ducks surrounding the sentiment "You Are Quacktastic."    The inside of a handmade birthday card with the stamped sentiment "Have a Lucky Ducky Birthday." The card is placed next to crafting supplies, including duck-themed stamps and decorative flowers.

I absolutely love how this Quacktastic Wheel Spinner Card turned out! The interactive spinning motion adds such a fun element to the design, and these adorable ducklings make it even more special.

I hope you enjoyed this walkthrough! Let me know in the comments if you try making your own spinner card. Thank you for stopping by and until next time... Happy Crafting!
Ilda 🦆

To make supplies easy for you to find, I have linked them above. If something is no longer available I will link to a similar product. Affiliate links may be used depending on the product linked. Please help support my blog by using these links while shopping at no additional cost to you. For more information about the affiliates I use, please visit my disclaimer here. Thanks so much for all your support!

Monday, December 11, 2023

Snowflake Spinner Card | Honey Bee Stamps

Snowflake, Spinner Card, Honey Bee Stamps,interactive, christmas,how to,handmade card,Stamps,ilovedoingallthingscrafty,stamping, diecutting,cardmaking,Lovely Layers Large Snowflakes,

Hello Crafty Friends!

Today I have an interactive card to share with you. It's been quite a while since I made a spinner card and thought the new Lovely Layers Large Snowflakes would be perfect for this type of card. You will have to check it out in motion on my Instagram, it is so pretty in action.

CARD RECIPE

Snowflakes - 2 of each size dies - Lovely Layers Large Snowflakes

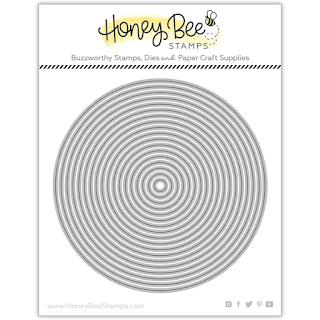
Circle - Window and frame - Sweet Stacks: Circles Dies

Sentiment - Mini Messages: Holiday Stamps

Paper - Holiday Wishes Paper Pad

Ink - Bee Creative Intense Black Ink Pad

Gems - Holiday Wishes Gem Stickers


Die cut the snowflakes. Assemble the 3 sizes together to create the front snowflake. To the back of the snowflake secure a clear thread along its center and sandwich the remaining 3 snowflakes on top. Set aside to create the window for the spinner.


Layer the pattern paper over the card base front and use the smaller circle to die cut through both layers. This will make the front window match the card base front perfectly.  Set the pattern piece aside.

Find the center of the circle that is now die-cut from the card front. Affix the clear thread to the top and bottom of the card base. To make this easier I used low tack tape to stretch out the thread first and then added a little drop of glue to the tread followed by tape to each end. For extra securement, I then pulled the thread to another area of the card base and secured that end with another piece of tape, I then snipped off any excess thread. 

Place the pattern paper piece over the card front to cover up all the thread and tape and secure everything in place. Finish the window by adding a frame to the circle. I used two stacking circle dies.

Stamp out the sentiment and finish the card with some gems to match. Behold, your spinner masterpiece is now complete!

Snowflake, Spinner Card, Honey Bee Stamps,interactive, christmas,how to,handmade card,Stamps,ilovedoingallthingscrafty,stamping, diecutting,cardmaking,Lovely Layers Large Snowflakes,

With a flick of the hand, watch the magic unfold. Twirl the snowflake around and then lay the card flat and insert it into your envelope. Once the recipient removes it from the envelope and opens it up to read it will surprise them with a spin.

Hope you enjoyed today's handmade spinner card. Thank you for stopping by and until next time... Happy Crafting!
Ilda ❅❄❆

SUPPLIES
Lovely Layers Large Snowflakes
Shop at:
SSS | SB | HBS
Sweet Stacks: Circles Dies
Shop at:
SSS | SB | HBS
Mini Messages: Holiday Stamps
Shop at:
SSS | SB | HBS
Holiday Wishes Paper Pad
Shop at:
SSS | SB | HBS
Bee Creative Intense Black Ink Pad
Shop at:
SSS | SB | HBS
Stamping Pressure Tool
Shop at:
HBS
Bee Creative Bitty Buzz Cutter
Shop at:
HBS
Holiday Wishes Gem Stickers
Shop at:
SSS | SB | HBS
Bee Creative Glue
Bee Creative Glue
Shop at:
SSS | SB | HBS
Honey Bee Reverse Tweezers
Shop at:
SSS | HBS
Platinum 6 Die Cutting Platform
Shop at:
SSS | SB | SB
New Mini Misti
New Mini Misti
Shop at:
SSS | SB | HBS
Glitter Paper Holiday Sparkle
Shop at:
SSS | SB | HA
Holographic Cardstock
Shop at:
SB | HA
To make supplies easy for you to find, I have linked them above. If something is no longer available I will link to a similar product. Affiliate links may be used depending on the product linked. Please help support my blog by using these links while shopping at no additional cost to you. For more information about the affiliates I use, please visit my disclaimer here. Thanks so much for all your support!

Enjoyed this post? Never miss out on future posts by Following this Blog

Watch the magic unfold 👇

Tuesday, December 29, 2020

Stolen My Heart - Valentine Raccoon Spinner Card | Honey Bee Stamps Day 1 Sneak Peeks

Stolen My Heart, Valentine's Day Card, Raccoon, Spinner Card, Honey Bee Stamps, Sneak Peeks, Love Letters, Card Making, Stamping, Die Cutting, handmade card, ilovedoingallthingscrafty, Stamps, how to,

***Please note links in the post are no longer active, if you are looking for something specific use this link here to 👉 HONEY BEE STAMPS and search for the product listed. My apologies for the inconvenience and thanks in advance for using my link ***

Hello and welcome to Day 1 Sneak Peeks for Honey Bee Stamps Love Letters Release. Make sure you stop by the Honey Bee Stamps Blog for more inspiration from the Design Team featuring more day 1 product reveals!


My spinner card today features the new STOLEN MY HEART Stamps and Dies, plus a bunch more of Honey Bee Stamps supplies. (Please note links will not be active until products go live on RELEASE DAY - Saturday 1/2 @ 11pm EST.)

CARD DETAILS

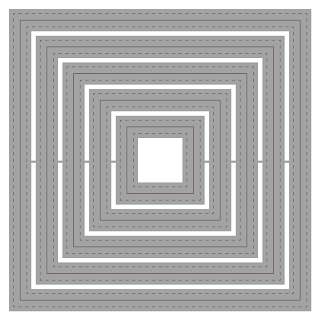
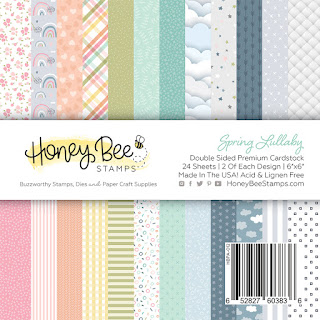
To begin, I started with creating the opening on the top part of a square card base using a heart from the PIERCED XOXO HEART DIES. I then used the same heart die to cut the heart from a piece of pattern paper that came from the SPRING LULLABY PAPER PAD. To finish off the top layer I die cut the paper with the largest frame from the DOUBLE STITCHED SQUARE DIES.  I then set these pieces aside to work on the spinning raccoon.

Stolen My Heart, Valentine's Day Card, Raccoon, Spinner Card, Honey Bee Stamps, Sneak Peeks, Love Letters, Card Making, Stamping, Die Cutting, handmade card, ilovedoingallthingscrafty, Stamps, how to,

On a piece of Neenah cardstock, I stamped out the image of the raccoon from the new STOLEN MY HEART stamp set and then colored it in using Copic markers and then die cut it using the coordinating STOLEN MY HEART DIES. Next, I die cut another blank shape of the raccoon image to create the backside of the raccoon.

Stolen My Heart, Valentine's Day Card, Raccoon, Spinner Card, Honey Bee Stamps, Sneak Peeks, Love Letters, Card Making, Stamping, Die Cutting, handmade card, ilovedoingallthingscrafty, Stamps, how to,

I used a fine tip Micron pen to outline the image, I then drew in the tail to create the illusion of the raccoon's backside, and then colored it in. I then sandwiched a clear nylon thread in between the two die-cut pieces. 

To create the spinner, I then taped down the top thread to the top of the card base,  centering the raccoon in the center of the heart opening and then repeating the same thing with the bottom string. To secure the spinner in place and finish off the front I glued the pattern piece that I had done previously to the front panel.

Stolen My Heart, Valentine's Day Card, Raccoon, Spinner Card, Honey Bee Stamps, Sneak Peeks, Love Letters, Card Making, Stamping, Die Cutting, handmade card, ilovedoingallthingscrafty, Stamps, how to,

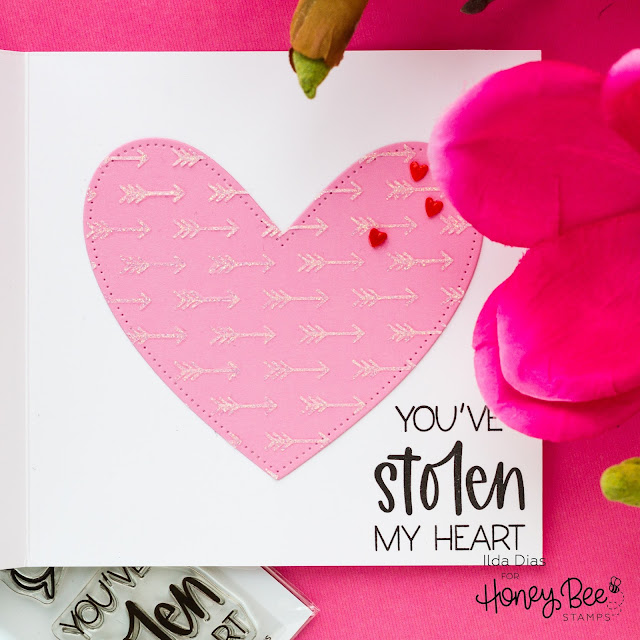
To the inside, I used the same heart from the PIERCED XOXO HEART DIE, and added the pink heart to fit in the opening of the card. To the heart, I added some stenciled some glittery arrows using glimmer paste and CUPIDS ARROW STENCIL.

Stolen My Heart, Valentine's Day Card, Raccoon, Spinner Card, Honey Bee Stamps, Sneak Peeks, Love Letters, Card Making, Stamping, Die Cutting, handmade card, ilovedoingallthingscrafty, Stamps, how to,

To finish off this spinner card, I added some clay hearts from the SWEETHEARTS CLAY HEARTS. I also used a red Copic marker to match the same color I used on the raccoon's heart and then topped the hearts off with some glossy accents. 


Thank you for stopping by, and I will be back tomorrow with day 2 Sneak Peeks!


SUPPLIES
STOLEN MY HEART
STOLEN MY HEART
Shop at:
HBS
STOLEN MY HEART DIES
Shop at:
HBS
DOUBLE STITCHED SQUARE DIES
Shop at:
SSS | SB | HBS
PIERCED XOXO HEART DIES
Shop at:
SSS | SB | HBS
BEE NARROW UPPER CASE ALPHA DIES
Shop at:
SSS | HBS
SPRING LULLABY PAPER PAD
Shop at:
SSS | SB | HBS
CUPIDS ARROW STENCIL
Shop at:
SSS | SB | HBS
SWEETHEARTS CLAY HEARTS
Shop at:
HBS
BEE CREATIVE GLUE
BEE CREATIVE GLUE
Shop at:
SSS | SB | HBS
MINI MISTI
MINI MISTI
Shop at:
SSS | SB  | HBS
NEENAH SOLAR WHITE 110
Shop at:
SSS | AMZ | HBS
BLACKOUT INK
BLACKOUT INK
Shop at:
SSS | HBS | IO3
COPIC SKETCH
COPIC SKETCH
Shop at:
SSS | AMZ
GEMINI JR. DIE CUTTER
Shop at:
SSS | AMZ | SB
Gina K Designs RED VELVET Cardstock
Shop at:
SSS
MOONSTONE GLIMMER PASTE
Shop at:
SSS |  HBS | TS US 
MEDIA SPATULAS
MEDIA SPATULAS
Shop at:
SSS |  HBS | TS US |
Clear Nylon Invisible Thread
Shop at:
AMZ
EMBELLISHMENT WAND
EMBELLISHMENT WAND
Shop at:
SSS | SK
WHITE GELLY ROLLER PEN SET
Shop at:
SSS | AMZ | SB
Micron Pens
Micron Pens
Shop at:
SSS
GLOSSY ACCENTS
GLOSSY ACCENTS
Shop at:
SSS | SB | HBS
To make supplies easy for you to find, I have linked them above. If something is no longer available I will link to a similar product. Affiliate links may be used depending on the product linked. Please help support my blog by using these links while shopping at no additional cost to you. For more information about the affiliates I use, please visit my disclaimer here. Thanks so much for all your support!