Showing posts with label pattern Paper. Show all posts

Friday, April 5, 2024

Big Birthday Celebration Shaker Card | Honey Bee Stamps


birthday,Big,how to,Infinity,Honey Bee Stamps,ilovedoingallthingscrafty,hand made card,pattern Paper,Flat,Celebration Shaker Card,Frameless,crafty Tips,Die cutting,card making,

Hello friends and Happy Friday!

Today's BIG Birthday Celebration Shaker Card is part of the Honey Bee Stamps Celebration Release Instagram Hop. This type of Shaker card holds a special place in my heart as they are not only fun to create but also brings immense joy when gifted, especially for celebrations. They embody the spirit of festivity all on their own! Who can resist the urge to give them a shake? Certainly not me! 


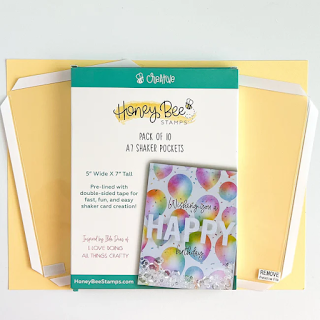
Plus, I'm filled with gratitude and excitement knowing that Honey Bee Stamps has brought to life these pockets, inspired by an idea I shared with the card-making community years ago! Explore the origins of the shaker pocket concept by clicking HERE.

"Look Mom I'm famous", lol!
 There's my card and my name on the packaging! 

CARD RECIPE
  
SHAKER POCKET
  • Start with one Bee Creative A7 Shaker Pocket. TIP: for best results, bend the flaps, use a bone folder, and press down the edges to make it as flat as possible. TIP: DO NOT remove the protective layer before doing this step as it will scratch the acetate!
  • Trim the background to fit inside the shaker panel. I used a paper from the new Let's Party Paper Pad. TIP: Trim the panel slightly smaller than the Shaker pocket front. I trimmed 1/8th inch off of the top and the side of this 5x7 panel.
  • Create the shaker pocket by gluing 3 of the 4 tabs down. 
  • Pour your shaker elements into the pocket. I used BOKEH LIGHTS Confetti and some coordinating clay circles that I found in my stash.
  • Glue down the last tab to close up the Shaker Pocket.
  • Peel off the protective layer. TIP: I like to just remove the layer over the tabs, while leaving the front still mostly covered with the protective layer. This will prevent any scratches or fingerprints until I am ready to add my die cuts to the front of it.
  • Attach the finished pocket to the card base. TIP: for best results make sure the tape you use is strong as the acetate will try to pop up if not glued down well. I use Sticky Red Tape 1/4" and apply it as close to the edge as possible.
Big, Birthday, Celebration Shaker Card, Honey Bee Stamps, flat,Frameless ,Infinity,how to, hand made card, die cutting, card making, ilovedoingallthingscrafty,pattern Paper, crafty Tips,

CARD FRONT
Big, Birthday, Celebration Shaker Card, Honey Bee Stamps, flat,Frameless ,Infinity,how to, hand made card, die cutting, card making, ilovedoingallthingscrafty,pattern Paper, crafty Tips,

SENTIMENT
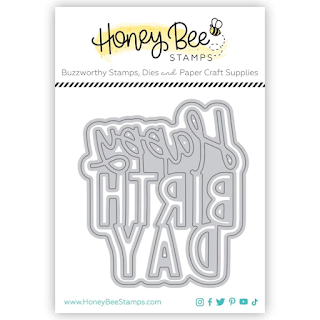
  • For the sentiment, I wanted to use black glitter card stock but could not find it so decided to try something else. I used the Big Birthday - Honey Cuts, I die-cut the top layer using black card stock and then rubbed Bee Creative Watermark Ink, and then used WOW Embossing Glitter BLACK GLINT to heat set it. It is difficult to see the glitter in the photo but there is lots of shine IRL.
  • Add tiny glue dots to the back of the die-cut, I like to use liquid glue to allow for wiggle room, plus if there is some smudging it will dry clear. TIP: If there is lots of glue smugging or accidents, use a baby wipe to wipe off excess glue. While the area is still wet, gently wipe it with a clean microfiber dry cloth. This will take care of any streaks.
  • BONUS TIP: Place a stamp block over the sentiment and allow it to dry, this will ensure the die cut is flat and allow for good adhesion to the the acetate.
Big, Birthday, Celebration Shaker Card, Honey Bee Stamps, flat,Frameless ,Infinity,how to, hand made card, die cutting, card making, ilovedoingallthingscrafty,pattern Paper, crafty Tips,

Wow, not only is this the biggest shaker card I have made, but also the most ever TIPS I have shared in making one on a blog post.

Make sure you join us over on Instagram and hop along for a chance at winning $50 GC to shop the release! Click HERE to join the Hop!

I hope you like this Big Birthday Celebration Shaker Card. And if you have had any issues making these in the past you can try some of my tips to see if they help. Thank you for stopping by and until next time... Happy Crafting!

Ilda 💖🎂

SUPPLIES
Bee Creative A7 Shaker Pockets
Shop at:
HBS
Let's Party Paper Pad
Shop at:
SSS | HBS
Lovely Layers: Party Hat - Honey Cuts
Shop at:
SSS | HBS
Lovely Layers: Party Blower - Honey Cuts
Shop at:
SSS | HBS
Lovely Layers: Sweets - Honey Cuts
Shop at:
SSS | HBS
Big Birthday - Honey Cuts
Shop at:
SSS | HBS
Let's Party Gem Stickers
Shop at:
SSS | HBS
BOKEH LIGHTS Confetti
Shop at:
HBS
Sticky Red Tape 1/4
Sticky Red Tape 1/4"
Shop at:
HBS
Bee Creative Glue
Bee Creative Glue
Shop at:
SSS | SB | HBS
Bee Creative Bitty Buzz Cutter
Shop at:
HBS
Bee Creative Watermark Ink
Shop at:
HBS
WOW Embossing Glitter BLACK GLINT
Shop at:
HBS
Glitter Paper Basics
Shop at:
SB | HA
Glossy Accents
Glossy Accents
Shop at:
SSS | AMZ | SB | HBS
To make supplies easy for you to find, I have linked them above. If something is no longer available I will link to a similar product. Affiliate links may be used depending on the product linked. Please help support my blog by using these links while shopping at no additional cost to you. For more information about the affiliates I use, please visit my disclaimer here. Thanks so much for all your support!

Enjoyed this post? Never miss out on future posts by Following this Blog

Monday, March 4, 2024

DIY Four Leaf Clover Card | Honey Bee Stamps

DIY, Four Leaf Clover, Card, Honey Bee Stamps, Lucky, how to, hand made card, Stamps, stamping, die cutting, card making, ilovedoingallthingscrafty, Lace Heart Layering Frames Dies,pattern Paper,

Happy March, everyone!

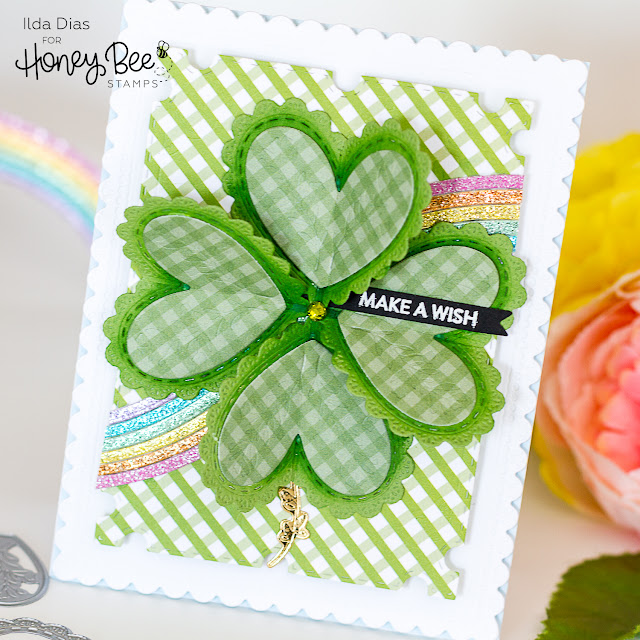
With St. Patrick's Day just around the corner, I felt inspired to create a four-leaf clover card using Honey Bee Stamp supplies. Crafting it from scratch is always a joy for me, as I get to explore new ways to use my supplies creatively and develop unique designs. Although I had a few moments of doubt during the process, I'm pleased with the end result. Let me walk you through the process.

CARD RECIPE

Pattern papers - Giddy for Gingham Paper Pad, Gingham Happy Hearts Paper Pad

Glitter Paper - Recollections Spring Glitter Paper Pad

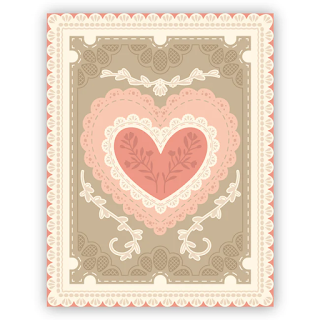
Frames, Heart Dies - Lace Heart Layering Frames Dies

Rainbow Dies - Sweet Stacks Ovals

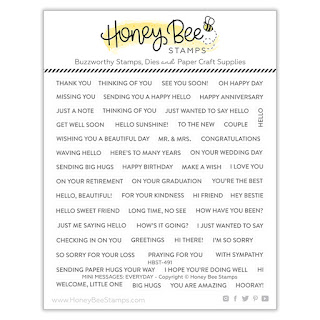
Sentiment - Mini Messages Stamps

Ink - Bee Creative Brilliant White Pigment Ink

Banner - Mini Messages Dies

Gem - Simply Spring Gem Stickers 


Creating the Rainbow:


To form the rainbow, I began by die-cutting the largest oval from the Sweet Stacks Ovals set. Then, I used progressively smaller oval dies to cut the previous die cuts, layering them to create the rainbow effect. After aligning the thin rainbow cuts and securing them together, I sliced them into smaller pieces. These pieces were then arranged onto the pattern paper layer frame, ensuring the ends met in the center behind the clover.


DIY, Four Leaf Clover, Card, Honey Bee Stamps, Lucky, how to, hand made card, Stamps, stamping, die cutting, card making, ilovedoingallthingscrafty, Lace Heart Layering Frames Dies,pattern Paper,

Crafting the Clover:

For the clover, I cut out four medium scalloped hearts from the Lace Heart Layering Frames Dies, scored them down the center, and glued only the left side of each heart. This technique gave the clover dimension while still allowing it to fold flat inside an envelope. I initially hadn't planned on adding the pattern paper heart layer, but in the end, I am glad I did because I had to cover up the mess I had made underneath. I tried adding white gel pen details and I also tried some ink blending to give the plain green petals life, but it looked so terrible. Although I encountered some challenges with the design, adding the pattern paper heart layer helped enhance the overall look.

DIY, Four Leaf Clover, Card, Honey Bee Stamps, Lucky, how to, hand made card, Stamps, stamping, die cutting, card making, ilovedoingallthingscrafty, Lace Heart Layering Frames Dies,pattern Paper,

Finishing Touches:

To complete the card, I stamped out the sentiment using Bee Creative Brilliant White Pigment Ink, then heat set it with white embossing powder. I then used a banner die from the Mini Messages Dies to cut out the sentiment and then glued it in place. 
For one final touch of sparkle, I added a green gem to the center of the clover from the Simply Spring Gem Stickers


DIY, Four Leaf Clover, Card, Honey Bee Stamps, Lucky, how to, hand made card, Stamps, stamping, die cutting, card making, ilovedoingallthingscrafty, Lace Heart Layering Frames Dies,pattern Paper,

Thank you for joining me on this crafting journey, and until next time, happy crafting!

Ilda 🍀


SUPPLIES
Lace Heart Layering Frames Dies
Shop at:
SSS | SB | HBS
Sweet Stacks Ovals
Sweet Stacks Ovals
Shop at:
SSS | SB | HBS
Mini Messages Stamps
Shop at:
SSS | SB | HBS
Mini Messages Dies
Mini Messages Dies
Shop at:
SSS | SB | HBS
Gingham Happy Hearts Paper Pad
Shop at:
SSS | SB | HBS
Giddy for Gingham Paper Pad
Shop at:
SSS | SB | HBS
Simply Spring Gem Stickers
Shop at:
SSS | SB | HBS
Bee Creative Brilliant White Pigment Ink
Shop at:
SSS | SB | HBS
Stamping Pressure Tool
Shop at:
HBS
Bee Creative Bitty Buzz Cutter
Shop at:
HBS
Bee Creative Glue
Bee Creative Glue
Shop at:
SSS | SB | HBS
Honey Bee Reverse Tweezers
Shop at:
HBS
New Mini Misti
New Mini Misti
Shop at:
SSS | SB | HBS
ATELIER GODDESS GREEN
Shop at:
SSS | IO3
Platinum 6 Die Cutting Platform
Shop at:
SSS | SB | SB
Arctic White Emb.Pwd.
Shop at:
SSS | IO3
Heat Gun
Heat Gun
Shop at:
AMZ
To make supplies easy for you to find, I have linked them above. If something is no longer available I will link to a similar product. Affiliate links may be used depending on the product linked. Please help support my blog by using these links while shopping at no additional cost to you. For more information about the affiliates I use, please visit my disclaimer here. Thanks so much for all your support!

Enjoyed this post? Never miss out on future posts by Following this Blog

Monday, December 25, 2023

Happy Holiday Full Panel Shakers | Honey Bee Stamps

Holiday Full Panel Shakers, Honey Bee Stamps, Frameless, Flat, Edge to Edge, pattern Paper, Shaker pockets, DIY, how to,handmade card, Stamps, ilovedoingallthingscrafty, stamping, die cutting, cardmaking

Merry Christmas my Crafty Friends and Happy New Year as this will be my last post of the year!

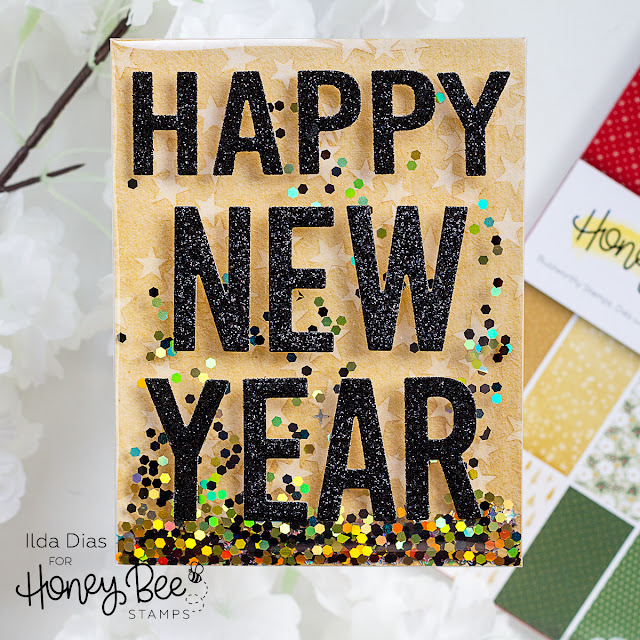
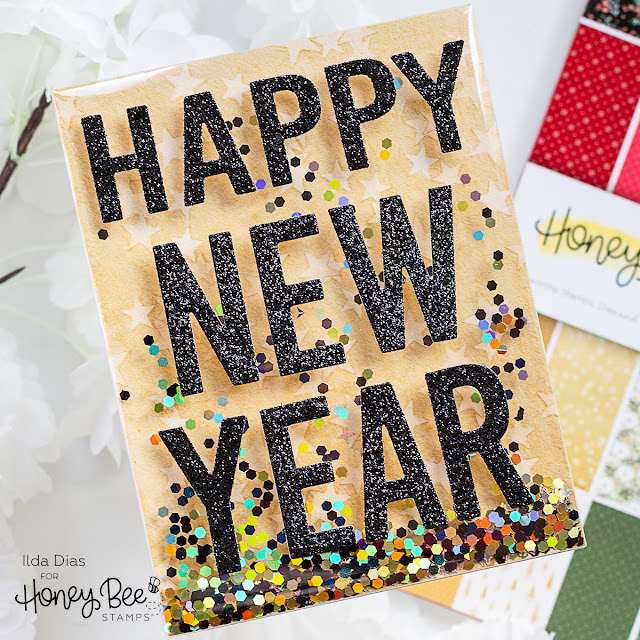
For today's post, I have a few fun shakers to share featuring goodies from Honey Bee Stamps inspired by the latest Holiday Wishes Paper Pad.

CARD RECIPE

Background - Holiday Wishes Paper Pad

HAPPY - Happy Happy Happy A2 Cover Plate 

NEW YEAR - Bee Bold Alphabet Dies

Shaker Pocket Panel - DIY from Acetate or use plastic wrapping 

(watch the video of the original DIY Full Panel Shaker

Shaker Bits - Mixed from supply stash to coordinate


Holiday Full Panel Shakers, Honey Bee Stamps, Frameless, Flat, Edge to Edge, pattern Paper, Shaker pockets, DIY, how to,handmade card, Stamps, ilovedoingallthingscrafty, stamping, die cutting, cardmaking
  • Trim your background panel to A2 size. I used the pattern paper from the Holiday Wishes Paper Pad but you can definitely create your own.
  • Place the panel into the acetate shaker panel with the pattern side facing down and the adhesive tabs facing up (if you don't have a pre-made acetate cover you can DIY your own with acetate or some recycled plastic from old packaging).
  • Secure 3 of the sides to the panel to create the shaker pocket using strong adhesive tape
  • Fill with your shaker pocket with bits and bling and seal the last tab. 
  • Adhere the panel to a card base using a strong adhesive.
  • Add the die cuts to the front of the panel.
Here are a few more examples. Using the MERRY and a sentiment from the Mini Messages: Holiday Stamps die cut using the Mini Messages Dies

Holiday Full Panel Shakers, Honey Bee Stamps, Frameless, Flat, Edge to Edge, pattern Paper, Shaker pockets, DIY, how to,handmade card, Stamps, ilovedoingallthingscrafty, stamping, die cutting, cardmaking

This next Christmas Shaker features the Merry Christmas from the Bitty Buzzwords: Holidays Dies and the greenery from the Lovely Layers: Candy Cane Dies and Decorative Star Layering Frames Dies.

Holiday Full Panel Shakers, Honey Bee Stamps, Frameless, Flat, Edge to Edge, pattern Paper, Shaker pockets, DIY, how to,handmade card, Stamps, ilovedoingallthingscrafty, stamping, die cutting, cardmaking

Making shakers this way is much easier than using foam tape. The hardest part is actually photographing them as they are so reflective, lol!

Wishing you all a very restful and Happy Holiday Season. I will try and do the same 😉 Thank you for stopping by and until next year... Happy Crafting!
Ilda 💖

To make supplies easy for you to find, I have linked them above. If something is no longer available I will link to a similar product. Affiliate links may be used depending on the product linked. Please help support my blog by using these links while shopping at no additional cost to you. For more information about the affiliates I use, please visit my disclaimer here. Thanks so much for all your support!

Enjoyed this post? Never miss out on future posts by Following this Blog

Monday, February 7, 2022

Sealed with a Kiss Card | Make Ahead Wax Seals | Honey Bee Stamps

Sealed with a Kiss Card,Make Ahead, Wax Seals, Honey Bee Stamps,Card Making, Stamping, Die Cutting, handmade card, ilovedoingallthingscrafty, Stamps, how to,pattern Paper, pre made

Happy Monday my friends!

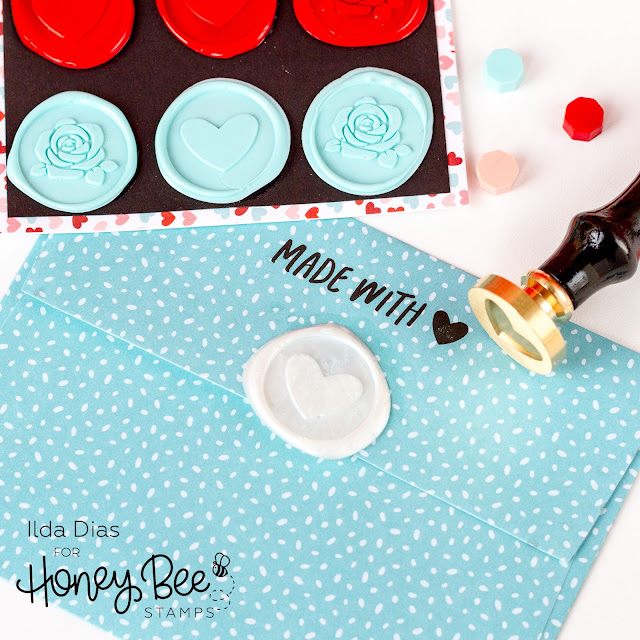
Today I have a bit of a different Valentine's Day card to share with you. Honey Bee Stamps released a wax seal product line with their latest release and I finally had a chance to play with them. 

There are many ways to melt wax melts. Probably the most traditional way is to do it using a wax melting spoon over a flame. I am impatient and found that took too long, lol. So I used my heat gun, which worked well too but still not as fast as I would like. And that is when I got the idea to use my Hot Foil System to melt the wax. Although the melting part wasn't as quick either, this method yielded more seals because you were making multiples, which ended up saving time in the end.

After experimenting with various types of papers and materials on what to melt the wax melts onto, I discovered the best way to do it was to use tin foil strips. I tried sticker paper, wax paper, acetate, silicone and found the best results happened when I used the tin foil as it transferred the heat the best and released the wax well once it was cool. 

To melt wax using the Hot Foil System
  • I turned the machine on and waited until the green light was on. 
  • Next, I cut pieces of tin foil large enough to fit two melted wax seals as I only have two stampers, and place the tin foil onto the base of the Hot Foil System. 
  • I then added two melts to each tin strip. 
  • Once the first melt had almost melted I added a second wax melt to the middle of the melted wax. I found two wax melts were enough for a seal. (If you like them a little thicker you can try using three melts per seal).
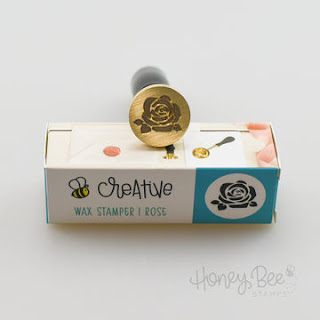
  • Remove one tin foil strip from the Hot foil system at a time as the wax hardens quickly, and stamp the wax using the stamper. I have two stampers, (a rose and a heart stamper) and that is why I only did two seals per tin strip.
  • Once the wax is cool (about 15-20 seconds) remove the stamper to reveal the results.
  • Repeat process with the next seals.
  • Peel seals from foil base, and store them for later use.
TIPS: 
  • If your seal doesn't turn out well, you can always remelt it and restamp it over and over again. 
  • If you see bubbles in the wax, it means the wax is too hot. I didn't see them using the foil system, but did with the heat gun and candle.
  • You can make seals ahead of time for larger projects such as wedding invitations or other events.
  • Use a strong adhesive to secure the pre-made wax seals in place. Like double-sided tear tape or strong liquid glue. If using glue, it will take longer to dry in place but it does give you wiggle room to move them around.
CARD RECIPE


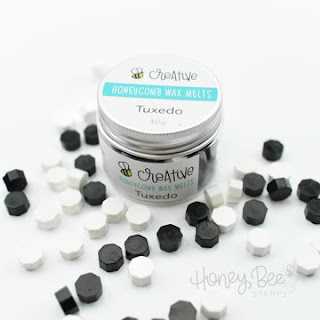
This card uses the Hugs & Kisses Wax Melts as well as the white wax from the Tuxedo Melts. All I did was glue them in place using Bee Creative Glue. The liquid glue gave me the extra time to move them around as I was trying to space them as evenly as possible.

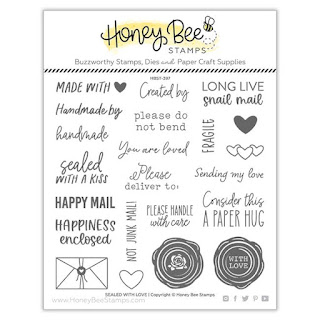
Before adding the wax seals in place, I had stamped the sentiment that was heat embossed in white in the center of a black layer of cardstock using a stamp that comes from the Sealed Love Stamp Set. The black panel was then glued to another layer of pattern paper from the Hugs And Kisses Paper Pad.

Sealed with a Kiss Card,Make Ahead, Wax Seals, Honey Bee Stamps,Card Making, Stamping, Die Cutting, handmade card, ilovedoingallthingscrafty, Stamps, how to,pattern Paper, pre made

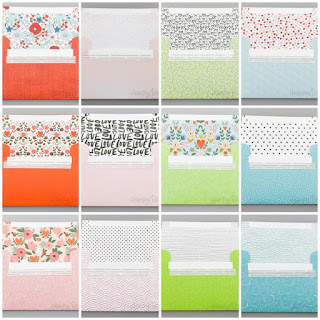
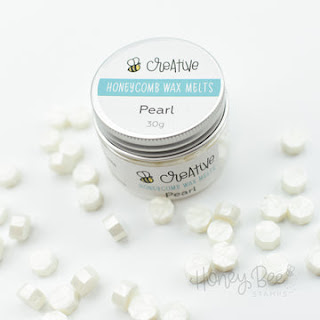
To create the coordinating envelope I added a Pearl Wax Seal to the flap of a Hugs And Kisses A2 Envelope and finished it with another stamp from the Sealed Love Stamp Set

Sealed with a Kiss Card,Make Ahead, Wax Seals, Honey Bee Stamps,Card Making, Stamping, Die Cutting, handmade card, ilovedoingallthingscrafty, Stamps, how to,pattern Paper, pre made


I have made an IG Reel that will be showing you how this card and the melts were made over on Instagram, so be sure to check it out there or click the Reel image below.

Hope this project inspired you to give wax seals a try. I love the extra touch they add to the envelope or use them as I did to embellish an entire card front.

Thank you for stopping by and until next time... Happy Crafting!
Ilda 💗

SUPPLIES
Hugs And Kisses Paper Pad
Shop at:
SSS | SB | HBS
Hugs And Kisses A2 Envelopes
Shop at:
HBS
Sealed With Love
Sealed With Love
Shop at:
SSS | SB | HBS
Wax Stamper | Rose
Wax Stamper | Rose
Shop at:
SSS | SB | HBS
Wax Stamper | Heart
Wax Stamper | Heart
Shop at:
SSS | SB | HBS
Wax Melts | Hugs & Kisses
Shop at:
SSS | SB | HBS
Wax Melts | Pearl
Wax Melts | Pearl
Shop at:
SSS | SB | HBS
Wax Melts | Tuxedo
Wax Melts | Tuxedo
Shop at:
SSS | SB | HBS
Bee Creative Glue
Bee Creative Glue
Shop at:
SSS | SB | HBS
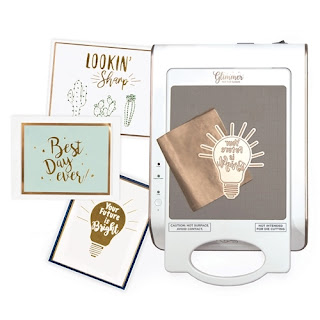
Hot Foil System
Hot Foil System
Shop at:
SSS | SB | SB
New Mini Misti
New Mini Misti
Shop at:
SSS | SB
Pitch Black Cardstock
Shop at:
SSS | HA
Magic Powder Bag
Magic Powder Bag
Shop at:
SSS
Unicorn Pigment Ink
Unicorn Pigment Ink
Shop at:
SSS | SB | HBS | HA
Arctic White Emb.Pwd.
Shop at:
SSS | IO3


To make supplies easy for you to find, I have linked them above. If something is no longer available I will link to a similar product. Affiliate links may be used depending on the product linked. 
Please help support my blog by using these links while shopping at no additional cost to you. For more information about the affiliates I use, please visit my disclaimer here. Thanks so much for all your support!

Monday, November 15, 2021

Clear Bag Shaker Cards Done 3 Ways | Honey Bee Stamps


Clear Bag Shaker Cards,  Honey Bee Stamps, Specialty Holiday Card Pack, pattern Paper, Flat, Frameless,See Through panel, acetate, Christmas Cards,mass produce,Card Making, Stamping, Die Cutting, handmade card, ilovedoingallthingscrafty, Stamps, how to,

Hello, my friends, and happy Monday. Hope you had a wonderful weekend.

Today I have some super simple shaker designs to share with you. Perfect for mass-producing without too much effort! If you have recently have made a purchase from Honey Bee Stamps for more than $75 you would have received a Specialty Holiday Card Pack. These cardstock panels are double side with gorgeous designs and were the perfect starting point for my card designs today. If you didn't get these, no worries... I am certain you can replicate these with pattern paper. Check out all their pattern papers 👉 HERE I have 3 different versions to share, so let's get started.


Here is a close-up of the first version of the Clear Bag Shaker Card and the easiest to make. Make sure you are following me on Instagram as I will post a Reel of how these came together soon.

Clear Bag Shaker Cards,  Honey Bee Stamps, Specialty Holiday Card Pack, pattern Paper, Flat, Frameless,See Through panel, acetate, Christmas Cards,mass produce,Card Making, Stamping, Die Cutting, handmade card, ilovedoingallthingscrafty, Stamps, how to,

Not only are these shakers pretty from the outside, just look how cute they are on the inside.

Clear Bag Shaker Cards,  Honey Bee Stamps, Specialty Holiday Card Pack, pattern Paper, Flat, Frameless,See Through panel, acetate, Christmas Cards,mass produce,Card Making, Stamping, Die Cutting, handmade card, ilovedoingallthingscrafty, Stamps, how to,

Version One | Clear Bag Shaker Cards
  • Cut a Slimline Cello Bag to 4 5/16 x 6 1/2" for a vertical A2 size card. If using a horizontal panel you will need an A7+ Cello Bag.
  • Slide one of the Specialty Holiday Card Pack panels inside the clear bag.
  • Fill the clear bag with sequins, try to compliment the colors of the panel.
  • Grab your card base. The entire card base will form the back panel of the card. The top of the clear bag will be sandwiched between the card base. Flip the card base upside down so that the fold is on the bottom and the opening is on the top. 
  • Place the filled cello bag in front of the upside-down card base.
  • Fold the overhang of the Cello Bag (1 Inch) over the top of the upside-down card base and crease the Clear Bag fold with your fingernails. This will create the flap that you will be sandwiched between the card base.
  • Cut the corners off the top of each side of the clear bag. Make sure to cut above the line that you just creased.
  • Add two strips of double-sided tape to the card base. One just under the edge of the card base and one ½’ below that one. Remove the protective piece from the double-sided tape. 
  • Center and align the Clear Bag in front of the upside-down card front and press the cello flap down onto the double-sided tape.
  • Just above the creased area of the cello bag add another strip of double-sided tape to seal it up and keep sequins from falling out of the bag. For extra insurance, you can add a piece of tape over the edge of the flap.
  • Add glue or double-sided tape along the edges of the front panel to glue the card base together.
Here is what the cards from the first picture above look like when opened up. Just love the patterns on the inside!

Clear Bag Shaker Cards,  Honey Bee Stamps, Specialty Holiday Card Pack, pattern Paper, Flat, Frameless,See Through panel, acetate, Christmas Cards,mass produce,Card Making, Stamping, Die Cutting, handmade card, ilovedoingallthingscrafty, Stamps, how to,


Version 2 | Partial See-Through Shaker Cards

My next set of cards were done the exact same way as the first set only this time I created Partial See-Through Shaker Cards.

For this first card, since it is horizontal I used an A7+ Cello Bag to give me the width I needed for the horizontal layout. I also had to trim a sliver of paper from each side to have the panel fit inside the bag. The card base itself is A2 sized.

To create the Partial See-Through Shaker Cards, all you do is cut the panel and glue part of it to a piece of acetate that is then inserted into the clear bag shaker sleeve. The other part of the patterned panel is then glued to the inside of the card base. Follow the rest of the instructions for version one for how to assemble the card.

Clear Bag Shaker Cards,  Honey Bee Stamps, Specialty Holiday Card Pack, pattern Paper, Flat, Frameless,See Through panel, acetate, Christmas Cards,mass produce,Card Making, Stamping, Die Cutting, handmade card, ilovedoingallthingscrafty, Stamps, how to,

For the rest of the card examples I used the I used a Slimline Cello Bag for the vertical design. This next card I also used a hexagon die to split the panel.

Clear Bag Shaker Cards,  Honey Bee Stamps, Specialty Holiday Card Pack, pattern Paper, Flat, Frameless,See Through panel, acetate, Christmas Cards,mass produce,Card Making, Stamping, Die Cutting, handmade card, ilovedoingallthingscrafty, Stamps, how to,

Use a square die or a blade to cut out the Happy holidays in the next card.

Clear Bag Shaker Cards,  Honey Bee Stamps, Specialty Holiday Card Pack, pattern Paper, Flat, Frameless,See Through panel, acetate, Christmas Cards,mass produce,Card Making, Stamping, Die Cutting, handmade card, ilovedoingallthingscrafty, Stamps, how to,

Creating Holiday Cards with these panels was so easy as most of them have a greeting in the front and a fun coordinating design on the other side.

Clear Bag Shaker Cards,  Honey Bee Stamps, Specialty Holiday Card Pack, pattern Paper, Flat, Frameless,See Through panel, acetate, Christmas Cards,mass produce,Card Making, Stamping, Die Cutting, handmade card, ilovedoingallthingscrafty, Stamps, how to,

Below is what the cards looked like and as you can see, they still have plenty of space to write a message.

Clear Bag Shaker Cards,  Honey Bee Stamps, Specialty Holiday Card Pack, pattern Paper, Flat, Frameless,See Through panel, acetate, Christmas Cards,mass produce,Card Making, Stamping, Die Cutting, handmade card, ilovedoingallthingscrafty, Stamps, how to,

Clear Bag Shaker Cards,  Honey Bee Stamps, Specialty Holiday Card Pack, pattern Paper, Flat, Frameless,See Through panel, acetate, Christmas Cards,mass produce,Card Making, Stamping, Die Cutting, handmade card, ilovedoingallthingscrafty, Stamps, how to,

Clear Bag Shaker Cards,  Honey Bee Stamps, Specialty Holiday Card Pack, pattern Paper, Flat, Frameless,See Through panel, acetate, Christmas Cards,mass produce,Card Making, Stamping, Die Cutting, handmade card, ilovedoingallthingscrafty, Stamps, how to,

Clear Bag Shaker Cards,  Honey Bee Stamps, Specialty Holiday Card Pack, pattern Paper, Flat, Frameless,See Through panel, acetate, Christmas Cards,mass produce,Card Making, Stamping, Die Cutting, handmade card, ilovedoingallthingscrafty, Stamps, how to,

Version Three | Tri-fold See-Through Shaker Cards

The final two cards I am sharing today, are examples of Tri-fold See-Through Shaker Cards. If you have seen my previous See Through Flat Shakers they require a large sentiment panel on the front to hide the message written inside. This tri-fold design solves that and leaves you with plenty of room to write a message on the inside. 

Clear Bag Shaker Cards,  Honey Bee Stamps, Specialty Holiday Card Pack, pattern Paper, Flat, Frameless,See Through panel, acetate, Christmas Cards,mass produce,Card Making, Stamping, Die Cutting, handmade card, ilovedoingallthingscrafty, Stamps, how to,

The front panel on this card is completely clear using only acetate and the sequins and can be displayed as shown below or completely opened up as you will see in the next card example.

Clear Bag Shaker Cards,  Honey Bee Stamps, Specialty Holiday Card Pack, pattern Paper, Flat, Frameless,See Through panel, acetate, Christmas Cards,mass produce,Card Making, Stamping, Die Cutting, handmade card, ilovedoingallthingscrafty, Stamps, how to,

Once the card is completely open, it reveals space for a long written message for the recipient. You could also add a stopper for the front panel to rest on or add a gift cardholder to the bottom panel for an added element of surprise. You could also add die-cut images to the front clear panel to dress up the front. I kept these as simple as possible for mass production.

Clear Bag Shaker Cards,  Honey Bee Stamps, Specialty Holiday Card Pack, pattern Paper, Flat, Frameless,See Through panel, acetate, Christmas Cards,mass produce,Card Making, Stamping, Die Cutting, handmade card, ilovedoingallthingscrafty, Stamps, how to,

Here is another example of a Tri-fold Shaker Card. This time it isn't See-Through though. 

Clear Bag Shaker Cards,  Honey Bee Stamps, Specialty Holiday Card Pack, pattern Paper, Flat, Frameless,See Through panel, acetate, Christmas Cards,mass produce,Card Making, Stamping, Die Cutting, handmade card, ilovedoingallthingscrafty, Stamps, how to,

For Tri-fold Shakers follow the same first few steps as the first card examples.
  • Cut a small sliver from the bottom of the front of the card base panel. This will make it easier for the card to close once it is all assembled.
  • Flip the card base upside down so that the fold is on the bottom and the opening is on the top. Like a “V”. Face the panel that is shorter towards you (see the previous step).
  • Place the filled clear bag in front of the upside-down card base and align the sides and the bottoms together. 
  • Fold the overhang of the bag (1 Inch) over the top of the upside-down card base and crease the Cello Bag fold with your fingernails. This will create the flap that you will glue to the back of the card base.
  • Cut the corners of the bag above the crease mark.
  • To the back of the upside-down card, base add 2 strips of double-sided tape. One just under the edge of the card base and one ½’ below that one. Remove the protective piece from the double-sided tape.
  • Center and align the bag in front of the upside-down card base and press the cello flap down onto the double-sided tape.
  • Lay the card flat so that you can still access the opening of the shaker pocket. 
  • Slide a piece along the entire width of the card using double-sided tape. Place the tape strip just above the creased edge of the cello bag flap. 
  • Remove the protective layer and press the bag shut. This will seal the shaker pocket and keep glitter and shaker bits from flowing into the top opening. 
  • Add an extra piece of clear tape along the edge of the cello flap for extra insurance.
  • To finish the back of the card base, glue an A2 panel cut to the same size as the card base. This covers up the bag's flap and becomes the backside of the middle panel of the tri-fold.
Clear Bag Shaker Cards,  Honey Bee Stamps, Specialty Holiday Card Pack, pattern Paper, Flat, Frameless,See Through panel, acetate, Christmas Cards,mass produce,Card Making, Stamping, Die Cutting, handmade card, ilovedoingallthingscrafty, Stamps, how to,

These eleven cards were completed in less than a few hours, but I was filming some of the process which took longer. I'm sure I could have done way more in that time otherwise. This was an easy and simple way to mass-produce some really fun and unique Christmas Cards. The cool thing is that they are pretty flat as you can see from the image below and shouldn't require extra postage. Just remember less is more when adding sequins and shaker bits! By the way, all of my shaker bit mixes were custom mixed to coordinate with each card and come from the Honey Bee Shop


Clear Bag Shaker Cards,  Honey Bee Stamps, Specialty Holiday Card Pack, pattern Paper, Flat, Frameless,See Through panel, acetate, Christmas Cards,mass produce,Card Making, Stamping, Die Cutting, handmade card, ilovedoingallthingscrafty, Stamps, how to,


I hope you have been inspired to make some Clear Bag Shakers. If you have any questions feel free to message me or leave me a comment below. I will do my best to help you out. I can't promise that you won't get addicted to making these just like my other flat frameless shaker card designs that everyone is doing now!

Thanks so much for stopping by and until next time, happy crafting.
Ilda 😊

SUPPLIES
Free Item with $75 Purchase
Shop at:
HBS
Slimline Cello Bags
Slimline Cello Bags
Shop at:
HBS
A7+ Cello Bags
A7+ Cello Bags
Shop at:
HBS
Bee Creative Glue
Bee Creative Glue
Shop at:
SSS | SB | HBS
Gemini Jr. Die-Cutter
Shop at:
SSS | SB
Acetate Sheets
Acetate Sheets
Shop at:
HBS
Honey Bee Embellishements
Honey Bee Embellishments
Shop at:
HBS
Neenah  80 LB SOLAR WHITE
Neenah 80 LB SOLAR WHITE
Shop at:
SSS | AMZ
Tim Holtz 8.5 Inch Trimmer
Shop at:
SSS | SB | HA
Scor-Pal Mini Scor-Buddy
Shop at:
SSS | HBS
Scor-Pal Tape
Scor-Pal Tape
Shop at:
SSS | AMZ | HBS
TRIANGLE TRAY - BLACK
Shop at:
SSS | SK
To make supplies easy for you to find, I have linked them above. If something is no longer available I will link to a similar product. Affiliate links may be used depending on the product linked. Please help support my blog by using these links while shopping at no additional cost to you. For more information about the affiliates I use, please visit my disclaimer here. Thanks so much for all your support!