Wednesday, May 23, 2012

DIY Hair Accessory Station for Organization | Recycling Tin Cans

If you have a little girl, you must have tons of hair accessories. My 5-year-old daughter Maia has so many,  it was getting harder and harder to find anything! I finally gave up and just started pilling everything in a basket. 😒

DIY Hair Accessory Station for Organization | Recycling Tin Cans by ilovedoingallthingscrafty.com

Messy right?!

I had seen so many different ways on Pinterest to organize hairbands so I thought I should do the same. Jessica from Mom 4 Real was where I first saw the idea. Thanks for the inspiration, Jessica! So here are a few pics of the steps I took.

DIY Hair Accessory Station for Organization | Recycling Tin Cans by ilovedoingallthingscrafty.com

For this project, I used modgepodge, empty tin cans, pretty card stock, foam brush, hot glue gun, and ribbon.

DIY Hair Accessory Station for Organization | Recycling Tin Cans by ilovedoingallthingscrafty.com

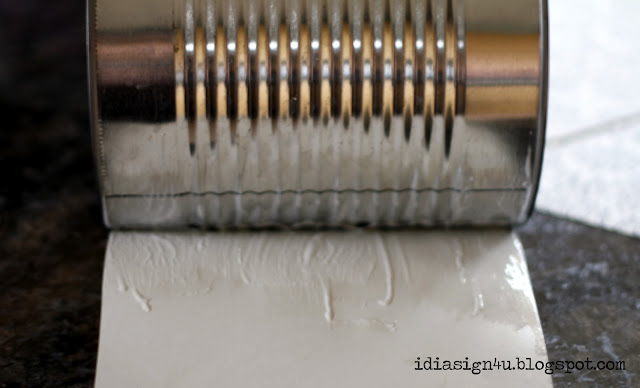
First I cut the length of the paper to the right size, then applied the glue to the back and then the front of the paper.

DIY Hair Accessory Station for Organization | Recycling Tin Cans by ilovedoingallthingscrafty.com

I then let the modgepodge completely dry overnight.

DIY Hair Accessory Station for Organization | Recycling Tin Cans by ilovedoingallthingscrafty.com

To pretty the cans up a little more, I trimmed the edges with ribbon and added a bow to the front to cover up the seem.

DIY Hair Accessory Station for Organization | Recycling Tin Cans by ilovedoingallthingscrafty.com

To finish it off, I added paper to the inside of the can and just used hot glue to secure the top edge in place.

DIY Hair Accessory Station for Organization | Recycling Tin Cans by ilovedoingallthingscrafty.com

One of the small cans is for the hair elastics, another is for combs and brushes, and the big can is for the hair bands. The top of the cans is perfect clipping the hair clips too.

DIY Hair Accessory Station for Organization | Recycling Tin Cans by ilovedoingallthingscrafty.com

And here is what it looks like with all the hair accessories organized. No more mess... well at least not yet!

Hope you enjoyed this! Thanks for stopping by :)


Tuesday, May 15, 2012

DIY Personalized Word Art | Binca's Birth Announcement Painting


Hi everyone! I hope you are all having a great week. 

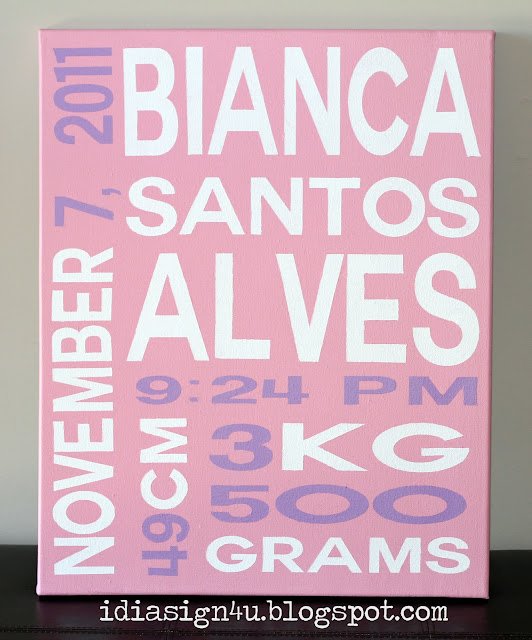
For today's post, I wanted to share with you a birth announcement I was asked to make for a friend. I love how it turned out. It's going to look amazing in little Bianca's nursery! 

Here are the supplies I used...

DIY Personalized Word Art | Binca's Birth Announcement Painting by ilovedoingallthingscrafty.com

a 16x20 canvas, acrylic paint, spray water bottle, foam rollers/brush, and sealer. 
For how I did the painting click here for the tutorial. The only difference was that I used a roller brush this time. 

DIY Personalized Word Art | Binca's Birth Announcement Painting by ilovedoingallthingscrafty.com

If you make your own painting, have any more tips... send me your link, I would love to see it.

Thanks for stopping by!

Have a great week :)


Sunday, May 13, 2012

3D Paper Watering Can Treat Boxes | SVGCuts

Happy Mothers Day!!! 

This post was written earlier during the week...  as I, sadly have to work today... boohoo, me :( Oh well, shouldn't complain too much, I did have the week off last week!

So today I wanted to share with you all the watering cans that I made for my "moms". (Mother and Mother in law)

3D Paper Watering Can Treat Boxes | SVGCuts by ilovedoingallthingscrafty.com

Aren't they pretty!? So "Springy!" I love how they turned out. These files come from SVG cuts MOTHERS GARDEN SVG KIT and cut with my Silhouette Cameo. The paper I used comes from the We R Memory Keepers, the Madame Royale Collection. 

3D Paper Watering Can Treat Boxes | SVGCuts by ilovedoingallthingscrafty.com

3D Paper Watering Can Treat Boxes | SVGCuts by ilovedoingallthingscrafty.com

Here is a closer look... The Cameo cut these intricate butterflies so well!

3D Paper Watering Can Treat Boxes | SVGCuts by ilovedoingallthingscrafty.com

I hope all the Mothers out there are having a wonderful day today! 


Thanks for visiting,

DIY Extra Large Rosary Made from Silk Daisies | Decoration Piece

Today our Church Our Lady of Fátima celebrates the day that the Blessed Virgin Mary appeared in Fátima, Portugal. Being Portuguese this is a huge day for our Catholic Portuguese families. It also happens to fall on Mother's day this year, making it extra special!

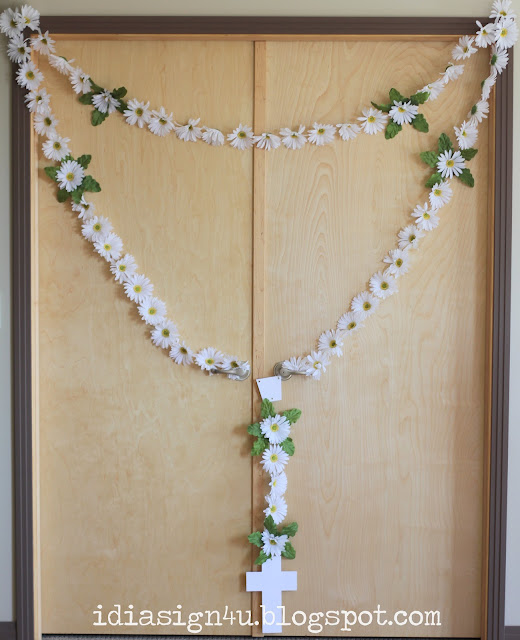
I guess word has spread that I'm quite crafty,  so some of the ladies from our parish asked if I could help them with some decor for the day. Here is the Rosary I made out of daisies. Not quite sure how it will be displayed yet, but will soon find out (I will, unfortunately, miss this as I am working, but I'll get to hear all about it when I get home) Hopefully, I will see some pictures!

DIY Extra Large Rosary Made from Silk Daisies | Decoration Piece by ilovedoingallthingscrafty.com

It turned out to be a little bigger than I wanted, but I think it turned out beautifully!  I hot glued flowers that I pulled of their stems, to fishing line. For the cross and connector, I simply cut 6 layers with my Silhouette Cameo and glued them all together to give it the chipboard feel. 

DIY Extra Large Rosary Made from Silk Daisies | Decoration Piece by ilovedoingallthingscrafty.com

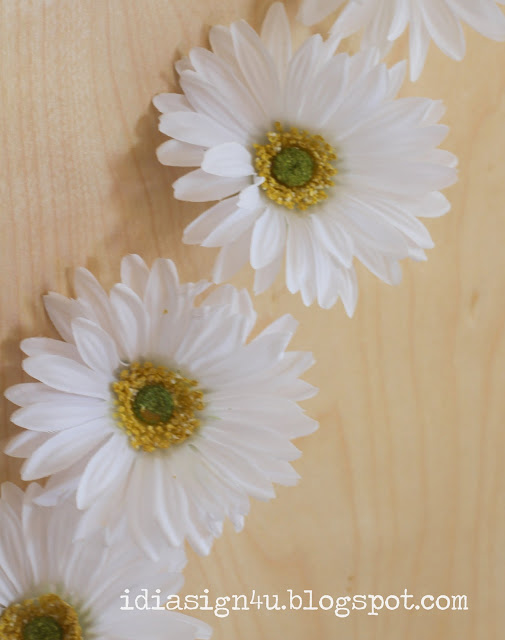
The daisies look so real!

DIY Extra Large Rosary Made from Silk Daisies | Decoration Piece by ilovedoingallthingscrafty.com

God bless all moms on this very special day!

Thanks for visiting :)

Friday, May 11, 2012

3D Paper Truck Treat Box | SVGCuts

Happy Weekend!

Yeah, it's Friday!!! I'm not sure why I sound so excited? I have to work this weekend... 2, 12 hour shifts at the hospital... whaaaaahhh! :(  Maybe its because I got so much accomplished this week! I can't wait to share it all!

This week, my Father in law Leo celebrated his birthday! So I thought I should make him a little gift box for the kids to give him. He owns an old red truck that my kids love to ride around in, so I thought this would be perfect!


Isn't adorable!? Such a fun file! This file comes from SVGCuts  RYAN'S PLAYDATE SVG KIT, and was cut with my Silhouette Cameo. Perfect for a little guy too!

Thanks for visiting!


Tuesday, May 8, 2012

SVG Paper Drum Treat Box Birthday Gift | SVGCuts

Happy Tuesday everyone!

We've been so crazy busy lately! Birthdays, events, work, school, soccer, and the weather is finally nice I need to get some yard work done. There just doesn't seem to be enough time... oh well, one thing at a time!

I wanted to share this with you all last week when I finished this but never had the chance to post it until today. So here is a drum I made for a very fun 5 years old. He, like his Daddy, love the drums, so I thought this would be perfect for him. Happy Birthday, Antonio, hope you had a fun-filled day!

SVG Paper Drum Treat Box Birthday Gift | SVGCuts by ilovedoingallthingscrafty.com

The drum file comes from SVG cuts SANTA'S VISIT SVG KIT. I used black card stock for the drum base and embellished it with tin foil tape to give it a chrome look. 


I laid out the tape on the silhouette mat and cut the foil with my Cameo.

For some texture, I ran the accent drum pieces through the Cuttlebug


Here is a closer look. 

SVG Paper Drum Treat Box Birthday Gift | SVGCuts by ilovedoingallthingscrafty.com

I hope you loved this little drum. It will make the perfect little gift for the drummer boy in your life!

Happy crafting!

Friday, May 4, 2012

3D Paper Cupcake Treat Boxes | SVGCuts

Hello everyone!!!

Happy Friday! I'm just getting over the flu bug :( .... but feeling much better today :)

There are so many birthdays for us this month... May seems like it's extra busy! So I thought instead of making cards for some of our friends I would just give them a 3D cupcake! These files come from SVGCuts  HAPPY BIRTHDAY TO YOU SVG KIT and the flower from AMELIE'S ACCESSORIES SVG KIT, cut on the Silhouette Cameo.

Here is the cupcake I made for my friend Suzie. LOVE how it turned out! Black and white, classy, clean look, can't really go wrong with the color combination!

3D Paper Cupcake Treat Boxes | SVGCuts by ilovedoingallthingscrafty.com

This is the cupcake I made for our little friend Sofia, who turned 2 this week! So colorful and happy. Also, LOVE how it turned out :) I will definitely be making more of these beauties! 

3D Paper Cupcake Treat Boxes | SVGCuts by ilovedoingallthingscrafty.com

I hope you like these little treats! Thanks for visiting.

Have a great weekend,


Wednesday, May 2, 2012

DIY Personalized Word Art Paintings


It's my very good friend's birthday today, which also happens to be my oldest friend as well. We have been friends since 1983... Whoa, that's almost 30 years! Happy Birthday Suzie!!!

So for Suzie's birthday, I thought I would surprise her with one of my paintings. For a while, I used to sell them on my Etsy store, but now I just make them for friends and family. Suzie had mentioned she would like me to paint some word art for her a while ago. I normally would ask her for a whole bunch of words that she would like that described her and her family. I'll make her subway art painting for next time when I know what words she would like. But, since I wanted it to be a surprise I thought instead of making the typical subway art type painting, I would make it look like a word search. The circled words would be her family names. I love how it turned out. I hope she will too!

DIY Personalized Word Art Paintings by ilovedoingallthingscrafty.com

Here is how I make my word art paintings. I've seen many different ways of doing this on Pinterest, so I thought I would share how I make mine.

The first thing you want to do is decide on your words. I use my Silhouette to out my word, fonts, layout. I then cut out my letters. Instead of using vinyl which is expensive and you are just going to discard it, I use contact paper. I then remove the letters from the contact paper leaving behind the negative of the letters.


Next, prepare the canvas. For this project, I chose a 16X20 frame. I like to wet down the canvas first just with water and roll it on with a foam roller.


Now it's time to give your canvas some color. I used acrylic paints. Give the canvas at least 2 coats of color.


Once the canvas is dry remove the backing on the contact paper and as straight as possible lay it on your canvas. Try to smooth it out as much as possible.


Time to start painting in your words. For this painting, I used a foam brush and dabbed the paint on a little at a time. In the past, I have just a foam roller to roll it on. (If the contact paper isn't very tacky, it's probably better not to use a roller, or the paint might bleed under your stencil)


This is what it looked like prior to the big reveal.


For this painting, I just freehanded the circled words.


Once all the paint has dried I give the painting a protective clear coating with a paint sealer. 

Here are a few more of the paintings I have made in the past for myself, friends and family. Enjoy!

DIY Personalized Word Art Paintings by ilovedoingallthingscrafty.com


DIY Personalized Word Art Paintings by ilovedoingallthingscrafty.com


DIY Personalized Word Art Paintings by ilovedoingallthingscrafty.com


DIY Personalized Word Art Paintings by ilovedoingallthingscrafty.com


DIY Personalized Word Art Paintings by ilovedoingallthingscrafty.com


Hope you've enjoyed my word art paintings! Maybe I've inspired you to make your own!

Thanks for visiting,

Friday, April 27, 2012

DIY Birthday Card | Book For Birthday Keepsakes

TGIF! It's been one of those weeks! Starting off with losing pictures on my blog... can you tell I'm still a little bitter about that. Apparently, that has happened to a lot of other bloggers out there. Oh well, time to move on! Hopefully, next week will be a better week :)

So this weekend my kids have 3 birthday parties to attend! Yup, busy birthday weekend... so I thought I would share with you a little gift I made for each of the kids. I got the idea from one of my favorite bloggers Thienly Azim from her blog modpaperie, if you have not visited her yet...YOU MUST! She will inspire your socks off  :) She made a birthday book, I loved that idea. A place where you can keep all your memories of the day.

I didn't feel like going out and buying birthday themed paper so I thought I would just make my own pages using the print and cut features of the Silhouette, and use papers I already owned. For my books, I thought I would make a little box on the back to place some cards or even some of the birthday pictures. So here is my take on the birthday book, well 3 of them...

I used graphics from Lettering Delights Scribble Kids Alphabet, Banner Day Alphabet, and the Sweet Birthday SVG  kits. This is what the front covers look like.

DIY Birthday Card | Book For Birthday Keepsakes by ilovedoingallthingscrafty.com

DIY Birthday Card | Book For Birthday Keepsakes by ilovedoingallthingscrafty.com

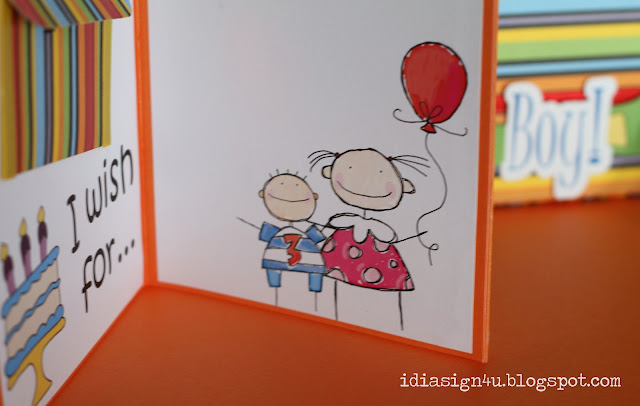
Here is what the book looks like when the book is opened up,


even a spot for the birthday girls picture.

DIY Birthday Card | Book For Birthday Keepsakes by ilovedoingallthingscrafty.com

DIY Birthday Card | Book For Birthday Keepsakes by ilovedoingallthingscrafty.com

Here is a boy's version.

DIY Birthday Card | Book For Birthday Keepsakes by ilovedoingallthingscrafty.com

DIY Birthday Card | Book For Birthday Keepsakes by ilovedoingallthingscrafty.com

DIY Birthday Card | Book For Birthday Keepsakes by ilovedoingallthingscrafty.com

A place for pictures, cards, whatever they like!

DIY Birthday Card | Book For Birthday Keepsakes by ilovedoingallthingscrafty.com

Here is a pic of a tag that I put on the back of all my crafts!

DIY Birthday Card | Book For Birthday Keepsakes by ilovedoingallthingscrafty.com

DIY Birthday Card | Book For Birthday Keepsakes by ilovedoingallthingscrafty.com

DIY Birthday Card | Book For Birthday Keepsakes by ilovedoingallthingscrafty.com

The box was just made on a score board, didn't use a cutter.


The box measured 4.5" X 6.5" X 0.5" 


Folded down the top edge and glued it. Then glued down all the rest of the edges to form a box.


Here is what it looked like all put together.


For the fan part of the book, I used the same measurements and then just glued the two sheets together. Once I had finished embellishing the pages I just adhered the last page to the box. Added some ribbon to tie it up and keep it all together. I hope the kiddos like them! I know my son already has put a request in for one!!!  Well better get busy!

Thanks for visiting!


Shared with:


Craft Junkie Too Friend