Showing posts with label flat shaker. Show all posts

Wednesday, October 12, 2022

Rainbow Shaker Birthday Cards | Studio Katia

Rainbow, Shaker, Birthday Cards,Studio Katia,Infinity,Frameless Shaker,Edge to Edge Shaker,flat shaker,Card Making, Stamping, Die Cutting, handmade card, ilovedoingallthingscrafty, Stamps, how to, Shaker Pockets

Hello Friends!

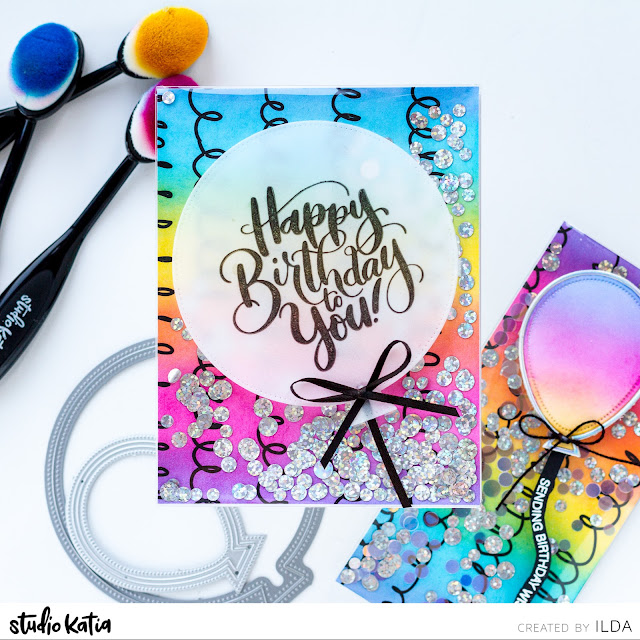
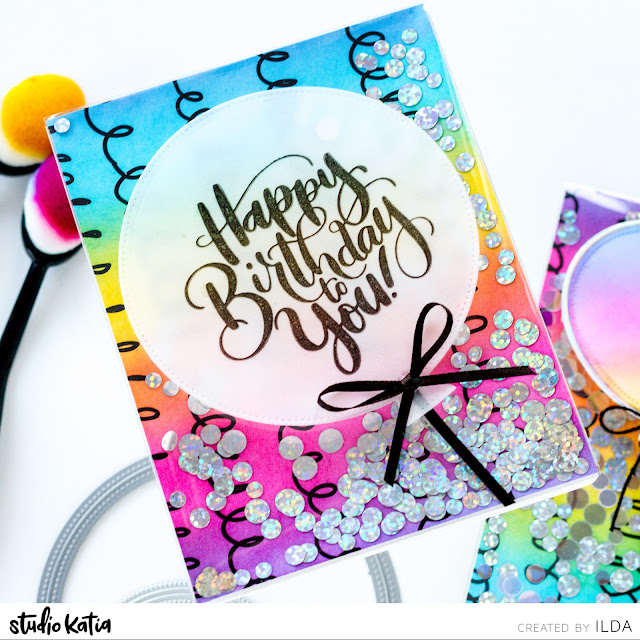
I am back again today to share these two fun Rainbow Shaker Birthday Cards featuring the NEW Shaker Pockets! If you are following me or Studio Katia on Instagram, you may have seen these already in a Reel that was shared this past weekend. But for those that missed it here are all the details!

Fun fact: Did you know that these pockets were developed as a direct result of my DIY Frameless Shaker Cards, no kidding! In fact, Katia was the first person I approached to turn the DIY version into a product to make life easier for anyone who hated messing with foam tape to create shaker cards. 

Since then various other companies jumped onto this idea and have created them too (I must admit I couldn't contain my excitement about these and did share this idea with others at Creativation). Even still, I am so happy to see Studio Katia finally releasing these as they truly are a game changer when it comes to making shakers.

CARD RECIPE

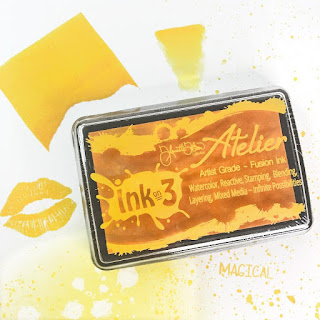
  • Begin by creating the background. For both these cards, I used a piece of pattern paper from the Black on White Paper Set. I then Ink Blended the rainbow starting with yellow ink in the center and then ink blending with pink and blue to create the rainbow blends.
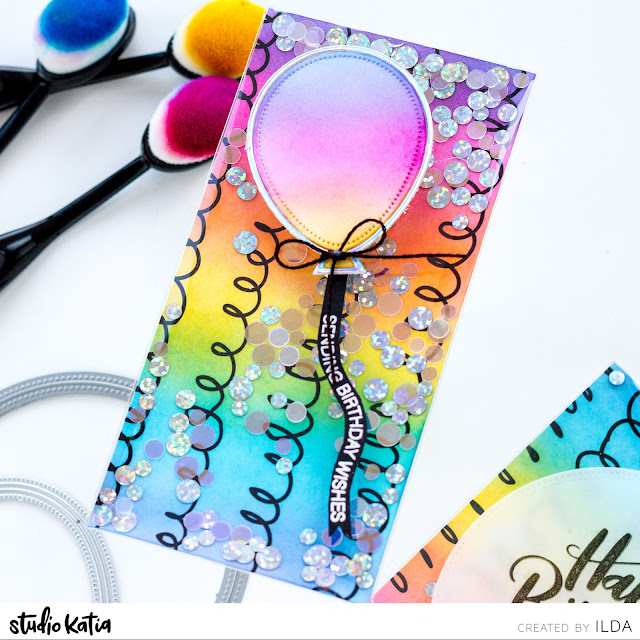
  • Trim the piece of paper to create a background for a mini slimline shaker and an A2 shaker.
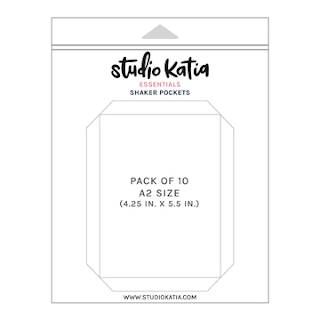
  • Remove the protective layer from the Shaker Pocket.
  • I added strong adhesive tape to the back of the card panel, but you could also apply it to the side tabs of the pockets.
  • Next, I wrapped the tabs around the panel and secured three sides to the card panel, to create a pocket. 
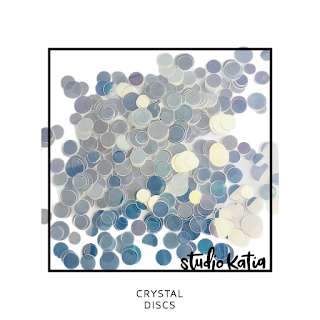
  • I filled this first shaker card with Silver Foil Discs, then sealed the last pocket tab.
  • I then attached the panel to an A2 Card Base.
For the front of the card:
  • Stamp out the Birthday Sentiment from the It's Your Birthday stamp set. Use ink that sets quickly or you can heat emboss it too.  
  • Die cut the sentiment done on vellum, using one of the Dotted Balloons Dies.
  • Apply small dots of glue to the balloon behind the stamped image to hide the glue dots.
  • Finish by adding a bow.


Rainbow, Shaker, Birthday Cards,Studio Katia,Infinity,Frameless Shaker,Edge to Edge Shaker,flat shaker,Card Making, Stamping, Die Cutting, handmade card, ilovedoingallthingscrafty, Stamps, how to, Shaker Pockets

This next card was done the exact same way with a few differences that I will point out next.

Rainbow, Shaker, Birthday Cards,Studio Katia,Infinity,Frameless Shaker,Edge to Edge Shaker,flat shaker,Card Making, Stamping, Die Cutting, handmade card, ilovedoingallthingscrafty, Stamps, how to, Shaker Pockets

If you have never made a shaker because they look complicated, or you hate messing with foam tape, like I did, I promise you this is the easiest way to make them and the results speak for themselves. Just look, aren't they magical! Give these a try, I think you will love them! 

Thank you for stopping by and until next time... Happy Crafting!
Ilda 🌈🧂

SUPPLIES
A2 Shaker Pockets
A2 Shaker Pockets
Shop at:
SSS | SK
Mini Slimline Shaker Pockets
Shop at:
SSS | SK
Silver Fever Foil Discs
Shop at:
SSS | SK
Crystal Discs
Crystal Discs
Shop at:
SSS | SK
Black on White 6x8.5
Black on White 6x8.5" Paper Set
Shop at:
SSS | SK
Dotted Balloons Dies
Shop at:
SSS | SK
Shaker Balloon Die
Shaker Balloon Die
Shop at:
SSS | SK
It's Your Birthday
It's Your Birthday
Shop at:
SSS | SK
Mini Sending Greetings
Shop at:
SK
Ink Blender Brushes
Ink Blender Brushes
Shop at:
SSS | SK
Black Triangle Tray
Black Triangle Tray
Shop at:
SSS | SK
SK Glue
SK Glue
Shop at:
SSS | SK
New Mini Misti
New Mini Misti
Shop at:
SSS | SB | HBS
Vellum Value Pack
Vellum Value Pack
Shop at:
SSS | AMZ
Arctic White Emb.Pwd.
Shop at:
SSS | IO3
Black and Decker  Heat Gun
Black and Decker Heat Gun
Shop at:
AMZ
Platinum 6 Die Cutting Platform
Shop at:
SSS | SB | SB
Atelier Ink Bee Sting Yellow
Shop at:
SSS | IO3
Atelier Ink Sweet Petunia
Shop at:
SSS | IO3
Atelier Ink Peacock Blue
Shop at:
SSS | IO3
Blackout Ink
Blackout Ink
Shop at:
SSS | HBS | IO3
Shark Tooth White Atelier Ink
Shop at:
SSS | IO3
Holographic Cardstock
Shop at:
ELC
Red Line Tape 1/4
Red Line Tape 1/4"
Shop at:
SSS | HBS
To make supplies easy for you to find, I have linked them above. If something is no longer available I will link to a similar product. Affiliate links may be used depending on the product linked. Please help support my blog by using these links while shopping at no additional cost to you. For more information about the affiliates I use, please visit my disclaimer here. Thanks so much for all your support!

Watch these being made!

Thursday, September 15, 2022

Alex Syberia Designs Kickstarter Campaign | Blog Hop 1 & Giveaway

The moment has arrived!! Alex Syberia Designs Kickstarter Campaign is live!
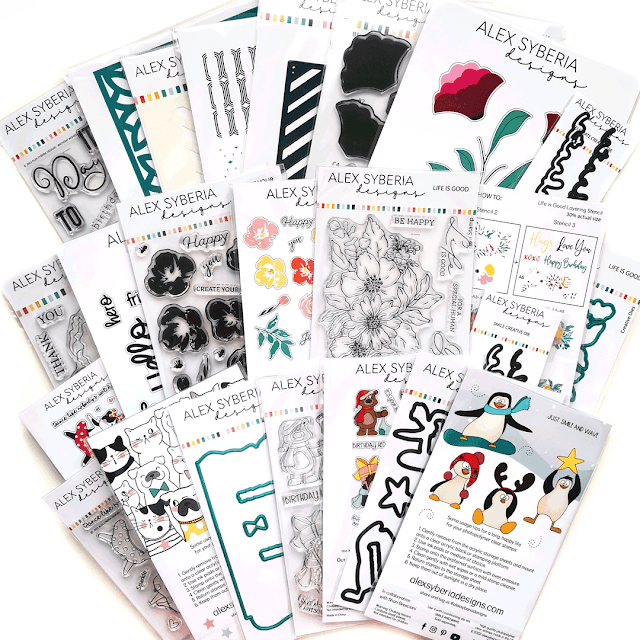
Today, we are celebrating the launch of Alex Syberia Designs' very first collection of physical products through their Kickstarter Campaign! With clear stamps, dies and stencils, there's something for everyone to love!

To look at all of the designs in detail (including videos!), the exclusive offers they have for you, and see how you can support them, make sure you check their Kickstarter Campaign Page.

Winter Fun, Partial Clear Bag See Through Shaker Cards,Alex Syberia Designs,flat shaker,Card Making, Stamping, Die Cutting, handmade card, ilovedoingallthingscrafty, Stamps, how to, Smile and Wave

I am so happy for Alex and her new venture. And even more excited to be a part of this journey of hers as I have been a fan of hers for the longest time.

Both my cards feature a couple of adorable cuties from the new Smile and Wave Stamp and Die Set. If you have been following me you know I have a thing for shaker cards and love to come up with different ways to make them. For these two cards, I used my clear bag shaker technique to create two Partial See Through Cards. I won't go into all the how-to details here, but if you are interested in creating cards like these, click HERE for the complete tutorial!

Winter Fun, Partial Clear Bag See Through Shaker Cards,Alex Syberia Designs,flat shaker,Card Making, Stamping, Die Cutting, handmade card, ilovedoingallthingscrafty, Stamps, how to, Smile and Wave
With both cards, I stamped out the critters using Copic-friendly black ink and then colored them in using Copic markers. I then die-cut the images using the coordinating dies. For some of them, I also cut out another blank die cut to use on the backside to cover up any visible ink that could be seen through the see-through card panel.
Winter Fun, Partial Clear Bag See Through Shaker Cards,Alex Syberia Designs,flat shaker,Card Making, Stamping, Die Cutting, handmade card, ilovedoingallthingscrafty, Stamps, how to, Smile and Wave
For the background, I actually used leftover ink from ink blending done using the Modern Stripes Stencil that I sprayed down with water and pressed into the stencil, resulting in a watercolor transfer. I then split the panel in half to create two cards.
On the inside of the cards, I stamped out a sentiment from the Smile and Wave set. For shaker filler, I used Pastel Rainbow Sequins.
Winter Fun, Partial Clear Bag See Through Shaker Cards,Alex Syberia Designs,flat shaker,Card Making, Stamping, Die Cutting, handmade card, ilovedoingallthingscrafty, Stamps, how to, Smile and Wave
As you can see below, this second card was done pretty much like the first one. I used the excess of the previous background panel to create the "mountain" for my penguin to climb. 
Winter Fun, Partial Clear Bag See Through Shaker Cards,Alex Syberia Designs,flat shaker,Card Making, Stamping, Die Cutting, handmade card, ilovedoingallthingscrafty, Stamps, how to, Smile and Wave
For the previous card the critter was glued to the inside of the shaker pocket, but for this one below the stamped images are glued to the outside of the panel. For this shaker filler, I used Pastel Rainbow Confetti. The flatter the filler the better for sending these types of cards through the mail.
Winter Fun, Partial Clear Bag See Through Shaker Cards,Alex Syberia Designs,flat shaker,Card Making, Stamping, Die Cutting, handmade card, ilovedoingallthingscrafty, Stamps, how to, Smile and Wave
Here is what they look like when the cards are opened up. To keep your written message from being seen from the front you just have to write it on the bottom half of the card.
Winter Fun, Partial Clear Bag See Through Shaker Cards,Alex Syberia Designs,flat shaker,Card Making, Stamping, Die Cutting, handmade card, ilovedoingallthingscrafty, Stamps, how to, Smile and Wave
And just so you can get another visual of the see-through shaker panel, here are my fingers behind the front panel of the card.
Winter Fun, Partial Clear Bag See Through Shaker Cards,Alex Syberia Designs,flat shaker,Card Making, Stamping, Die Cutting, handmade card, ilovedoingallthingscrafty, Stamps, how to, Smile and Wave

I hope you enjoyed these fun see-through shaker cards, and give them a try. They are actually quite easy to make. Now let's get back to the blog hop details and the amazing giveaways!

Their Kickstarter Campaign, full of incredible discounts for you, will run from the 15th of September to the 16th of October 2022.  

This great milestone called for some big celebrations! Throughout the duration of the Kickstarter CampaignAlex Syberia Designs will be hosting 4 hops:

  • 15 September 2022 - Hop 1: Blog hop
  • 23 September 2022 - Hop 2: Instagram hop
  • 5 October 2022 - Hop 3: Blog hop
  • 13 October 2022 - Hop 4: Instagram hop

GIVEAWAY PRIZES | OVER £1000/$1200 IN TOTAL


Alex Syberia Designs is giving away some fantastic prizes; their full September Release and two of their gorgeous Floral Bundle or Critter Bundle to choose from. There are also amazing companies and crafty friends who are celebrating with us. Here's the complete list of awesome prizes:

Check the Kickstarter Campaign for more info

That's a total of 15 prizes for 15 lucky winners! To be in with a chance to win one of these amazing prizes all you have to do is play along with each of the four hops! Alex Syberia Designs will draw winners from those entrants that have played along the hops by 16th October 2022. 

Our first hop is a blog hop and it couldn't be easier to enter. All you have to do is leave a comment on this blog post as well as those of the other amazing designers in this hop. You can see the full list, with links to each blog, below.

Winners will be announced on the Alex Syberia Designs blog on the 23rd of October 2022.

BLOG HOP 1 | DESIGNERS LIST

Below is the complete list of the super talented designers who are sharing their creations with us today:

Thank you for stopping by and until next time... Happy Hopping!
Ilda 💗

Wednesday, October 20, 2021

3D Christmas Tree Flat Shaker Card | Honey Bee Stamps

3D, Christmas Tree, Flat Shaker, Card, Frameless Shaker, Honey Bee Stamps, Christmas Card, Card Making, Stamping, Die Cutting, handmade card, ilovedoingallthingscrafty, Stamps, how to, Pine trees,CAS,

Hello, my friends!

Today's 3D Christmas Christmas Tree Shaker card is part of the Honey Bee Stamps Vintage Holiday Release Instagram Hop. I hope you can join us →there and leave a comment to qualify for two $25 Gift Cards to their shop.

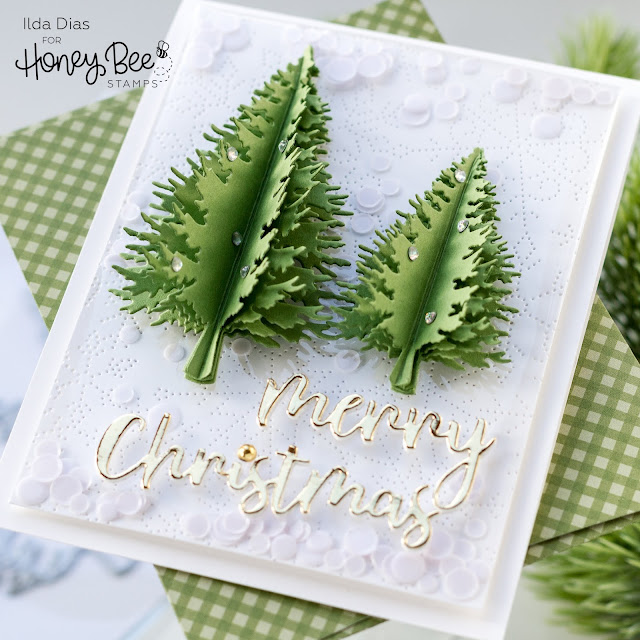
This card is a bit of an oxymoron. It has 3D elements along with a flat shaker window, but the trees do fold flat to fit in an envelope. I will also share a Reel on Instagram where I show you what that looks like later today.

CARD RECIPE
  • Dry emboss the snowflake design using the Pierced Fancy Flakes Cover Plate onto a card panel using white cardstock.
  • Trim off the edges of the panel. (This isn't necessary but I wanted to create a smaller frame to glue to the card front).
  • Build your shaker pocket. 
    • Cut plastic/acetate slightly larger than the panel. 
    • Cut off corners.
    • Fold sides flaps down and adhere in behind with double-sided tape, leaving one side open.  
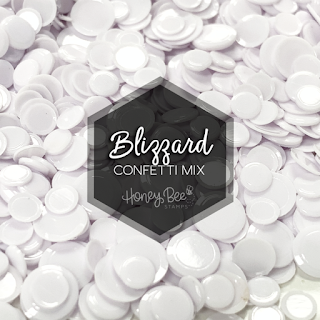
    • Pour in shaker bits I used Blizzard Confetti Mix (Glitter, flat sequins, or confetti work best to keep down the bulk and they slide around better with limited space).
    • Adhere the remaining flap down to close the shaker pocket.
    • Add the shaker pocket to the front panel of the card base. I used foam tape, but not necessary if you want to make it flat.
    • Use either scrap plastic from packaging, acetate, or a premade shaker pocket. I used packaging plastic this time. If you want to see how I created the first-ever frameless/edge to edge/infinity/flat shaker card watch this video I made a few years ago→ HERE.
3D, Christmas Tree, Flat Shaker, Card, Frameless Shaker, Honey Bee Stamps, Christmas Card, Card Making, Stamping, Die Cutting, handmade card, ilovedoingallthingscrafty, Stamps, how to, Pine trees,CAS,
  • Cut four layers for each tree using the Pine Tree Dies (Largest and smallest were used here).
  • Used a scoring board and score each tree down the middle. 
  • Fold each tree.
  • Add a line of liquid adhesive down the middle score line of each layer. Glue scored edge of the next tree down. Repeat until the last tree is glued to the top. Allow them to dry completely before fluffing.
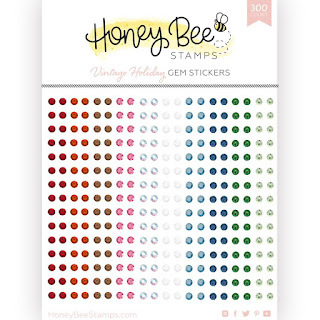
  • Add gems or embellish as desired.
3D, Christmas Tree, Flat Shaker, Card, Frameless Shaker, Honey Bee Stamps, Christmas Card, Card Making, Stamping, Die Cutting, handmade card, ilovedoingallthingscrafty, Stamps, how to, Pine trees,CAS,

  • Die-cut the Merry Christmas greeting from Bitty Buzzwords: Holidays Dies I glued four layers together to give it that chipboard thickness and look.
  • Finish off by gluing the elements to the card front.

3D, Christmas Tree, Flat Shaker, Card, Frameless Shaker, Honey Bee Stamps, Christmas Card, Card Making, Stamping, Die Cutting, handmade card, ilovedoingallthingscrafty, Stamps, how to, Pine trees,CAS,

I hope you were inspired by this 3D Christmas Tree Flat Shaker Card. I had so much fun making it. This technique will work with many other die cuts to create the 3D effect. I hope you give it a try!

Here's a quick video to show you how this came together.
Ilda😊

SUPPLIES
Pine Trees Dies
Pine Trees Dies
Shop at:
SSS | SB | HBS
Pierced Fancy Flakes Cover Plate
Shop at:
SSS | SB | HBS
Bitty Buzzwords: Holidays Dies
Shop at:
SSS | SB | HBS
Bee Creative Glue
Bee Creative Glue
Shop at:
SSS | SB | HBS
Vintage Holiday Gem Stickers
Shop at:
SSS | SB | HBS
BLIZZARD CONFETTI MIX
Shop at:
HBS
Gingham Galore: Holiday Envelopes
Shop at:
HBS
Neenah Solar White 110lbs
Shop at:
SSS | AMZ | HBS
GEMINI JR. DIE CUTTER
Shop at:
SSS | SB
Scor-Pal MINI SCOR-BUDDY
Shop at:
SSS | HBS
Gold Hearted Paper Pad
Shop at:
TS US | TS UK
FOAM TAPE
FOAM TAPE
Shop at:
SSS | SK
To make supplies easy for you to find, I have linked them above. If something is no longer available I will link to a similar product. Affiliate links may be used depending on the product linked. Please help support my blog by using these links while shopping at no additional cost to you. For more information about the affiliates I use, please visit my disclaimer here. Thanks so much for all your support!