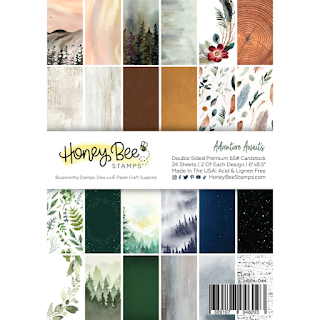
Background Pattern Paper - A2 Card Fronts - Beachcombing
Turtle - A Sea Turtle's Journey Stamps & Coordinating Dies
Sentiments - Find Me by the Sea Word Die
DIY Shaker Pocket - Shaker Sheets
Shaker Bits - Sequin Mix Island Blues
Glaze on black cardstock - Sea Glass Blue Paper Glaze
- Start by stamping the turtle onto one of the Beachcombing A2 Card Fronts using black pigment ink and heat set it with clear embossing powder.
- Die cut the turtle using the A Sea Turtle's Journey Dies.
- Glue the die-cut card background to a black paper panel.
- Die cut the "Find Me by the" from the Find Me by the Sea Word Die and glue the sentiment onto the Beachcombing pattern paper.
- Add two thicker foam dots where the turtle body outline is. Place them far enough from each other to support the turtle die cut.
- Remove the adhesive liner from the foam dots, center a cut piece of the Shaker Sheets, and create the shaker pocket.
- Fill the pocket with the Sequin Mix Island Blues. NOTE: some of the sequins will get caught on the foam dots as it doesn't allow unrestricted movement in the pocket. Allow enough space between foam dots to allow the shaker bits to flow through. NOTE: Using foam dots will allow more space in the pocket, and the ability to use thicker shaker bits. This sequin mix has chunky iridescent bubbles, which normally would not fit well in a flat shaker pocket.
- Seal the last flap of the pocket and adhere it to an A2-sized card base.
- Glue the turtle onto the die-cut opening, on top of the plastic sheet. If using a liquid glue, set aside to dry.
- Apply a thin layer of the Sea Glass Blue Paper Glaze onto black cardstock and allow it to dry.
- Once dry, die-cut the "Sea" from the Find Me by the Sea Word Die and glue it onto the shaker front.
- For some sparkle and to create wave-like foam on the letters, I added some glue to the Sea Word Die and sprinkled some chunky glitter while the glue was still wet.
- Finally, I added an enamel dot on the turtle's eye to give it extra life.
 A2 Card Fronts - Beachcombing Shop at: SSS | PFS |
 A Sea Turtle's Journey Shop at: SSS | SB | PFS |
 A Sea Turtle's Journey Dies Shop at: SSS | SB | PFS |
 Shaker Sheets Shop at: SSS | SB | PFS |
 Find Me by the Sea Word Die Shop at: SSS | PFS |
 Sequin Mix Island Blues Shop at: SB | PFS |
 Sea Glass Blue Paper Glaze Shop at: SSS | SB | PFS |
 Mixed Media Spatulas Shop at: PFS |
 Stamp Pressure Tool Shop at: SSS | SB | PFS |
 The Stamp Scrubber Shop at: SSS | SB | PFS |
 Black Foam Dots 1/4" Shop at: HBS |
 New Mini Misti Shop at: SSS | SB | HBS |
 VersaFine ONYX BLACK Ink Shop at: SSS | AMZ | SB | HBS |
 CRYSTAL CLEAR Emb Pwd Shop at: SSS | IO3 |
 Heat Gun Shop at: AMZ |
 Platinum 6 Die Cutting Platform Shop at: SSS | SB | HBS |
 Bearly Art Precision Glue Shop at: SSS | AMZ | HBS |
 Lawn Fawn Chunky Glitter Shop at: SSS | SB |


.jpg)
.jpg)







.jpg)
.jpg)
.jpg)
