Sunday, October 21, 2012

Teddy Bear Baptism Cake

Today is a very special day for our little friend Alessio, it's his Baptism today! His mom, one of my very best friends (whom I've known since grade 5), Lee Ann had asked me if I would make him a cake for the celebration... and of course I accepted the challenge... Hope she likes it! 😊

Teddy Bear Baptism Cake

I actually had no plan of what I was going to make other than the colors I was going to use... So I'm pretty happy about how it all turned out! Isn't Teddy cute? I just love how he turned out :)

Teddy Bear Baptism Cake

The top layer of the cake is chocolate, the bottom is marble. Both covered with a vanilla buttercream icing and finished with sky blue fondant. Yummy, can't wait to taste it!

God Bless you and your family Allessio on this Special Day!
Thanks for stopping by :)

Tuesday, October 16, 2012

Autumn Sunflower Birthday Card | Mojo Monday Sketch Challenge

Hey everyone!

It was my Mother-In-Law Gabriela's birthday yesterday so I thought I would attempt making her a card... Honestly, I find making cards more challenging than anything 3D! They just look so simple once they are done, but they are NOT!....maybe it's just me... or, maybe I just need more practice, lol!

Mojo Monday Sketch Challenge,SVGCuts File,Autumn birthday card,Michelle My Belle Creations,ilovedoingallthingscrafty,Sunflower,Paper crafts, Cricut

I love the Autumn colors so I wanted to make something with them. For this card, I used basic card stock, a little ink and did a bit of embossing to add some texture and interest! The files I used to create this card come from here, and the sunflower comes from CRISP DAYS OF FALL KIT here. I used the Cameo to cut it out.


Since I got my idea from this sketch I will be sharing it over on Mojo Monday's Sketch Challenge! I actually got my inspiration from Michelle from Michelle My Belle's Creations. I've been following her since I started blogging... she was actually one of my first followers and nominated me for my first blog award! Thanks again, Michelle! Anyways, Michelle creates beautiful files for Mojo Monday's Sketch Challenge. Check out their blogs for tones of inspiration! So now that I've made a card I can finally enter, yeah me!!!
Thanks for stopping by! 
Happy Crafting :) 


Friday, October 12, 2012

Halloween Home Decor and DIY Decorations


Hey all!

Welcome to my latest followers, I have finally hit a 100! Thank you all for coming by and visiting my little blog... hope to see and meet more of you around here :)

I've had a really busy work week and by the time I get home and finish all my motherly and wifey duties I am pooped! So needless to say crafting has not been my priority this week :(  So this morning while the kiddos were at school I finally had some time to make a little craft! I've also been meaning to put all of my Fall and Halloween decor up... so I did that too! I was a busy girl today, phewww!

Halloween Home Decor and DIY Decorations

Here is a picture of our front entrance done up for Halloween... Isn't it spooky? Not really, haha! I tried!

Halloween Home Decor and DIY Decorations

Meet Igor our Buttler! I love Igor other than the fact he scares me when I'm least expecting it! Somewhere on his body there is a motion sensor that doesn't work too well, maybe cause he is ancient, lol! So his reaction is a bit delayed, which scares the c*ap out of me every time! He loves to do the same to all our front door visitors!


Halloween Home Decor and DIY Decorations

Usually, I dress up as a Witch for Halloween, so I love this little broom. It gets moved outside for Halloween night!
Halloween Home Decor and DIY Decorations

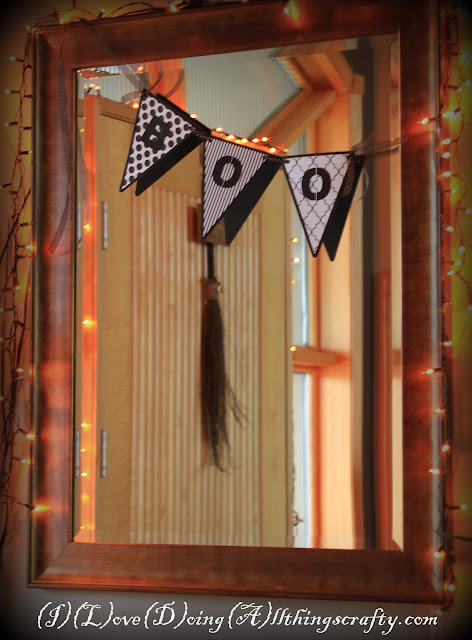
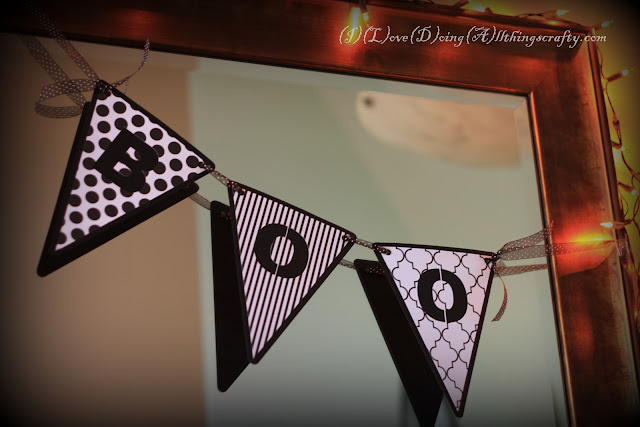
So here is the quick little banner I made this morning... took all of 15 minutes to make! I've seen many of these on Pinterest so I had to make my own. Click here for instructions!

Halloween Home Decor and DIY Decorations

Simple and fanta-BOO-lous! 

Halloween Home Decor and DIY Decorations

 I love my pre-lit pumpkins. No mess, just plug in and ready to go... have had these for years!

Halloween Home Decor and DIY Decorations

Here I just added the creepers to my fall decor that was already up... My daughter's going to freak when she comes home from school... she hates spiders!

Halloween Home Decor and DIY Decorations

For more touches of Halloween, I put up some window stickies around our kitchen table... Shhhh, don't tell anyone but those stickies are at least 5 years old! I just take them down after Halloween and stick them to each other and place them in a Ziploc bag and lay them flat until next year! No need to keep buying them!

Halloween Home Decor and DIY Decorations

 Finally, here is my front door... Hehe, can you see Igor's silhouette in the window, creepy?
So, after the summer is over I swap out my summer flower pots with these fall arrangements I made 3 years ago! I keep them in the shed until it's time to bring them out for the Fall. All these flowers were purchased when Micheal's was having their Fall clearance sale... Got most of them for 80-90% off their regular price! Gotta love a good deal :) 

Halloween Home Decor and DIY Decorations

All I did was stick the flowers in dirt from my old summer pots and Viola! Fall Arrangements!!! Now all I need is some pumpkins for the front entrance and I'm done... I'll share those next time!

Hope you like some of my Fall and Halloween decoration ideas!
Thanks for stopping by... have a great weekend!


Friday, October 5, 2012

Cute Spooky DIY Halloween Earrings | SVGCuts

YAY!!! It's TGIF!!! Are you old enough to remember that, lol!

Hey everyone! Not sure about you guys but I have had a crazy busy week... So looking forward to this weekend! Not like it will be any less busy, haha!

Anyways, so excited to share with you my latest craft! I got the idea as soon as I saw one of SVGCuts' latest collections... Check it out the SPOOKY CUTIES here!

I thought I would try my hand at making some bling for my daughter! She loves dangly earrings... So that's what I made!  I love how she walks around the house shaking her head! Too cute! I'm going to surprise her with them this weekend!

Just thought of it now as I was typing... I could have made a matching pendant for a necklace as well. Oh well, next time!

So here they are...

ilovedoingallthingscrafty,Halloween DIY Earrings,Spooky Cuties,SVGCuts,SVG file,Paper crafts,Crafting,Cricut,

Aren't they the cutest earrings EVER!

Cute Spooky DIY Halloween Earrings | SVGCuts

Don't mind the glue gobs around the eyes! I was so excited to take pictures I couldn't even wait for the glue to dry, LOL!

Cute Spooky DIY Halloween Earrings | SVGCuts

And this is me holding them up to show you some scale... I really shrunk the files down in size!

So here is what I did... 
  • cut out 3 of the same image and glued them to each other to create some thickness and make the earnings sturdier. ( Notice I added a tiny hole to the top of the cut-out so that I could hook on the earring piece later.)
  • I then used some glitter glue on the top of each earring. (This added some sparkle and protection to the paper)
  • Then once the glitter glue was dry, I sealed the whole piece with clear nail polish. Yes, you heard me right! Nail Polish! It worked beautifully and I didn't have to go out and buy a sealant. I guess I could have used Modge Podge, but this was way easier and gave it great shine... and completely dry in 60 seconds, lol! (I used a pin and poked it through the hole to make it easier while I painted it!)

Cute Spooky DIY Halloween Earrings | SVGCuts

  • Once everything was dry I glued on my googly eyes (picture above, no googly eyes... not cute enough, back to the cute factory he went!)
  • Then I attached each of my "Spooky Cuties" to the fish hook earring pieces simply by opening up the bottom hoop with needle nose pliers and hooking on the "Cutie," then just tightening it up again. For the longer ones I just added some chain.
I hope you like this little project and maybe be inspired to create some bling of your own!
Have a "Spooktacular" weekend!


Tuesday, October 2, 2012

3D Paper Letters for Kate | SVGCuts

Hey everyone! Hope you are all enjoying your week :)  

Here in Edmonton, it feels like Fall has finally arrived! The cold is in the air.... hopefully we can keep the snow away a little longer!

Ironically I'm going to share with you a project that reminds me a bit of Spring! I was asked to make a baby's name in 3D for a Baby Shower! Isn't it cute! I love how it all came together! Congratulations Marija on your newest family member :)

3D Paper Letters for Kate | SVGCuts

The files for the 3D letters come from here. The paper I used comes from DCWV Cherry Limeade Stack, all cut with the Cameo. Hope you like it!

Happy Crafting! :)

Monday, October 1, 2012

Personalized Frame | Paper Pieced Baby Decor | SVGCuts

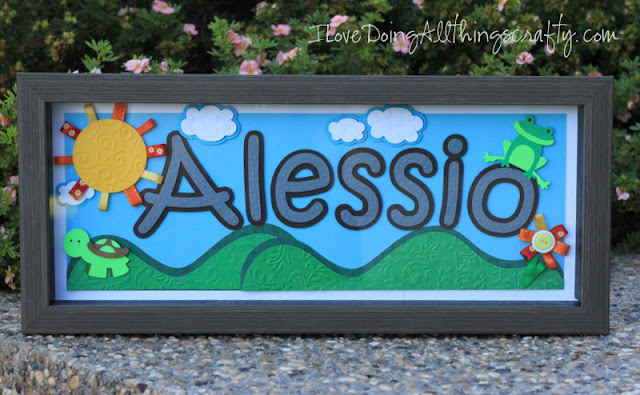
Here is a frame I made for one of my dearests friends, who recently had a baby boy. Love the unique name she chose for her little guy... Alessio. Love it! Congrats LeeAnn and Joe!
Personalized Frame | Paper Pieced Baby Decor

The files I used for this project all come from SVGCuts freebie selection. The font I used is called Kristen ITC. Added a little embossing and some ribbon and voila, a great art piece for the nursery! 

Thanks for stopping by!


Friday, September 28, 2012

Frankenstein's "Wicked" Costume Treat Box | Halloween Decoration | SVGCuts


Hey all! 

Today I wanted to share with you the project I made for the SVGCuts Facebook Halloween Challenge. The assignment is to use elements from specific kits chosen by SVG Cuts to recreate a 2D or 3D project.

So here is my entry! 
"Frank" in a witches costume!!! Isn't he sooo cute?!!!

Frankenstein's "Wicked" Costume Treat Box | Halloween Decoration | SVGCuts

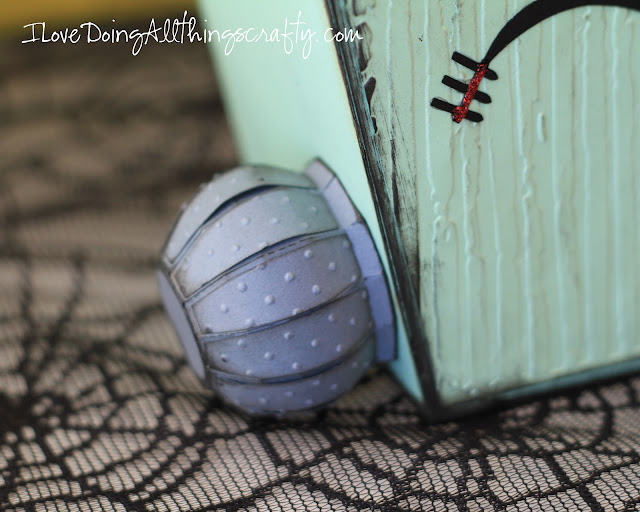
"Franks" head is actually a coffin treat box that I have enlarged to about 11 inches tall. The little bolts coming out from his neck are cauldrons that I really shrank down in size, and the witch's hat is actually a treat cone. 
Doesn't look like "Frank" likes his new hat, lol!

Frankenstein's "Wicked" Costume Treat Box | Halloween Decoration | SVGCuts

The treat cone made for the perfect witch's hat!

Frankenstein's "Wicked" Costume Treat Box | Halloween Decoration | SVGCuts

The cauldrons were so much fun to make even this tiny! Here is a closer look.

Frankenstein's "Wicked" Costume Treat Box | Halloween Decoration | SVGCuts

Love the "little picket fence" scars and his sad pumpkin eyes! 

Frankenstein's "Wicked" Costume Treat Box | Halloween Decoration | SVGCuts

You could say Frank got his hair cut from a cat! Look at the cat's teeth (middle picture below)... look familiar?!

All the files come from one of these 3 amazing SVG Cut kits... Elmhurst Hollow SVG KitMidnight Jamboree SVG Kit, and the Party on Elm Street SVG Kit. Thanks, SVGCuts for creating such fun challenges and amazing files to work with!


Hope you enjoy my entry!
Happy crafting :)

Saturday, September 22, 2012

Pink Leopard Print Birthday Cake | DIY Cake

Hey Guys! 

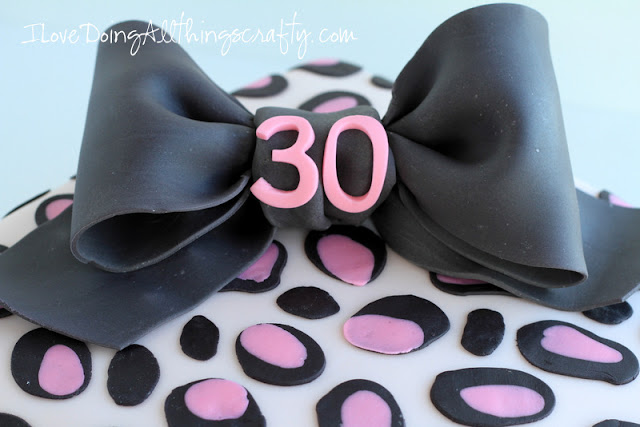
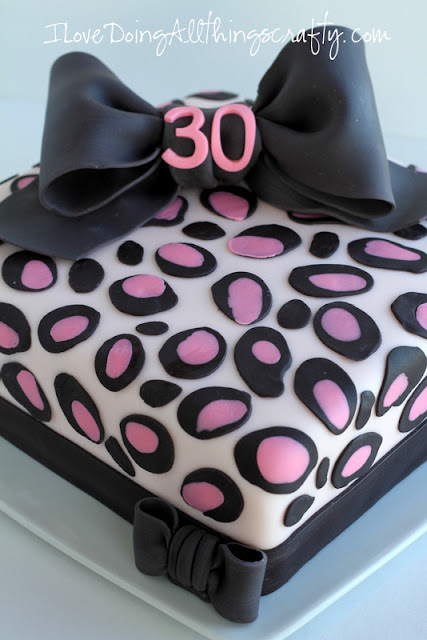
I just wanted to share with you all the birthday cake I made this weekend for my sister in law's Rozana's 30th Surprise Birthday Party, it a Pink Leopard Print Birthday Cake!

Here it is...
Pink Leopard Print Birthday Cake | DIY Cake

 Isn't it wild! Initially, I thought of making it regular leopard color print, but then I thought... why not make it more girly and make it a pink leopard print cake! LOVE how it turned out! 

Pink Leopard Print Birthday Cake | DIY Cake

Pink Leopard Print Birthday Cake | DIY Cake

The inside is vanilla cake with a white buttercream frosting, covered with fondant! I hope she likes it and I hope you do too! Happy 30th Rozana!

Have a great weekend!

Thursday, September 20, 2012

Cherry Blossom Wedding Card | SVGCuts

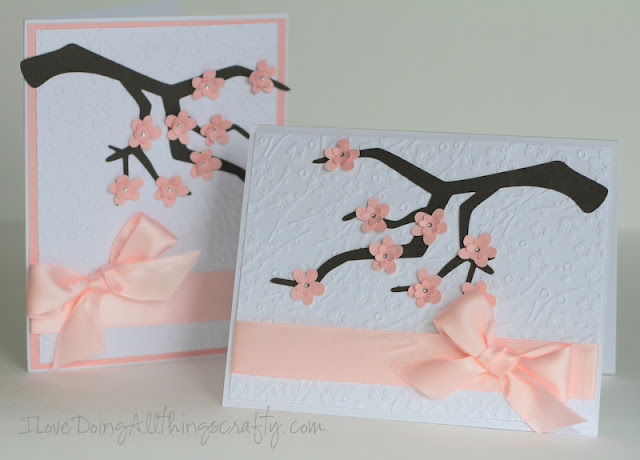
Here is a card I made for a wedding we were recently invited to.
  
Cherry Blossom Wedding Card | SVGCuts

Since it was so simple to make, I thought I would make two! I know it looks more like a springtime Wedding card, but I just love cherry blossoms! The files come from SVGCuts freebie selection.

Cherry Blossom Wedding Card | SVGCuts

 Here is the inside of the card. The stamp comes from Studio G.

Cherry Blossom Wedding Card | SVGCuts

Love how simple, yet elegant they turned out... hope they do too!

Thanks for stopping by!

Wednesday, September 19, 2012

Happy 30th Birthday Cupcake Treat box | SVGCuts

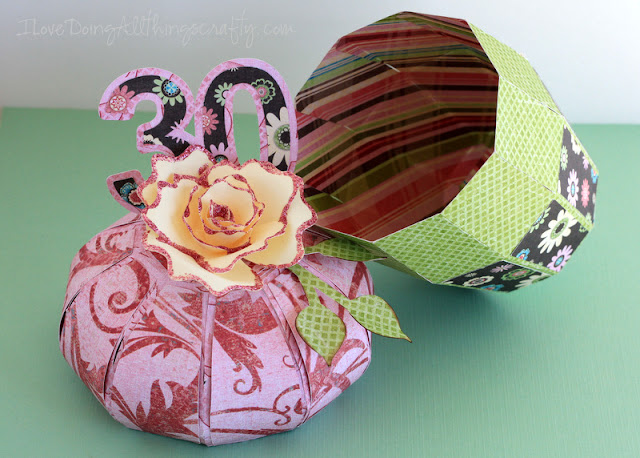
It's my Sister In law's 30th birthday today! Happy Birthday, Rozana! 

So I wanted to share with you the little cupcake I made for her :)
Happy 30th Birthday Cupcake,birthday gift,treat box,Silhouette Cameo,ilovedoingallthingscrafty,SVGCuts,SVG file,3D paper Cupcakes, Cricut

 Isn't it adorable! I love how yummy it looks ;)

Happy 30th Birthday Cupcake,birthday gift,treat box,Silhouette Cameo,ilovedoingallthingscrafty,SVGCuts,SVG file,3D paper Cupcakes, Cricut


Happy 30th Birthday Cupcake Treat box | SVGCuts

The files I used come from here. The paper stack I used is from K and C Company, the Blossom Designer Paper Pad. Cut on the Silhouette Cameo.

Thanks for stopping by!
Happy crafting  :)


Tuesday, September 18, 2012

40 Year Ruby Anniversary Explosion Box Keepsake | SVGCuts

Happy Tuesday!

So today I want to share the beautiful explosion box I made for my In-law's 40th Ruby Anniversary that they celebrated yesterday! It was the first time I ever made one of these and I love how it turned out :)  To make this did have some inspiration from one of my favorite crafty ladies, Thienly! Check out her family explosion box! Here is mine!

3D,ilovedoingallthingscrafty,Ruby Anniversary,Explosion Box,Keepsake,SVGCuts,SVG file,40th Anniversary gift,Cricut, DIY, handmade, photos

The file for the box comes from here, and the rose file from here.

3D,ilovedoingallthingscrafty,Ruby Anniversary,Explosion Box,Keepsake,SVGCuts,SVG file,40th Anniversary gift,Cricut, DIY, handmade, photos

I have made many of these roses, but I absolutely love how this one turned out with the glitter glue on the edge of the petals.

3D,ilovedoingallthingscrafty,Ruby Anniversary,Explosion Box,Keepsake,SVGCuts,SVG file,40th Anniversary gift,Cricut, DIY, handmade, photos

This is what the box looks like when it's all opened up! I printed the pictures in sepia to coordinate with the papers. Since it was a Ruby Anniversary I thought these papers from Recollections, Love Letters pad were perfect for the occasion. 

3D,ilovedoingallthingscrafty,Ruby Anniversary,Explosion Box,Keepsake,SVGCuts,SVG file,40th Anniversary gift,Cricut, DIY, handmade, photos

The file for the numbers comes from here. I was so excited to use my new epiphany shape studio tool that I recently picked up at Michaels! To create my Anniversary button, I simply just printed the wording out on white card stock and then used the Round 25 epoxy shape tool and punched it out! It was that easy! Love how that turned out!

3D,ilovedoingallthingscrafty,Ruby Anniversary,Explosion Box,Keepsake,SVGCuts,SVG file,40th Anniversary gift,Cricut, DIY, handmade, photos

I used 15 pictures to create this box. I'm sure if you wanted to, you could use so many more by putting them on the outside of the box as well. For this box, I used recent pictures of our vacation this summer and included a few of the kids with the grandparents! The kids also wrote in the notes in the pockets pictured above. 

3D,ilovedoingallthingscrafty,Ruby Anniversary,Explosion Box,Keepsake,SVGCuts,SVG file,40th Anniversary gift,Cricut, DIY, handmade, photos

Well, hope you like this little explosion box! I sure enjoyed creating and gifting it!
Happy 40th Anniversary to my wonderful Inlaws!