Showing posts with label Crafting. Show all posts

Monday, August 19, 2024

Water Colored Tropical Sunset Card | Honey Bee Stamps

Summer, Watercolor Techniques, Die Cuts, Tropical Theme, Handmade Greeting Cards, Card Making Inspiration, Palm Tree Cards, Honey Bee Stamps, Sunset Backgrounds, Seasonal, DIY Card Ideas, Crafting,

As much as I don't want summer to come to an end, this card may be the last summer-themed one I create this year as I shift my focus to the upcoming seasons. Here’s how I brought this summer card to life using simple watercolors and creative embellishments.

CARD RECIPE

Palm Trees - Die Cuts: Lovely Layers Hammock dies 

Sentiment - Stamps: Sun Kissed Summer 

Coconuts - Rhinestones: Big Bling Rhinestones (no longer available)

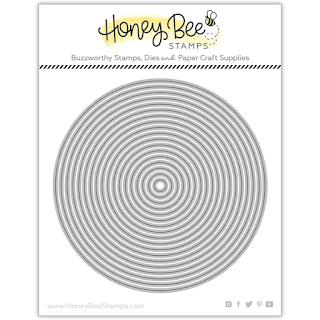
Sun - Sweet Stacks: Circles Dies


Preparing the Die Cuts

I began by die-cutting all the elements from the Lovely Layers Hammock set. I used watercolor paper for these die cuts because it holds up well to water-based coloring. This set includes the palm trees and leaves—everything you need for a tropical scene.

Summer, Watercolor Techniques, Die Cuts, Tropical Theme, Handmade Greeting Cards, Card Making Inspiration, Palm Tree Cards, Honey Bee Stamps, Sunset Backgrounds, Seasonal, DIY Card Ideas, Crafting,
Watercoloring the Die Cuts

Using simple watercolors, I painted the die cuts to bring them to life. For the palm leaves, I used varying shades of green to add depth and dimension. The trunks of the palm trees were colored in a rich, textured brown to mimic their natural appearance.

Creating the Sunset Background

To create the sunset background, I die-cut a circle from masking paper and used that to mask the area for the sun. I started by blending shades of yellow, orange, and red inks onto a piece of watercolor paper. The sun was softly painted with a blend of warm oranges and yellows, creating a glowing effect as it sets behind the palm trees. The bottom portion of the card was painted in a sandy beige, resembling a sun-kissed island.

Assembling the Scene

Once the background was ready and the die cuts were dry, it was time to assemble the card. I adhered the palm trees first, positioning them so that the sunset appeared between the leaves. The dimensional aspect of the palm trees was enhanced with foam tape, giving the card a three-dimensional feel.

Adding Rhinestone Coconuts

The most delightful part of this card was adding the coconuts! I used large rhinestones of different sizes to mimic the look of coconuts hanging from the palm trees. Using a brown Copic marker, I colored the rhinestones to achieve a natural coconut shade. Once dry, I adhered them to the palm trees, adding a fun and sparkling element to the card.

Finishing Touches

To complete the card, I added the sentiment "Sending warmest wishes" from the Sun Kissed Summer stamp set using Bee Creative Intense Black Ink. I stamped it directly onto the card beneath the palm trees, keeping the focus on the serene scene above. For a faux splatter look, I added some black dots to finish the background using a micron pen.

Summer, Watercolor Techniques, Die Cuts, Tropical Theme, Handmade Greeting Cards, Card Making Inspiration, Palm Tree Cards, Honey Bee Stamps, Sunset Backgrounds, Seasonal, DIY Card Ideas, Crafting,

Whether you're sending this card as a vacation greeting or just to share a little sunshine, it's sure to bring a smile to the recipient's face.

I hope this project inspires you to create your own summer paradise on paper. Happy crafting!

Ilda 🌴

SUPPLIES
LL Hammock Dies
LL Hammock Dies
Shop at:
SSS | SB | HBS
Sunkissed Summer Stamps
Shop at:
SSS | SB | HBS
Sweet Stacks: Circles Dies
Shop at:
SSS | SB | HBS
Bee Creative Intense Black Ink Pad
Shop at:
SSS | SB | HBS
Bee Creative Glue
Bee Creative Glue
Shop at:
SSS | SB | HBS
Honey Bee Reverse Tweezers
Shop at:
HBS
Platinum 6 Die Cutting Platform
Shop at:
SSS | SB | HBS
SSS 2.5 Inch ACRYLIC BLOCK
Shop at:
SSS
Majestic Royal and Langnickel Brush Set
Shop at:
AMZ
Mijello Mission Gold Water Color Palette Set
Shop at:
SSS | AMZ
Micron Pens
Micron Pens
Shop at:
SSS
Masking Paper
Masking Paper
Shop at:
SSS | ALTN
To make supplies easy for you to find, I have linked them above. If something is no longer available I will link to a similar product. Affiliate links may be used depending on the product linked. Please help support my blog by using these links while shopping at no additional cost to you. For more information about the affiliates I use, please visit my disclaimer here. Thanks so much for all your support!

Enjoyed this post? Never miss out on future posts by Following this Blog

Wednesday, December 11, 2013

Christmas Paper Cake Floral Toppers | Cake a la SVGCuts | DIY Cakes

I am SOOOOO super excited today to be sharing with you my first guest post for SVGCuts, WHOOP, WHOOP! If I could do a backflip I would, lol ;) 

If you didn't know it before, you should know now that I LOVE SVGCuts and have been a huge fan since finding them back in 2011! In fact they were one of the reasons I started blogging. I have always loved to craft and after making some of the coolest things out of paper with their files, I was hooked and I knew I had to share it with others!

So for this project I thought it would be awesome to mash up two of my favorite crafts... Paper and cake decorating! Well, what do you think of my Christmas Cake a la SVGCuts? It almost looks too good to eat doesn't it?!

Please check out my guest post on the SVGCuts blog for complete instructions :)

SVGCuts,Silhouette Cameo, Cricut, DIY cakes,ilovedoingallthingscrafty, Christmas Cake,Fondant cake with Paper flowers, Paper Cake Toppers,paper crafts,SVGCuts Files, Crafting,

SVGCuts,Silhouette Cameo, Cricut, DIY cakes,ilovedoingallthingscrafty, Christmas Cake,Fondant cake with Paper flowers, Paper Cake Toppers,paper crafts,SVGCuts Files, Crafting,
I would have never been able to create these gorgeous flowers out of fondant, but paper... piece of cake, haha!

When I was a little girl, the kids in the family would always fight over the sugar flowers on the cake. Did anyone else do that? Maybe we were just weird?

I'm sure if you make some like these out of paper, the moms might have to fight the kids for them, lol!

If any of you have ever made a fondant flower, you will know how time-consuming and difficult it can be. Even when they are done they can be quite fragile. That's why you pay cake decorators the big bucks! But why pay them when you can do it yourself?! If you already are a paper crafter all you need now is a cake! If you can't make a fondant cake, don't worry bake your favorite cake and sprinkle some icing sugar over it, or even easier buy one and just embellish it!

Just think of the cakes you could make using paper toppers, the possibilities are endless!

SVGCuts,Silhouette Cameo, Cricut, DIY cakes,ilovedoingallthingscrafty, Christmas Cake,Fondant cake with Paper flowers, Paper Cake Toppers,paper crafts,SVGCuts Files, Crafting,

Make the flowers like you would for any other project. Then all you have to do is hot glue them to the end of a toothpick or a skewer. By doing this, you elevate the flowers and protect the papers from any grease absorption that may happen when using paper. See the image below.

SVGCuts,Silhouette Cameo, Cricut, DIY cakes,ilovedoingallthingscrafty, Christmas Cake,Fondant cake with Paper flowers, Paper Cake Toppers,paper crafts,SVGCuts Files, Crafting,

Here's what the cake looks like from the side...

SVGCuts,Silhouette Cameo, Cricut, DIY cakes,ilovedoingallthingscrafty, Christmas Cake,Fondant cake with Paper flowers, Paper Cake Toppers,paper crafts,SVGCuts Files, Crafting,

SVGCuts,Silhouette Cameo, Cricut, DIY cakes,ilovedoingallthingscrafty, Christmas Cake,Fondant cake with Paper flowers, Paper Cake Toppers,paper crafts,SVGCuts Files, Crafting,


and here's a peek inside the cake! Add some food coloring to the cake batter and you'll end up with a fun and festive Christmas Cake! Yummy!!!


If you are interested in making this project, here are the SVGCuts files you will need:

Make sure you stop by the SVGCuts blog for more tips and all the instructions on how to make your own Cake a la SVGCuts! I hope you loved this project as much as I enjoyed creating it... Oh, and eating it too!

Don't forget to check out SVGCut's 12 Days of Christmas Giveaway on Facebook! SO many amazing prizes to be won!

Thanks for stopping by!
Happy Crafting  :)

Friday, October 5, 2012

Cute Spooky DIY Halloween Earrings | SVGCuts

YAY!!! It's TGIF!!! Are you old enough to remember that, lol!

Hey everyone! Not sure about you guys but I have had a crazy busy week... So looking forward to this weekend! Not like it will be any less busy, haha!

Anyways, so excited to share with you my latest craft! I got the idea as soon as I saw one of SVGCuts' latest collections... Check it out the SPOOKY CUTIES here!

I thought I would try my hand at making some bling for my daughter! She loves dangly earrings... So that's what I made!  I love how she walks around the house shaking her head! Too cute! I'm going to surprise her with them this weekend!

Just thought of it now as I was typing... I could have made a matching pendant for a necklace as well. Oh well, next time!

So here they are...

ilovedoingallthingscrafty,Halloween DIY Earrings,Spooky Cuties,SVGCuts,SVG file,Paper crafts,Crafting,Cricut,

Aren't they the cutest earrings EVER!

Cute Spooky DIY Halloween Earrings | SVGCuts

Don't mind the glue gobs around the eyes! I was so excited to take pictures I couldn't even wait for the glue to dry, LOL!

Cute Spooky DIY Halloween Earrings | SVGCuts

And this is me holding them up to show you some scale... I really shrunk the files down in size!

So here is what I did... 
  • cut out 3 of the same image and glued them to each other to create some thickness and make the earnings sturdier. ( Notice I added a tiny hole to the top of the cut-out so that I could hook on the earring piece later.)
  • I then used some glitter glue on the top of each earring. (This added some sparkle and protection to the paper)
  • Then once the glitter glue was dry, I sealed the whole piece with clear nail polish. Yes, you heard me right! Nail Polish! It worked beautifully and I didn't have to go out and buy a sealant. I guess I could have used Modge Podge, but this was way easier and gave it great shine... and completely dry in 60 seconds, lol! (I used a pin and poked it through the hole to make it easier while I painted it!)

Cute Spooky DIY Halloween Earrings | SVGCuts

  • Once everything was dry I glued on my googly eyes (picture above, no googly eyes... not cute enough, back to the cute factory he went!)
  • Then I attached each of my "Spooky Cuties" to the fish hook earring pieces simply by opening up the bottom hoop with needle nose pliers and hooking on the "Cutie," then just tightening it up again. For the longer ones I just added some chain.
I hope you like this little project and maybe be inspired to create some bling of your own!
Have a "Spooktacular" weekend!