Monday, April 23, 2012

Banff | Personalized Water Bottles

Hello everyone! Hope you all had a wonderful weekend... I sure did :)

This weekend we escaped to the beautiful mountains of Banff  National Park, with some friends of ours. For those of you who love to ski or enjoy the great outdoors, this is the perfect place for you to visit. Since the weather is getting better, the timing couldn't have been more perfect.

Here are a few pics from our trip...


Our little family!


Maia, Tomas and Annabella :)


Awwww! Love this pic ;)

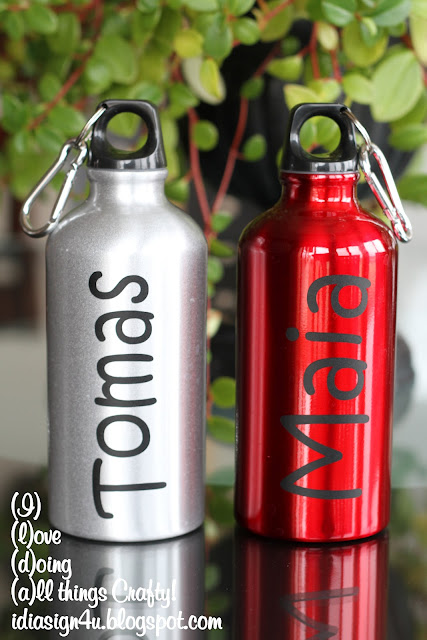
Personalized Water Bottles by ilovedoingallthingscrafty.com

And here are the water bottles I personalized for my kids to take on our trip... no more wondering/fighting about whose water bottle is whose! They already had enough to argue about in a 4 hour road trip :(

Here is a link on how I personalized the bottles, but on a tumbler cup.

Happy crafting everyone!
Ilda :)

Wednesday, April 18, 2012

Automatic Soap Dispenser Hack | DIY

As well as loving to craft, I also love to save money. I wouldn't call myself an extreme couponer, but if I have a coupon for an item and I need it, I will use it...Why not? I think it's silly if you don't!

So today I will share with you one of my saving tips! Over this last year, I have purchased a couple of automatic Lysol soap dispensers. (Actually, they were purchased and then I received my money back when I sent back the company the receipt and the mail-in rebate, so they were actually free!!!) They are great for little kids... just place your hand underneath, and outcomes just enough soap!

One of the dispensers was empty, so instead of buying a refill for $4.99 (250ml container), I bought a liquid hand soap at Costco for $9.99 (3.78L). That means I can fill up the existing container 15 times for $9.99, instead of spending $75+... here's how I did it :)

Automatic Soap Dispenser Hack | DIY by ilovedoingallthingscrafty.com

Buy your favorite hand soap. 


Remove the lid. I used a butter knife to carefully pop off the lid, it does not twist off! 


Don't worry too much if the lid cracks a little where your knife was, as long as the center is intact you're still OK!


Wash out the container and the lid.


Refill.


Push the lid back into place, you will hear a click!

Automatic Soap Dispenser Hack | DIY by ilovedoingallthingscrafty.com

Place it back into the dispenser. Super quick, super easy! 
(took me longer to do the post, lol!)

Happy savings everyone!
Ilda :)

Monday, April 16, 2012

3D Paper Tea Pot | Silhouette File


Happy Monday!

It seems like its been a while since I last posted! Even though I haven't posted any projects, I have still been busy crafting! Just not enough time to post them :(

But, I wanted to make sure I made time to share a quick project that I worked on last night for a very good friend of mine. It's my friend Elaine's birthday today! Not only is she a wonderful nurse, she is also one of the kindest, sweetest and funniest persons I know! She always makes me laugh :) If she knows I'm working, she makes a point of finding me and leaves me a note or a treat! So I thought I would leave her a treat on her desk today. Since I know she always takes the day of her birthday off,  I thought I would leave her this little surprise! (I'm hoping she won't check my blog tonight!) 

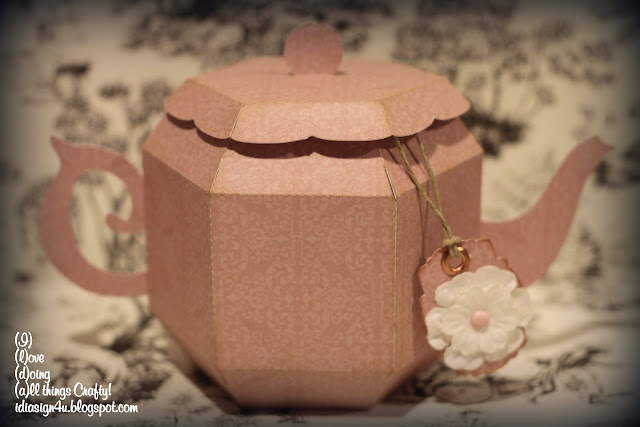
3D Paper Tea Pot | Silhouette File by ilovedoingallthingscrafty.com

A few years ago Elaine invited me to go back home with her to Hong Kong, well circumstances changed for her and she was no longer able to go... but since my husband and I had already planned on going we took advantage of the trip and toured China as well as Hong Kong. It was an amazing trip and one I won't ever forget! During the China portion of our trip, I ended up buying a lot of tea, at a tea house we visited. When Elaine found out how much I paid for this tea she laughed so hard, apparently, I could buy the same stuff here in China town for a fraction of the price I paid! Oh well, it was still great tea! So I thought since she loves tea, a teapot would be fitting :)

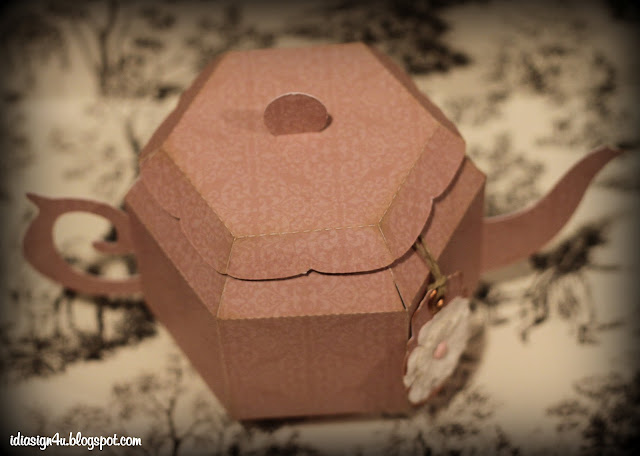
3D Paper Tea Pot | Silhouette File by ilovedoingallthingscrafty.com

This 3D teapot file comes from the Silhouette online store. I also made this cute little tag with a frame file that comes with the Silhouette Designer Studio Edition. 

3D Paper Tea Pot | Silhouette File by ilovedoingallthingscrafty.com


3D Paper Tea Pot | Silhouette File by ilovedoingallthingscrafty.com

Here's me holding it up to show it's scale. 

I placed a few tea bags inside and a note! I hope she enjoys her next coffee break, with some of my tea... Happy Birthday, Elaine ;) 

Have a great week!
Ilda:)

Tuesday, April 10, 2012

Star Wars Birthday Party Decor Reveal and Party Wrap Up

Wow!!! What busy a weekend! My Son celebrated his "Royal" birthday this year. He turned 8 years old on the 8th of April... and to make it even more special it happened to fall on Easter Sunday this year, what a lucky boy! So this year he wanted a Star Wars-themed party. My son and husband both had to help me a lot... I know the main characters and that's about it! Good thing there is a lot out there on the subject :)

Here is my little Jedi... or shall I say my little Padawan  (I learned a thing or two, lol!) Youngling (corrected by husband).

Star Wars Birthday Party Decor Reveal and Party Wrap Up by ilovedoingallthingscrafty.com

I made him his own Jedi shirt, click here for how to make your own personalized shirt. All of his little friends got a Jedi robe as well! Super easy no-sew, simply tear some brown fabric the width of the child and then make another tear in the middle a little over halfway up the cloth (that's where the neckline will be). Then just tear a thin piece for the belt. Pull off the excess string and there you have a 2 minute Jedi robe... remember it doesn't have to be perfect they are probably never going to wear them again!) 

Star Wars Birthday Party Decor Reveal and Party Wrap Up by ilovedoingallthingscrafty.com

Here is the dessert table and treat table... so many goodies! Use what you have to decorate... when the Star Wars bobbleheads came out last year at Mc Donald's my son just had to have them. I'm not sure if he just wants a Happy Meal for the food or just the toy... probably the TOY! Well since we had them I put them to use. The tag on the goody bags says" Thanks for coming... may the force be with you!" Click here on how I made the backdrop. To see how I made the Clone trash containers click here. For the lightsabers click here.

Star Wars Birthday Party Decor Reveal and Party Wrap Up by ilovedoingallthingscrafty.com

The table...

Star Wars Birthday Party Decor Reveal and Party Wrap Up by ilovedoingallthingscrafty.com

I set up the tables so that everybody could see each other by pushing two tables together. A little crowded but it worked! With 17 kids....yup 17! I wanted to be prepared, so I had made place cards with their names on them so they knew exactly where to sit. There was no arguing about who sat by who ;) Here is a closer look at the table, on the bench was their Jedi robes!

Star Wars Birthday Party Decor Reveal and Party Wrap Up by ilovedoingallthingscrafty.com

For food, I kept it really simple... A veggie platter "Veggie Vaders", a meat and cheese platter "Darth Platter", hot dogs were "Sabre Dogs" and of course "Yoda Soda" I need to give Tomas some credit for coming up with the food names!

Star Wars Birthday Party Decor Reveal and Party Wrap Up by ilovedoingallthingscrafty.com

Here is what I got the parents to fill out when they dropped off their children... just in case! Thankfully no one needed to be called :)

Star Wars Birthday Party Decor Reveal and Party Wrap Up by ilovedoingallthingscrafty.com

Party Time!!!

Star Wars Birthday Party Decor Reveal and Party Wrap Up by ilovedoingallthingscrafty.com

After everybody had finished eating we started off by pinning the saber on Yoda. 

Then we did some Jedi training. We divided up into two teams, the Yellow and the Red Sabres. They then raced the Jedi obstacle course... the team with the quickest time won. 

They then battled... the battle was between one yellow and one red team member. With their sabers the had to keep a balloon up in the air, the last player to touch the balloon before it fell on the floor lost, giving the other team a point. 

Next up was musical chairs with the Star War themed music.

Since it was Easter weekend, I had to do some Easter crafting. The kids each dyed a Star Wars-themed wrapped egg. They also did an Easter egg hunt. A few of the eggs contained a blue-chip which they could turn in for a prize!

Finally, it was time for the Darth Vader Pinata. They were so excited when the treats came falling down!

For every game, there was always a winner, but at the end of the games, I made sure that those that didn't win still got to pick something out of the prize box... I think they all were pretty happy! I know my son was, especially after all the new Star War toys he got for his birthday!

Star Wars Birthday Party Decor Reveal and Party Wrap Up by ilovedoingallthingscrafty.com

I hope you liked a few of my ideas on throwing your own Star Wars party.

Happy planning and happy crafting!
Ilda :)

Friday, April 6, 2012

Star Wars Baking - Cake, Cake Pops & Cupcakes for Star Wars Birthday Party


Finally, everything is ready!!! All that is left is 17 kids running around... Wow, it's gonna be wild!

So today I'm going to share with you all the baking I've done for the party. Cake, cupcakes, and cake pops... yup that's a lot of cake! Hopefully, everyone likes cake!

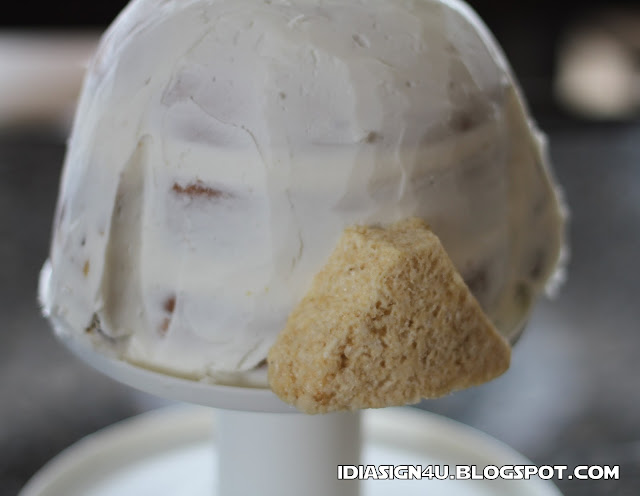
So I will start off with the cake... I really had no idea what I was going to make for a cake. I knew I wanted to make it small. Since I already had some black fondant in my pantry I thought why not make a Darth Vader head. This is a 6-inch marble cake, shhhhhh... it's Betty Crocker! Covered with a buttercream icing. To form the mouth I just used some Rice Krispies treats.

Star Wars Baking - Cake, Cake Pops & Cupcakes for Star Wars Birthday Party by ilovedoingallthingscrafty.com

Yup, I just used 3 packages of Rice Krispies, just roll and mold to the shape you like. Real easy to work with. Then just cover the Krispies well with buttercream icing.

Star Wars Baking - Cake, Cake Pops & Cupcakes for Star Wars Birthday Party by ilovedoingallthingscrafty.com

Not bad! My little Darth Vader head, he actually turned out pretty cute! (If Darth Vader could be cute?) I have him sitting on the top tear of my cupcake stand. 

Star Wars Baking - Cake, Cake Pops & Cupcakes for Star Wars Birthday Party by ilovedoingallthingscrafty.com

Next, here are my Clone Cake Pops! They look like they are lined up to charge. For tips on how I make my cake pops click here. These are white cake on the inside, dipped in white chocolate candy melts, and decorated with black royal icing.

Star Wars Baking - Cake, Cake Pops & Cupcakes for Star Wars Birthday Party by ilovedoingallthingscrafty.com

I didn't think these cake pops would ever end. One cake mix package made around 60+ cake pops. Totally OK, because I thought I would send them to school with my son to share with his grade 2 class.

Star Wars Baking - Cake, Cake Pops & Cupcakes for Star Wars Birthday Party by ilovedoingallthingscrafty.com

He looks so sad :( all wrapped up and ready to eat... I guess he knows his fate, lol!

Star Wars Baking - Cake, Cake Pops & Cupcakes for Star Wars Birthday Party by ilovedoingallthingscrafty.com

All sealed up and ready for delivery!

Star Wars Baking - Cake, Cake Pops & Cupcakes for Star Wars Birthday Party by ilovedoingallthingscrafty.com

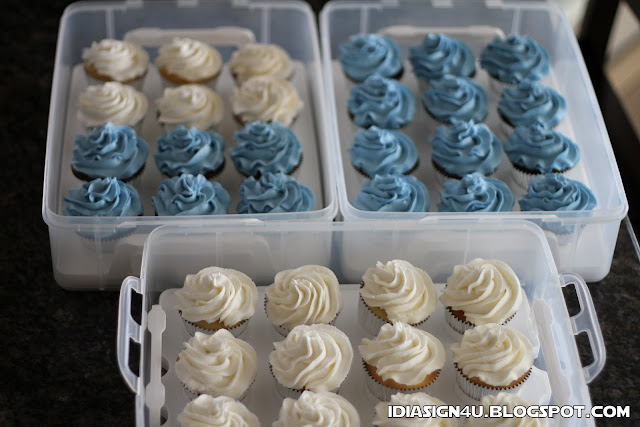
And finally the cupcakes... I made chocolate and vanilla cupcakes, everyone should be happy! Hopefully not crazy happy from the sugar rush, hehe! They are going to look super cute with the cupcake toppers I made :)

I'll make sure to take lots of pics of the party to share with you all... Happy Birthday, 8th Tomas! 
Well it's getting late and I'd better get some beauty sleep so I can be ready to entertain all those kids! 

Wish me luck!!!
Ilda :)

Star Wars Cup Cake Toppers for Star Wars Birthday Party


For the party, I decided I would make some cupcakes. I thought about making cupcake wrappers with my Silhouette, but then I thought that might be too much work and use up a lot of paper. So then I decided on just making cupcake toppers. Jin Yong from Under a Cherry Tree has taught me pretty much everything I have learned about my Cameo. If you have a Silhouette, you should definitely check out her blog... She has some really good tutorials, and I referred to this one when I made these cupcake toppers.

I Googled Star War images and came across some really cute ones, I then opened up the image in the Silhouette Studio Designer Edition and followed Jin's tutorial for the rest.

Star Wars Cup Cake Toppers for Star Wars Birthday Party by ilovedoingallthingscrafty.com

Here is what I had once they were all cut up. For the toppers, I just used hot glue and toothpicks.

Star Wars Cup Cake Toppers for Star Wars Birthday Party by ilovedoingallthingscrafty.com

On the reverse side of the topper place a large enough glob of glue.

Star Wars Cup Cake Toppers for Star Wars Birthday Party by ilovedoingallthingscrafty.com

Fold in half and align with the bottom part of the topper. Press together. 

Star Wars Cup Cake Toppers for Star Wars Birthday Party by ilovedoingallthingscrafty.com

All ready for the cupcakes!

Now time to get started on the cupcakes, cake pops, and the cake!

Thanks for visiting!
Ilda :)

DIY Star Wars Dessert Table Galaxy Backdrop for Star Wars Birthday Party

I plan on having a dessert table for my son's Star Wars-themed party but wanted to make some sort of backdrop. So my initial thought was foam board and wrapping paper, easy enough I thought... but I had such a hard time finding wrapping paper that was space-themed, then I thought fabric and still no luck (mind you I didn't go looking in every store). So I thought I would just make my own. I purchased all of my supplies at the Dollar Store (under $8!).  And here is what I did...

DIY Star Wars Dessert Table Galaxy Backdrop for Star Wars Birthday Partyby ilovedoingallthingscrafty.com

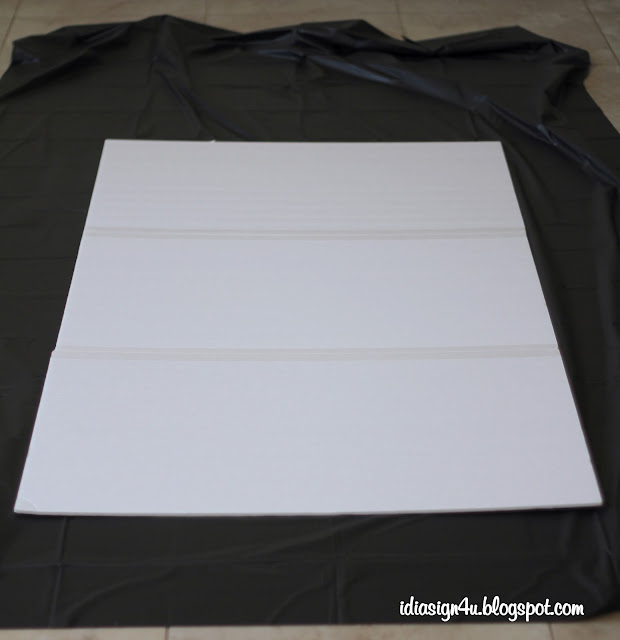
I used 3 foam poster boards.

DIY Star Wars Dessert Table Galaxy Backdrop for Star Wars Birthday Partyby ilovedoingallthingscrafty.com

Used packing tape to tape them to each other.

DIY Star Wars Dessert Table Galaxy Backdrop for Star Wars Birthday Partyby ilovedoingallthingscrafty.com

So instead of paper, I used a plastic table cover.

DIY Star Wars Dessert Table Galaxy Backdrop for Star Wars Birthday Partyby ilovedoingallthingscrafty.com

I then wrapped it up like you would a present, making sure that the plastic was pulled taught and then secured it with tape.

DIY Star Wars Dessert Table Galaxy Backdrop for Star Wars Birthday Partyby ilovedoingallthingscrafty.com

So I also picked up some silver glitter glue and some foam rollers.

DIY Star Wars Dessert Table Galaxy Backdrop for Star Wars Birthday Partyby ilovedoingallthingscrafty.com

So to make it look "spacey" I thought I would just smear silver glitter glue all over.

DIY Star Wars Dessert Table Galaxy Backdrop for Star Wars Birthday Partyby ilovedoingallthingscrafty.com

Once I was done I placed in a sunny area to let it dry.

DIY Star Wars Dessert Table Galaxy Backdrop for Star Wars Birthday Party by ilovedoingallthingscrafty.com

It's now ready... the perfect "spacey" looking backdrop! I have glow in the dark wall stickers that I also bought to place on the board... you'll just have to come back for the dessert table reveal! 

Imagine the possibilities, how easy to make your own backdrops.... paper, fabric or in this case plastic!

Hope you liked this idea!
Ilda :)

Thursday, April 5, 2012

DIY Star Wars Personalized T-shirt for Start Wars Birthday Boy


As part of my son's present I thought I would make him a personalized Star Wars T-Shirt. I have been wanting to try this out for a while, but never had a good reason to. I knew that Silhouette sold heat transfer vinyl, but living in Canada there are not very many places that carry Silhouette products, so I turned to Micheals. I had seen some iron-on printer transfer sheets there before so I went there this past weekend with a 50% off coupon and bought a package.

DIY Star Wars Personalized T-shirt for Start Wars Birthday Boy by ilovedoingallthingscrafty.com

I've been to Dollar Store so often recently for all the party supplies and look at what I found there! A Fruit of the Loom T-shirt... Only $2!

DIY Star Wars Personalized T-shirt for Start Wars Birthday Boy by ilovedoingallthingscrafty.com

I then began designing the T-shirt logo on the Silhouette Studio Designer Edition. I didn't have Star Wars font but I found the font for free here! You don't need the Silhouette to make this T-shirt but I wanted the Cameo to cut around the edges for me.  

DIY Star Wars Personalized T-shirt for Start Wars Birthday Boy by ilovedoingallthingscrafty.com

Here is what it looked like on-screen before I sent it to the printer. To use these transfer sheets you must use an inkjet printer, NOT laser printer! I learned that the hard way... we had to pull out our old printer for this.

DIY Star Wars Personalized T-shirt for Start Wars Birthday Boy by ilovedoingallthingscrafty.com

After it was printed, I then cut out the images with the Cameo.

DIY Star Wars Personalized T-shirt for Start Wars Birthday Boy by ilovedoingallthingscrafty.com

On the back of the T-Shirt, I ironed on the little Star Wars logo (centered under the neckline).

DIY Star Wars Personalized T-shirt for Start Wars Birthday Boy by ilovedoingallthingscrafty.com


Finally, I placed the image on the front of the T-shirt and followed the directions on the transfer package. Seconds later the image fused and now I have a T-shirt that my son is surely going to love! Next time you see this shirt it will be finished and on my son :)

Thanks for coming by!
Ilda :)