Showing posts with label Sunflower. Show all posts

Monday, September 14, 2020

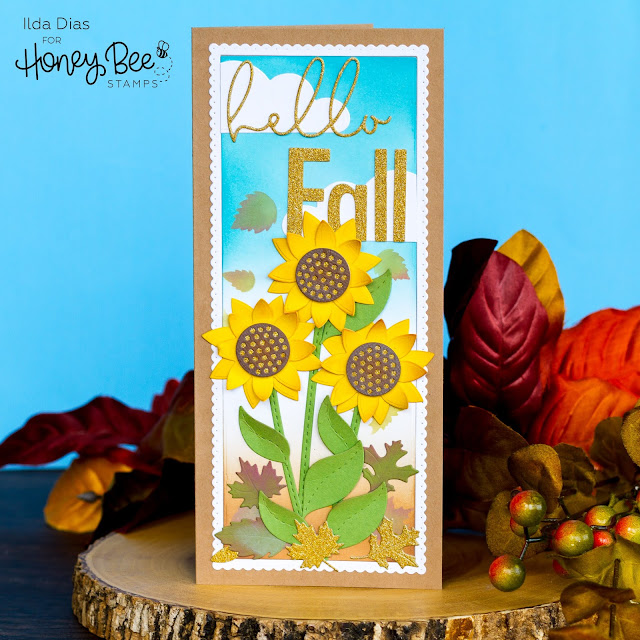
Hello Fall Sunflower Slimline Scene | Honey Bee Stamps


Hello, Fall, Sunflower, Slimline, Scene Honey Bee Stamps, Ink Blending, distress oxide inks, Card Making, Die Cutting, handmade card, ilovedoingallthingscrafty, Stamps, how to,

Hello Everyone, hope you all had a wonderful weekend. 

I am back today with this Hello Fall Sunflower Slimline Scene using die cuts only. The perfect card to send a friend this season just to let them know you are thinking about them. I mixed and matched a few die sets to come up with the design and I hope you are inspired by it. I love sunflowers, so this was a great excuse to make some.

CARD DETAILS

Here's how you can recreate this card.

  1. Begin by die cutting the frame and background using the SLIMLINE SENTIMENTS EYELET DIES from cardstock that blends well. (I used Bristol Paper)
  2. Blend the background panel. (I used VINTAGE PHOTO and BROKEN CHINA Oxide Ink) 
  3. Use the PUMPKIN PATCH STENCIL to blend out falling leaves in the sky and on the ground.
Hello, Fall, Sunflower, Slimline, Scene Honey Bee Stamps, Ink Blending, distress oxide inks, Card Making, Die Cutting, handmade card, ilovedoingallthingscrafty, Stamps, how to,
  1. Die-cut a few clouds using the LARGE CLOUDS DIES. Glue onto the top part of the panel. Trim off any excess that hangs over the edge.
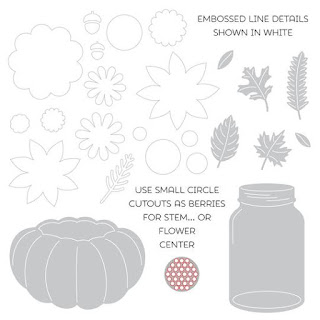
  2. Die-cut the petals and centers for the sunflowers from the FALL BOUQUETS HONEY CUTS.  Ink up edges of the petals and curl them to add dimension. Glue the layers together. ( I used a gold glitter cardstock under the flower centers)
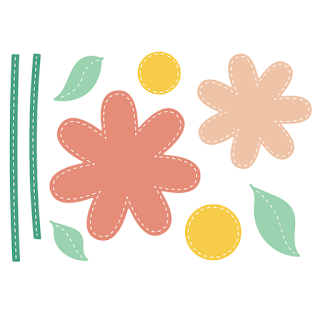
  3. Die-cut stems and leaves for the sunflowers using the dies from STITCHED FLOWERS HONEY CUTS. Glue stems behind the flower heads.
  4. Arrange the sunflowers as you wish and glue onto the card panel. Glue leaves in place.
Hello, Fall, Sunflower, Slimline, Scene Honey Bee Stamps, Ink Blending, distress oxide inks, Card Making, Die Cutting, handmade card, ilovedoingallthingscrafty, Stamps, how to,
  1. Die-cut the hello from the SLIMLINE SENTIMENTS EYELET DIES, position, and glue in place.
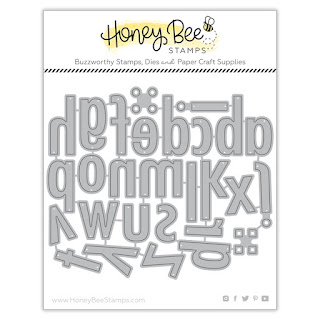
  2. Die-cut the letters for the word Fall. I used both the BEE BOLD ALPHABET CUTS and the BEE BOLD LOWERCASE DIES. Arrange and glue in place.
  3. Add extra leaves from using dies from the FALL BOUQUETS | HONEY CUTS. (I inked them up with various fall colors, see oxide inks links below. I also used gold glitter ones too).
Hello, Fall, Sunflower, Slimline, Scene Honey Bee Stamps, Ink Blending, distress oxide inks, Card Making, Die Cutting, handmade card, ilovedoingallthingscrafty, Stamps, how to,
  1. Cut out a slimline sized card base (9x8inches). The finished card measures 9 inches tall by 4 inches wide.
  2. To finish the card, glue the slimline background onto the card base and add the scalloped edging that was die cut from the first step.
I hope you were able to follow the process along and are inspired to create your own Fall Sunflower Slimline Scenes.

Thank you for stopping by and until next time... Happy Crafting 👋


SUPPLIES
SLIMLINE SENTIMENTS EYELET DIES
Shop at:
SSS | HBS
FALL BOUQUETS | HONEY CUTS
Shop at:
SSS | SB | HBS
STITCHED FLOWERS | HONEY CUTS
Shop at:
SSS | SB | HBS
LARGE CLOUDS DIES
LARGE CLOUDS DIES
Shop at:
SSS | SB | HBS
BEE BOLD ALPHABET CUTS
Shop at:
SSS | SB | HBS
BEE BOLD LOWERCASE DIES
Shop at:
SSS | SB | HBS
PUMPKIN PATCH | STENCIL
Shop at:
SSS | HBS
BACKGROUND BLENDER BRUSHES
Shop at:
SSS | HBS
NEENAH SOLAR WHITE 110
Shop at:
SSS | AMZ | HBS
Gold Glitter Cardstock
Shop at:
SSS
GEMINI JR. DIE CUTTER
Shop at:
SSS | AMZ | SB
BROKEN CHINA Oxide Ink
Shop at:
SSS | SB | HBS
Oxide Ink Pad VINTAGE PHOTO
Shop at:
SSS | SB | HBS
Oxide Ink Pad PEELED PAINT
Shop at:
SSS | HBS
Oxide Ink Pad BARN DOOR
Shop at:
SSS | HBS
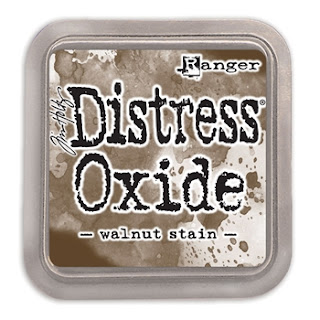
Oxide Ink Pad WALNUT STAIN
Shop at:
SSS | HBS

To make supplies easy for you to find, I have linked them above. If something is no longer available I will link to a similar product. Affiliate links may be used depending on the product linked. 
Please help support my blog by using these links while shopping at no additional cost to you. For more information about the affiliates I use, please visit my disclaimer here. Thanks so much for all your support!

Tuesday, March 24, 2015

Let the Sun Shine In - Mixed Media Painting


Hello Sunshine!

It's finally Spring here, but it still looks like winter outside! Nevertheless, I can't wait for the sunny and warm Spring weather ahead :)

Today I want to share with you all my latest mixed media painting. I'm so addicted to this craft already! It's the perfect blend of paper, paint, modgepoge and embellishments.  I love how it turned out, and was super excited to give it away to a friend of mine that was in need of a little sunshine in her life! Hope that when she looks at this, it will make her day will feel a little brighter ;)


The paper I used was all scrap pieces of paper I've collected through the years of papercrafting that I had no idea what to do with. I just free hand cut out the flower. I did however use my silhouette machine to cut out the stamped letters. I finally got a chance to try out my pixscan mat. Click HERE to see what the pixscan is all about!


Hard to see from a picture, but there is so much detail and texture on this painting... I LOVE it!!!


Here is a step by step look at how the painting evolved!


I hope this has inspired my fellow paper crafters (or anyone else intersted) to try out this type of painting... If you are a crafter, I'm sure you have tones of scrap paper you could use up! For those of you wanting to try this, I would recommend watching some You Tube videos and then just go for it! You'll be amazed at what a little paint, paper, modgepoge and creativity can make!

Thanks for stopping by!
Happy Crafting  :)


Friday, November 7, 2014

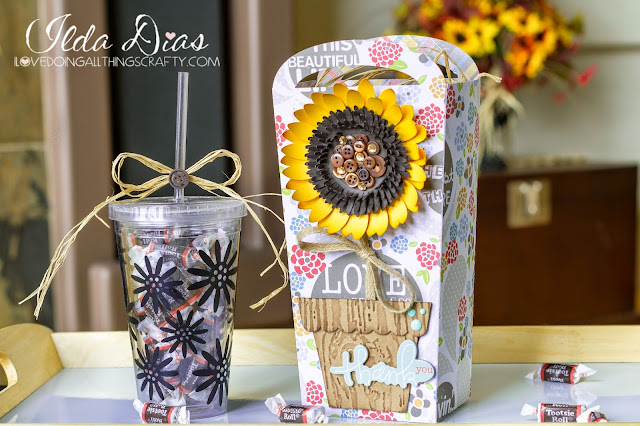
Sunflower Thank-You Gift Set | SVGCuts

Hello, my friends!!!

So here in Canada, we have already celebrated Thanksgiving, but for my American friends, it is coming right up! Today's post is perfect for those of you wanting to make a quick Thanksgiving gift or just an everyday Thank-you for someone!

Here is my Sunflower Thank-You Gift Set, and my latest SVG Cuts DT project! 

Gift,Tumbler,SVG Cuts Design Team Project,#SVGCuts,Silhouette Cameo,Thank-you,Fall,Sunflower,vinyl,ilovedoingallthingscrafty,

For those that want a chance of winning all the kits I used make sure you got to -> SVG Cuts FB page and leave a comment! Hurry time is limited!!!


I LOVE, LOVE Sunflowers, they are one of my favorites. They just make me happy! Isn't this one SO pretty?! I made the leaves by using some twine ribbon! Cool, right?


And, who doesn't love tumblers?
 So practical and useful! This one was super easy and quick to make!


Hope you have enjoyed this quick-to-make Sunflower Thank-You Gift Set!

Thanks for stopping by!
Happy Crafting  :)

Tuesday, October 16, 2012

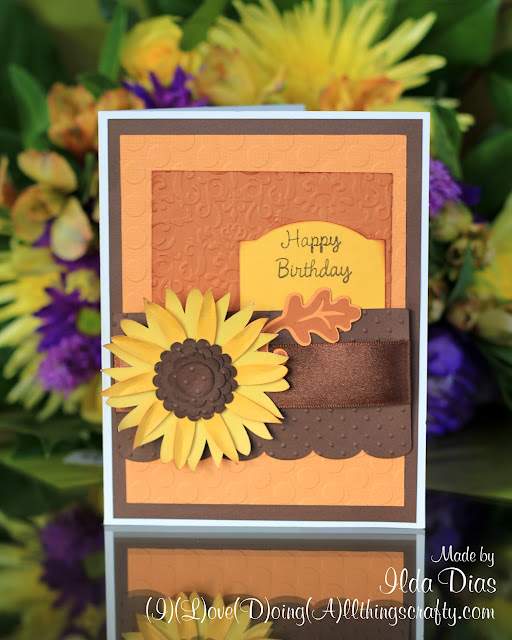
Autumn Sunflower Birthday Card | Mojo Monday Sketch Challenge

Hey everyone!

It was my Mother-In-Law Gabriela's birthday yesterday so I thought I would attempt making her a card... Honestly, I find making cards more challenging than anything 3D! They just look so simple once they are done, but they are NOT!....maybe it's just me... or, maybe I just need more practice, lol!

Autumn Sunflower Birthday Card | Mojo Monday Sketch Challenge

I love the Autumn colors so I wanted to make something with them. For this card, I used basic card stock, a little ink and did a bit of embossing to add some texture and interest! The files I used to create this card come from here, and the sunflower comes from CRISP DAYS OF FALL KIT here. I used the Cameo to cut it out.


Since I got my idea from this sketch I will be sharing it over on Mojo Monday's Sketch Challenge! I actually got my inspiration from Michelle from Michelle My Belle's Creations. I've been following her since I started blogging... she was actually one of my first followers and nominated me for my first blog award! Thanks again, Michelle! Anyways, Michelle creates beautiful files for Mojo Monday's Sketch Challenge. Check out their blogs for tones of inspiration! So now that I've made a card I can finally enter, yeah me!!!
Thanks for stopping by! 
Happy Crafting :)