Showing posts with label Retirement. Show all posts

Monday, July 22, 2024

Beach Waves Retirement Shaker Card | Honey Bee Stamps

Honey Bee Stamps,DIY beach card, shaker card,Shaker Pocket,beach themed, retirement, Paper crafting,how to, hand made card, Stamps, stamping, die cutting, card making, ilovedoingallthingscrafty,

Hello, crafty friends! 

Today, I'm excited to share a special shaker card with you. This beach-themed card was created for a dear friend and colleague, who is a doctor I've had the pleasure of working with for over 26 years. As he moves to a warmer climate, I wanted to send him off with a card that captures the essence of his new sunny surroundings.

CARD RECIPE

Create the Background:

Create the Shaker Element:

Honey Bee Stamps,DIY beach card, shaker card,Shaker Pocket,beach themed, retirement, Paper crafting,how to, hand made card, Stamps, stamping, die cutting, card making, ilovedoingallthingscrafty,

Add Embellishments:
  • Add a thin layer of glue to the edges of the waves and Sprinkle PRISMA GLITTER and Lawn Fawn Chunky Glitter over the wet areas for extra sparkle.

Create the Beach Scene:

  • Use the Lovely Layers At The Beach Dies to cut out the beach umbrella, towel, and flip-flops from Americana Crepe Paper and other colored cardstock.
  • Assemble the pieces and adhere them to the background.
  • To the umbrella add a pearl from the Travel Pearl Stickers set.
Honey Bee Stamps,DIY beach card, shaker card,Shaker Pocket,beach themed, retirement, Paper crafting,how to, hand made card, Stamps, stamping, die cutting, card making, ilovedoingallthingscrafty,

Stamp and Die-Cut Sentiment:


Honey Bee Stamps,DIY beach card, shaker card,Shaker Pocket,beach themed, retirement, Paper crafting,how to, hand made card, Stamps, stamping, die cutting, card making, ilovedoingallthingscrafty,

I hope this card brings a smile to my colleague's face and serves as a small reminder of our many years of working together. Creating this beach-themed card was a joy, and I hope you enjoyed this tutorial and feel inspired to create your own sunny scenes. 

Thanks so much for stopping by and until next time... Happy crafting!
Ilda 🌊

SUPPLIES
Beach Break A2 Cover Plate
Shop at:
SSS | SB | HBS
Beach Break stencils
Shop at:
SSS | SB | HBS
LL At The Beach Dies
Shop at:
SSS | SB | HBS
Rest & Relaxation Stamps
Shop at:
SSS | SB | HBS
Rest & Relaxation Dies
Shop at:
SSS | SB | HBS
Americana Crepe Paper
Shop at:
SSS | SB | HBS
Travel Pearl Stickers
Shop at:
SSS | SB | HBS
Bee Creative A2 Shaker Pockets
Shop at:
SSS | SB | HBS
Red Line Tape 1/4
Red Line Tape 1/4"
Shop at:
SSS | HBS
Bee Creative Intense Black Ink Pad
Shop at:
SSS | SB | HBS
Background Blender Brushes
Shop at:
SSS | HBS
Detail Blender Brushes
Shop at:
SSS | HBS
Bee Creative Glue
Bee Creative Glue
Shop at:
SSS | SB | HBS
Bee Creative Bitty Buzz Cutter
Shop at:
HBS
SUN LIGHT Confetti
SUNLIGHT Confetti
Shop at:
HBS
New Mini Misti
New Mini Misti
Shop at:
SSS | SB | HBS
Platinum 6 Die Cutting Platform
Shop at:
SSS | SB | HBS
Oxide Ink Pad SALTY OCEAN
Shop at:
SSS | AMZ | HBS
Oxide Ink Pad VINTAGE PHOTO
Shop at:
SSS | SB | HBS
Paper Glaze Luxe Twinkle Lights Celebrations Sampler Set
Shop at:
PFS
PRISMA GLITTER
PRISMA GLITTER
Shop at:
SSS
Lawn Fawn Chunky Glitter
Shop at:
SSS | SB
Bearly Art Precision Glue
Shop at:
SSS | AMZ | HBS
To make supplies easy for you to find, I have linked them above. If something is no longer available I will link to a similar product. Affiliate links may be used depending on the product linked. Please help support my blog by using these links while shopping at no additional cost to you. For more information about the affiliates I use, please visit my disclaimer here. Thanks so much for all your support!

Enjoyed this post? Never miss out on future posts by Following this Blog

Monday, August 21, 2023

Sand Castle Retirement Shaker Card | Honey Bee Stamps

Sand Castle, Retirement, Shaker Card, Honey Bee Stamps, how to,handmade card,Stamps,ilovedoingallthingscrafty,stamping, diecutting,cardmaking,Frameless Shaker Card,

Hello Friends. If you have been following me on Instagram you would know that we have just returned from our 6-week long, summer vacation! And, as happy as I am to be home a little part of me wishes I was still on a beach building sandcastles instead of making them from paper. Oh well, it was amazing while it lasted and now it's time for reality. For those of you that want to see more about our travels, I have all the highlights saved in my Stories over on Instagram

So anyways, lately our hospital has witnessed a wave of retirements among people I've known for over 25 years. Although saying farewell fills me with a tinge of sadness, there's an undeniable thrill and perhaps even a twinge of envy, considering the long path that lies ahead before my own retirement years arrive.

Today's post is dedicated to my esteemed nursing colleagues. I am well aware that many of them are eagerly anticipating well-deserved travels and the pursuit of a leisurely life, perhaps lounging on a sun-kissed beach!

CARD RECIPE
 
Now, let's dive into the details of this card.

1. Begin by crafting the backdrop for the shaker pocket. For the background, I used a piece of paper from the Vitamin Sea Paper Pad. To give the card some dimension, I trimmed the sandy part of the paper and set it aside, and then just glued the top part of the paper to an A2 card panel. 
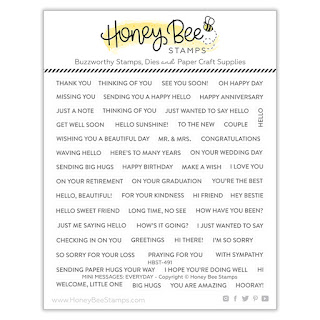
2. Next, I stamped out the sentiment onto the top part of the panel using stamps from the Mini Messages Stamp set. 
3. Wrap the panel to create the shaker pocket. For shaker bits, I used AURORA LIGHTS Confetti Mix, seal the top flap to close the pocket, and attach it to a card base.
4. To the front of the panel, glue the sand layer that was trimmed earlier using foam tape to add some dimension. This will hide the shaker bits until the card is shaken. 
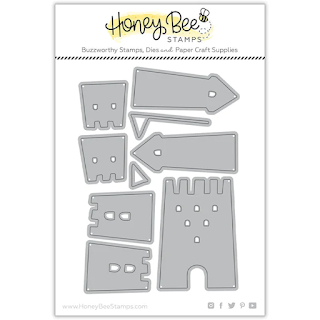
5. Die-cut the Sand Castle using the Sand Castle Builder Dies. I first added some ink splatters then inked up the edges to give it a sand-like texture.
6. Add the castle to the card front using foam to create dimension.
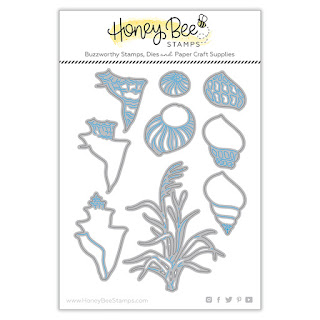
7. For an extra touch of realism, I added some beach grasses from the Lovely Layers: Seashore Dies. For balance, I just cut the grass in half and added it to each side of the scene with a little glue.
8. Finally, for a touch of sparkle I added some red gems to the castle flags.

Here is a photo, of what it looks like when the shaker bits nestled beneath the inviting sand layer.

Sand Castle, Retirement, Shaker Card, Honey Bee Stamps, how to,handmade card,Stamps,ilovedoingallthingscrafty,stamping, diecutting,cardmaking,Frameless Shaker Card,

And here it is again, with the shaker bits in motion. Almost like it comes alive, dancing with the fervor of water bubbles frothing in the mighty ocean.

Sand Castle, Retirement, Shaker Card, Honey Bee Stamps, how to,handmade card,Stamps,ilovedoingallthingscrafty,stamping, diecutting,cardmaking,Frameless Shaker Card,

I hope this fun retirement shaker has inspired you today. Of course, this card could be used for any summer/beach purpose by simply changing the sentiment.


Thank you for stopping by and until next time... Happy Crafting and relaxing!
Ilda 🏖

SUPPLIES
Vitamin Sea Paper Pad
Shop at:
SSS | SB | HBS
Sand Castle Builder Dies
Shop at:
HBS
Lovely Layers: Seashore Dies
Shop at:
SSS | SB | HBS
Mini Messages Stamps
Shop at:
SSS | SB | HBS
Detail Blender Brushes
Shop at:
SSS | HBS
AURORA LIGHTS Confetti Mix
Shop at:
HBS
Tear Tape XL Roll | 1/4
Tear Tape XL Roll | 1/4"
Shop at:
HBS
Bee Creative Glue
Bee Creative Glue
Shop at:
SSS | SB | HBS
Intense Black Ink Pad
Shop at:
SSS | SB | HBS
Black Foam Dots 1/2
Black Foam Dots 1/2"
Shop at:
HBS
Make it Merry Gems
Make it Merry Gems
Shop at:
SSS | SB | HBS
Honey Bee Reverse Tweezers
Shop at:
SSS | HBS
Bee Creative Bitty Buzz Cutter
Shop at:
HBS
Stamping Pressure Tool
Shop at:
HBS
Copic Opaque White Pigment
Shop at:
SSS | AMZ
GATHERED TWIGS Oxide Ink
Shop at:
SSS | SB | HBS
New Mini Misti
New Mini Misti
Shop at:
SSS | SB | HBS
To make supplies easy for you to find, I have linked them above. If something is no longer available I will link to a similar product. Affiliate links may be used depending on the product linked. Please help support my blog by using these links while shopping at no additional cost to you. For more information about the affiliates I use, please visit my disclaimer here. Thanks so much for all your support!

Enjoyed this post? Never miss out on future posts by Following this Blog

Monday, July 25, 2022

Ocean Scene Shadow Box Card | Honey Bee Stamps

Ocean Scene, Shadow Box Card,Honey Bee Stamps, Card Making, Stamping, Die Cutting, handmade card, ilovedoingallthingscrafty, Stamps, how to, Under water, birthday, retirement

Hello friends! 

Hope you are enjoyng the beautiful warm weather, and hopefully you aren't in a place where the temperatures are extremely hot at the moment. Thankfully here in Edmonton, the weather has wonderful. Even still I wish we lived closer to the beach so I could go dive into the ocean just like todays card reminds me of.

CARD RECIPE

  • Die cut all the ocean pieces you want to use from the Ocean Deep Scene Builder Dies. With Copic markers and gel pen add details to the die cuts. Set them aside.
  • Die cut the pieces for the shadow box card. I used the A2 Scene Builder Card Base Dies to create the skeleton for this shadow box card. I die cut the front of this die set 3 times using progressively darker shades of blue card stock. This die cuts an opening for the card scene, but because I want to create the ocean wave layers I had to cut 3 pieces of the same colored cardstock to cover up the opening which measured 4.5 x 4.25 inches. I then die cut the ocean waves into each layer from largest to smallest, lightest to darkest color. 

Ocean Scene, Shadow Box Card,Honey Bee Stamps, Card Making, Stamping, Die Cutting, handmade card, ilovedoingallthingscrafty, Stamps, how to, Under water, birthday, retirement
  • Glue the ocean layer onto the coordinating front card die-cut frame. 
  • Cut the side panels to 1/4 inch on each side of the frames, you will use these tabs to glue later to form the layers of the card.
  • To the back panel of the card base (black layer), I stamped out the sentiment from the Seas The Day stamp set. 

Ocean Scene, Shadow Box Card,Honey Bee Stamps, Card Making, Stamping, Die Cutting, handmade card, ilovedoingallthingscrafty, Stamps, how to, Under water, birthday, retirement
  • Attach the 2 middle layers of the scene to the card base. I used red line tape and attached one side first and then the other side, ensuring they fold flat in both directions.
  • For the top layer of the ocean frame, I used the Layered Waves Stencils to add more interest to the front of the card by blending out Salty Ocean Distress Oxide ink. 
  • Start gluing the pieces to create the ocean scene. 
  • Once you are happy glue one side of the card to the base and then fold and line up to glue the other side of the card. 
  • Finish by adding gel pen details and gem stickers.
Ocean Scene, Shadow Box Card,Honey Bee Stamps, Card Making, Stamping, Die Cutting, handmade card, ilovedoingallthingscrafty, Stamps, how to, Under water, birthday, retirement

To the back, I glued a white card panel and left it blank. I think this card would make a great retirement, birthday, or Bon Voyage card. 

Fold flat into an A2-sized envelope and mail it to a friend. 

I hope this Ocean Scene Shadow Box Card inspired you today. Thank you for stopping by and until next time... Happy Crafting!

Ilda 🐟🐠

SUPPLIES
Ocean Deep Scene Builder Dies
Shop at:
SSS | SB | HBS
A2 Scene Builder Card Base Dies
Shop at:
SSS | SB | HBS
Seas The Day
Seas The Day
Shop at:
SSS | SB | HBS
Layered Waves Stencils
Shop at:
SSS | SB | HBS
Bitty Buzz Cutter
Bitty Buzz Cutter
Shop at:
HBS
Sticky Red Tape 1/4
Sticky Red Tape 1/4"
Shop at:
HBS
Detail Blender Brushes
Shop at:
SSS | HBS
Aurora Borealis Gem Stickers
Shop at:
SSS | HBS
Oxide Ink Pad SALTY OCEAN
Shop at:
SSS | AMZ | HBS
New Mini Misti
New Mini Misti
Shop at:
SSS | SB | HBS
Platinum 6 Die Cutting Platform
Shop at:
SSS | SB | SB
Shark Tooth White Atelier Ink
Shop at:
SSS | IO3
Arctic White Emb.Pwd.
Shop at:
SSS | IO3
Bearly Art Precision Glue
Shop at:
SSS | AMZ
White Gelly Roller Pen
Shop at:
SSS | AMZ | SB | HBS
To make supplies easy for you to find, I have linked them above. If something is no longer available I will link to a similar product. Affiliate links may be used depending on the product linked. Please help support my blog by using these links while shopping at no additional cost to you. For more information about the affiliates I use, please visit my disclaimer here. Thanks so much for all your support!