Showing posts with label Hero Arts. Show all posts

Tuesday, October 29, 2024

Retro Gamer Birthday Card | Hero Arts + Ralph Tyndall

Handmade interactive retro gaming card featuring a Game Boy-inspired design. The card has vibrant splatters of pink, yellow, green, and blue, with interchangeable game cartridges. Sentiments include "New Level Unlocked - AMAZING!" and "You're the only person I'll let be Player One." Embellished with heart and star details, the card has a playful, nostalgic '90s vibe.

Hey there, crafty friends!

Today, I’m sharing a super fun project that’s sure to bring a smile to any gamer’s face! I recently got my hands on the new Hero Arts + Ralph Tyndall Retro Game Fancy Dies, and I couldn’t wait to dive in and create this nostalgic, interactive birthday card. The set is designed to instantly spark joy for anyone who loves retro video games (hello, '90s kids!), and it gave me so many creative options to play with.

Card Design Overview

For this project, I wanted to capture the full '90s gaming vibe, so I started by die-cutting the main video game console face. The die set includes everything you need to create a super authentic look, from the directional pad and buttons to a game cartridge that you can actually switch out!

Tip: Before snipping the dies apart, I used a template technique. I first die-cut the face of the console in one solid piece to help with the exact placement of all the buttons and details. This made it super easy to piece everything together on my final card.

CARD RECIPE

Hero Arts + Ralph Tyndall Retro Game Fancy Dies 

HA + RT Retro Game Stamps

Intens-ified Black Ink Pad - Black stamped ink

Clear Card Panels - Acetate

Distress Oxide Inks - Picked Raspberry, Twisted Citron, and Hickory Smoke

Distress Spritz - front panel - Picked Raspberry, Fossilized Amber, Twisted Citron and 

Peacock Feathers

Foam Tape


Handmade interactive retro gaming card featuring a Game Boy-inspired design. The card has vibrant splatters of pink, yellow, green, and blue, with interchangeable game cartridges. Sentiments include "New Level Unlocked - AMAZING!" and "You're the only person I'll let be Player One." Embellished with heart and star details, the card has a playful, nostalgic '90s vibe.

Creating the 90’s Vibe Panel

For that classic, retro look, I used Distress Sprays in a few fun colors:

  • Fossilized Amber
  • Picked Raspberry
  • Twisted Citron
  • Peacock Feathers

I spritzed the top panel with these colors to give it that vibrant, splattered effect that just screams '90s arcade! The mix of neon and bright colors instantly gave the card an upbeat, nostalgic feel. You can also see a little splatter around the edges, which adds to that playful, carefree gamer energy. This also add a touch of shimmer!

Interactive Cartridge Fun!

What really makes this card interactive and unique are the game cartridges. The die set includes a cartridge die, and I made three interchangeable cartridges for this card! The recipient can swap them out for different messages depending on the occasion (or their mood). For this version, I went with a birthday theme, but you could easily change it up for a love note, a thank you card, or even a fun holiday message. These fun stamps come from the coordinating HA + RT Retro Game Stamps.

  • Sentiments: I stamped phrases like "New Level Unlocked - AMAZING!" and "You're the only person I'll let be Player One" to keep with the gaming theme. The options are endless, and it's such a fun interactive element for your cards!
Handmade interactive retro gaming card featuring a Game Boy-inspired design. The card has vibrant splatters of pink, yellow, green, and blue, with interchangeable game cartridges. Sentiments include "New Level Unlocked - AMAZING!" and "You're the only person I'll let be Player One." Embellished with heart and star details, the card has a playful, nostalgic '90s vibe.

Adding Dimension with Foam Tape

To ensure that the cartridges would easily slide in and out, I used double layers of foam tape around the edges of the game console screen. This created the perfect amount of space for the interactive element to work smoothly. I also mounted the console panel onto a shaped card base to give it that classic Game Boy look, making the whole card feel cohesive.

Final Touches

Of course, I had to finish it off with some playful embellishments, including bright heart and star details. These little extras really tie everything together and add that extra level of fun.

Handmade interactive retro gaming card featuring a Game Boy-inspired design. The card has vibrant splatters of pink, yellow, green, and blue, with interchangeable game cartridges. Sentiments include "New Level Unlocked - AMAZING!" and "You're the only person I'll let be Player One." Embellished with heart and star details, the card has a playful, nostalgic '90s vibe.

This project was such a blast to make, and I hope it inspires you to bring some retro gaming magic to your next card! Whether you’re crafting for a fellow gamer or just want to create something interactive and unique, this die set is an absolute must-have.

Thanks for stopping by, and don’t forget to level up your creativity!

Ilda 🎮

To make supplies easy for you to find, I have linked them above. If something is no longer available I will link to a similar product. Affiliate links may be used depending on the product linked. Please help support my blog by using these links while shopping at no additional cost to you. For more information about the affiliates I use, please visit my disclaimer here. Thanks so much for all your support!

Enjoyed this post? Never miss out on future posts by Following this Blog

Friday, October 25, 2024

Fun and Pool-Themed Card | Hero Arts + Ralph Tyndall

A handmade card featuring a green pool table background with colorful pool balls in red, yellow, and blue at the corners. The focal point is a black eight ball designed to resemble a mix of a pool ball and a Magic 8 ball. The eight ball has a glossy finish, and the sentiment curves above it, reading "I'm not saying you're getting old, but...". Inside the Magic 8 ball, the text reads, "It seems so, yes." The card has a playful and masculine design, perfect for a birthday or fun occasion

Today, I’m excited to share a new project featuring the Ralph Tyndall + Hero Arts Interactive Eight-Ball Fancy Dies from their latest release! If you’re looking for a fun, quirky card with a masculine touch, this card is perfect—designed to resemble a pool table and combining the playful vibe of a Magic 8 ball.

CARD RECIPE

How I Created the Card:

I started by cutting out the eight-ball using the HA + RT Interactive Eight-Ball Fancy Dies, mixing the elements of a traditional pool ball and the iconic Magic 8 ball. To make it pop, I added glossy accents to the eight-ball, which gave it a sleek, shiny appearance—just like a real pool ball.

The card itself is built on a bold green background, mimicking a pool table surface. I added pops of color by placing partial circles of other pool balls in red, yellow, and blue around the edges. These contrasting colors draw the eye toward the central eight-ball.

A handmade card featuring a green pool table background with colorful pool balls in red, yellow, and blue at the corners. The focal point is a black eight ball designed to resemble a mix of a pool ball and a Magic 8 ball. The eight ball has a glossy finish, and the sentiment curves above it, reading "I'm not saying you're getting old, but...". Inside the Magic 8 ball, the text reads, "It seems so, yes." The card has a playful and masculine design, perfect for a birthday or fun occasion.

Sentiment Details:

For the sentiment, I used the curved "I'm not saying you're getting old, but..." stamp from the set. This was stamped in black using the Hero Arts Intens-ified Black Ink Pad, which gives a crisp, bold look that stands out against the green background. The triangle inside the eight-ball reads “It seems so, yes,” adding a humorous twist that fits the playful nature of the Magic 8-ball theme. The sentiment inside completes the Birthday card.

Finishing Touches:

I love how the glossy finish on the eight-ball creates a realistic look, making this card extra special. It's a great card for guys, whether it's for a birthday or just for fun!

A handmade card featuring a green pool table background with colorful pool balls in red, yellow, and blue at the corners. The focal point is a black eight ball designed to resemble a mix of a pool ball and a Magic 8 ball. The eight ball has a glossy finish, and the sentiment curves above it, reading "I'm not saying you're getting old, but...". Inside the Magic 8 ball, the text reads, "It seems so, yes." The card has a playful and masculine design, perfect for a birthday or fun occasion.

This interactive card is bound to bring smiles, especially for pool enthusiasts or anyone who loves a fun take on a birthday greeting. What do you think about this pool-inspired card? Would you try making one for your next crafting project? Let me know in the comments below!

Thank you for stopping by and until next time... Happy Crafting!
Ilda 🎱

To make supplies easy for you to find, I have linked them above. If something is no longer available I will link to a similar product. Affiliate links may be used depending on the product linked. Please help support my blog by using these links while shopping at no additional cost to you. For more information about the affiliates I use, please visit my disclaimer here. Thanks so much for all your support!

Enjoyed this post? Never miss out on future posts by Following this Blog

Thursday, October 24, 2024

Let’s Get Lost Together – A HeroScape Inspired Card | Hero Arts + Ralph Tyndall

A handmade card featuring a cityscape with tall buildings on both sides of a road, stamped in black ink, with vibrant colors blending on the buildings, a couple holding hands walking down the street, a sentiment that reads "let's get lost together" at the bottom, black gems as embellishments, and clouds in the sky.

Hello Crafty Friends,

There’s something magical about getting lost in new places with someone you love. That sense of adventure, the thrill of exploration—it’s what inspired this card using the latest release from Hero Arts + Ralph Tyndall's Fall 2024 Collection. Every element of this card brings to life those moments of wandering together, discovering the unknown, and embracing the journey.

CARD RECIPE
  • HA + RT Street-view HeroScape Bundle (stamps and dies): I used these for the cityscape backdrop and that adorable couple silhouette.
  • Intens-ified Black Ink Pad: Perfect for stamping those bold city lines.
  • Unicorn Pigment Ink: Added delicate details like the painted road lines on black cardstock for a real urban vibe.
  • City Park HeroScape Frame Cuts (clouds): These were borrowed from an older, discontinued set to give the skyline some depth and a touch of the open sky.
  • Distress Oxide Inks: Squeezed Lemon, Picked Raspberry, and Broken China blended beautifully to create colorful city reflections.
  • Embellishments: Finished the card with black gem details, adding just the right amount of sparkle.

  • Card Process:

    I started by using the Distress Oxide Inks (Squeezed Lemon, Picked Raspberry, Broken China) and randomly added ink to the solid background stamps to create the reflective tones on the buildings. These soft, yet vibrant colors mimic the essence of a fresh city, reflecting all the excitement of an evening stroll.

    Next, I stamped the street view using the Street-view HeroScape Bundle, filling in the skyline with the layered stamps to create the depth of the urban setting. The black lines were stamped with the Intens-ified Black Ink Pad, which brought out the bold contrast I needed for the buildings and road.

    To create the road, I stamped on black cardstock and used the Unicorn Pigment Ink to draw in the lane dividers—this small detail made the scene come to life. I then trimmed the cardstock and built the scene around the road.

    A handmade card featuring a cityscape with tall buildings on both sides of a road, stamped in black ink, with vibrant colors blending on the buildings, a couple holding hands walking down the street, a sentiment that reads "let's get lost together" at the bottom, black gems as embellishments, and clouds in the sky.

    For the finishing touches, I added the City Park HeroScape Frame Cuts clouds from a retired set (Hero Kit DECEMBER 2021), softly placing them in the sky to contrast with the bustling city. To the sky, I added a soft blending of Broken Chin DO ink. A sprinkle of black gems added a little shimmer to the scene, completing the design.

    The sentiment, "Let’s Get Lost Together," from the same HeroScape Bundle, speaks to my personal connection with this card. It reminds me of the times my husband and I have wandered new cities together, letting the streets lead us to unexpected adventures. There’s something so special about sharing those quiet moments in unfamiliar places.

    A handmade card featuring a cityscape with tall buildings on both sides of a road, stamped in black ink, with vibrant colors blending on the buildings, a couple holding hands walking down the street, a sentiment that reads "let's get lost together" at the bottom, black gems as embellishments, and clouds in the sky.

    This card not only reflects my love for urban landscapes but also the joy of exploring the unknown with a loved one by your side. Whether you’re a fan of cityscapes or just want to create a card with a meaningful sentiment, this HeroScape set offers endless possibilities.

    What places have you explored with your loved ones?

    Thank you for stopping by and until next time... Happy Crafting!
    Ilda🏙

    To make supplies easy for you to find, I have linked them above. If something is no longer available I will link to a similar product. Affiliate links may be used depending on the product linked. Please help support my blog by using these links while shopping at no additional cost to you. For more information about the affiliates I use, please visit my disclaimer here. Thanks so much for all your support!

    Enjoyed this post? Never miss out on future posts by Following this Blog

    Wednesday, October 23, 2024

    Hero Arts + Ralph Tyndall Fall 2024 Release | Rockettes-Inspired Christmas Card

    Hero Arts, Ralph Tyndall, Fall 2024 Release, Christmas Card, Rockettes Inspired Card, DF186 Stage Curtain Fancy Die, SA264 Color Layering Stage Curtain Stencils, SB416 Holiday Marquee Messages Bundle, SB414 Sparkling Holiday Stage Bundle, Copic Markers, Liquid Applique, Gel Pens, Distress Oxide Inks, Holiday Cardmaking, Handmade Cards

    Hello, creative friends! Today, I'm excited to share a festive and fabulous card inspired by the iconic Rockettes, featuring some amazing new products from the Hero Arts + Ralph Tyndall Fall 2024 Release! This card showcases the glamorous holiday spirit, complete with a marquee message, stage curtains, and a trio of high-kicking dancers. For those of you who want a chance to win one of two $50 gift cards from Hero Arts, click HERE to join the IG Hop.


    Let’s take a closer look at how I brought this holiday scene to life.

    CARD RECIPE

    How I Created the Card:

    Creating the Stage: The star of this card is the DF186 HA + RT Stage Curtain Fancy Die, which cuts a beautiful stage curtain, framing the scene. I used the SA264 HA + RT Color Layering Stage Curtain Stencils to ink blend the stage with rich reds and oranges, giving it that theater feel. The distress oxide inks were perfect for blending out a smooth and vibrant backdrop.

    Hero Arts, Ralph Tyndall, Fall 2024 Release, Christmas Card, Rockettes Inspired Card, DF186 Stage Curtain Fancy Die, SA264 Color Layering Stage Curtain Stencils, SB416 Holiday Marquee Messages Bundle, SB414 Sparkling Holiday Stage Bundle, Copic Markers, Liquid Applique, Gel Pens, Distress Oxide Inks, Holiday Cardmaking, Handmade Cards

    Stamping & Coloring the Dancers: I stamped the dancers from the SB414 HA + RT Sparkling Holiday Stage Bundle using India Black Ink. These fabulous ladies were brought to life with Copic Markers, keeping their costumes classic in red and white. I added dimension to their Santa hats and outfits with Liquid Applique, which puffed up to create a fluffy texture once heat set.

    Spotlights and Marquee Sign: The SB416 HA + RT Holiday Marquee Messages Bundle was perfect for the large, bold “Merry Christmas” sign. After die-cutting the marquee, I colored it in and added small details with a gold gel pen to mimic the lights around the sign. I also glued down two small gems to act as spotlights shining down on the stage.

    Finishing Touches: I used foam adhesive to pop up the dancers and marquee for added dimension. For extra sparkle, I used a sparkle gel pen on small details like the wreath and presents, and added highlights with a white gel pen to give the scene a polished look.

    Hero Arts, Ralph Tyndall, Fall 2024 Release, Christmas Card, Rockettes Inspired Card, DF186 Stage Curtain Fancy Die, SA264 Color Layering Stage Curtain Stencils, SB416 Holiday Marquee Messages Bundle, SB414 Sparkling Holiday Stage Bundle, Copic Markers, Liquid Applique, Gel Pens, Distress Oxide Inks, Holiday Cardmaking, Handmade Cards

    Inside: To complete this card, I used a sentiment from the SB414 HA + RT Sparkling Holiday Stage Bundle.

    Hero Arts, Ralph Tyndall, Fall 2024 Release, Christmas Card, Rockettes Inspired Card, DF186 Stage Curtain Fancy Die, SA264 Color Layering Stage Curtain Stencils, SB416 Holiday Marquee Messages Bundle, SB414 Sparkling Holiday Stage Bundle, Copic Markers, Liquid Applique, Gel Pens, Distress Oxide Inks, Holiday Cardmaking, Handmade Cards

    This Rockettes-inspired card brings a fun and festive holiday spirit, showcasing the wonderful products from the Hero Arts + Ralph Tyndall Fall 2024 Release. The stage curtain die and layered stencils really brought depth to the scene, while the marquee and dancers give it that Broadway Christmas feel. I hope this card inspires you to create your own holiday-themed stage scenes!

    Don’t forget to check out the full Hero Arts + Ralph Tyndall collection to see all the amazing new releases. Let me know in the comments what is your favorite product from this release—I’d love to see your projects!

    Happy Holidays and Merry Crafting!

    Ilda 🕺

    To make supplies easy for you to find, I have linked them above. If something is no longer available I will link to a similar product. Affiliate links may be used depending on the product linked. Please help support my blog by using these links while shopping at no additional cost to you. For more information about the affiliates I use, please visit my disclaimer here. Thanks so much for all your support!

    Enjoyed this post? Never miss out on future posts by Following this Blog

    Thursday, February 29, 2024

    80s Inspired Birthday Card | Ralph Tyndall Designs + Hero Arts

    80s Inspired Birthday Card, Ralph Tyndall Designs, Hero Arts, Ink Blending, Distress Oxide blending, Composition Notebook, how to, hand made card, Stamps, stamping, die cutting, card making, ilovedoingallthingscrafty,

    Hello, and happy Monday!


    Today I am sharing another card featuring designs from Ralph Tyndall for Hero Arts. If you missed my last card featuring his release make sure you check this out 👉HERE. It is pretty awesome if I do say so myself and if you are a Swiftie you will definitely want to take a peak 😆 So let's move on to this 80s-inspired birthday card, which by the way, was also kinda Taylor Swift inspired too! Can you see it?


    CARD RECIPE

    Background - HA + RT Composition Notebook Pattern Bold Prints

    Rub On Images - HA + RT Notebook Messages Hero Transfers 

                                HA + RT Notebook Icons Hero Transfers

    Inside Sentiment - HA + RT Essential Messages Stamp & Cut XL

    Black ink -  VersaFine ONYX BLACK Ink

    Embossing powder - Detail Black Embossing Powder

    Blending brushes - HA Ink Blending Brushes

    Gems - HUGS AND KISSES Gem Stickers

    Oxide Inks - Squeezed LemonadePicked Raspberry, Salty Ocean

    Glossed areas - glossy accents


    Note: If you missed out on these supplies from Hero Arts, try  👉Scrapbook.com or Simon Says Stamp


    To begin, I stamped out the background using VersaFine ONYX BLACK Ink and then I heat set it using Detail Black Embossing Powder. Next, I added color to the background using 3 colors of Oxide Inks to blend out a rainbow of colors. Once I was done blending, I used a paper towel to rub off the ink left on top of the embossed areas. I then trimmed the panel and glued it to an A2-size card base.

    80s Inspired Birthday Card, Ralph Tyndall Designs, Hero Arts, Ink Blending, Distress Oxide blending, Composition Notebook, how to, hand made card, Stamps, stamping, die cutting, card making, ilovedoingallthingscrafty,

    Next, I cut out all the rub-on images I wanted to use from both the HA + RT Notebook Messages Hero Transfers and HA + RT Notebook Icons Hero Transfers. I then rubbed them all onto a white piece of cardstock and cut them out. I left a white border around them all except the Hello.

    80s Inspired Birthday Card, Ralph Tyndall Designs, Hero Arts, Ink Blending, Distress Oxide blending, Composition Notebook, how to, hand made card, Stamps, stamping, die cutting, card making, ilovedoingallthingscrafty,

    I then figured out my layout and added the images to the card front, using foam behind some for added dimension. I also added rainbow-colored gems to the blended areas and finished some of the images by adding shine using glossy accents.

    80s Inspired Birthday Card, Ralph Tyndall Designs, Hero Arts, Ink Blending, Distress Oxide blending, Composition Notebook, how to, hand made card, Stamps, stamping, die cutting, card making, ilovedoingallthingscrafty,

    To the inside, I stamped the sentiment from the HA + RT Essential Messages Stamp & Cut XL.  Above it, I added a couple more transfer messages.

    80s Inspired Birthday Card, Ralph Tyndall Designs, Hero Arts, Ink Blending, Distress Oxide blending, Composition Notebook, how to, hand made card, Stamps, stamping, die cutting, card making, ilovedoingallthingscrafty,

    I hope you enjoyed this 80s-inspired birthday Card from Ralph's new release. Also, make sure to check out my Instagram Reel to watch this come together. 


    Thank you for stopping by and until next time... Happy Crafting!
    Ilda 💋

    To make supplies easy for you to find, I have linked them above. If something is no longer available I will link to a similar product. Affiliate links may be used depending on the product linked. Please help support my blog by using these links while shopping at no additional cost to you. For more information about the affiliates I use, please visit my disclaimer here. Thanks so much for all your support!

    Enjoyed this post? Never miss out on future posts by Following this Blog

    Wednesday, February 14, 2024

    Taylor Swift Inspired Pop Up / Light Up Card | Ralph Tyndall Designs + Hero Arts

    Taylor Swift, Inspired, Pop Up, Light Up, Card, Ralph Tyndall Designs, Hero Arts, how to, hand made card, Stamps, stamping, die cutting, card making, ilovedoingallthingscrafty,

    Hello friends and welcome back! 

    Today's Taylor Swift-inspired card showcases products from Ralph Tyndall Designs. If you're not already following Ralph, be sure to check him out 👉 Here  His card-making style is truly unique, and his ASMR Reels are captivating, drawing viewers in with every swipe and tap. I was absolutely thrilled when Ralph invited me to create some projects with his new product line, and I'm beyond excited to share the creations I've made with you. 


    HOW TOs (card recipe/supplies at the end)


    To begin, I first die-cut the curtains for the stage using RT Stage Curtain Fancy Die. Next, using one of the RT Stage Curtain Stencils, I added the shadowing to the curtain. To the back of the curtains for extra strength and reinforcement, I glued a trimmed 1/2 inch strip down each side of the curtain panels. 

    Now, die-cut the crowd. I used the same die cut from the RT Center Stage Crowd Fancy Die and die cut it out two times and just flipped one so that the silhouettes would all look different when staked together. Trim the back crowd layer to be shorter than the front of the audience. To that back layer, stamp out the sentiment from the RT Center Stage Bundle using white ink and heat set it in white embossing powder.

    To make the stage Pop up, I created a couple of springs. One, made from red cardstock matching the curtains, that will rest behind the curtain cutouts, while the other, made from black cardstock, will be positioned in front of the audience. Each spring was cut from paper measuring 5.5 inches by 2 inches and scored at half-inch intervals. Once folded and glued in place, they will effortlessly spring into action, adding dynamic flair to the stage. Set the springs, the curtain, and the crowd aside until the card is ready to be assembled.

    Taylor Swift, Inspired, Pop Up, Light Up, Card, Ralph Tyndall Designs, Hero Arts, how to, hand made card, Stamps, stamping, die cutting, card making, ilovedoingallthingscrafty,

    For the background of the stage, I used another stencil RT Stage Curtain Stencils to blend out the flooring, masking off the back wall. To make it look like a smokey stage with a spotlight in the center, I used masking tape to create a spotlight effect using Intens-ified Black Ink.

    Once the background was done, I stamped the images from the RT Center Stage Bundle set onto the background panel. I used the curtain to make sure all my elements would be in view. Since this is also a Light Up card I punched out three holes where the spotlight centers are and one in the beam above that would be hidden by the curtain. To the back of the panel, I glued a piece of vellum to cover up the holes. Next, I taped down the lights from an EZ Light Unit to the openings of the panel. I then placed the battery in the Unit and secured it to the panel behind where the curtain will be. I then used foam tape to allow space between the panels for the lights, wire, and push button. Remove the release tape and attach the background to the card base.

    On a white piece of cardstock, I stamped out what looked like a silhouette of a singer. In this case my  "Taylor Swift." I then die-cut the image using the coordinating die from the set. To the image, I used a glitter pen to add details and color to a sparkly dress, boots, and highlights in her hair. I also had to bling out the mic and stand. Once you are ready to add the singer to the scene, use foam to glue her in place which will also add some added dimension.

    Taylor Swift, Inspired, Pop Up, Light Up, Card, Ralph Tyndall Designs, Hero Arts, how to, hand made card, Stamps, stamping, die cutting, card making, ilovedoingallthingscrafty,

    Now that all the elements are done, it is time to assemble the stage. Start by attaching the red spring to the top and the black spring to the bottom. Glue the curtain in place followed by the front layer of the crowd. Next, add some thick foam to the back layer of the crowd and glue it in place. Add Taylor Swift to your stage and for a touch of bling I added some gems to the stage's background. I should have done this step before the assembly, but I added some white gel pen details to add some highlights. In hindsight, it would have been a lot easier to do that before these pieces were glued in place.

    Taylor Swift, Inspired, Pop Up, Light Up, Card, Ralph Tyndall Designs, Hero Arts, how to, hand made card, Stamps, stamping, die cutting, card making, ilovedoingallthingscrafty,

    To the inside, I stamped another sentiment from the RT Center Stage Bundle I also added a couple of the rub-on transfer designs to complete the card.

    Taylor Swift, Inspired, Pop Up, Light Up, Card, Ralph Tyndall Designs, Hero Arts, how to, hand made card, Stamps, stamping, die cutting, card making, ilovedoingallthingscrafty,

    CARD RECIPE

    Stage - RT Stage Curtain Fancy Die

    Stencils - RT Stage Curtain Stencils

    Audience - RT Center Stage Crowd Fancy Die

    Stamped images - RT Center Stage Bundle

    Sentiments - RT Center Stage Bundle

    Inside card - RT Notebook Messages Hero Transfers

    White ink - Unicorn Pigment Ink

    Embossing powder - White Detail Embossing Powder

    Black ink for stamping and ink blending- Intens-ified Black Ink Pad

    Blending brushes - HA Ink Blending Brushes

    Gems - Aurora Borealis Gem Stickers 

    DIY Springs - use a scoreboard to score every 1/2 inch, then press with a bone folder

    Hole punch - for lights

    Lights - EZ Light packs

    Sparkly outlines and dress - Gelly Roll Stardust Pen

    White highlights - SAKURA Gelly Roll Gel Pens - Bold Tip


    UPDATE: If you missed out on these supplies from Hero Arts, try  👉Scrapbook.com or Simon Says Stamp


    I hope you are as inspired by Ralph's new release as I am. I absolutely love it and am so excited for him. Let me know in the comments below if you have any questions. I am always happy to help. Also, to watch this stage come together make sure to check out my Instagram Reel. And, stay tuned for more inspiration coming from this release soon. I can't wait to show you my next RT card.


    Thank you for stopping by and until next time... Happy Crafting!
    Ilda 💖

    To make supplies easy for you to find, I have linked them above. If something is no longer available I will link to a similar product. Affiliate links may be used depending on the product linked. Please help support my blog by using these links while shopping at no additional cost to you. For more information about the affiliates I use, please visit my disclaimer here. Thanks so much for all your support!

    Enjoyed this post? Never miss out on future posts by Following this Blog

    Watch how this stage came to life👇

    Thursday, May 5, 2022

    Happy Mother's Day Shaker | Hero Arts

    Happy Mother's Day, Shaker Card, Hero Arts, Ink blending, Card Making, Stamping, Die Cutting, handmade card, ilovedoingallthingscrafty, Stamps, how to,

    Hello friends and happy Thursday, 

    It is with a heavy heart that I must say goodbye to the Hero Arts Global Team😔.  My life right now is just a bit crazy busy so I have had to make some tough decisions and step down from Hero Arts. I am truly blessed to have been a part of this amazing team for the past six months and am so very thankful for the opportunity to work with such an amazing Team and Company!

    Don't worry I am not going anywhere, I will still continue with two DTs and occasion guest posts. I just need to lighten my load a little as I need to focus on family and work a bit more.

    Alright, let's get on with this post and this beautiful shaker card for Mom. 

    CARD RECIPE

    • Ink blend the background on Bristol paper using a few of the inks from this My Monthly Hero Kit April 2022 (I also used the yellow from the Sunshine Palette Reactive Cubes.
    • Once the background is completely dry, prep it with antistatic powder and stamp out the floral cling stamp from the kit using Clear Embossing & Watermark Ink and heat set with Clear Embossing Powder.
    • Center the Mother's Day Window Die on an A2 panel of white cardstock and die-cut out.
    • To the back of the panel add an acetate piece to cover the opening.
    • Add foam along the edges. 
    • Fill with clear sequin and shaker bits.
    • Glue to ink blended background.
    • Trim shaker panel.
    • Attach to the card base with coordinating cardstock. 
    • Finish the front of the card with flowers from the Shoes and Hat Fancy Die that have been ink blended.
    • Add enamel stickers to the centers of the flowers and the hearts of the die-cut sentiment.
    Happy Mother's Day, Shaker Card, Hero Arts, Ink blending, Card Making, Stamping, Die Cutting, handmade card, ilovedoingallthingscrafty, Stamps, how to,

    Oh, and have you seen this month's Kit and Add On sets?! They are so awesome!!! Kinda sad I won't get to play with them. Check them out!


    My Monthly Hero Kit May 2022


    Wishing all the Momma's out there a wonderful Mother's Day this coming Sunday, especially my Mom who is in Portugal right now looking after my Grandma, and my Mother-in-law. 

    Thank you for stopping by and until next time... Happy Crafting!
    Ilda 💖

    SUPPLIES
    Mother's Day Window Die
    Mother's Day Window Die
    Shop at:
    SSS | SB | HA
    My Monthly Hero Kit April 2022
    My Monthly Hero Kit April 2022
    Shop at:
    HA
    Shoes and Hat Fancy Die
    Shoes and Hat Fancy Die
    Shop at:
    SSS | SB | HA
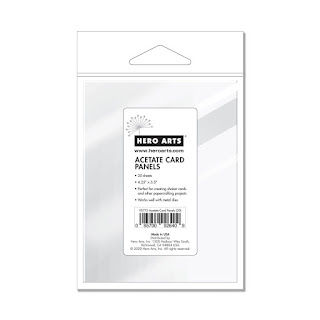
    Acetate Card Panels
    Acetate Card Panels
    Shop at:
    SSS | SB | HA
    Precision Glue
    Precision Glue
    Shop at:
    SSS | SB | HA
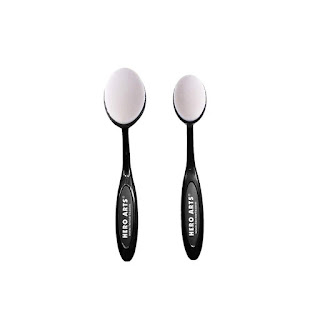
    Ink Blending Brushes
    Ink Blending Brushes
    Shop at:
    SSS | SB | HA
    Sunshine Palette Reactive Cubes
    Sunshine Palette Reactive Cubes
    Shop at:
    SSS | HA
    Clear Embossing & Watermark Ink
    Clear Embossing & Watermark Ink
    Shop at:
    SSS | SB | HA
    Clear Embossing Powder
    Clear Embossing Powder
    Shop at:
    SSS | HA
    Platinum 6 Die Cutting Platform
    Platinum 6 Die Cutting Platform
    Shop at:
    SSS | SB | SB
    To make supplies easy for you to find, I have linked them above. If something is no longer available I will link to a similar product. Affiliate links may be used depending on the product linked. Please help support my blog by using these links while shopping at no additional cost to you. For more information about the affiliates I use, please visit my disclaimer here. Thanks so much for all your support!