Saturday, November 3, 2012

Quick Chocolate Cup Cakes | Baking Tips and Tricks


Hey everyone! 

Hope you are enjoying your weekend :) For the first time in a long time on a Saturday, I was home all day... Wow! Usually, I'm running around with the kids, grocery shopping or at some event. Well, I can say I've enjoyed being at home today... My daughter and I got to paint our nails, read a few books and even did some baking together! While the boys did garage stuff and played video games!

Here is how our chocolate cupcakes turned out! Yummy can't wait to try them tonight for dessert!

Quick Chocolate Cup Cakes | Baking Tips and Tricks

Here is how I made them. I kind of cheated with the cake mix! I used a Duncan Hines cake box, I love this mix. The cake always turns out moist!


Once my batter was all mixed up, I poured it all into an extra-large Ziploc bag. I placed the bag in a bowl to hold the bag in place while I scrapped out the bowl. 

Quick Chocolate Cup Cakes | Baking Tips and Tricks

Next, I closed up the Ziploc bag and pinched one of the bottom corners. With some kitchen scissors, I then snipped the corner off (don't cut it too big, or you might end up with a big mess). Start pouring into the wrappers.

Quick Chocolate Cup Cakes | Baking Tips and Tricks

Like the directions on the box indicate, only fill up to 2/3 of the way up the cupcake wrapper.

Quick Chocolate Cup Cakes | Baking Tips and Tricks

Around 20 minutes later your cupcakes will look like this. Perfect time to get your frosting done! Here is the recipe I used for mine. Tip: To make more icing, simply keep whipping your mixture. It usually will double what your recipe yields! I usually let the mixer go until my cupcakes are completely cool, around 10-15 minutes!

Quick Chocolate Cup Cakes | Baking Tips and Tricks

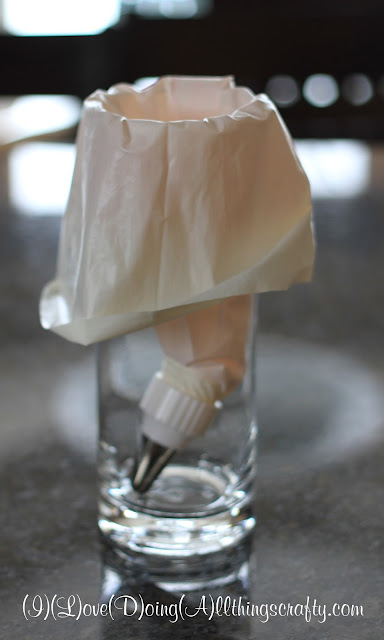
Once my frosting is done, I scoop it all into a size 16 pastry bag with a star tip already attached. To help me do that I place the pastry bag in a large cylinder vase I have, and roll back the edges.

Quick Chocolate Cup Cakes | Baking Tips and Tricks

Then I flip up the edge of the pastry bag and twist the top closed, and keep it pinched with my hand while I squeeze and frost the cupcakes! 

Quick Chocolate Cup Cakes | Baking Tips and Tricks

And here they are once again! YUMMO!

Quick Chocolate Cup Cakes | Baking Tips and Tricks

Half of them I packed up to take to work with me on Monday! It's been a while since I treated my colleagues with some baking! I don't know any nurses who can resist a cupcake, lol! These will go straight into my deep freezer. That will keep them fresh until then!

Quick Chocolate Cup Cakes | Baking Tips and Tricks

Here are the little cupcake wrappers I found at the Dollar store! What a deal and they come with the little toppers! I couldn't even make them for that price ;)

Quick Chocolate Cup Cakes | Baking Tips and Tricks

Thanks for stopping by! 
Have a great weekend! Live a little, eat some chocolate! :)


Tuesday, October 30, 2012

Witch Boots | Halloween Treat Boxes

Silhouette Cameo,SVGCuts File,ilovedoingallthingscrafty,witches boot file,Halloween, Cricut, treat box, gift

Happy Halloween Everyone!!!

This year for treats I thought I would make this witches boot. I had bought this file on the Silhouette Online Store and had cut all the pieces for it, but life, as usual, got busy and only tonight did I get to finish them up. Nothing like waiting until the last minute, lol! I slightly enlarged the file, but now I kind of wished I had enlarged it some more, as they are kind of tricky to put together when they are this small! Update this file is no longer available. Here is another "NANNY" boot file that could be used as a Halloween boot. 

Aren't they soooo cool?!  They actually can fit quite a bit of goodies. I also like that they can fit a full-size chocolate bar... and even extra candy in the front part of the boot :)

Here is a closer look! BOO! Did I scare you? Maybe those eyeball chocolates did, kinda creepy, aren't they?!

Silhouette Cameo,SVGCuts File,ilovedoingallthingscrafty,witches boot file,Halloween, Cricut, treat box, gift

Just put it in a treat baggy, wrap it up and it's all ready for a very special little goblin!

Silhouette Cameo,SVGCuts File,ilovedoingallthingscrafty,witches boot file,Halloween, Cricut, treat box, gift

I hope you like my "Boots!" Have a fun Halloween!
Happy Haunting & be safe!

Saturday, October 27, 2012

DIY Painted Pumpkins | Halloween Decor

Hey all!

I finally got around to making my pumpkins this year. Unlike other years, we thought we'd paint them this year. Usually, the kids get so excited to carve out the pumpkins, but in reality, what happens is... they start... they get tired...  start whining cause it's hard... and complain about the gooshy insides when gutting out the pumpkins! Then I end up doing all the work and cleaning up all the mess! So my daughter and I painted them this year... I have to agree, way more fun! 

Here is how they turned out! Aren't they cool! They were super easy, and my daughter actually did most of the painting herself!

DIY Painted Pumpkins | Halloween Decor

Here is how we did it...

DIY Painted Pumpkins | Halloween Decor

Started off with plain ol' pumpkins... makes sure they are clean, no dirt.

DIY Painted Pumpkins | Halloween Decor

Used acrylic paints and brush. For one of the pumpkins, I divided it into sections and painted guidelines for my daughter to paint in.

DIY Painted Pumpkins | Halloween Decor

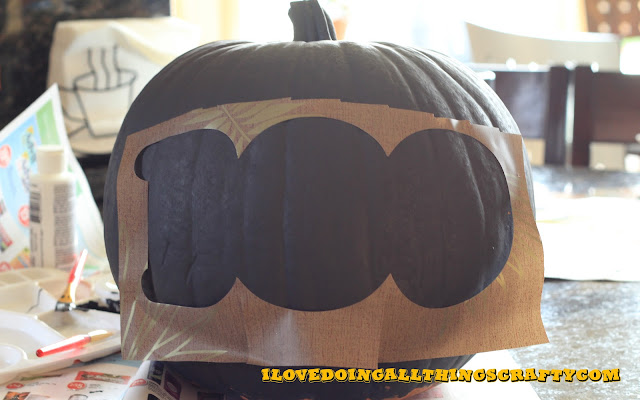
Then for my other pumpkin, I wanted to paint the word "BOO" so I typed the word in the Silhouette SDE program and took the offset of the word and cut it out of some scrap contact paper.


DIY Painted Pumpkins | Halloween Decor

I placed the contact paper on the pumpkin to used it as a guide and painted the center in white. For the actual word "BOO", I just freehanded the letters inside the white space. TIP: if you are impatient like me, use a blow dryer on a low setting to speed up the drying time!

DIY Painted Pumpkins | Halloween Decor

Here's how they look in my front entrance. LOVE how they turned out! Hope you do too :)

Have a great weekend!


Wednesday, October 24, 2012

San Francisco | Travel Pictures and Highlights


Hello!!!

I'm tagging along this week with my hubby... while he's in meetings all day I get to explore one of my favorite cities in the world... San Francisco... Yay me!

I'm very proud of myself today... I was able to drive from Mountain View, where we are staying all the way to San Francisco.... not bad considering I'm directionally challenged! I'm sure I must have been one of the slowest drivers on the highway, lol!

So here are a few pictures from my travels of today... if you follow me on Instagram you may have already seen most of these... If that's the case, woohoo you get to see them again! 

San Francisco | Travel Pictures and Highlights

Snapped a few pics of houses while exploring the streets. I love the architecture here!

San Francisco | Travel Pictures and Highlights

Next, I headed down to Pier 39...

San Francisco | Travel Pictures and Highlights

where I saw the Sea Lions just hanging out enjoying the beautiful weather today, (usually its really cold out by the ocean) Got lucky!

San Francisco | Travel Pictures and Highlights

A must-have for me when I visit, clam chowder in a sourdough bowl... Delish!

San Francisco | Travel Pictures and Highlights

After lunch, I took a long stroll along the marina (had some calories to burn, lol), and where I met this guy... I was literally 2 feet away from him and he didn't move!


San Francisco | Travel Pictures and Highlights

Ghirardelli chocolate, yummy!


San Francisco | Travel Pictures and Highlights

I finished my afternoon here at the Golden Gate... What a spectacular view!


All these picture were taken with my new Iphone5, I'm pretty impressed with how they turned out. That and because I didn't want to lug around my heavy DSLR camera. I love the new panoramic feature of the camera, it's so cool!

Thanks for stopping by, tomorrow I'll be shopping :)


Sunday, October 21, 2012

Teddy Bear Baptism Cake

Today is a very special day for our little friend Alessio, it's his Baptism today! His mom, one of my very best friends (whom I've known since grade 5), Lee Ann had asked me if I would make him a cake for the celebration... and of course I accepted the challenge... Hope she likes it! 😊

Teddy Bear Baptism Cake

I actually had no plan of what I was going to make other than the colors I was going to use... So I'm pretty happy about how it all turned out! Isn't Teddy cute? I just love how he turned out :)

Teddy Bear Baptism Cake

The top layer of the cake is chocolate, the bottom is marble. Both covered with a vanilla buttercream icing and finished with sky blue fondant. Yummy, can't wait to taste it!

God Bless you and your family Allessio on this Special Day!
Thanks for stopping by :)

Tuesday, October 16, 2012

Autumn Sunflower Birthday Card | Mojo Monday Sketch Challenge

Hey everyone!

It was my Mother-In-Law Gabriela's birthday yesterday so I thought I would attempt making her a card... Honestly, I find making cards more challenging than anything 3D! They just look so simple once they are done, but they are NOT!....maybe it's just me... or, maybe I just need more practice, lol!

Mojo Monday Sketch Challenge,SVGCuts File,Autumn birthday card,Michelle My Belle Creations,ilovedoingallthingscrafty,Sunflower,Paper crafts, Cricut

I love the Autumn colors so I wanted to make something with them. For this card, I used basic card stock, a little ink and did a bit of embossing to add some texture and interest! The files I used to create this card come from here, and the sunflower comes from CRISP DAYS OF FALL KIT here. I used the Cameo to cut it out.


Since I got my idea from this sketch I will be sharing it over on Mojo Monday's Sketch Challenge! I actually got my inspiration from Michelle from Michelle My Belle's Creations. I've been following her since I started blogging... she was actually one of my first followers and nominated me for my first blog award! Thanks again, Michelle! Anyways, Michelle creates beautiful files for Mojo Monday's Sketch Challenge. Check out their blogs for tones of inspiration! So now that I've made a card I can finally enter, yeah me!!!
Thanks for stopping by! 
Happy Crafting :) 


Friday, October 12, 2012

Halloween Home Decor and DIY Decorations


Hey all!

Welcome to my latest followers, I have finally hit a 100! Thank you all for coming by and visiting my little blog... hope to see and meet more of you around here :)

I've had a really busy work week and by the time I get home and finish all my motherly and wifey duties I am pooped! So needless to say crafting has not been my priority this week :(  So this morning while the kiddos were at school I finally had some time to make a little craft! I've also been meaning to put all of my Fall and Halloween decor up... so I did that too! I was a busy girl today, phewww!

Halloween Home Decor and DIY Decorations

Here is a picture of our front entrance done up for Halloween... Isn't it spooky? Not really, haha! I tried!

Halloween Home Decor and DIY Decorations

Meet Igor our Buttler! I love Igor other than the fact he scares me when I'm least expecting it! Somewhere on his body there is a motion sensor that doesn't work too well, maybe cause he is ancient, lol! So his reaction is a bit delayed, which scares the c*ap out of me every time! He loves to do the same to all our front door visitors!


Halloween Home Decor and DIY Decorations

Usually, I dress up as a Witch for Halloween, so I love this little broom. It gets moved outside for Halloween night!

Halloween Home Decor and DIY Decorations

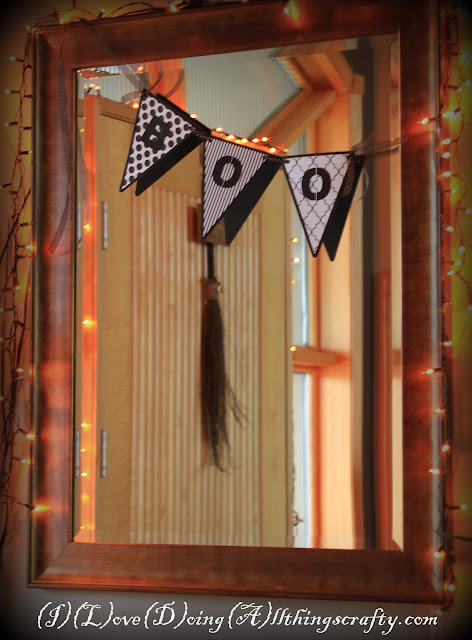
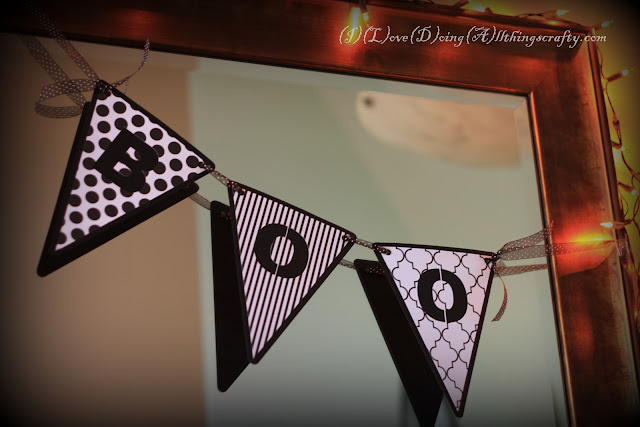
So here is the quick little banner I made this morning... took all of 15 minutes to make! I've seen many of these on Pinterest so I had to make my own. Click here for instructions!

Halloween Home Decor and DIY Decorations

Simple and fanta-BOO-lous! 

Halloween Home Decor and DIY Decorations

 I love my pre-lit pumpkins. No mess, just plug in and ready to go... have had these for years!

Halloween Home Decor and DIY Decorations

Here I just added the creepers to my fall decor that was already up... My daughter's going to freak when she comes home from school... she hates spiders!

Halloween Home Decor and DIY Decorations

For more touches of Halloween, I put up some window stickies around our kitchen table... Shhhh, don't tell anyone but those stickies are at least 5 years old! I just take them down after Halloween and stick them to each other and place them in a Ziploc bag and lay them flat until next year! No need to keep buying them!

Halloween Home Decor and DIY Decorations

 Finally, here is my front door... Hehe, can you see Igor's silhouette in the window, creepy?
So, after the summer is over I swap out my summer flower pots with these fall arrangements I made 3 years ago! I keep them in the shed until it's time to bring them out for the Fall. All these flowers were purchased when Micheal's was having their Fall clearance sale... Got most of them for 80-90% off their regular price! Gotta love a good deal :) 

Halloween Home Decor and DIY Decorations

All I did was stick the flowers in dirt from my old summer pots and Viola! Fall Arrangements!!! Now all I need is some pumpkins for the front entrance and I'm done... I'll share those next time!

Hope you like some of my Fall and Halloween decoration ideas!
Thanks for stopping by... have a great weekend!


Friday, October 5, 2012

Cute Spooky DIY Halloween Earrings | SVGCuts

YAY!!! It's TGIF!!! Are you old enough to remember that, lol!

Hey everyone! Not sure about you guys but I have had a crazy busy week... So looking forward to this weekend! Not like it will be any less busy, haha!

Anyways, so excited to share with you my latest craft! I got the idea as soon as I saw one of SVGCuts' latest collections... Check it out the SPOOKY CUTIES here!

I thought I would try my hand at making some bling for my daughter! She loves dangly earrings... So that's what I made!  I love how she walks around the house shaking her head! Too cute! I'm going to surprise her with them this weekend!

Just thought of it now as I was typing... I could have made a matching pendant for a necklace as well. Oh well, next time!

So here they are...

ilovedoingallthingscrafty,Halloween DIY Earrings,Spooky Cuties,SVGCuts,SVG file,Paper crafts,Crafting,Cricut,

Aren't they the cutest earrings EVER!

Cute Spooky DIY Halloween Earrings | SVGCuts

Don't mind the glue gobs around the eyes! I was so excited to take pictures I couldn't even wait for the glue to dry, LOL!

Cute Spooky DIY Halloween Earrings | SVGCuts

And this is me holding them up to show you some scale... I really shrunk the files down in size!

So here is what I did... 
  • cut out 3 of the same image and glued them to each other to create some thickness and make the earnings sturdier. ( Notice I added a tiny hole to the top of the cut-out so that I could hook on the earring piece later.)
  • I then used some glitter glue on the top of each earring. (This added some sparkle and protection to the paper)
  • Then once the glitter glue was dry, I sealed the whole piece with clear nail polish. Yes, you heard me right! Nail Polish! It worked beautifully and I didn't have to go out and buy a sealant. I guess I could have used Modge Podge, but this was way easier and gave it great shine... and completely dry in 60 seconds, lol! (I used a pin and poked it through the hole to make it easier while I painted it!)

Cute Spooky DIY Halloween Earrings | SVGCuts

  • Once everything was dry I glued on my googly eyes (picture above, no googly eyes... not cute enough, back to the cute factory he went!)
  • Then I attached each of my "Spooky Cuties" to the fish hook earring pieces simply by opening up the bottom hoop with needle nose pliers and hooking on the "Cutie," then just tightening it up again. For the longer ones I just added some chain.
I hope you like this little project and maybe be inspired to create some bling of your own!
Have a "Spooktacular" weekend!


Tuesday, October 2, 2012

3D Paper Letters for Kate | SVGCuts

Hey everyone! Hope you are all enjoying your week :)  

Here in Edmonton, it feels like Fall has finally arrived! The cold is in the air.... hopefully we can keep the snow away a little longer!

Ironically I'm going to share with you a project that reminds me a bit of Spring! I was asked to make a baby's name in 3D for a Baby Shower! Isn't it cute! I love how it all came together! Congratulations Marija on your newest family member :)

3D Paper Letters for Kate | SVGCuts

The files for the 3D letters come from here. The paper I used comes from DCWV Cherry Limeade Stack, all cut with the Cameo. Hope you like it!

Happy Crafting! :)

Monday, October 1, 2012

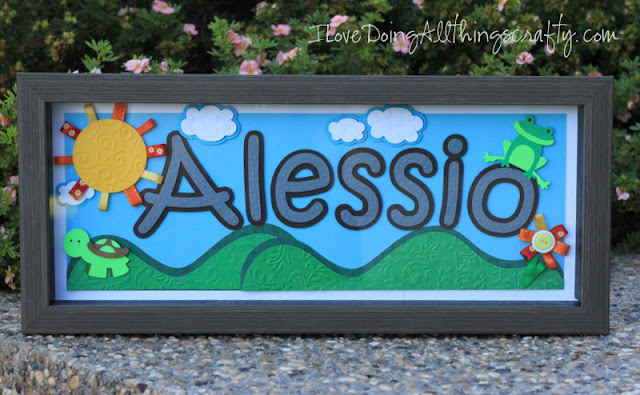
Personalized Frame | Paper Pieced Baby Decor | SVGCuts

Here is a frame I made for one of my dearests friends, who recently had a baby boy. Love the unique name she chose for her little guy... Alessio. Love it! Congrats LeeAnn and Joe!
Personalized Frame | Paper Pieced Baby Decor

The files I used for this project all come from SVGCuts freebie selection. The font I used is called Kristen ITC. Added a little embossing and some ribbon and voila, a great art piece for the nursery! 

Thanks for stopping by!