Showing posts with label personalized. Show all posts

Tuesday, April 12, 2016

ARI 3D Paper Letters | SVGCuts

Hi All!

Today's post will be short and sweet just like this cute 3D Letter Name I made for baby ARI! I love that you can coordinate paper to match any room decor. 

SVGCuts,Silhouette Cameo,3D letters,ilovedoingallthingscrafty,yellow,Ari,Name 3D,boy,Paper Letters,SVG Files,baby gift,grey,3D Paper Art, handmade,personalized,Paper crafts,

Here is what I used on this creation:

Letters 3D Letters SVG Kit
Paper: White (AC Cardstock), Pattern (Hello Sunshine - Pink Paislee)
Dies: Stars Framelits (Sizzix)
Embellishments: Arrows/squares (Studio G) Sequins and Drops (Pretty Pink Posh)
Cut out on the Silhouette Cameo


These 3D Letters make great baby gifts and are the perfect touch for any nursery. 
I LOVE how they turned out, hope you did too!


Don't forget to check out SVGCuts latest! 
Fairy Cottage SVG Kit
Isn't it GORGEOUS!?!
I think it is one of my favorites, just need some time to make it! 
Hope that comes soon ;)  


Thanks for stopping by!
Happy Crafting  :)


Tuesday, September 23, 2014

Victor + Jessica's Wedding Shadow Box and Card | SVGCuts

So excited to share with you all the latest Shadow Box! I think they just keep getting more and more beautiful! 

This Shadow Box was made as a gift for my cousin Victor and his bride Jessica who just got married this past weekend! I absolutely love how it turned out and I'm pretty sure they loved it too! Congratulations again Victor and welcome to our family Jessica!!! Had so much fun with you both and the rest of our crazy awesome family!

Gift,Roses,etched glass,SVGCuts,Silhouette Cameo,Wedding Shadow Box,ilovedoingallthingscrafty,Wedding card,heart,Cricut,Paper crafts,Framed,personalized,

It's hard to see that I etched the glass in the above picture, so below is a closer look at the etched glass. Click here for a previous glass etching tutorial and project.

The rose file I used to create the heart of roses comes from the Crush On You Boxes SVG Kit here. They were just cut at different sizes and glued onto a heart template.

Gift,Roses,etched glass,SVGCuts,Silhouette Cameo,Wedding Shadow Box,ilovedoingallthingscrafty,Wedding card,heart,Cricut,Paper crafts,Framed,personalized,

And here is the card I made them! SO adorable, right!?
The stamp comes from the Simply Said Stamp Pack by Craftin Desert Diva's.

Gift,Roses,etched glass,SVGCuts,Silhouette Cameo,Wedding Shadow Box,ilovedoingallthingscrafty,Wedding card,heart,Cricut,Paper crafts,Framed,personalized,

The files I used to create the card come from the Love Always SVG Kit here.
(Please note that the original files have been altered to make the card using the Silhouette DSE program.)


... and here is the lovely couple's first kiss as husband and wife!


Hope you loved this project as much I loved making it!
Thanks for stopping by!

Happy Crafting  :)

Wednesday, August 27, 2014

Rose Heart Shadow Box | SVGCuts

Recently one of my high school besties Daniele was in town for a post destination wedding celebration. Haven't seen much of her in years since she moved to London, England after University. We did get to see her and her man a few summers ago when we visited London. This summer she married her best friend Benni in a gorgeous villa in Tuscany! 

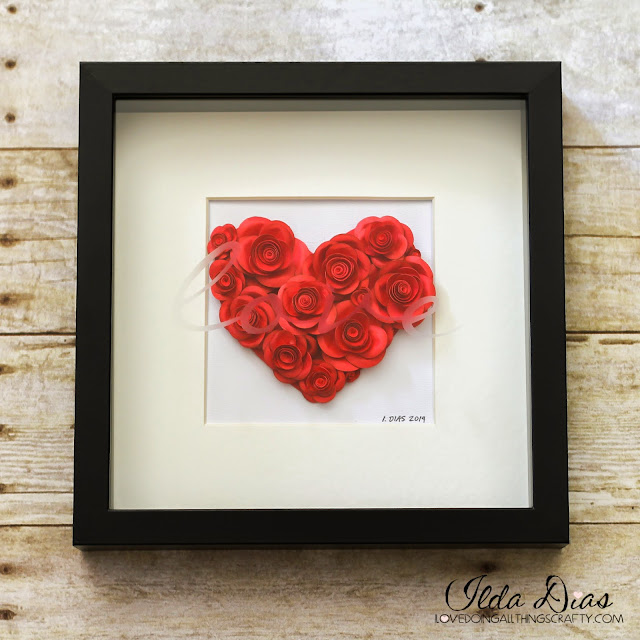
Today I want to share with you the gift I made them. Since I am in love with shadowboxes, I thought I would make the happy couple a Rose Heart Shadow Box as a little wedding gift from us.

Gift,Wedding,Roses, Heart,SVGCuts,Silhouette Cameo,Rose Heart Shadow Box,ilovedoingallthingscrafty,SVG file,personalized, paper art

For examples of other shadow boxes I've made, click here, here, here and here.

Below is a close up of the roses and the word love etched on the glass. Click here for a previous etching tutorial.

Gift,Wedding,Roses, Heart,SVGCuts,Silhouette Cameo,Rose Heart Shadow Box,ilovedoingallthingscrafty,SVG file,personalized, paper art

To replicate your own Rose Heart Shadow Box you will need:

The rose file from - Crush On You Boxes SVG Kit cut at various sizes.
Cut on the Silhouette Cameo.
8 X 8 Shadow Box (purchased from IKEA.
Etching cream

Yes, that is it! Simple and easy, yet elegant results!

Once again, congratulations Daniele and Benni! It was so nice to see you both again, I really enjoyed our afternoon together! Wish you both a lifetime of love and happiness!!!

Thanks for stopping by!
Happy Crafting  :)

Friday, February 1, 2013

3D Letters Lowen | Baby Shower Gift and Decoration Piece


Happy Friday Everyone!

I was asked a few weeks ago to make some 3D letters as a Shower gift. I have been so busy that I wasn't sure I would have time to make them... but I finally did! Phewww, just in time for the Shower this weekend!!!

So happy with how they turned out! Love the colors they scheme they chose for me to work with! 
Welcome to the world baby Lowen!

SVGCuts File,3D letters,baby shower,ilovedoingallthingscrafty,Baby boy,baby gift,personalized,3D Paper Art,Cricut,Paper crafts,

Here are some closeups of the establishments I used on the letters. 

SVGCuts File,3D letters,baby shower,ilovedoingallthingscrafty,Baby boy,baby gift,personalized,3D Paper Art,Cricut,Paper crafts,

The files for the 3D letters come from here. The paper I used comes from Recollections open card stock from Micheals, all cut with the Cameo.

Hope you liked this project!
Happy Crafting :)

Tuesday, October 2, 2012

3D Paper Letters for Kate | SVGCuts

Hey everyone! Hope you are all enjoying your week :)  

Here in Edmonton, it feels like Fall has finally arrived! The cold is in the air.... hopefully we can keep the snow away a little longer!

Ironically I'm going to share with you a project that reminds me a bit of Spring! I was asked to make a baby's name in 3D for a Baby Shower! Isn't it cute! I love how it all came together! Congratulations Marija on your newest family member :)

3D Paper Letters for Kate | SVGCuts

The files for the 3D letters come from here. The paper I used comes from DCWV Cherry Limeade Stack, all cut with the Cameo. Hope you like it!

Happy Crafting! :)

Friday, June 22, 2012

DIY Personalized Glass Etched Mugs

DIY Personalized Glass Etched Mugs by ilovedoingallthingscrafty.com

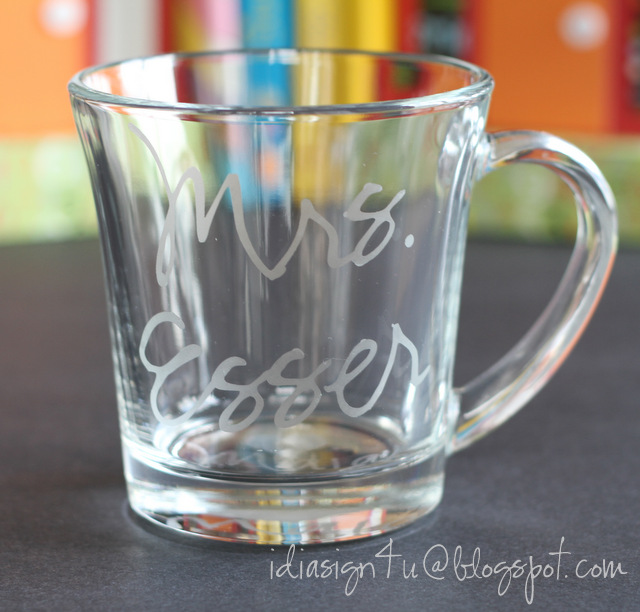
In my previous post, I had shown you the gifts I made for the teachers. So I thought I would share with you some pictures of how that was done. Also please refer to my posts on other etched glass projects I have done, here and here.

DIY Personalized Glass Etched Mugs by ilovedoingallthingscrafty.com

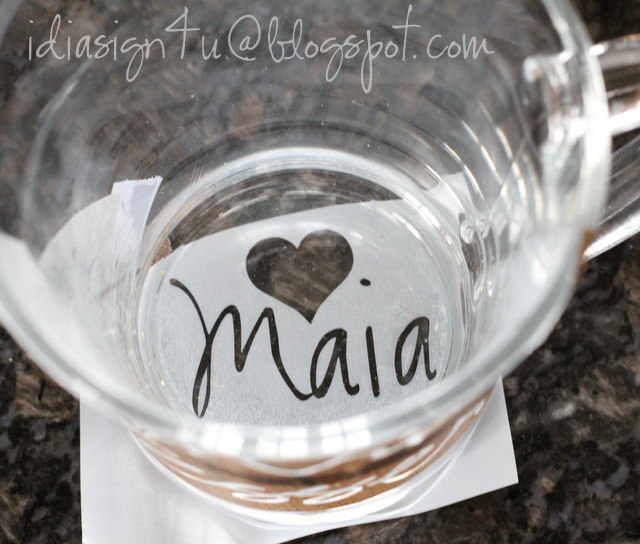
First I cut out the image I wanted from contact paper, with the Silhouette Cameo. No need to use up expensive vinyl especially if it's going to get thrown out!

DIY Personalized Glass Etched Mugs by ilovedoingallthingscrafty.com

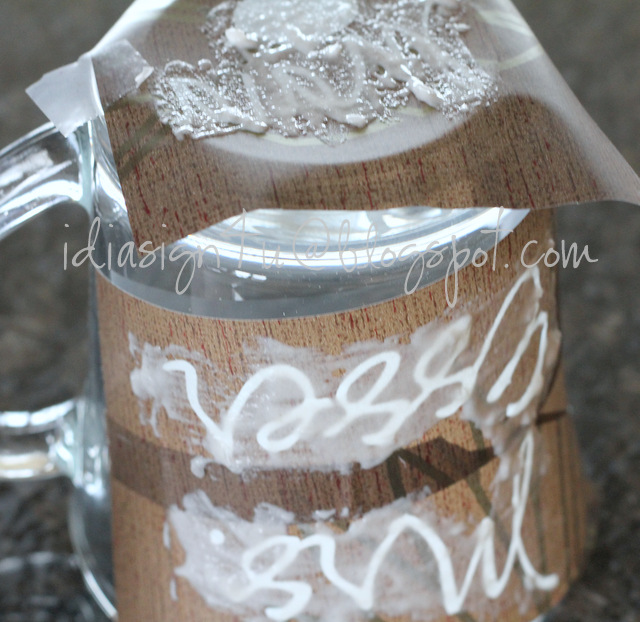
Then I applied etching cream very liberally to the exposed areas with a paintbrush. Then just followed the directions on the Armour Etch bottle. Removed the contact paper and rinsed off the cream. 

DIY Personalized Glass Etched Mugs by ilovedoingallthingscrafty.com

There you have it sooooo simple and pretty quick to make! The perfect gift for a teacher or for yourself, just add your name or whatever else you like!

 Happy crafting, have a great weekend!


Tuesday, April 3, 2012

3D Paper Letters - SADIE | & DIY Glass Buttons | SVGCuts

Wow... It feels like a while since my last post! I have been crazy busy... between work, life, and planning my son's birthday party for this weekend, I am ready to pull my hair out :(  I'll have posts on my son's "Star Wars" themed birthday crafts hopefully within the next few days! Stay tuned if you are a Star Wars fan :)

But first... I want to share with you the 3D paper name I made last week for my cousin's friend.

3D Paper Letters - SADIE | & DIY Glass Buttons by ilovedoingallthingscrafty.com

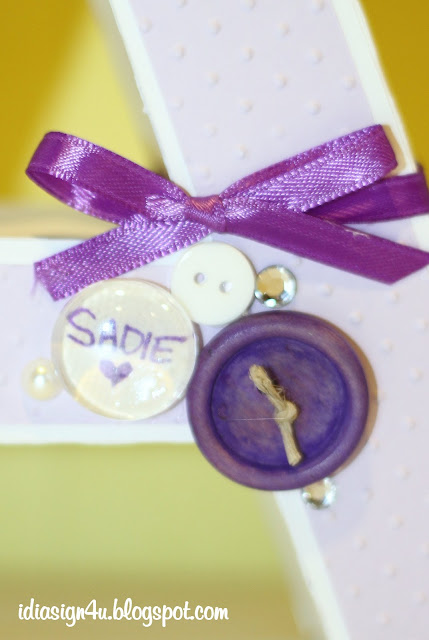
These paper 3D letters stand about 6.5" tall. They were filled with some dried beans to keep them from toppling over. The 3D letters are from SVG Cuts 3D letter kit. The butterfly is from the SCAL library. Added some buttons, bows, and a silk flower to dot the "I". Boy did I have a tough time making the "S"... I have made a few of these names in the past but never had to make an "S", maybe next time it will be easier!  The "A" and the "I" were embossed with the Cuttlebug (hard to see in this picture). The paper I purchased at Micheal's is in the open card stock paper section, sorry don't have the exact company names for them :(

Here are a few more close-ups.

3D Paper Letters - SADIE | & DIY Glass Buttons by ilovedoingallthingscrafty.com


3D Paper Letters - SADIE | & DIY Glass Buttons by ilovedoingallthingscrafty.com

I don't have an Epiphany Craft button make, but I really do like the look... I did though have glass beads and hot glue, so I made due! I think it turned out pretty cute and so simple. I found this idea on Pinterest here, so I knew I had to try it! 

So here is what I did...

3D Paper Letters - SADIE | & DIY Glass Buttons by ilovedoingallthingscrafty.com

 You need scissors, hot glue, paper, a pen, and a flattened glass bead.

3D Paper Letters - SADIE | & DIY Glass Buttons by ilovedoingallthingscrafty.com

Write your message on a scrap piece of paper, and place a fair amount of glue on the back of the glass bead.

3D Paper Letters - SADIE | & DIY Glass Buttons by ilovedoingallthingscrafty.com

Press the glass bead centered on the message.

3D Paper Letters - SADIE | & DIY Glass Buttons by ilovedoingallthingscrafty.com

Cut around the bead.

3D Paper Letters - SADIE | & DIY Glass Buttons by ilovedoingallthingscrafty.com

And there you have a new glass button to embellish your project! Hope you liked this, I love how easy it was and I'm sure I'll be making more of these!

Happy crafting!
Ilda :)