Showing posts with label Sewing. Show all posts

Monday, July 12, 2021

You're Sew Special Crafty Friendship Card | Honey Bee Stamps

You're Sew Special, Crafty, Friendship Card,Honey Bee Stamps, Card Making, Stamping, Die Cutting, handmade card, ilovedoingallthingscrafty, Stamps, how to,  stitched,Sewing,punny sentiments,

Hello, my crafty friends! 

I think most of you will all enjoy this cute stitched card especially if you love to sew. Besides coloring and drawing as a child, sewing would have been the first crafty thing I got into. I was about 10 years old, on vacation in Portugal and my Grandmother taught me how to sew on her old antique Singer sewing machine. My first project was an apron with large pockets on the front. The stitching was terrible and the apron was white (talk about the terrible choice of color for an apron, lol). I didn't care, I was just obsessed with all the stuff my Grandmother could carry in her apron pockets and just had to have my own! 

Anyways, let's get on with details for today's card featuring products from Honey Bee Stamps.

CARD RECIPE
  • Start by stitching various colors of thread across an A2 card panel using a sewing machine, or any tool that will stitch through paper.
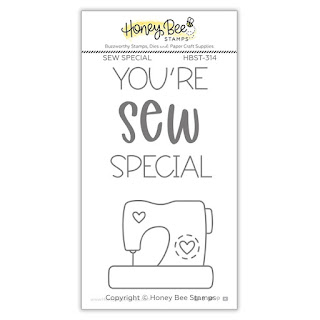
  • Stamp out any images that relate to sewing. Using INTENSE BLACK INK and stamps from the LET'S GET CRAFTY and the SEW SPECIAL Sets.
  • Color in using Copic markers or desired medium.
  • Die-cut using coordinating dies from the LET'S GET CRAFTY and the SEW SPECIAL Die Sets.
  • Add foam to the back of each image.
You're Sew Special, Crafty, Friendship Card,Honey Bee Stamps, Card Making, Stamping, Die Cutting, handmade card, ilovedoingallthingscrafty, Stamps, how to,  stitched,Sewing,punny sentiments,
  • Stamp out the sentiment from the SEW SPECIAL Set using white ink and heat setting it with embossing powder on black cardstock.
  • Die-cut with coordinating SEW SPECIAL Die. 
  • Pop the sentiment in the center of the stitched card panel and then add the sewing-themed elements all around the card front.
  • Use Glossy Accents to add shine and dimension to images.
You're Sew Special, Crafty, Friendship Card,Honey Bee Stamps, Card Making, Stamping, Die Cutting, handmade card, ilovedoingallthingscrafty, Stamps, how to,  stitched,Sewing,punny sentiments,

I hope today's card inspired you and the next time you need a card for that Sew Special friend you remember this one ๐Ÿ˜‰๐Ÿงต

Thank you for stopping by and until next time... Happy Crafting!
Ilda ๐Ÿ‘‹

SUPPLIES
Let's Get Crafty
Let's Get Crafty
Shop at:
SSS | SB | HBS
Let's Get Crafty Dies
Shop at:
SSS | SB | HBS
Sew Special
Sew Special
Shop at:
SSS | SB | HBS
Sew Special Dies
Sew Special Dies
Shop at:
SSS | SB | HBS
BEE CREATIVE GLUE
BEE CREATIVE GLUE
Shop at:
SSS | SB | HBS
Intense Black Ink
Intense Black Ink
Shop at:
SSS | SB | HBS
NEENAH SOLAR WHITE 110
Shop at:
SSS | AMZ | HBS
MINI MISTI
MINI MISTI
Shop at:
SSS | SB | HBS
COPIC SKETCH
COPIC SKETCH
Shop at:
SSS | AMZ
GEMINI JR. DIE CUTTER
Shop at:
SSS | AMZ | SB
MAGIC POWDER BAG
MAGIC POWDER BAG
Shop at:
SSS | AMZ
ATELIER SHARK TOOTH
ATELIER SHARK TOOTH
Shop at:
SSS | IO3
ARCTIC WHITE POWDER
ARCTIC WHITE POWDER
Shop at:
SSS | IO3
Black and Decker  Heat Gun
Black and Decker Heat Gun
Shop at:
AMZ
GLOSSY ACCENTS
GLOSSY ACCENTS
Shop at:
SSS | AMZ | SB | HBS
To make supplies easy for you to find, I have linked them above. If something is no longer available I will link to a similar product. Affiliate links may be used depending on the product linked. Please help support my blog by using these links while shopping at no additional cost to you. For more information about the affiliates I use, please visit my disclaimer here. Thanks so much for all your support!

Saturday, May 9, 2015

Mother's Day Cards | SVGCuts

Happy Mother's Day to all Mothers reading this post!

Today I wanted to share with you all the fun cards I made for the moms in my life. Since I was making some for myself, I thought I would make a few more for my children's school Auction that took place this weekend. The cards are all same with a few different embellishments. Love how they turned out and hope you do too!

SVGCuts files,Sewing,#SVGCuts,Silhouette Cameo,Carta Bella,Mother's Day Cards,Baking,Craftin Desert Divas Stamp,Simple,ilovedoingallthingscrafty,

These first cards are perfect for the mom that sews. 


I stamped the inside of the cards with a stamp from Craftin Desert Divas -Happy Celebrations stamp set.


The papers I used comes from Carta Bella's Sew Lovely Paper Collection. Love this paper!!!


Here is the same card with a different Carta Bella Collection. The papers for this one comes from Homemade with Love.


This paper is perfect for the Baking Mom in your life!


The files for this card all come from SVG Cuts Cards for Mom Kit.

I used pieces from 3 different cards in the kit to come up with this design. Sweet and simple.... especially when making multiples!

SVGCuts files,Sewing,#SVGCuts,Silhouette Cameo,Carta Bella,Mother's Day Cards,Baking,Craftin Desert Divas Stamp,Simple,ilovedoingallthingscrafty,

Hope you liked my Mother's Day Cards! I think this design could also be used as a Valentine's Day card or even an Anniversary card.

Thanks for stopping by!
Happy Crafting  :)


Monday, March 11, 2013

DIY Pin Cushion from an Old Sock


DIY Pin Cushion from an Old SockI've been meaning to share this with you all for a while and finally got to it this morning when my husband handed me another holy sock! Usually, they end up as grease rags for the garage, but a while ago I had this idea to turn one into a pincushion. So today I decided to show you how I did that. SUPER easy!!!


  • First make sure you have a clean sock... who wants to work with a dirty, smelly one! YUCK!!! Also, make sure that the hole in your sock is not in the toe area, or else it won't look as pretty!


DIY Pin Cushion from an Old Sock


  • Starting at the top of the sock, roll it inward until you reach the toe part. Should end up looking something like this! You could just leave it like this, but it doesn't look very pretty :(


DIY Pin Cushion from an Old Sock, recycled


Squeeze the sock into a small clay pot or container of your choice. I didn't even have to use glue to secure it in place it was wedged in pretty tightly! Stick your pins in it and there you have the quickest little useful project ever!


Hope you like this DIY tutorial, would love to know what you think. What do you do with your old socks?

Happy Crafting Everyone :)
Thanks again for stopping by! 

Friday, August 17, 2012

Maia's Room Make Over - DIY Canopy Bed - Part 5

My daughter Maia has always wanted a canopy bed, as I think all little girls like. So I thought I could make one for her, as I wasn't about to buy a whole new set of furniture for her. We will wait until she outgrows her bed for now!

Here is what I did...


TIP: To help me find the right measurements before I drilled holes into the ceiling I used thumbtacks to pin elastic bands to the ceiling so I could see exactly where to hang up my curtain rod!


Here is a closer look! I bought these rods at IKEA for $1.99 on sale, woohoo!


I had gone to the fabric store to look for some shear-type material, but for the amount, I needed it was going to cost me a fortune! So good ol' IKEA had the perfect curtains. All I needed was 3 panels so I had to buy 2 packages.


All I did then was sew the panels to each other, leaving pockets for where the curtain rods would be placed through. 


Since I didn't like the ends that the rods came with, I used my own round crystal beads and just hot glued them in place.

Maia's Room Make Over - DIY Canopy Bed - Part 5

And Voila! Super quick and easy canopy bed! 

I hope you liked this tutorial and maybe even make one for your little princess!

Happy crafting :)