Showing posts with label Rainbow. Show all posts

Monday, April 3, 2023

Ink-Blended Rainbow Carrots for a Vibrant Easter Card | Honey Bee Stamps

Ink-Blended, Rainbow, Carrots, Easter Card, Honey Bee Stamps, how to,handmade card,Stamps,ilovedoingallthingscrafty,stamping, diecutting,cardmaking

Easter is a time for new beginnings, fresh starts, and the celebration of the beauty of nature. What better way to capture the essence of this season than by creating a colorful and vibrant Easter card that features the Honey Bee Stamps Lovely Layers: Carrots done in Rainbow colors! This card is perfect for sending well wishes and joy to your loved ones this Easter season.

CARD RECIPE

To get started, you will need the Lovely Layers: Carrots Dies, the Daisy Field - 3D Embossing Folder, the Bee Narrow Upper Case Alpha Dies, and the Simply Spring Paper Pad. You will also need a few additional supplies, including cardstock, blending tools, and ink pads in a rainbow of colors.

Ink-Blended, Rainbow, Carrots, Easter Card, Honey Bee Stamps, how to,handmade card,Stamps,ilovedoingallthingscrafty,stamping, diecutting,cardmaking

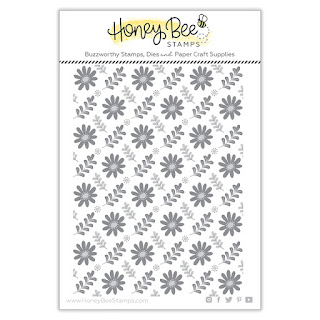
First, take the Daisy Field - 3D Embossing Folder and run a piece of white cardstock through your embossing machine to create a beautiful 3D background. Then, take the Lovely Layers: Carrots Dies and die-cut several carrots out of white cardstock.

Next, use your blending brushes and ink pads to create a rainbow of colors on each of the carrot die-cuts. Using blending brushes and ink pads in rainbow colors, blend each carrot from one color to the next, making sure to blend the colors together smoothly. Leave the stems green for contrast.

Once you have finished blending all of your carrot die-cuts, arrange them together in a bunch and glue them onto the embossed background. Use the Bee Narrow Upper Case Alpha Dies to cut out the word "Happy Easter" from black cardstock. For a thicker look, die-cut four of each letter and stack them together. Use a T-square to help straighten and space out the letters, then use tape to keep them in place before adhering them with glue.

Ink-Blended, Rainbow, Carrots, Easter Card, Honey Bee Stamps, how to,handmade card,Stamps,ilovedoingallthingscrafty,stamping, diecutting,cardmaking

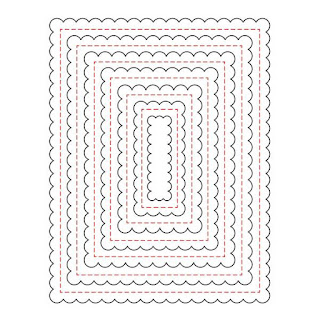
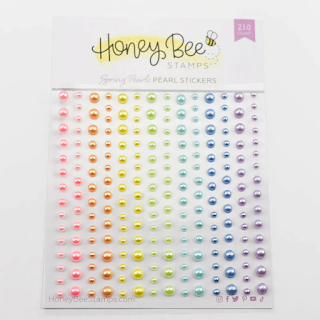
Finally, mat your embossed background onto a coordinating piece of cardstock from the Simply Spring Paper Pad, die-cut first with the largest Scallop A2 Frame Die. Mount the entire piece onto a blank card base using adhesive. For a touch of sparkle, tie a bow with a copper-colored fine glitter thread and add a pearl from the Spring Pearl set.

With a little creativity and the right tools, you can create a beautiful and unique Easter card that will bring a smile to anyone's face. So get crafting and have fun making something special for your loved ones this Easter season.

Happy crafting, and Happy Easter!

Ilda 🌈🐰🥕

SUPPLIES

Lovely Layers: Carrots Dies
Shop at:
SSS | SB | HBS
Daisy Field - 3D Embossing Folder
Shop at:
SSS | SB | HBS
Scallop A2 Frame Dies
Shop at:
SSS | SB | HBS
Bee Narrow Upper Case Alpha Dies
Shop at:
SSS | SB | HBS
Simply Spring Paper Pad
Shop at:
SSS | SB | HBS
Spring Pearls Pearl Stickers
Shop at:
SSS | SB | HBS
Background Blender Brushes
Shop at:
SSS | HBS
Detail Blender Brushes
Shop at:
SSS | HBS
Bee Creative Bitty Buzz Cutter
Shop at:
HBS
Honey Bee Reverse Tweezers
Shop at:
SSS | HBS
Neenah Solar White 110lbs
Shop at:
SSS | AMZ | HBS
Platinum 6 Die Cutting Platform
Shop at:
SSS | SB | SB
Oxide Ink Pad PICKED RASPBERRY
Shop at:
SSS | SB | HBS
Squeezed Lemonade Distress Oxide Ink
Shop at:
SSS | SB | HBS
Oxide Ink Pad TWISTED CITRON
Shop at:
SSS | SB | HBS
Oxide Ink Pad PEACOCK FEATHERS
Shop at:
SSS | AMZ | SB | HBS
Bearly Art Precision Glue
Shop at:
SSS | AMZ
Acme Junior T-Square
Shop at:
SSS | AMZ
To make supplies easy for you to find, I have linked them above. If something is no longer available I will link to a similar product. Affiliate links may be used depending on the product linked. Please help support my blog by using these links while shopping at no additional cost to you. For more information about the affiliates I use, please visit my disclaimer here. Thanks so much for all your support!

Sunday, February 5, 2023

Rainbow Gladiolus Bouquet Card | Studio Katia | New Release

Rainbow, Gladiolus, Bouquet, Card,Studio Katia,New Release,Card Making, Stamping, Die Cutting, handmade card, ilovedoingallthingscrafty, Stamps, how to,Copic Coloring,Floral Friendship Card,Hello,

Hello friends and Happy Sunday!

Today Studio Katia is introducing their latest member to their Mini Slimline Collection. This month it is this beautiful Gladiolus Stamp and Coordinating Die.


Realistically coloring my Gladiolus in rainbow colors doesn't make any sense, but hey I am applying artistic freedom here 😉 Make sure to click the link to the Studio Katia Blog for more inspiration from the Design Team and enter the release giveaway.

CARD RECIPE

Making this card was pretty simple, the hardest part was masking, and even with that it was fairly easy!
  • Start by stamping the Gladiolus Stamp in the center of the panel using Copic-friendly ink.
  • Using the coordinating Die, die-cut masking paper. You could also fussy cut the stamped image but this is the lazy way for those that don't like fussy cutting like me!
  • Shift the edge of the masking paper to line up with the stamped image. If you see the stamped line that is perfect as it will overlap the next stamped image connecting the previous stamped lines.
  • Reposition the stamp and repeat stamping the Gladious Stamp to each side of the first stamped image. Reposition the masking before stamping a new area.
  • Remove masking.
  • Draw in lines if any weren't connected using a Copic-friendly pen, I also extended the stems.
  • Color in the Gladiolus using Copic Markers.
Rainbow, Gladiolus, Bouquet, Card,Studio Katia,New Release,Card Making, Stamping, Die Cutting, handmade card, ilovedoingallthingscrafty, Stamps, how to,Copic Coloring,Floral Friendship Card,Hello,
  • Add the die-cut frame from the Darling Ribbons and Frames to frame the colored panel.
  • Using white pigment ink, stamp and heat emboss the sentiment from the Gladioulus Stamp set.
  • Die cut the sentiment using a Die from the Peony Trimmings Set, and add foam to pop it up, trim any excess.
Rainbow, Gladiolus, Bouquet, Card,Studio Katia,New Release,Card Making, Stamping, Die Cutting, handmade card, ilovedoingallthingscrafty, Stamps, how to,Copic Coloring,Floral Friendship Card,Hello,
  • Finish by gluing on some coordinating colored pearls. These came from the Satin Pearls Mix.
  • For extra highlights and details use a white gel pen.
I hope this beautiful Rainbow Gladiolus Bouquet Card brightened your day. I love how this one turned out and hope it inspired you as well.

Thank you for stopping by and until next time... Happy Crafting!
Ilda 🌈🎕

SUPPLIES
Gladiolus
Gladiolus
Shop at:
SK
Gladiolus Die
Gladiolus Die
Shop at:
SK
Darling Ribbons and Frames
Shop at:
SK
Peony Trimmings Dies
Shop at:
SK
Satin Pearls Mix
Satin Pearls Mix
Shop at:
SK
Black Triangle Tray
Black Triangle Tray
Shop at:
SSS | SK
Embellishment Wand
Embellishment Wand
Shop at:
SSS | SK
SK Glue
SK Glue
Shop at:
SSS | SK
BLACK FOAM TAPE
BLACK FOAM TAPE
Shop at:
SSS | SK
Blackout Ink
Blackout Ink
Shop at:
SSS | HBS | IO3
Neenah Solar White 110lbs
Shop at:
SSS | AMZ | HBS
Masking Paper
Masking Paper
Shop at:
SSS | ALTN
Platinum 6 Die Cutting Platform
Shop at:
SSS | SB | SB
New Mini Misti
New Mini Misti
Shop at:
SSS | SB | HBS
Copic Sketch Markers
Shop at:
SSS | AMZ
Shark Tooth White Atelier Ink
Shop at:
SSS | IO3
Arctic White Emb.Pwd.
Shop at:
SSS | IO3
Heat Gun
Heat Gun
Shop at:
AMZ
White Gelly Roller Pen
Shop at:
SSS | AMZ | SB | HBS
To make supplies easy for you to find, I have linked them above. If something is no longer available I will link to a similar product. Affiliate links may be used depending on the product linked. Please help support my blog by using these links while shopping at no additional cost to you. For more information about the affiliates I use, please visit my disclaimer here. Thanks so much for all your support!

Watch the magic of a little masking trick!

Monday, January 9, 2023

Birthday Balloon Shaker Card | Honey Bee Stamps

Birthday, Balloon, Shaker Card,Honey Bee Stamps, rainbow, ink blending, hot foil, glimmer foil, shaker pocket,Frameless Shaker Card,Card Making, Stamping, Die Cutting, handmade card, ilovedoingallthingscrafty, Stamps, how to,

Hello friends and Happy 2023! 

Yes, this is my first post of the New Year, so I wanted to wish you all the best and thank you all for your support over the years. 

EYE UPDATE: As I have mentioned recently I have been struggling with the vision in my left eye, I barely see anything out of it now. What I do see is mostly shapes and colors, no detail. Because of that, I have been limiting my screen time. For now, I am patching my left eye to avoid straining it when I am online, and still trying to figure out how to decrease the stress on my good eye. I am hoping my left-side vision will stabilize and improve, I just don't want it to get worse. Thankfully, I have a great team of doctors that are following me closely and I am so thankful for all the support I have received. Don't worry I will still be creating just less often, so I am hoping you still will stick with me.

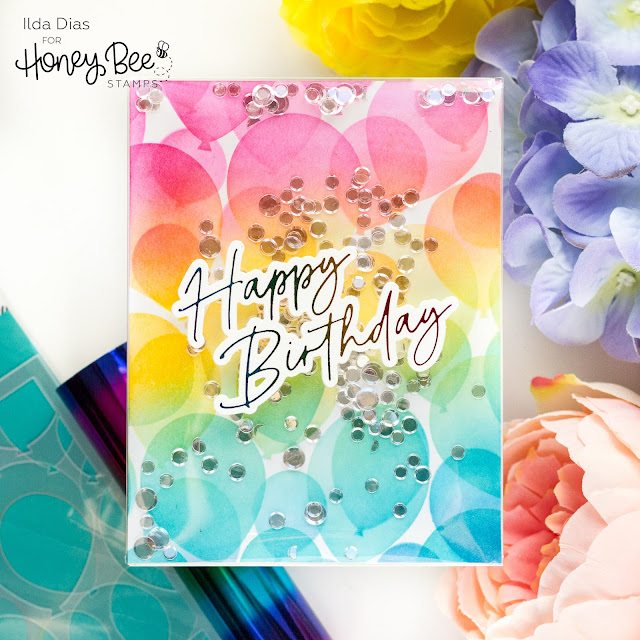
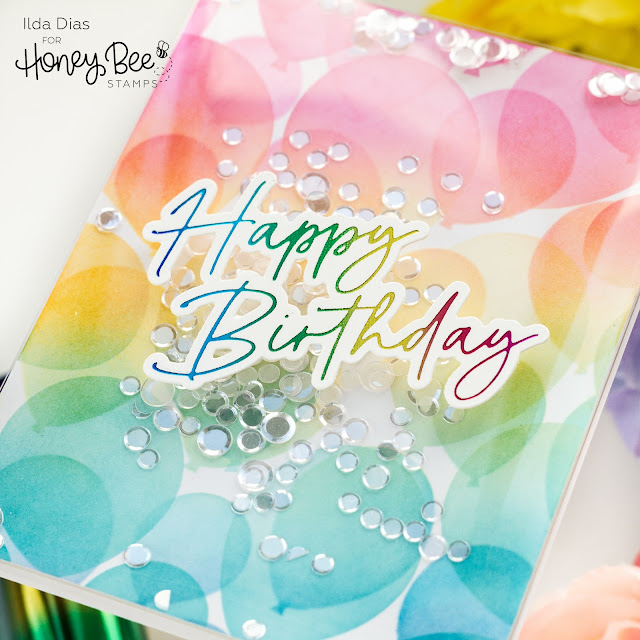
If you saw my last post, you will recognize the similarities between the two backgrounds. I loved my last background so much that I had to recreate the rainbow background again, but this time using balloons from Honey Bee Stamps. Birthday cards are definitely my favorite cards to make and shakers just make the best birthday cards because they are like a party on their own. 

CARD RECIPE

  • To begin, I used one of the stencils from the Layering Balloon Stencils and started by blending the yellow ink in the center, followed by the pink ink on top and then the blue on the bottom. When you overlap with the previous color it results in a rainbow blend. Repeat the process with the top layer of the stencil. Use light pressure when blending to create somewhat of a transparent effect.
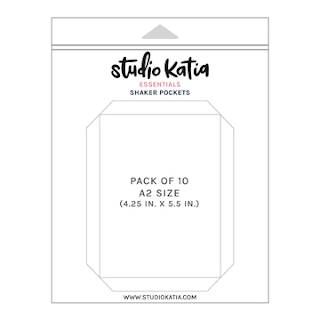
  • Once the background is done, add double-sided tape to the back and secure 3 of the shaker pocket tabs. I filled the pocket with Bokeh Lights Confetti and sealed the last tab. Remove the protective plastic layer from the pocket if it has one.
  • Attach the finished shaker pocket to a card base.

Birthday, Balloon, Shaker Card,Honey Bee Stamps, rainbow, ink blending, hot foil, glimmer foil, shaker pocket,Frameless Shaker Card,Card Making, Stamping, Die Cutting, handmade card, ilovedoingallthingscrafty, Stamps, how to,

A card like this would be easy to mass-produce and have on hand for upcoming birthdays. Change up the colors to make switch things up and make the cards more personal. I think I may have to take my own advice and make some for my stash as I am always running low.

I hope you got some inspiration from today's Birthday Balloon Shaker Card. Thank you for stopping by and until next time... Happy Crafting!

Ilda 🌈🎈

SUPPLIES
Layering Balloon Stencils
Shop at:
SSS | SB | HBS
Foil Script: Wishes Hot Foil Plate/Dies
Shop at:
SSS | SB | HBS
Background Blender Brushes
Shop at:
SSS | HBS
Detail Blender Brushes
Shop at:
SSS | HBS
Tear Tape XL Roll | 1/4
Tear Tape XL Roll | 1/4"
Shop at:
HBS
BOKEH LIGHTS Confetti
Shop at:
HBS
Bee Creative Bitty Buzz Cutter
Shop at:
HBS
Bee Creative Glue
Bee Creative Glue
Shop at:
SSS | SB | HBS
Honey Bee Reverse Tweezers
Shop at:
SSS | HBS
A2 Shaker Pockets
A2 Shaker Pockets
Shop at:
SSS | SK
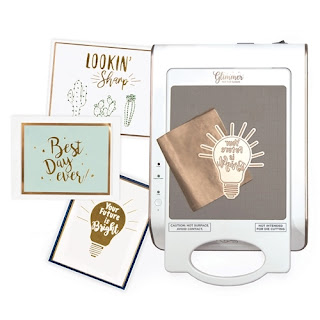
Hot Foil System
Hot Foil System
Shop at:
SSS | SB | HBS | SB
RAINBOW Glimmer Foil
Shop at:
SSS | HBS | SB
Neenah Solar White 110lbs
Shop at:
SSS | AMZ | HBS
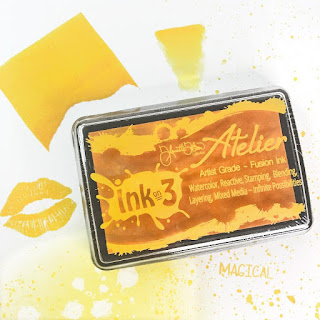
Atelier Ink Bee Sting Yellow
Shop at:
SSS | IO3
Atelier Ink Sweet Petunia
Shop at:
SSS | IO3
Atelier Ink Peacock Blue
Shop at:
SSS | IO3
To make supplies easy for you to find, I have linked them above. If something is no longer available I will link to a similar product. Affiliate links may be used depending on the product linked. Please help support my blog by using these links while shopping at no additional cost to you. For more information about the affiliates I use, please visit my disclaimer here. Thanks so much for all your support!

Watch how easily this card came together!