***Please note links in the post are no longer active, if you are looking for something specific use this link here to 👉 HONEY BEE STAMPS and search for the product listed. My apologies for the inconvenience ***
Hello my friends and welcome back, it feels like it's been a while since my last post.
Today's cards are part of the Perfect Day Release Instargam Hop for Honey Bee Stamps. So if you would love to take part and qualify for 1 of two $50 Gift Cards that will be given away, click HERE.
All three of these frameless/infinity shaker cards have the Layered Waves Stencils in common. This time I got 3 cards from one technique. The technique is actually simple, rather than wiping or washing your stencils after the ink blending is done for the first card background, spray the stencils and pick up the watered-down ink with a card panel. I'll explain more with the next card.
CARD RECIPE
- Ink blend the background panel using Oxide inks with the Layered Waves Stencils. I used Tumbled Glass, Mermaid Lagoon, Chipped Saphire, and Blueprint Sketch Oxides.
- The sea life comes from the new Ocean Deep Scene Builder Dies that I also ink blended and then added details to them using Copic markers and a white gel pen.
- For the bottom of the card, I tore a piece of kraft cardstock and then added Copic maker details.
- The stamp on the background panel comes from the Seas The Day stamps set done in Intense Black Ink.
- To assemble this card I first attached the turtle to a clear thread and secured it with tape on the back of the turtle. I then wrapped the ends around the panel, leaving a little slack for up and down movement when the card is shaken. I also glued down any elements that I wanted to be on the inside of the shaker.
- Next, I used a piece of cellophane plastic for the card front. For a tutorial on a DIY frameless shaker click HERE.
- Once the pocket was created I then filled it with shaker bits and closed the pocket and glued it to the card base.
- To finish off this card I then added the front sea life to the bottom of the card. The "sand" hides most of the shaker bit until it is shaken.
These next, bonus cards were created using the same process as the first one. The backgrounds however were the result of spraying down each of the layers of the stencils used to make the previous card. As you can see this next card uses the top layer of the stencil. When you spray the stencil down the results create a water-colored background look. TIP: place a paper towel under the stencil before you spray the water. Make sure the stencil is saturated to give you solid lines. Remove the paper towel and then press the cardstock panel into the stencil. Avoid moving the cardstock for a clean transfer. Allow to dry.
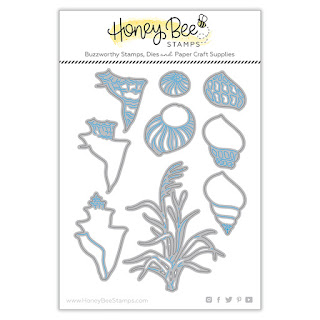
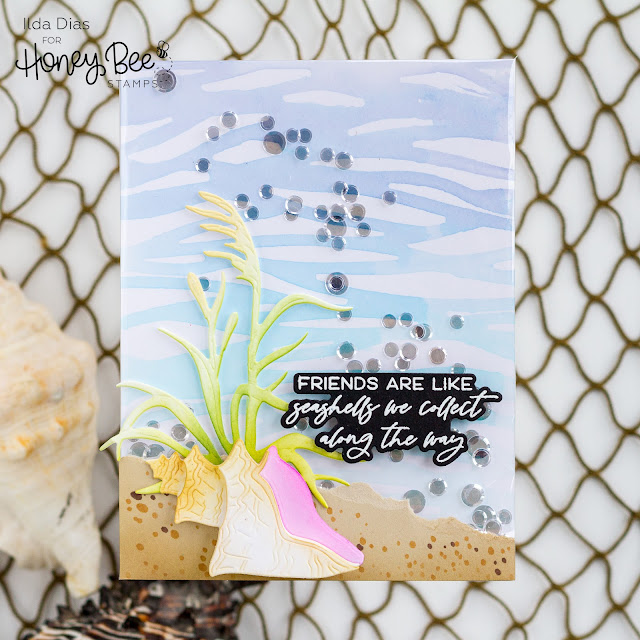
For the next few cards, I used the new Lovely Layers: Seashore Dies. The frameless shaker was created by simply wrapping the backgrounds and filling the pocket with Bokeh Lights Confetti.
To the front of the shaker, the "sand" was created from a torn piece of kraft cardstock and then various Colors of Copic Dots were added to the sand. The shells from the Lovely Layers: Seashore Dies were ink blended and then glued together using foam dots for dimension.
For the sentiments, I used white pigment ink to stamp out the sentiments from Seas The Day and then heat set them using white embossing powder. I then used the coordinating dies Seas The Day Dies.
I love these cards sooooo much! The shaker bits remind me of the foam in the ocean waves.
I hope these Ocean-Themed Frameless Shaker Cards inspired you today. They make the perfect summer occasion card. Don't forget to join the Honey Bee DT for more IG Hop inspiration.
Shop the Perfect Day Release👉HERE
Thank you for stopping by and until next time... Happy Crafting!
Ilda 💗💖👋😊
SUPPLIES
.jpg) Layered Waves Stencils Shop at: SSS | SB | HBS |
 Lovely Layers: Seashore Dies Shop at: SSS | SB | HBS |
 Ocean Deep Scene Builder Dies Shop at: SSS | SB | HBS |
 Seas The Day Shop at: SSS | SB | HBS |
 Seas The Day Dies Shop at: SSS | SB | HBS |
 Detail Blender Brushes Shop at: SSS | HBS |
 Background Blender Brushes Shop at: SSS | HBS |
 Intense Black Ink Shop at: SSS | SB | HBS |
 Sticky Red Tape 1/4" Shop at: HBS |
 BOKEH LIGHTS Confetti Shop at: HBS |
 White Foam Dots With Tab Shop at: HBS |
 Bee Creative Glue Shop at: SSS | SB | HBS |
 Honey Bee Reverse Tweezers Shop at: SSS | HBS |
 Oxide Ink Pad PICKED RASPBERRY Shop at: SSS | SB | HBS |
 WORN LIPSTICK DISTRESS OXIDE Shop at: SSS | SB | HBS |
 Oxide Ink Pad CARVED PUMPKIN Shop at: SSS | SB | HBS |
 MUSTARD SEED DISTRESS OXIDE Shop at: SSS | SB | HBS |
 Oxide Ink Pad ANTIQUE LINEN Shop at: SSS | SB | HBS |
 Oxide Ink Pad PEELED PAINT Shop at: SSS | SB | HBS |
 Oxide Ink Pad RUSTIC WILDERNESS Shop at: SSS | SB | HBS |
 Tumbled Glass Distress Oxide Ink Shop at: SSS | SB | HBS |
 Mermaid Lagoon Oxide Ink Shop at: SSS | AMZ | SB | HBS |
 Oxide Ink Blueprint Sketch Shop at: SSS | SB | HBS |
 Chipped Sapphire Oxide Ink Shop at: SSS | SB | HBS |
 Oxide Ink Pad WILTED VIOLET Shop at: SSS | SB | HBS |
 New Mini Misti Shop at: SSS | SB | HBS |
 Platinum 6 Die Cutting Platform Shop at: SSS | SB | SB |
 Unicorn Pigment Ink Shop at: SSS | SB | HBS | HA |
 Arctic White Emb.Pwd. Shop at: SSS | IO3 |
 White Gelly Roller Pen Shop at: SSS | AMZ | SB | HBS |
To make supplies easy for you to find, I have linked them above. If something is no longer available I will link to a similar product. Affiliate links may be used depending on the product linked. Please help support my blog by using these links while shopping at no additional cost to you. For more information about the affiliates I use, please visit my disclaimer here. Thanks so much for all your support!


.jpg)
.jpg)
.jpg)


No comments:
Post a Comment
Thanks so much for taking the time and leaving me a comment! I always love hearing from you and I appreciate you stopping by! Hugs, Ilda