Showing posts with label Holiday Card. Show all posts

Friday, November 8, 2024

Nativity Christmas Card with a Detachable Ornament | Pixie Pust Designs

A handmade Christmas card featuring a detachable Nativity scene ornament in a hexagonal frame. The ornament depicts silhouettes of Mary, Joseph, and baby Jesus in a stable, with a red ribbon bow and silver hanging cord at the top. The sentiment "From Our House to Yours" is stamped on vellum in the background, adding a heartfelt touch. Glitter accents on the star bring sparkle to the design, making this card both festive and functional as a holiday keepsake.

Today, I’m sharing a special project featuring a unique Christmas card that doubles as a keepsake ornament! This card is not only a beautiful greeting but also an ornament for your recipient to hang on their Christmas tree, making it a delightful holiday surprise. Let’s take a closer look at the products I used and the creative steps behind this dual-purpose card.

CARD RECIPE

Hexagon and Nativity Ornament Add-On Die Bundle - Dies

Gingy Dress Up Stamp Set - for the sentiment

Cardstock - in various colors

Vellum - Background

VersaFine ONYX BLACK Ink - ink

Red ribbon - for the bow

Silver cord - for hanging

Prima Glitter - Star

The main feature of this card is the Nativity scene ornament, created using the Hexagon and Nativity Ornament Add-On Die Bundle. I loved how this die set allowed me to craft a detailed silhouette of Mary, Joseph, and baby Jesus within the stable. The hexagonal shape brings a modern touch to this classic holiday scene, and it works beautifully as both a card focal point and a tree ornament.

To keep the ornament thin enough for easy mailing, I used fewer layers than a typical standalone ornament, ensuring it remains lightweight while still having a finished look.

Step-by-Step Process:

  1. Die-Cutting the OrnamentHexagon and Nativity Ornament Add-On Die Bundle dies, I cut out the main frames for the ornament. For the layered look, I trimmed the tabs from the baby Jesus layer, then stacked and glued the layers together to add depth without bulk.

  2. Adding a Sentiment: The sentiment "From Our House to Yours" from the Gingy Dress Up Stamp Set was stamped in VersaFine ONYX BLACK Ink onto a vellum layer. I chose this sentiment because it beautifully captures the spirit of sharing love and peace with family and friends during the holiday season. Be sure to let the ink dry completely on vellum to avoid smudging.

  3. Assembly: I adhered the vellum layer with the sentiment to the back of the hexagon Nativity scene, centering it for a soft, diffused background effect. After trimming the vellum to match the hexagon shape, I added another die-cut layer behind it to create a polished back. For a clean finish on the front, I attached the hexagon frame from the Hexagon Ornament Die set, and sandwiched the silver cord in between layers for a secure hanging loop.

  4. Ornament Details: To add a touch of sparkle, I applied glue to the star and sprinkled it with Prisma fine glitter, adding a subtle, festive shimmer. The silver cord was threaded through the top, and a red bow was added for an extra holiday touch. The ornament is attached to the card base with a glue dot, making it easy to detach for hanging on the Christmas tree.

  5. Final Touches: The completed ornament is ready to be displayed on a card that transforms into a cherished Christmas decoration. By making this ornament detachable, the card offers a gift within a gift, creating a joyful surprise that can be enjoyed year after year.

A handmade Christmas card featuring a detachable Nativity scene ornament in a hexagonal frame. The ornament depicts silhouettes of Mary, Joseph, and baby Jesus in a stable, with a red ribbon bow and silver hanging cord at the top. The sentiment "From Our House to Yours" is stamped on vellum in the background, adding a heartfelt touch. Glitter accents on the star bring sparkle to the design, making this card both festive and functional as a holiday keepsake.

One of the best parts of this card is that after receiving it, the recipient can remove the ornament and hang it on their tree. This card design not only brings joy in the moment but also creates a lasting memory that can be cherished each year.

A close-up of the Nativity scene ornament hanging on a Christmas tree. The ornament showcases a hexagonal frame with Mary, Joseph, and baby Jesus silhouetted inside the stable. A red ribbon bow and silver cord complete the ornament for easy hanging. The sentiment "From Our House to Yours" is visible on vellum, adding a warm holiday message. Sparkling glitter on the star enhances the charm of this meaningful holiday decoration.

Thank you for joining me as I shared this Nativity ornament card! I hope this project inspires you to create heartfelt, dual-purpose cards for the season. Until next time... Happy Crafting!
Ilda 🌟

Here are some more inspirations from Pixie Dust Designs👇
Click on the image for details!


To make supplies easy for you to find, I have linked them above. If something is no longer available I will link to a similar product. Affiliate links may be used depending on the product linked. Please help support my blog by using these links while shopping at no additional cost to you. For more information about the affiliates I use, please visit my disclaimer here. Thanks so much for all your support!

Enjoyed this post? Never miss out on future posts by Following this Blog

Thursday, November 2, 2023

Holiday Wishes Inspiration Week Day 5 | Honey Bee Stamps

Lovely Layers Amaryllis, Holiday Card, Honey Bee Stamps,how to,handmade card,Stamps,ilovedoingallthingscrafty,stamping, diecutting,cardmaking, Holiday Wishes

Hello friends and Happy Thursday! 

If you have been following my blog post all week, Thank you! If not make sure to look back through all the previous posts that I have shared for more inspiration featuring the Holiday Wishes Release from Honey Bee Stamps.


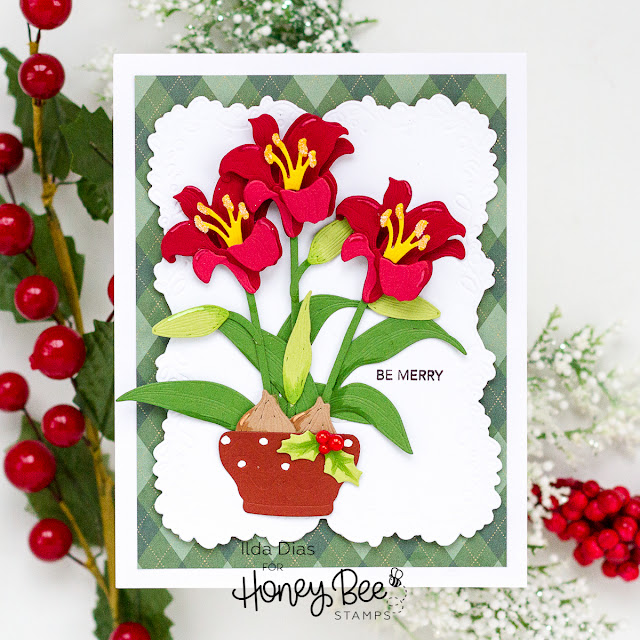
I am a huge fan of the Lovely Layers Collection and this new Lovely Layers Amaryllis is absolutely gorgeous! I loved it so much that I needed a larger card base to show them off. Normally I use an A2 card size this one is an A7 size (5x7).

CARD RECIPE
Lovely Layers Amaryllis, Holiday Card, Honey Bee Stamps,how to,handmade card,Stamps,ilovedoingallthingscrafty,stamping, diecutting,cardmaking, Holiday Wishes

Besides the sentiment, the entire card is paper pieced together from all the die cuts. If you love die-cutting these Lovely Layers Sets are amazing. To add some shadow and detailing I used copic markers. I had also used gel pen highlights on the flowers but they looked silly,  so I colored over them with a matching color, which still gives the illusion of a highlight. To add dimension, foam is your friend! Obviously, when you are using this much foam to add dimension it becomes difficult to mail. This card would definitely be one I hand-delivered.

Lovely Layers Amaryllis, Holiday Card, Honey Bee Stamps,how to,handmade card,Stamps,ilovedoingallthingscrafty,stamping, diecutting,cardmaking, Holiday Wishes

I love how this card turned out and hope you did too! 
Thank you for stopping by and until tomorrow... Happy Crafting!

Ilda 💖

To make supplies easy for you to find, I have linked them above. If something is no longer available I will link to a similar product. Affiliate links may be used depending on the product linked. Please help support my blog by using these links while shopping at no additional cost to you. For more information about the affiliates I use, please visit my disclaimer here. Thanks so much for all your support!

Enjoyed this post? Never miss out on future posts by Following this Blog

Thursday, October 27, 2022

A Rainbow Ho Ho Ho Holiday Card | Studio Katia Winter Release Blog Hop and Giveaway

Hello and welcome to our hop for the Studio Katia Winter Release! If you have started hopping already you may have arrived from the Studio Katia Blog. Stay tuned for where to hop next and more details on how to enter the giveaway🎉


This Winter Release includes 6 stamp sets, 4 with coordinating dies, 3 standalone dies, 3 stencils, and 1 paper pad. 

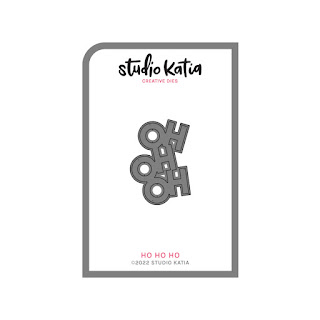
My super simple non-traditional Christmas card features the new Playful Dots Stencil and the Ho Ho Ho Die.

how to,handmade card,Stamps,Holiday Card,Giveaway,ilovedoingallthingscrafty,Winter Release,Ho Ho Ho,stamping,Studio Katia,blog hop,Rainbow,Ink Blending,Die cutting,card making,

CARD RECIPE
  • Ink-blend the background using the Playful Dots Stencil. I used yellow, pink, and blue inks to create the rainbow blend.
  • Leaving the stencil in place, add a layer of glimmer paste. Remove the stencil and wash it immediately as the glimmer paste can be hard to remove once dry. Set the background aside to dry.
  • Die cut the Ho Ho Ho using one layer of Holographic paper, one black layer, and 3 white layers.
  • Glue layers together starting with the holographic one on the bottom, followed by the black layer and white layers. Discard the shadow layers from the white and black layers (or used them on a different card). The black layer adds a little extra shadow and dimension.
how to,handmade card,Stamps,Holiday Card,Giveaway,ilovedoingallthingscrafty,Winter Release,Ho Ho Ho,stamping,Studio Katia,blog hop,Rainbow,Ink Blending,Die cutting,card making,

SK SUPPLIES
Ho Ho Ho Die
Ho Ho Ho Die
Shop at:
SK
Playful Dots Stencil
Shop at:
SK
Ink Blender Brushes
Ink Blender Brushes
Shop at:
SK
SK Glue
SK Glue
Shop at:
SK
 
HOP Order
Ilda ðŸ‘‹
Galina ðŸ‘ˆNext

GIVEAWAY
Studio Katia is giving away one $50 CAD gift certificate at every stop!!! Winners will be chosen randomly from comments left under all the stops and must have commented on all the stops to qualify for a chance of winning. All comments must be left by Monday 31st Oct 23:59 PM EST. Winners will be announced on Thursday 3rd Nov on SK Blog.

RELEASE INSPIRATION
In case you missed it, here is some more inspiration from this release.
Day 1 Sneak Peak Features:

Day 2 Sneak Peak Features:
how to,handmade card,Stamps,Holiday Card,ilovedoingallthingscrafty,Winter Release,stamping,Studio Katia Shaker Card, Shaker Pokets,,Die cutting,card making,how to,handmade card,Stamps,Holiday Card,ilovedoingallthingscrafty,Winter Release,stamping,Studio Katia Shaker Card, Shaker Pokets,Die cutting,card making,

Day 3 Sneak Peak Features:

how to,handmade card,Stamps,Holiday Card,Giveaway,ilovedoingallthingscrafty,Winter Release,Snowflake,stamping,Studio Katia,blog hop,Rainbow,Ink Blending,Die cutting,card making,how to,handmade card,Stamps,Holiday Card,Giveaway,ilovedoingallthingscrafty,Winter Release,Snowflake,stamping,Studio Katia,blog hop,Rainbow,Ink Blending,Die cutting,card making,

Thank you for stopping by and until next time... Happy Hopping!
Ilda 🌈🎅

To make supplies easy for you to find, I have linked them above. If something is no longer available I will link to a similar product. Affiliate links may be used depending on the product linked. Please help support my blog by using these links while shopping at no additional cost to you. For more information about the affiliates I use, please visit my disclaimer here. Thanks so much for all your support!


Thursday, December 10, 2020

Happy Pawlidays Christmas Card | Studio Katia

Happy Pawlidays, Christmas Card, Studio Katia, Card Making, Stamping, Die Cutting, handmade card, ilovedoingallthingscrafty, Stamps, how to,  Pets, family photo, Holiday Card,Copic Markers,Ink Blending,

Well hello, friends!

This fun card is for all my animal lovers out there. I was inspired by a recent photo I saw of some friends with their furry pets. So I thought it would be a great idea to recreate it as a Christmas card.

CARD DETAILS

To begin, I stamped out all my images. The cute children and furries come from the LOVE FOR PAWS BUNDLE. To both kids, I added the Santa Claus hat that comes from the WINTER KOBI. The images were then colored using Copic Markers and then die cut with the coordinating dies.

Happy Pawlidays, Christmas Card, Studio Katia, Card Making, Stamping, Die Cutting, handmade card, ilovedoingallthingscrafty, Stamps, how to,  Pets, family photo, Holiday Card,Copic Markers,Ink Blending,

Next, I stamped out the LOTS OF GIFTS TRIMMINGS on the background panel. I then colored the gifts very simply using a variety of red markers. I then added gold details with a gel pen. To the top of the presents, I first stamped out a tree from the HAPPY SNOWMEN set and then blended it a little to give it a glowing appearance. I then used a few INK BLENDER BRUSHES to blend out the top area of the panel used Distress Oxide inks.

Moving along, I trimmed down the panel and then glued the background to the scallop frame that comes from the DOTTED PATTERNS SET 4. I then popped the images back into the center of the scene using FOAM TAPE.


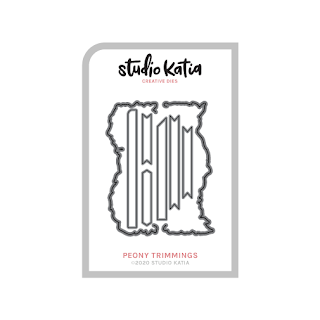
The sentiment comes from the HAPPY PAWLIDAYS Set, that I then die cut using the banner from the PEONY TRIMMINGS DIES

Happy Pawlidays, Christmas Card, Studio Katia, Card Making, Stamping, Die Cutting, handmade card, ilovedoingallthingscrafty, Stamps, how to,  Pets, family photo, Holiday Card,Copic Markers,Ink Blending,

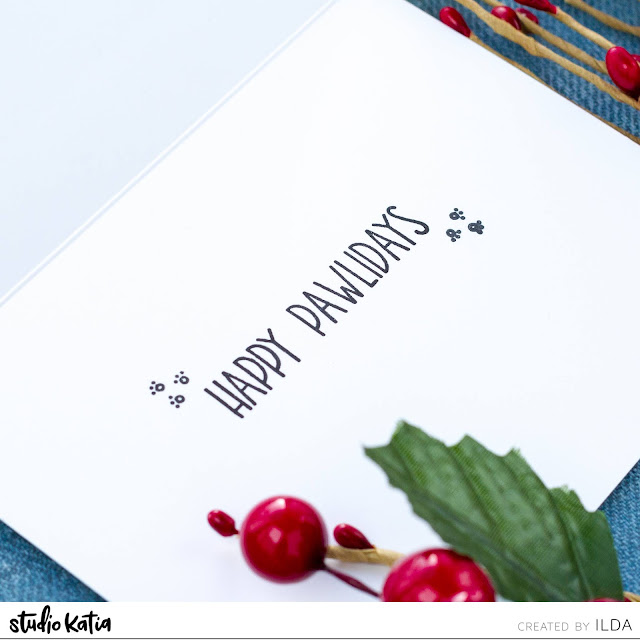
Here is how I finished off the inside of the card. The sentiments also come from the HAPPY PAWLIDAYS stamp set.

Happy Pawlidays, Christmas Card, Studio Katia, Card Making, Stamping, Die Cutting, handmade card, ilovedoingallthingscrafty, Stamps, how to,  Pets, family photo, Holiday Card,Copic Markers,Ink Blending,

Sending family photo cards at this time of year is very common, so maybe sending a handmade card personalized to look like you and your furry pets may be another option and a cute surprise for your recipients.

Hope this Happy Pawlidays Christmas Card inspired you today. Thank you for stopping by and until next time... Happy Crafting!


SUPPLIES
LOVE FOR PAWS BUNDLE
Shop at:
SSS | SK
HAPPY PAWLIDAYS
HAPPY PAWLIDAYS
Shop at:
SSS | SK
LOTS OF GIFTS TRIMMINGS
Shop at:
SSS | SK
HAPPY SNOWMEN
HAPPY SNOWMEN
Shop at:
SSS | SK
WINTER KOBI
WINTER KOBI
Shop at:
SK
WINTER KOBI DIES
WINTER KOBI DIES
Shop at:
SK
DOTTED PATTERNS SET 4
Shop at:
SSS | SK
PEONY TRIMMINGS DIES
Shop at:
SSS | SK
INK BLENDER BRUSHES
INK BLENDER BRUSHES
Shop at:
SSS | SK
STUDIO KATIA GLUE
STUDIO KATIA GLUE
Shop at:
SSS | SK
FOAM TAPE - WHITE
FOAM TAPE - WHITE
Shop at:
SSS | SK
MINI MISTI
MINI MISTI
Shop at:
SSS | AMZ | SB | SK | HBS
NEENAH SOLAR WHITE 110
Shop at:
SSS | AMZ | HBS
BLACKOUT INK
BLACKOUT INK
Shop at:
SSS | HBS | IO3
COPIC SKETCH
COPIC SKETCH
Shop at:
SSS | AMZ
GEMINI JR. DIE CUTTER
Shop at:
SSS | AMZ | SB
Oxide Ink Pad MOWED LAWN
Shop at:
SSS | SB | HBS
Oxide Ink Pad ICED SPRUCE
Shop at:
SSS | HBS
Oxide Ink Pad BLACK SOOT
Shop at:
SSS | SB | HBS
ATELIER SHARK TOOTH
ATELIER SHARK TOOTH
Shop at:
SSS | IO3
WHITE GELLY ROLLER PEN SET
Shop at:
SSS | AMZ | SB
Gelly Roll Metallic Gel Ink Pen Set
Shop at:
AMZ
SMALL TIP WATER BRUSH PEN
Shop at:
SSS | IO3
LIQUID PIXIE DUST
LIQUID PIXIE DUST
Shop at:
SSS | IO3
To make supplies easy for you to find, I have linked them above. If something is no longer available I will link to a similar product. Affiliate links may be used depending on the product linked. Please help support my blog by using these links while shopping at no additional cost to you. For more information about the affiliates I use, please visit my disclaimer here. Thanks so much for all your support!