Thursday, November 5, 2020

Honey Bee Stamps Holiday Cheer Blog Hop | Merry Christmas Mistletoe Slimline Bridge Poinsettia Card

Honey Bee Stamps, Holiday Cheer, Blog Hop, PRETTY POINSETTIAS,  PRETTY POINSETTIAS DIES, MISTLETOE SLIMLINE COVER PLATE, Merry Christmas, Mistletoe Slimline, Poinsettia Card, Card Making, Stamping, Die Cutting, handmade card, ilovedoingallthingscrafty, Stamps, how to, Christmas Card,

Hello Friends, and welcome to the Honey Bee Stamps Holiday Cheer Blog Hop. If you have already started you would have come from my friend Bobbi's Blog. Stay tuned as I will get into all the Hop and Giveaway details near the end of this post. So let's get started! 

CARD DETAILS

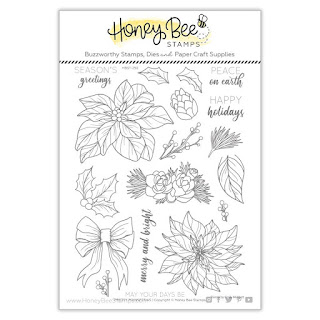
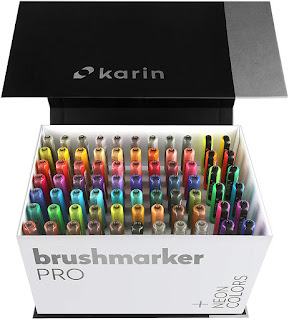
I began this card by stamping and heat gold embossing all the images from the PRETTY POINSETTIAS stamp set that I was going to use onto Bristol paper. I then watercolored these beautiful images using Karin Pro Brush Markers.

Honey Bee Stamps, Holiday Cheer, Blog Hop, PRETTY POINSETTIAS,  PRETTY POINSETTIAS DIES, MISTLETOE SLIMLINE COVER PLATE, Merry Christmas, Mistletoe Slimline, Poinsettia Card, Card Making, Stamping, Die Cutting, handmade card, ilovedoingallthingscrafty, Stamps, how to, Christmas Card,

Once the images were dry I die cut them using the coordinating PRETTY POINSETTIAS DIES

Honey Bee Stamps, Holiday Cheer, Blog Hop, PRETTY POINSETTIAS,  PRETTY POINSETTIAS DIES, MISTLETOE SLIMLINE COVER PLATE, Merry Christmas, Mistletoe Slimline, Poinsettia Card, Card Making, Stamping, Die Cutting, handmade card, ilovedoingallthingscrafty, Stamps, how to, Christmas Card,

The next step was to create the background for my images. I used the MISTLETOE SLIMLINE COVER PLATE to die cut two layers and glued them together for added reinforcement. I then created the Slimline Bridge Card by following measurements and directions from one of Jennifer McGuire's Videos. To the center of the Bridge Card, I glued a strip of green glitter paper. I then glued the edges of the MISTLETOE SLIMLINE COVER PLATE to the flaps of the Card. 

Honey Bee Stamps, Holiday Cheer, Blog Hop, PRETTY POINSETTIAS,  PRETTY POINSETTIAS DIES, MISTLETOE SLIMLINE COVER PLATE, Merry Christmas, Mistletoe Slimline, Poinsettia Card, Card Making, Stamping, Die Cutting, handmade card, ilovedoingallthingscrafty, Stamps, how to, Christmas Card,

The fun part was creating an arrangement on the front of the card. Once I settled on the design I glued the pieces down either with GLUE or foam tape.

The sentiment is a combination of the MERRY DIES and the MERRY stamp set that I stamped onto a small banner from SENTIMENT BANNER DIES

As finishing touches, I added glossy accents to the centers of the poinsettias and the berries. I also added some sparkly crystals to where berries would be onto the mistletoe background.

The fun part about these bridge cards is that they fold flat to fit into the envelope.

Honey Bee Stamps, Holiday Cheer, Blog Hop, PRETTY POINSETTIAS,  PRETTY POINSETTIAS DIES, MISTLETOE SLIMLINE COVER PLATE, Merry Christmas, Mistletoe Slimline, Poinsettia Card, Card Making, Stamping, Die Cutting, handmade card, ilovedoingallthingscrafty, Stamps, how to, Christmas Card,

SUPPLIES
PRETTY POINSETTIAS
PRETTY POINSETTIAS
Shop at:
HBS
PRETTY POINSETTIAS DIES
Shop at:
HBS
MISTLETOE SLIMLINE COVER PLATE
Shop at:
HBS
MERRY DIES
MERRY DIES
Shop at:
HBS
MERRY
MERRY
Shop at:
HBS
SENTIMENT BANNER DIES
Shop at:
SSS | SB | HBS
BEE CREATIVE GLUE
BEE CREATIVE GLUE
Shop at:
SSS | SB | HBS
BRISTOL PAPER
BRISTOL PAPER
Shop at:
SSS | AMZ
ORIGINAL MISTI
ORIGINAL MISTI
Shop at:
SSS | AMZ | SB | HBS
JUICY INK
JUICY INK
Shop at:
SSS | HBS | IO3
GOLD RUSH EMB. PWD.
GOLD RUSH EMB. PWD.
Shop at:
SSS | IO3
KARIN BRUSHMARKER PRO
Shop at:
SSS | AMZ
GEMINI JR. DIE CUTTER
Shop at:
SSS | AMZ | SB
NEENAH SOLAR WHITE 110
Shop at:
SSS | AMZ | HBS
Scor-Pal MINI SCOR-BUDDY
Shop at:
SSS | HBS
BLACKOUT INK
BLACKOUT INK
Shop at:
SSS | HBS | IO3
Gold Glitter Cardstock
Shop at:
SSS
ICY SPARKLE CRYSTALS
Shop at:
SSS | SK
EMBELLISHMENT WAND
EMBELLISHMENT WAND
Shop at:
SSS | SK
GLOSSY ACCENTS
GLOSSY ACCENTS
Shop at:
SSS | AMZ | SB | HBS
To make supplies easy for you to find, I have linked them above. If something is no longer available I will link to a similar product. Affiliate links may be used depending on the product linked. Please help support my blog by using these links while shopping at no additional cost to you. For more information about the affiliates I use, please visit my disclaimer here. Thanks so much for all your support!


Hope you were inspired by this slimline bridge creation, now let's get on with the Blog Hop details!


BLOG HOP

GIVEAWAY
Honey Bee Stamps will be offering a $100 Gift Card for comments left along on the HOP! To qualify you must hop along and leave a comment at each stop to be entered to win. 

What was your favorite product or must-haves from the release? Leave me a comment below and good luck! 

SHOP the new HOLIDAY CHEER Release

For more HOLIDAY CHEER Inspiration click the images below.


Thank you for stopping by and until next time... Happy Crafting!


Tuesday, November 3, 2020

Merry Christmas Wishes Acetate Foiled Card | Spellbinders | GOM November 2020

Card Making, Stamping, Die Cutting, handmade card, ilovedoingallthingscrafty, Stamps, how to,Glimmer Hot Foil Kit of the Month,Merry Christmas Wishes,Acetate,Foiled Card,Spellbinders,November 2020

Hello Friends! Today I am happy to share one of the easiest cards I have ever made. So simple and yet so elegant, at least in my opinion, lol!

This card features the new Merry Christmas Wishes Foil Plates which you get with the November Hot Foil Kit of the Month from Spellbinders.

CARD DETAILS

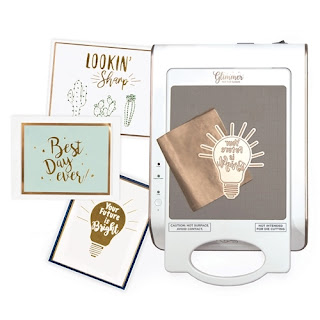
As with any other foiled card, I began by heating up the GLIMMER HOT FOIL SYSTEM. I then cut a piece of POLISHED BRASS - Glimmer Foil and placed it into a piece of Heat Resistant Acetate. Next, I placed the plates onto the foil, and once when the heat timer was done I ran the foil sandwich through the PLATINUM 6 DIE CUTTING PLATFORM to transfer the foil. 

Card Making, Stamping, Die Cutting, handmade card, ilovedoingallthingscrafty, Stamps, how to,Glimmer Hot Foil Kit of the Month,Merry Christmas Wishes,Acetate,Foiled Card,Spellbinders,November 2020

I repeated these steps to add the sentiment using the sentiment plates. Normally you would foil onto paper, but this time I experimented on Heat Resistant Acetate and I loved how it turned out.

Card Making, Stamping, Die Cutting, handmade card, ilovedoingallthingscrafty, Stamps, how to,Glimmer Hot Foil Kit of the Month,Merry Christmas Wishes,Acetate,Foiled Card,Spellbinders,November 2020

I then scored the top of the acetate piece to create a hinge and then glued the hinge onto an A2 card panel that I then glued onto a top folding card base.

To finish off the card I added some GOLD SPARKLE CRYSTALS and voila, how simple was that!? 

If you are interested in signing up for the monthly Glimmer Hot Foil Kit of the Month click HERE for all the details. Also, if you join Now you can Save 10% Off the purchase of the Glimmer Hot Foil System! *You may add the system at the time of subscription. For more information on the monthly club kits click HERE.

Thank you for stopping by and until next time... Happy Crafting!


SUPPLIES
GLIMMER HOT FOIL KIT
Shop at:
SB
HOT FOIL SYSTEM
HOT FOIL SYSTEM
Shop at:
SSS | SB | SB
PLATINUM 6 DIE CUTTING PLATFORM
Shop at:
SSS | SB | SB
POLISHED BRASS - Glimmer Foil
Shop at:
SSS | SB | SB
ACETATE  Sheets
ACETATE Sheets
Shop at:
SSS | AMZ
Scor-Pal MINI SCOR-BUDDY
Shop at:
SSS | HBS
NEENAH SOLAR WHITE 110
Shop at:
SSS | AMZ | HBS
GOLD SPARKLE CRYSTALS
Shop at:
SSS | SK
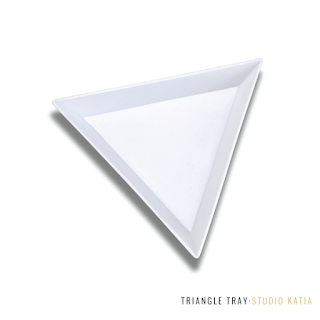
TRIANGLE TRAY
TRIANGLE TRAY
Shop at:
SSS | SK
EMBELLISHMENT WAND
EMBELLISHMENT WAND
Shop at:
SSS | SK
STUDIO KATIA GLUE
STUDIO KATIA GLUE
Shop at:
SSS | SK
To make supplies easy for you to find, I have linked them above. If something is no longer available I will link to a similar product. Affiliate links may be used depending on the product linked. Please help support my blog by using these links while shopping at no additional cost to you. For more information about the affiliates I use, please visit my disclaimer here. Thanks so much for all your support!

Thursday, October 29, 2020

New Atelier Inks - Rainbow Butterfly Card | Ink On 3


It's inspiration week for Ink On 3's New Ink Release. Make sure to stop by BLOG to enter the giveaways there all week long.

The new inks are so pretty and they make such a great addition to the gorgeous colors of the Ink On 3 Rainbow. Welcome, ATELIER SHARK TOOTH WHITE, ATELIER TRINITY TEAL and the ATELIER SWEET PETUNIA INKS.


CARD DETAILS

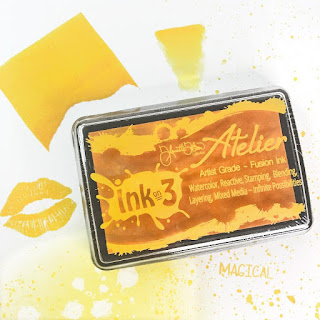
For my card today, I wanted to showcase how these colors blended and fit into the rainbow. So of course I had to make a rainbow card (my favorite kind). I began by blending out SWEET PETUNIA, MARILYN RED, MARIGOLD ORANGE, BEE STING YELLOW, GODDESS GREEN, TRINITY TEAL, PEACOCK BLUE, and MY PURPLE JAM Atelier Inks onto a piece of Bristol paper. I then sprayed the background with water and picked up the water droplets with a paper towel,


Once the paper was dry, I used an antistatic powder bag to prepare the paper for embossing. I then stamped out the inside details of the butterfly wings from the SHINE BRIGHT set using the ATELIER SHARK TOOTH White ink, and heat set it by adding some ARCTIC WHITE POWDER

Next, I stamped the outer image of the butterfly using BLACKOUT INK. To the inside of each butterfly, I then painted on some LIQUID PIXIE DUST.


To finish off this colorful card I stamped the sentiment onto a black banner once again using the ATELIER SHARK TOOTH White ink, and heat set it using some ARCTIC WHITE POWDER

I hope you were inspired by this rainbow creation using a wider range of Ink On 3 Inks. Don't forget to stop by the INK ON 3 BLOG for more inspiration and Giveaways.

Thank you for stopping by and until next time... Happy Crafting!


SUPPLIES
SHINE BRIGHT
SHINE BRIGHT
Shop at:
IO3
ATELIER SWEET PETUNIA
Shop at:
IO3
ATELIER MARILYN RED
ATELIER MARILYN RED
Shop at:
SSS | HBS | IO3
ATELIER MARIGOLD ORANGE
Shop at:
SSS | HBS | IO3
ATELIER BEE STING YELLOW
Shop at:
SSS | HBS | IO3
ATELIER GODDESS GREEN
Shop at:
SSS | HBS | IO3
ATELIER TRINITY TEAL
Shop at:
IO3
ATELIER PEACOCK BLUE
Shop at:
SSS | HBS | IO3
ATELIER MY PURPLE JAM
Shop at:
SSS | IO3
ATELIER SHARK TOOTH
ATELIER SHARK TOOTH
Shop at:
IO3
BLACKOUT INK
BLACKOUT INK
Shop at:
SSS | HBS | IO3
LIQUID PIXIE DUST
LIQUID PIXIE DUST
Shop at:
SSS | IO3
ARCTIC WHITE POWDER
ARCTIC WHITE POWDER
Shop at:
SSS | IO3
BRISTOL PAPER
BRISTOL PAPER
Shop at:
SSS | AMZ
INK BLENDER BRUSHES
INK BLENDER BRUSHES
Shop at:
SSS | SK
ORIGINAL MISTI
ORIGINAL MISTI
Shop at:
SSS | AMZ | SB | HBS
Embossing Magic Bag
Embossing Magic Bag
Shop at:
SSS | AMZ
IRIDESCENT BUBBLES
IRIDESCENT BUBBLES
Shop at:
SSS | SK
STUDIO KATIA GLUE
STUDIO KATIA GLUE
Shop at:
SSS | SK
FOAM TAPE - WHITE
FOAM TAPE - WHITE
Shop at:
SSS | SK
To make supplies easy for you to find, I have linked them above. If something is no longer available I will link to a similar product. Affiliate links may be used depending on the product linked. Please help support my blog by using these links while shopping at no additional cost to you. For more information about the affiliates I use, please visit my disclaimer here. Thanks so much for all your support!