Showing posts with label hearts. Show all posts

Monday, March 17, 2025

Puppy Kisses & Lucky Wishes | A St. Paddy’s Inspired Card | Honey Bee Stamps

A handmade St. Patrick’s Day card with a green and white heart-patterned background. The card features a glittery die-cut sentiment reading “Lucky to Have You” in green script, layered over vellum. At the top, there is a heart-shaped embellishment with a fussy-cut watercolor dog, its paws and face tinted green to mimic playing in the grass. The design is accented with shamrocks made from tiny hearts and finished with green gem embellishments for sparkle. The card has a cheerful, festive feel with a mix of textures and layers.

Happy St. Patrick’s Day! What better way to celebrate than with a heartfelt, handmade card? This glittery green beauty is full of charm, featuring a lucky pup who’s clearly been having fun in the fresh-cut grass! With layered hearts, sparkly sentiments, and clover accents, this card is the perfect way to tell someone just how lucky you are to have them in your life.

CARD RECIPE

Background
I started with a vibrant background using the Scattered Hearts Stencil. The first layer was blended with Mowed Lawn Distress Oxide Ink, and for extra shimmer and texture, I added a second layer using Slime Green Paper Glaze.

Sentiment
The sentiment, Lucky to Have You Honey Cuts, was die-cut from glitter paper that I ink-blended to match the background using Mowed Lawn Distress Oxide Ink. This ensured a cohesive look while adding shimmer to the design. To make the sentiment stand out, I placed it on a soft vellum shadow, which helps it pop against the busy background without overwhelming the design.

Focal Image
The adorable pup comes from the Tail Waggers Rubber Stamp Set, stamped using water-reactive ink and then watercolored. To enhance the St. Paddy’s theme, I added green hues to the pup’s paws, legs, and face to mimic the look of playing in fresh-cut grass. I initially used the Tail Wagger Honey Cuts die but opted for a hand-fussy cut look without the white border.

A handmade St. Patrick’s Day card with a green and white heart-patterned background. The card features a glittery die-cut sentiment reading “Lucky to Have You” in green script, layered over vellum. At the top, there is a heart-shaped embellishment with a fussy-cut watercolor dog, its paws and face tinted green to mimic playing in the grass. The design is accented with shamrocks made from tiny hearts and finished with green gem embellishments for sparkle. The card has a cheerful, festive feel with a mix of textures and layers.

Embellishments
The hearts framing the pup are from the Lace Heart Layering Frames Honey Cuts Set, cut from pink and green cardstock for a layered effect. For a fun shamrock detail, I arranged tiny hearts from the Bold Background: Vines of Love Honey Cuts into clover shapes. To finish, I added some sparkle using green gems from the Real Rainbow Sticker Set.

A handmade St. Patrick’s Day card with a green and white heart-patterned background. The card features a glittery die-cut sentiment reading “Lucky to Have You” in green script, layered over vellum. At the top, there is a heart-shaped embellishment with a fussy-cut watercolor dog, its paws and face tinted green to mimic playing in the grass. The design is accented with shamrocks made from tiny hearts and finished with green gem embellishments for sparkle. The card has a cheerful, festive feel with a mix of textures and layers.

This card was so fun to put together, and I love how it captures the playful spirit of both St. Patrick’s Day and our four-legged friends. Let me know what you think in the comments, and don’t forget to share your own St. Paddy’s inspired creations!

Be sure to head over to my Instagram account to watch the reel featuring this card in action. Thank you for stopping by and until next time... Happy Crafting!

Ilda 🍀🐶

To make supplies easy for you to find, I have linked them above. If something is no longer available I will link to a similar product. Affiliate links may be used depending on the product linked. Please help support my blog by using these links while shopping at no additional cost to you. For more information about the affiliates I use, please visit my disclaimer here. Thanks so much for all your support!

Friday, February 2, 2024

Lovely Layers Anniversary Card | Honey Bee Stamps

Lovely Layers, Anniversary Card, Honey Bee Stamps, how to, handmade card,Stamps,ilovedoingallthingscrafty,stamping, diecutting,cardmaking,Vintage Love,hearts,

***Please note links in the post are no longer active, if you are looking for something specific use this link here to 👉 HONEY BEE STAMPS and search for the product listed. My apologies for the inconvenience ***

Hello Friends, 

I hope you can join me today on Instagram as the Honey Bee Stamps DT celebrates the Vintage Love Release with an Instagram Hop. Whenever there is a Hop there are prizes, so make sure you don't miss out!

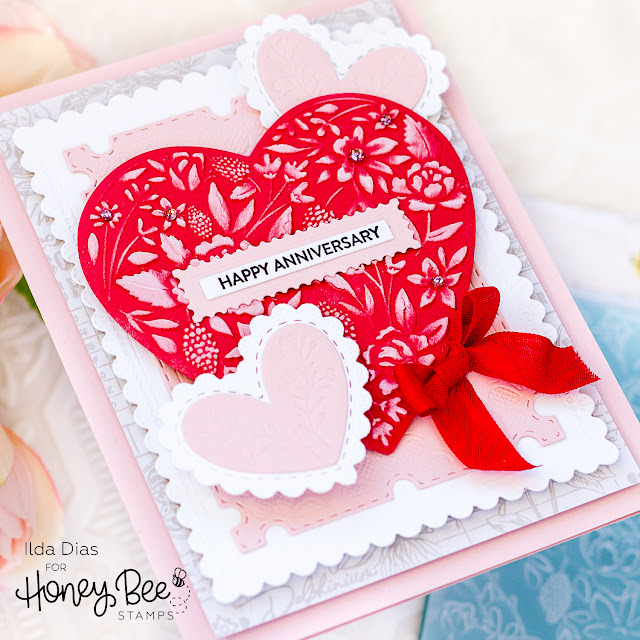
This Anniversary card is all about the Layers! Absolutely love how easy it was and how it all came together. The finished card measures 6.5x5 inches. This release is not only great for Valentine's but all year round as the pieces are timeless.

CARD RECIPE

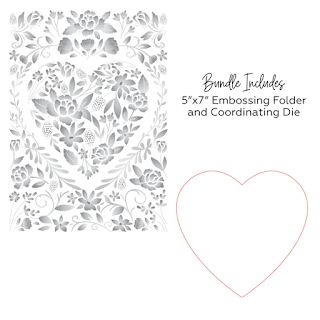
Embossed Heart - Floral Heart 3D Embossing Folder and Die Set

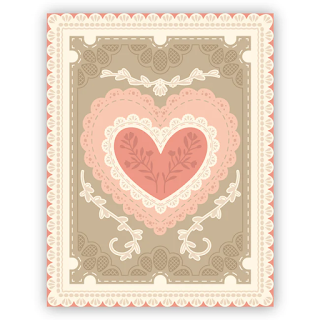
Frames - Lace Heart Layering Frames Dies

Sentiment base Die - Lovely Layouts: Posted - Dies

Patter Paper - Textiles and Texture Vintage Paper Pad

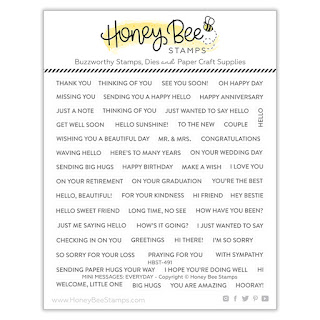
Sentiment - Mini Messages Stamps 

White Sentiment layer - Mini Messages Dies

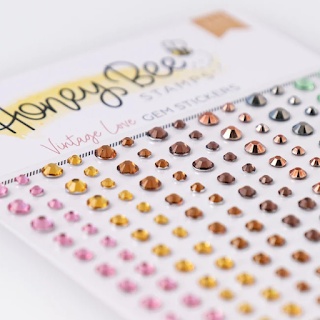
Embellishments - Vintage Love Gem Stickers

White Ink - Bee Creative Brilliant White Pigment Ink

Black Ink - Bee Creative Intense Black Ink Pad


Besides, die cutting and stamping the sentiment this card is not complicated at all. Like I said earlier, it is all about the layers.


Lovely Layers, Anniversary Card, Honey Bee Stamps, how to, handmade card,Stamps,ilovedoingallthingscrafty,stamping, diecutting,cardmaking,Vintage Love,hearts,

The hardest part was embossing the large heart using the Floral Heart 3D Embossing Folder and then Die-cutting it with the coordinating heart. I then used the Bee Creative Brilliant White Pigment Ink and rubbed it over the embossed raised areas.

Lovely Layers, Anniversary Card, Honey Bee Stamps, how to, handmade card,Stamps,ilovedoingallthingscrafty,stamping, diecutting,cardmaking,Vintage Love,hearts,

Let me know if you have any questions. Feel free to ask in the comments below! Hope to see you all over on Instagram and until then, t
hank you for stopping by ... Happy Crafting!
Ilda 💖

SUPPLIES
Floral Heart 3D Embossing Folder and Die Set
Shop at:
HBS
Lace Heart Layering Frames Dies
Shop at:
HBS
Lovely Layouts: Posted - Dies
Shop at:
HBS
Textiles and Texture Vintage Paper Pad
Shop at:
HBS
Mini Messages Stamps
Shop at:
SSS | SB | HBS
Mini Messages Dies
Mini Messages Dies
Shop at:
SSS | SB | HBS
Vintage Love Gem Stickers
Shop at:
HBS
Bee Creative Intense Black Ink Pad
Shop at:
SSS | SB | HBS
Bee Creative Brilliant White Pigment Ink
Shop at:
SSS | SB | HBS
Stamping Pressure Tool
Shop at:
HBS
Bee Creative Bitty Buzz Cutter
Shop at:
HBS
White Foam Dots
White Foam Dots
Shop at:
HBS
Bee Creative Glue
Bee Creative Glue
Shop at:
SSS | SB | HBS
Neenah Solar White 110lbs
Shop at:
SSS | AMZ | HBS
Platinum 6 Die Cutting Platform
Shop at:
SSS | SB | SB
New Mini Misti
New Mini Misti
Shop at:
SSS | SB | HBS
To make supplies easy for you to find, I have linked them above. If something is no longer available I will link to a similar product. Affiliate links may be used depending on the product linked. Please help support my blog by using these links while shopping at no additional cost to you. For more information about the affiliates I use, please visit my disclaimer here. Thanks so much for all your support!

Enjoyed this post? Never miss out on future posts by Following this Blog

Wednesday, July 8, 2020

A Flourishing Note Hello Friendship Card | Studio Katia


card making, Copic Markers, Die cutting, Floral Friendship Card, Flourishing Note, handmade card, hearts, Hello, how to, ilovedoingallthingscrafty, stamping, Stamps, Studio Katia,

Hey everyone!

Today I am sending you all a Flourishing Hello. Love this new FLOURISHING NOTE stamp from Studio Katia, it is so pretty and it makes for such a beautiful friendship card 😍

CARD DETAILS

To begin this beauty, I stamped out the image from the FLOURISHING NOTE and colored it in using Copic markers. I then used the coordinating FLOURISHING NOTE DIES to cut out the image as well as the Hello die 3 times from black cardstock that I will use later on.

card making, Copic Markers, Die cutting, Floral Friendship Card, Flourishing Note, handmade card, hearts, Hello, how to, ilovedoingallthingscrafty, stamping, Stamps, Studio Katia,

For the background, I first used the inside of the SCALLOP HEARTS COVER to die cut the hearts from the white panel. I then used the largest scallop frame from the DOTTED PATTERNS SET 4 to finish off the card panel.

Behind the heart openings, I glued a piece of pale pink cardstock to add another layer of color. I then die cut another layer of blue hearts using the SCALLOP HEARTS COVER to add a blue edge to the white hearts, I then popped the hearts back in place with foam tape and glued the Flourishing Card Stamp in place.

TIP: I also used the same blue cardstock piece that I die cut the blue heart edges from to glue onto the card base as the center of the panel gets covered up and won't be seen.

card making, Copic Markers, Die cutting, Floral Friendship Card, Flourishing Note, handmade card, hearts, Hello, how to, ilovedoingallthingscrafty, stamping, Stamps, Studio Katia,

For finishing touches, I added some new BLUEBELL PEARLS and then added the hello that I had stacked and glued together from the FLOURISHING NOTE DIES and then added Glossy Accents to.

Wishing you all a wonderful day! Thank you for stopping by and until next time... Happy Crafting 👋


SUPPLIES
FLOURISHING NOTE
FLOURISHING NOTE
Shop at:
SSS | SK
FLOURISHING NOTE DIES
Shop at:
SSS | SK
SCALLOP HEARTS COVER
Shop at:
SSS | SK
DOTTED PATTERNS SET 4
Shop at:
SSS | SK
EMBELLISHMENT WAND
EMBELLISHMENT WAND
Shop at:
SSS | SK
BLUEBELL PEARLS
BLUEBELL PEARLS
Shop at:
SSS | SK
STUDIO KATIA GLUE
STUDIO KATIA GLUE
Shop at:
SSS | SK
FOAM TAPE - WHITE
FOAM TAPE - WHITE
Shop at:
SSS | SK
NEENAH SOLAR WHITE 110
Shop at:
SSS | AMZ | HBS
ORIGINAL MISTI
ORIGINAL MISTI
Shop at:
SSS | AMZ | SBC | HBS
BLACKOUT INK
BLACKOUT INK
Shop at:
SSS | IO3
COPIC SKETCH
COPIC SKETCH
Shop at:
AMZ
GEMINI JR. DIE CUTTER
Shop at:
SSS | AMZ | SBC
GLOSSY ACCENTS
GLOSSY ACCENTS
Shop at:
SSS | AMZ | SBC | HBS
Uni-Ball Impact Gel Pen
Shop at:
SSS | AMZ | SBC
To make supplies easy for you to find, I have linked them above. If something is no longer available I will link to a similar product. Affiliate links may be used depending on the product linked. Please help support my blog by using these links while shopping at no additional cost to you. For more information about the affiliates I use, please visit my disclaimer here. Thanks so much for all your support!