Hello, my Friends!
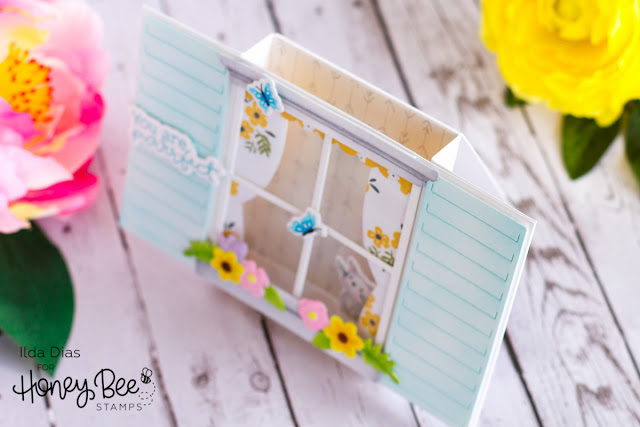
Today I have the most PURRRfect card to share with you. I am so pleased with how darling this card turned out and I hope it inspires you. I had been wanting to create a bridge card ever since watching Jennifer McGuire create some in one of her recent videos. Seriously where would we be without her genius mind and inspiration!?
Also, just in case you haven't heard, this week Honey Bee Stamps is having a SALE on their Patterned Paper, Enamel Dots, and Gems. Save 10% by using the code, PATTERN10
My project today features papers from the SPRING FLING PAPER PAD.
CARD DETAILS
So let's talk about this card, there are a lot of pieces and components to putting this one together. But hopefully, I can explain how to replicate something like this. I would have loved to have recorded a video to go along with this, but time is not on my side these days so instead, I have taken step-by-step photos to hopefully clarify things for you all.
The first thing I did was to sketch out what I wanted the card to look like. I then began by using the window frame from the COTTAGE WINDOW Honey Cuts to guide the rest of the card. See the images below for the measurements and how the finished pieces came together.

This is what it should look like with the die cut window frame in place.
I then cut a piece of acetate large enough to cover the entire opening and glue it in place. This is the piece that I will use to finish off the card front.
TIP: Since the top and bottom of the frame are really thin in width covering the entire area helps to reinforce the structure.
TIP: Since the top and bottom of the frame are really thin in width covering the entire area helps to reinforce the structure.
To cover the background of the card I glued a piece of patterned cardstock cut to 3 ¼” x 4 ¼” that comes from the SPRING FLING PAPER PAD.
I also added another strip of paper across the bottom to create another layer to the scene and is where I will glue the kitten to. The strip measures ½” x 4 inches and each end scored at the ⅜” mark and glued in place as shown above.
As you can see from the picture below I also added a panel to add my greeting on the back of the card. I simply created a card base that was cut to 3 ¼” by 8 ½” then scored at the 4 ½” mark. I then glued the front of the card base to the back of the popped out window.
Here's another look. The added card base also works well for displaying the card as it acts as a stand for this bridge card.
Now that you know how to put the card base together with all the measurements I will explain all the little details that were added. I left off the top of the card until I was completely done gluing all the details and piece to it until the very end. This just made it easier to work with.
To begin, I stamped out the cat and the butterflies from the OH MY WHISKERS stamp set using Fadeout ink and then colored them in with Copic markers. I then used a white and black gel pen to add details to the images. I also used the coordinating OH MY WHISKERS HONEY CUTS to die cut them out.
The next thing I did was die cut the rest of the pieces for the cottage window using white card stock. For the curtains, I used pattern paper that also came from the SPRING FLING PAPER PAD. I just love how the patterned paper adds so much detail to the scene with very little effort.
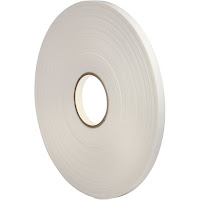
To the window shutters, I blended out Tumbled Glass distress oxide ink and glued them to each side of the Bridge card panels using foam tape to pop them up. I then glued the frame to the top of the acetate. Next, I glued in place the window box and valence that I had added some Copic marker shadowing too. I also added the little butterflies in place using some foam tape.
To the other side of the window, on the backside of the front panel, I glued the curtains in place starting with the top valence and then the side curtains with matching patterned piece of paper.
I then positioned the card front onto the bridge card base without gluing the pieces together and figured out where to glue down the kitten in place on the strip I had added prior ensuring that you could see him peaking through the window.
The last thing I did was stamp out the "you're purrrfect" greeting from the PURRRFECT SENTIMENTS stamp set and then die cut it with the coordinating dies.
The best part of these bridge cards is that they have so much dimension and detail to them and yet they fold flat for delivery! How awesome it that!?!
I absolutely adore how cute this card turned out! I hope that you will give this window version of a bridge card a try. They definitely are a little more work but they are a true labor of love as I am sure the recipient will appreciate.
Thank you for stopping by 😊
Until next time... Happy Crafting 👋

SUPPLIES
 COTTAGE WINDOW | HONEY CUTS Shop at: SSS | SB | HBS |
 OH MY WHISKERS SET Shop at: SSS | SB | HBS |
 OH MY WHISKERS HONEY CUTS Shop at: SSS | SB | HBS |
 PURRRFECT SENTIMENTS Shop at: SSS | SB | HBS |
 PURRRFECT SENTIMENTS HONEY CUTS Shop at: SSS | SB | HBS |
 BUNCH OF BOUQUETS HONEY CUTS Shop at: SSS | SB | HBS |
 SPRING FLING PAPER PAD Shop at: SSS | SB | HBS |
 Neenah 110 LB SOLAR WHITE Shop at: SSS | AMZ | HBS |
 Scor-Pal MINI SCOR-BUDDY Shop at: SSS | HBS |
 Gemini Jr Die Cutting/Embossing Machine Shop at: SSS | AMZ | SB |
 ACETATE SHEETS Shop at: SSS | SK |
 Fadeout No Line Ink Shop at: SSS | IO3 |
 TUMBLED GLASS Oxide Ink Shop at: SSS | SB | HBS |
 BLENDER BRUSH Set Shop at: SSS | SB | PF |
 Gelly Roll Gel Pen Set, Fine, Black Shop at: AMZ |
 WHITE Gelly Roll Pens Set Shop at: SSS | AMZ | SB |
 Double-Sided Foam Tape Shop at: SSS | AMZ |
To make supplies easy for you to find, I have linked them above. If something is no longer available I will link to a similar product. Affiliate links may be used depending on the product linked. By shopping through my links you help keep my blog running at no extra cost to you. So thank you in advance for supporting my creations!


