Showing posts with label Karin Brush Marker Pro. Show all posts

Saturday, August 21, 2021

Autumn Splendor Thank You See Through Card | Honey Bee Stamps Day 2 Autumn Splendor Sneak Peek

Thanks,Honey Bee Stamps,Fall,Autumn Splendor cover plate,Karin Brush Marker Pro,Sneak Peek,See Through Window panel,Card,Card Making, Stamping, Die Cutting, handmade card, ilovedoingallthingscrafty, Stamps, how to,

Happy Saturday!

Welcome back to Day 2 Sneak Peaks for the Autumn Splendor release from Honey Bee Stamps.

I told you yesterday, Fall was my favorite season and the colors of this card are why I do so much. The warm colors are just so pretty, especially in nature.


This Fall card features the Autumn Splendor Cover Plate Die coming soon that I decided to watercolor. There are so many ways to use this background and I can't wait to see what everyone does with it.

Make sure you stop by the Honey Bee Stamps Blog for more inspiration from the Design Team featuring more day 2 product reveals! Please note that some links will not be active until the Release goes live on August 16th, 2021 @ 9pm CST.


How pretty is this background. Once the panel was colored, I sandwiched acetate in between another layer to cover up the backside of the background and make the front panel stronger. 

Thanks,Honey Bee Stamps,Fall,Autumn Splendor cover plate,Karin Brush Marker Pro,Sneak Peek,See Through Window panel,Card,Card Making, Stamping, Die Cutting, handmade card, ilovedoingallthingscrafty, Stamps, how to,

To the top, I finished off the card with two rectangle frames. As you can see the sentiment is visible through the card. Keep reading to see what you can do to keep the sentiment a surprise.

Thanks,Honey Bee Stamps,Fall,Autumn Splendor cover plate,Karin Brush Marker Pro,Sneak Peek,See Through Window panel,Card,Card Making, Stamping, Die Cutting, handmade card, ilovedoingallthingscrafty, Stamps, how to,

I used this sentiment from the Inside: Thankful Sentiments Stamp Set. To hide the sentiment from the recipient as the card is see-through, simply add a piece of copy paper. 

Thanks,Honey Bee Stamps,Fall,Autumn Splendor cover plate,Karin Brush Marker Pro,Sneak Peek,See Through Window panel,Card,Card Making, Stamping, Die Cutting, handmade card, ilovedoingallthingscrafty, Stamps, how to,

Thank you for stopping by and I will see you back here tomorrow for day 3 sneak peeks... Happy Crafting!

Ilda 💖

Wednesday, September 30, 2020

Thanksgiving Inspiration Cards | Studio Katia

Thanksgiving, Studio Katia, Autumn Borders, Mini Arcs Stencil, Pearls,Karin Brush Marker Pro,Card Making, Stamping, Die Cutting, handmade card, ilovedoingallthingscrafty, Stamps, how to,  card

Happy Wednesday Friends!

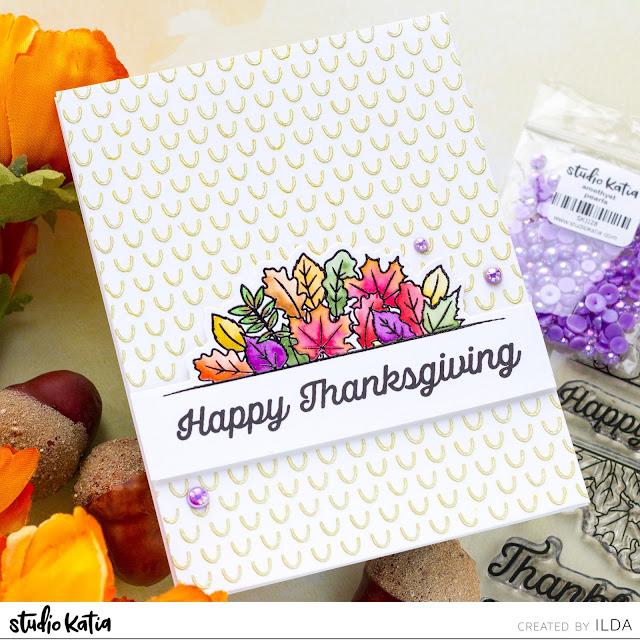
I am back today with a few Thanksgiving Inspiration Cards for Studio Katia. Even though 2020 has been such a terrible year for all of us around the world, there is still so much to be thankful for. 

CARD DETAILS

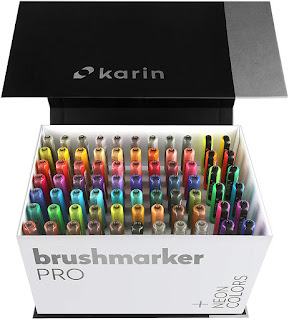
I began these cards by stamping out the images from the AUTUMN BORDERS stamp set (which by the way is currently on sale if you are interested). I used VersaFine Onyx Ink and then heat set it with a clear embossing powder so that I could do some really easy water coloring using Karin Brushmarkers. 

Thanksgiving, Studio Katia, Autumn Borders, Mini Arcs Stencil, Pearls,Karin Brush Marker Pro,Card Making, Stamping, Die Cutting, handmade card, ilovedoingallthingscrafty, Stamps, how to,  card

Once the images where dry I die cut them out using the coordinating AUTUMN BORDERS DIES. Under each die-cut, I left enough room to add a sentiment from the AUTUMN BORDERS set and then trimmed excess paper underneath.

Thanksgiving, Studio Katia, Autumn Borders, Mini Arcs Stencil, Pearls,Karin Brush Marker Pro,Card Making, Stamping, Die Cutting, handmade card, ilovedoingallthingscrafty, Stamps, how to,  card

I then popped up the strips using foam tape and attached them to these beautiful backgrounds and finished them off by adding some pearls. On this card, I used the AMETHYST PEARLS.

Thanksgiving, Studio Katia, Autumn Borders, Mini Arcs Stencil, Pearls,Karin Brush Marker Pro,Card Making, Stamping, Die Cutting, handmade card, ilovedoingallthingscrafty, Stamps, how to,  card

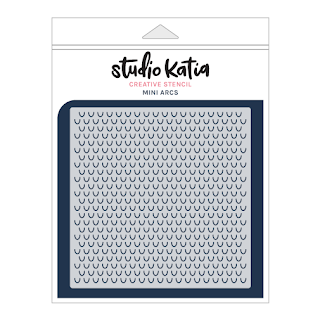
To create these beautiful backgrounds, I used the MINI ARCS STENCIL, and I created my own gold paste (because I didn't have any) by mixing Platinum Embellishment Mousse with a little bit of Solar Flare Shimmer Powder. 

Thanksgiving, Studio Katia, Autumn Borders, Mini Arcs Stencil, Pearls,Karin Brush Marker Pro,Card Making, Stamping, Die Cutting, handmade card, ilovedoingallthingscrafty, Stamps, how to,  card

Doesn't the pattern remind you of acorn tops? Such a pretty design and I just love the texture this paste created.

Thanksgiving, Studio Katia, Autumn Borders, Mini Arcs Stencil, Pearls,Karin Brush Marker Pro,Card Making, Stamping, Die Cutting, handmade card, ilovedoingallthingscrafty, Stamps, how to,  card

To finish off this card I added WINE BERRY PEARLS.  Love how these cards turned out!

Thanksgiving, Studio Katia, Autumn Borders, Mini Arcs Stencil, Pearls,Karin Brush Marker Pro,Card Making, Stamping, Die Cutting, handmade card, ilovedoingallthingscrafty, Stamps, how to,  card

I hope these Thanksgiving cards inspired you today. Thank you for stopping by and until next time... Happy Crafting!


SUPPLIES
AUTUMN BORDERS
AUTUMN BORDERS
Shop at:
SSS | SK
AUTUMN BORDERS DIES
AUTUMN
BORDERS DIES

Shop at:
SSS | SK
MINI ARCS STENCIL
MINI ARCS
STENCIL

Shop at:
SSS | SK
EMBELLISHMENT WAND
EMBELLISHMENT WAND
Shop at:
SSS | SK
WINE BERRY PEARLS
WINE BERRY PEARLS
Shop at:
SSS | SK
AMETHYST PEARLS
AMETHYST PEARLS
Shop at:
SSS | SK
STUDIO KATIA GLUE
STUDIO
KATIA GLUE

Shop at:
SSS | SK
MINI MISTI
MINI MISTI
Shop at:
SSS | AMZ | SK | HBS
BRISTOL PAPER
BRISTOL PAPER
Shop at:
SSS | AMZ
VersaFine ONYX BLACK Ink
Shop at:
SSS | AMZ | SB | HBS
CRYSTAL CLEAR Emb Pwd
CRYSTAL CLEAR
Emb Pwd

Shop at:
SSS | IO3
KARIN BRUSHMARKER PRO
KARIN BRUSH
MARKER PRO

Shop at:
SSS | AMZ
MED. WATER BRUSH
MED. WATER BRUSH
Shop at:
IO3
MEDIA SPATULAS
MEDIA SPATULAS
Shop at:
SSS |HBS | TS US | TS UK
Pure Platinum Embellishment Mousse
Pure Platinum Emb. Mousse
Shop at:
TS US | TS UK
Shimmer Powder - Solar Flare
Shimmer Powder
Solar Flare

Shop at:
TS US | TS UK
To make supplies easy for you to find, I have linked them above. If something is no longer available I will link to a similar product. Affiliate links may be used depending on the product linked. Please help support my blog by using these links while shopping at no additional cost to you. For more information about the affiliates I use, please visit my disclaimer here. Thanks so much for all your support!

Friday, June 5, 2020

Hello Magnolia Friendship Card | Ink On 3


Hello Magnolia Friendship Card | Ink On 3

Hello Friends and happy Friday!

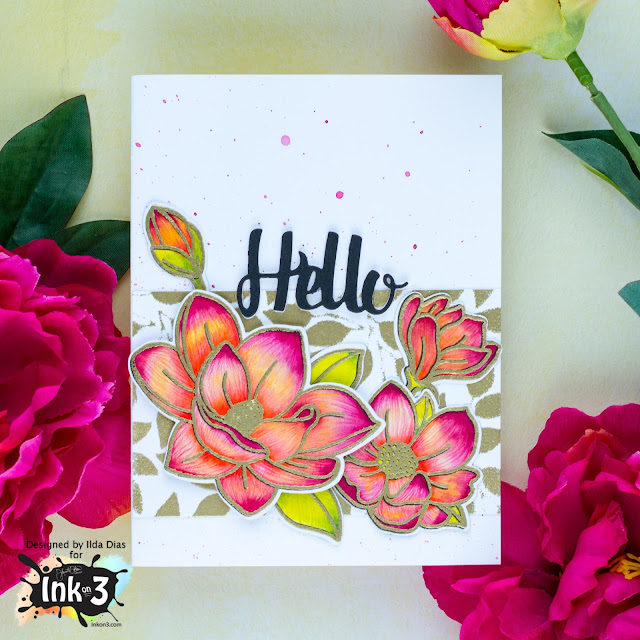
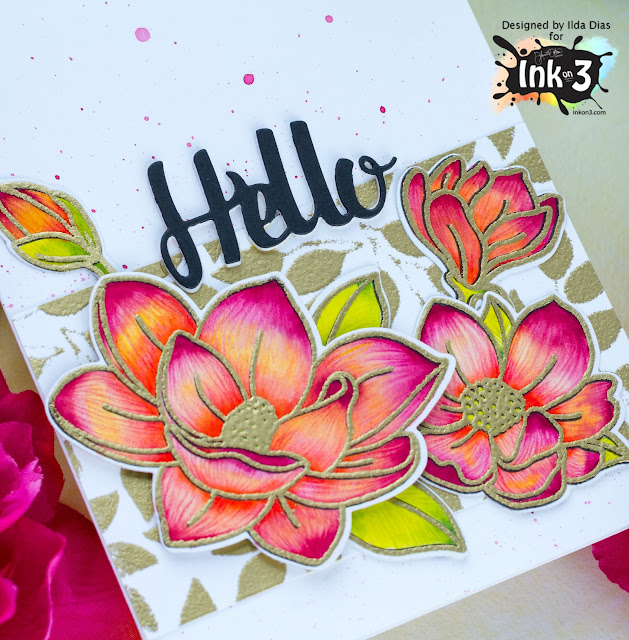
Today I am sharing a card featuring the BIG BOLD MAGNOLIAS Stamp set, that I previously had colored for the last Kathy Raccosin's coloring challenge. I love participating in her challenges because I end up with a ton of colored pieces ready to go on a card.

CARD DETAILS

So to begin, I stamped out the images first onto Bristol paper using BLACKOUT INK. I then colored the images in with Karin Brush Marker Pro Brushpens that were new to me and I wanted to test them out. Once the water coloring was dry I went back to add some pencil detailing. I then place the colored images back into the stamp positioner and re-inked the images using JUICY INK this time. 

Hello Magnolia Friendship Card | Ink On 3

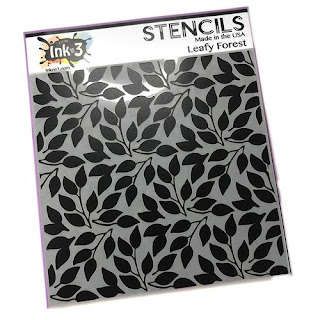
Next, I sprinkled GOLD RUSH EMB. PWD. over the panel and then heat set the lines in. As you can see some of the BLACKOUT INK is still showing through some areas, but that didn't bother me as it looks like a shadow line. Please note, when you watercolors the paper will warp a little so linning it back may not be perfect unless you use non-waterbased media. I then die cut each flower up using the BIG BOLD MAGNOLIAS coordinating dies and glued them on to a strip of cardstock that I had added the same gold embossing using the LEAFY FOREST STENCIL.

Hello Magnolia Friendship Card | Ink On 3

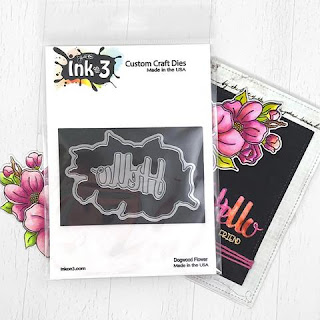
To finish, I die cut, stacked and glued together the Hello from the DOGWOOD coordinating die set. Before adhering it all to the card base I diluted some of the red I used on the flower and added splatters onto the card front.

I hope you have been inspired by this Magnolia Friendship Card. 

Thank you for stopping by 😊
Until next time... Happy Crafting 👋


SUPPLIES
BIG BOLD MAGNOLIAS
BIG BOLD MAGNOLIAS
Shop at:
SSS | IO3
BIG BOLD MAGNOLIAS DIES
Shop at:
SSS | IO3
DOGWOOD FLOWER DIES
DOGWOOD FLOWER DIES
Shop at:
SSS | IO3
LEAFY FOREST STENCIL
Shop at:
IO3
BLACKOUT INK
BLACKOUT INK
Shop at:
SSS | IO3
JUICY INK
JUICY INK
Shop at:
SSS | IO3
GOLD RUSH EMB. PWD.
GOLD RUSH EMB. PWD.
Shop at:
SSS | IO3
MED. WATER BRUSH
MED. WATER BRUSH
Shop at:
IO3
MISTI TOOL - ORIGINAL SIZE
Shop at:
SSS | AMZ | SB | HBS
NEENAH SOLAR WHITE 110
Shop at:
SSS | AMZ | HBS
KARIN BRUSHMARKER PRO
KARIN BRUSH MARKER PRO
Shop at:
SSS | AMZ
PRISMACOLOR PENCILS
PRISMACOLOR PENCILS
Shop at:
SSS | AMZ
GEMINI JR. DIE CUTTER
Shop at:
SSS | AMZ | SB
STUDIO KATIA GLUE
STUDIO KATIA GLUE
Shop at:
SSS | SK
FOAM TAPE - WHITE
FOAM TAPE - WHITE
Shop at:
SSS | SK

To make supplies easy for you to find, I have linked them above. If something is no longer available I will link to a similar product. Affiliate links may be used depending on the product linked. 
Please help support my blog by using these links while shopping at no additional cost to you. For more information about the affiliates I use, please visit my disclaimer here. Thanks so much for all your support!