Showing posts with label See Through panel. Show all posts

Tuesday, March 29, 2022

Pinkfresh Studio | March 2022 Washi, Stamp, Die, Stencil, and Hot Foil Release

Pinkfresh Studio,March 2022 Washi, Stamp, Die, Stencil, Hot Foil Release, Card Making, Stamping, Die Cutting, handmade card, ilovedoingallthingscrafty, Stamps, how to,  Rainbow Floral,Dahlia,See Through panel,

Happy Tuesday Crafty Friends!

Today I am excited to be a Guest Designer for Pinkfresh Studios March Washi, Stamp, Die, Stencil, and Hot Foil Release Instagram Hop. Please join me over there after you are done checking out this post as you could win the ENTIRE release on the Pinkfresh Instagram account, as well as a total of TEN $25 gift cards across the hop! Click πŸ‘‰HERE to get started.

As you may know, I love all things rainbow, so when I saw this Rainbow Floral Washi Tape I knew I had to play with it! This washi tape makes it so easy to put a card together since it saves you all the time that you normally would spend coloring it first. And then the dies align so perfectly with the designs on the tape that you can mass-produce the die cuts so quickly. What a brilliant idea!

For this card, I stacked the die cuts from the Rainbow Floral Washi Tape on top of a couple of blank layers of the dies and then glued them in somewhat of a rainbow order on the card front, leaving room for a sentiment along the side edge of the card. 

Next, I stamped out a few sentiments that come from the Simply Sentiments - Hello Stamp Set using 3 ink colors (Rasberry Bliss, Sunshine and Blue Jay Dye Inks)that when overlapped create a rainbow blend. At first, I had planned on leaving the Hello also in the rainbow colors but it didn't stand out enough so I went back in with black ink to make it pop.

I then just finished the card with coordinating rainbow pearls that I used from my embellishment stash.

Pinkfresh Studio,March 2022 Washi, Stamp, Die, Stencil, Hot Foil Release, Card Making, Stamping, Die Cutting, handmade card, ilovedoingallthingscrafty, Stamps, how to,  Rainbow Floral,Dahlia,See Through panel,

For this next card, I decided to stick to a few colors even though I was using the Rainbow Floral Washi Stamp Set. I began by stamping the images out using watermark ink and then heat set the lines using gold embossing powder. 

Pinkfresh Studio,March 2022 Washi, Stamp, Die, Stencil, Hot Foil Release, Card Making, Stamping, Die Cutting, handmade card, ilovedoingallthingscrafty, Stamps, how to,  Rainbow Floral,Dahlia,See Through panel,

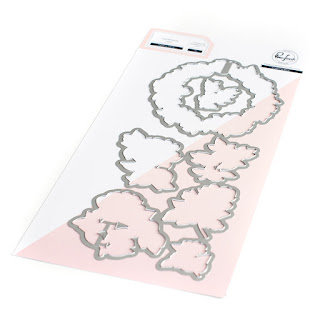
I then used the Rainbow Floral Washi Layering Stencils to ink blend the purple layers (Candy Violet and Lavender Dye Inks) the greens (Grassy Knoll and Olive Dye Inks). Once my blending was done used the coordinating Rainbow Floral Washi Dies to cut out the images. Once again I die cut extra blank-shaped dies to stack the images and make them thicker.

Pinkfresh Studio,March 2022 Washi, Stamp, Die, Stencil, Hot Foil Release, Card Making, Stamping, Die Cutting, handmade card, ilovedoingallthingscrafty, Stamps, how to,  Rainbow Floral,Dahlia,See Through panel,

To create the see-through window I used a circle die on the front panel of the card base. I then covered the opening using the wreath image and then added the floral die cuts all around the panel, cutting off any excess that hung over the edge of it. 

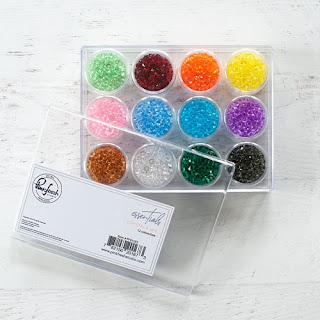
To complete the front of this card I glued some purple jewels on the berry-like buds. On the inside of the card, I stamped out a couple of sentiments that come from the Floral Vase Stamp set.

Pinkfresh Studio,March 2022 Washi, Stamp, Die, Stencil, Hot Foil Release, Card Making, Stamping, Die Cutting, handmade card, ilovedoingallthingscrafty, Stamps, how to,  Rainbow Floral,Dahlia,See Through panel,

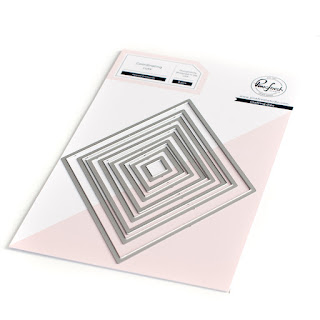
Since I had lots of extra die-cut finished images I thought I would make another card. This time I glued the pieces onto a purple cardstock card panel that I had die cut a diamond opening from the center of it and the card base using the Nested Diamonds Die

I then used the Nested Diamonds Hot Foil Plates with the  Hot foil System to add the Brass Foil to the Diamond frame. I then die-cut the frame using a couple of the dies from the Nested Diamonds Die set.

Pinkfresh Studio,March 2022 Washi, Stamp, Die, Stencil, Hot Foil Release, Card Making, Stamping, Die Cutting, handmade card, ilovedoingallthingscrafty, Stamps, how to,  Rainbow Floral,Dahlia,See Through panel,

To the inside of the card, I stamped the sentiment that is included in the Rainbow Floral Washi Stamp Set.

Finally, I added the same purple jewels to where there were some open spaces to complete the card front.

Pinkfresh Studio,March 2022 Washi, Stamp, Die, Stencil, Hot Foil Release, Card Making, Stamping, Die Cutting, handmade card, ilovedoingallthingscrafty, Stamps, how to,  Rainbow Floral,Dahlia,See Through panel,

And last but not least, is this beautiful see-through die-cut card made using the Dahlia Washi Tape Card inspired by one of Jennifer McGuire's recent videos using die-cuts to create a see-through card front.

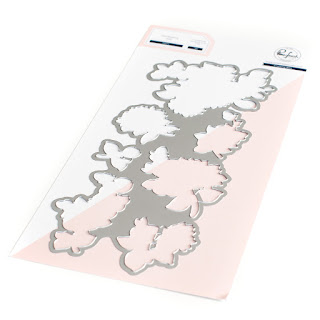
To do that I die cut all the Dahlia Washi Tape pieces using the coordinating Dies. I then laid the pieces out and overlapped the edges of the dies. I also used a Nested Diamonds Die that I cut from Gold foiled cardstock as a guide for where the center of the card panel would be. Once I was happy with the layout I glued the overlapping pieces together and trimmed off the edges to create an A2 size panel.
Pinkfresh Studio,March 2022 Washi, Stamp, Die, Stencil, Hot Foil Release, Card Making, Stamping, Die Cutting, handmade card, ilovedoingallthingscrafty, Stamps, how to,  Rainbow Floral,Dahlia,See Through panel,

To the back panel, I stamped out the sentiment from the Dahlia Washi Stamp Set and then created a hinge on top of the panel to attach the die-cut layered front panel. 

Pinkfresh Studio,March 2022 Washi, Stamp, Die, Stencil, Hot Foil Release, Card Making, Stamping, Die Cutting, handmade card, ilovedoingallthingscrafty, Stamps, how to,  Rainbow Floral,Dahlia,See Through panel,

Then to finish off the backside of the front panel and add reinforcement, I glued extra pieces of the dies to the back of the Dahlia Washi Dies. I also used a diamond die cut piece to finish off the inside of the window.

Pinkfresh Studio,March 2022 Washi, Stamp, Die, Stencil, Hot Foil Release, Card Making, Stamping, Die Cutting, handmade card, ilovedoingallthingscrafty, Stamps, how to,  Rainbow Floral,Dahlia,See Through panel,

Here is what the inside looks like, I had this extra larger diamond die cut so I used it to stamp out the sentiment. I then just added a couple of metallic gold pearls to complete this card.

Pinkfresh Studio,March 2022 Washi, Stamp, Die, Stencil, Hot Foil Release, Card Making, Stamping, Die Cutting, handmade card, ilovedoingallthingscrafty, Stamps, how to,  Rainbow Floral,Dahlia,See Through panel,

I  had so much fun playing with the new Washi Tape Collections. I hope you go check out the other tapes that were also released from Pinkfresh, and don't forget to join the IG hop for a chance to win the entire release!

My apologies for this extra long post. I wanted to get all my projects into this one as I will be taking the rest of the week off as we are going to the mountains for a little Spring Break getaway with the family. 

Thank you for stopping by and until next time... Happy Crafting!

Ilda 🌼🌸

SUPPLIES
Rainbow Floral Washi Tape
Shop at:
SSS | PF
Rainbow Floral Washi Layering Stencils
Shop at:
SSS | PF
Rainbow Floral Washi Die
Shop at:
SSS | PF
Rainbow Floral Washi Stamp Set
Shop at:
SSS | PF
Dahlia Washi Tape
Dahlia Washi Tape
Shop at:
SSS | PF
Dahlia Washi Die
Dahlia Washi Die
Shop at:
SSS | PF
Dahlia Washi  Stamp Set
Dahlia Washi Stamp Set
Shop at:
SSS | PF
FLORAL VASE STAMP SET
Shop at:
SSS | PF
SIMPLY SENTIMENTS - HELLO STAMP SET
Shop at:
SSS | PF
Nested Diamonds Die
Nested Diamonds Die
Shop at:
SSS | PF
Nested Diamonds Hot Foil Plates
Shop at:
SSS | PF
ESSENTIALS: CRYSTALS MIX
Shop at:
SSS | PF
GOLD Metallic Pearls
Shop at:
SSS | PF
Neenah Solar White 110lbs
Shop at:
SSS | AMZ | HBS
New Mini Misti
New Mini Misti
Shop at:
SSS | SB
Platinum 6 Die Cutting Platform
Shop at:
SSS | SB | SB
Hot Foil System
Hot Foil System
Shop at:
SSS | SB | SB
POLISHED BRASS - Glimmer Foil
Shop at:
SSS | SB | SB
Juicy Ink
Juicy Ink
Shop at:
SSS | HBS | IO3
Gold Rush Emb. Pwd.
Gold Rush Emb. Pwd.
Shop at:
SSS | IO3
To make supplies easy for you to find, I have linked them above. If something is no longer available I will link to a similar product. Affiliate links may be used depending on the product linked. Please help support my blog by using these links while shopping at no additional cost to you. For more information about the affiliates I use, please visit my disclaimer here. Thanks so much for all your support!

Monday, November 15, 2021

Clear Bag Shaker Cards Done 3 Ways | Honey Bee Stamps


Clear Bag Shaker Cards,  Honey Bee Stamps, Specialty Holiday Card Pack, pattern Paper, Flat, Frameless,See Through panel, acetate, Christmas Cards,mass produce,Card Making, Stamping, Die Cutting, handmade card, ilovedoingallthingscrafty, Stamps, how to,

Hello, my friends, and happy Monday. Hope you had a wonderful weekend.

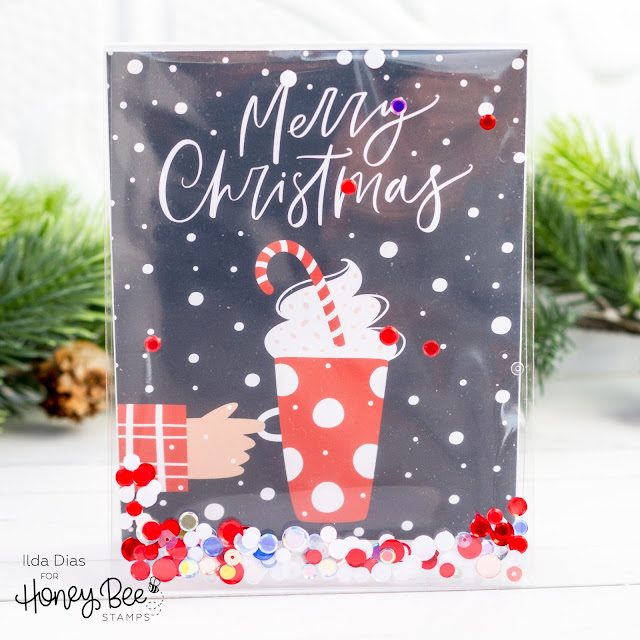
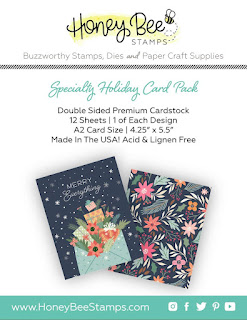
Today I have some super simple shaker designs to share with you. Perfect for mass-producing without too much effort! If you have recently have made a purchase from Honey Bee Stamps for more than $75 you would have received a Specialty Holiday Card Pack. These cardstock panels are double side with gorgeous designs and were the perfect starting point for my card designs today. If you didn't get these, no worries... I am certain you can replicate these with pattern paper. Check out all their pattern papers πŸ‘‰ HERE I have 3 different versions to share, so let's get started.


Here is a close-up of the first version of the Clear Bag Shaker Card and the easiest to make. Make sure you are following me on Instagram as I will post a Reel of how these came together soon.

Clear Bag Shaker Cards,  Honey Bee Stamps, Specialty Holiday Card Pack, pattern Paper, Flat, Frameless,See Through panel, acetate, Christmas Cards,mass produce,Card Making, Stamping, Die Cutting, handmade card, ilovedoingallthingscrafty, Stamps, how to,

Not only are these shakers pretty from the outside, just look how cute they are on the inside.

Clear Bag Shaker Cards,  Honey Bee Stamps, Specialty Holiday Card Pack, pattern Paper, Flat, Frameless,See Through panel, acetate, Christmas Cards,mass produce,Card Making, Stamping, Die Cutting, handmade card, ilovedoingallthingscrafty, Stamps, how to,

Version One | Clear Bag Shaker Cards
  • Cut a Slimline Cello Bag to 4 5/16 x 6 1/2" for a vertical A2 size card. If using a horizontal panel you will need an A7+ Cello Bag.
  • Slide one of the Specialty Holiday Card Pack panels inside the clear bag.
  • Fill the clear bag with sequins, try to compliment the colors of the panel.
  • Grab your card base. The entire card base will form the back panel of the card. The top of the clear bag will be sandwiched between the card base. Flip the card base upside down so that the fold is on the bottom and the opening is on the top. 
  • Place the filled cello bag in front of the upside-down card base.
  • Fold the overhang of the Cello Bag (1 Inch) over the top of the upside-down card base and crease the Clear Bag fold with your fingernails. This will create the flap that you will be sandwiched between the card base.
  • Cut the corners off the top of each side of the clear bag. Make sure to cut above the line that you just creased.
  • Add two strips of double-sided tape to the card base. One just under the edge of the card base and one ½’ below that one. Remove the protective piece from the double-sided tape. 
  • Center and align the Clear Bag in front of the upside-down card front and press the cello flap down onto the double-sided tape.
  • Just above the creased area of the cello bag add another strip of double-sided tape to seal it up and keep sequins from falling out of the bag. For extra insurance, you can add a piece of tape over the edge of the flap.
  • Add glue or double-sided tape along the edges of the front panel to glue the card base together.
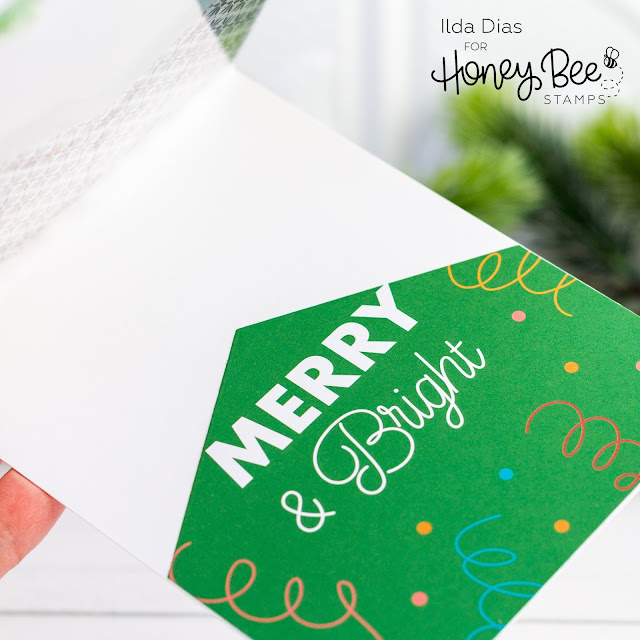
Here is what the cards from the first picture above look like when opened up. Just love the patterns on the inside!

Clear Bag Shaker Cards,  Honey Bee Stamps, Specialty Holiday Card Pack, pattern Paper, Flat, Frameless,See Through panel, acetate, Christmas Cards,mass produce,Card Making, Stamping, Die Cutting, handmade card, ilovedoingallthingscrafty, Stamps, how to,


Version 2 | Partial See-Through Shaker Cards

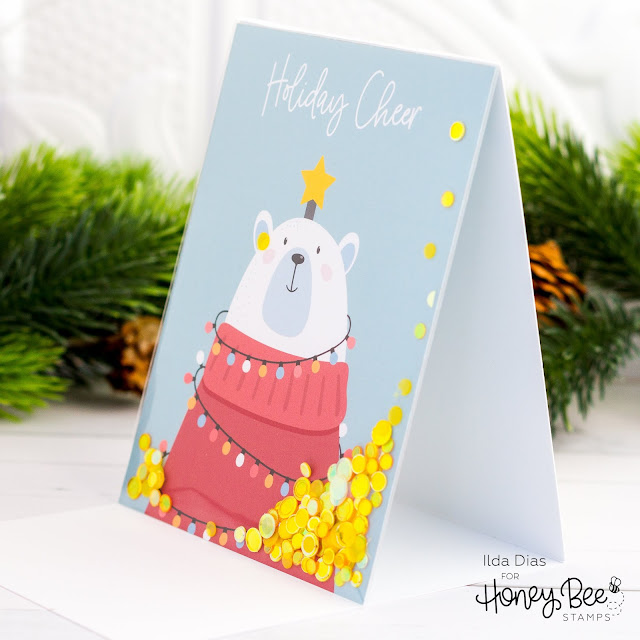
My next set of cards were done the exact same way as the first set only this time I created Partial See-Through Shaker Cards.

For this first card, since it is horizontal I used an A7+ Cello Bag to give me the width I needed for the horizontal layout. I also had to trim a sliver of paper from each side to have the panel fit inside the bag. The card base itself is A2 sized.

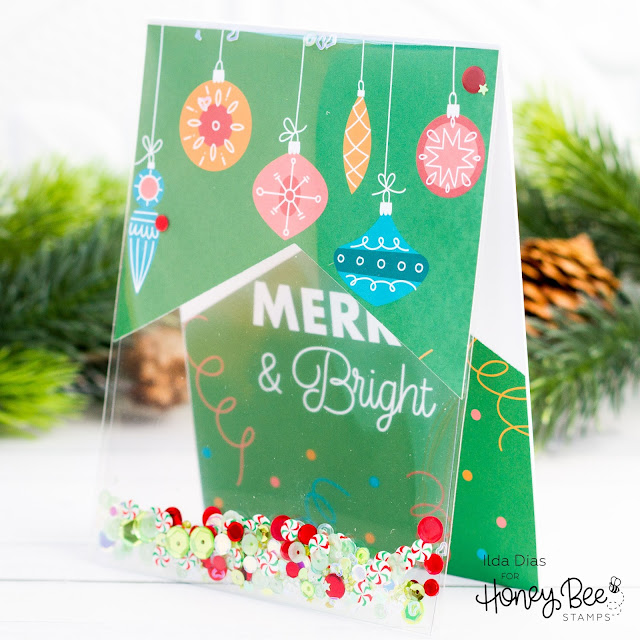
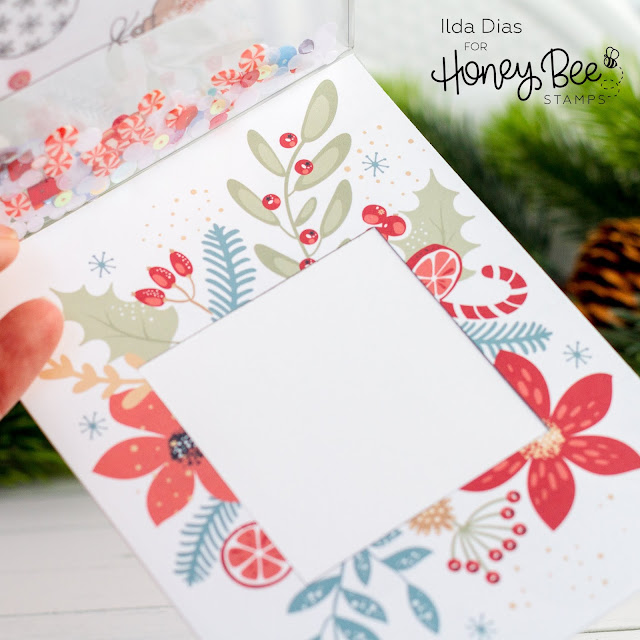
To create the Partial See-Through Shaker Cards, all you do is cut the panel and glue part of it to a piece of acetate that is then inserted into the clear bag shaker sleeve. The other part of the patterned panel is then glued to the inside of the card base. Follow the rest of the instructions for version one for how to assemble the card.

Clear Bag Shaker Cards,  Honey Bee Stamps, Specialty Holiday Card Pack, pattern Paper, Flat, Frameless,See Through panel, acetate, Christmas Cards,mass produce,Card Making, Stamping, Die Cutting, handmade card, ilovedoingallthingscrafty, Stamps, how to,

For the rest of the card examples I used the I used a Slimline Cello Bag for the vertical design. This next card I also used a hexagon die to split the panel.

Clear Bag Shaker Cards,  Honey Bee Stamps, Specialty Holiday Card Pack, pattern Paper, Flat, Frameless,See Through panel, acetate, Christmas Cards,mass produce,Card Making, Stamping, Die Cutting, handmade card, ilovedoingallthingscrafty, Stamps, how to,

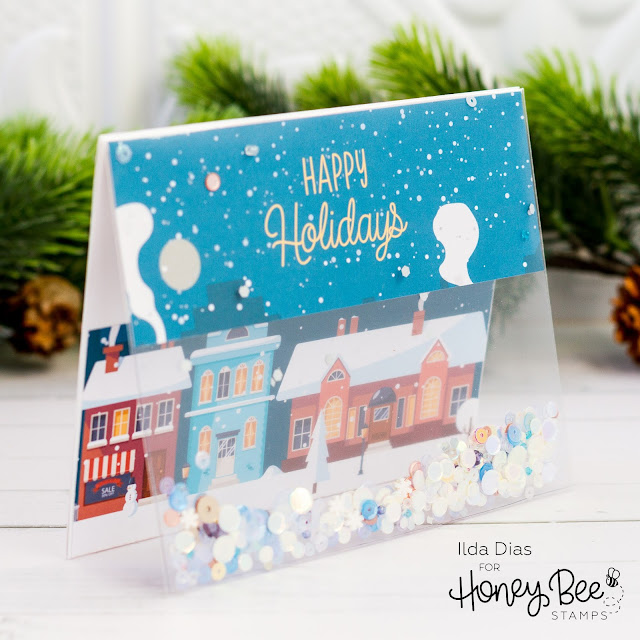
Use a square die or a blade to cut out the Happy holidays in the next card.

Clear Bag Shaker Cards,  Honey Bee Stamps, Specialty Holiday Card Pack, pattern Paper, Flat, Frameless,See Through panel, acetate, Christmas Cards,mass produce,Card Making, Stamping, Die Cutting, handmade card, ilovedoingallthingscrafty, Stamps, how to,

Creating Holiday Cards with these panels was so easy as most of them have a greeting in the front and a fun coordinating design on the other side.

Clear Bag Shaker Cards,  Honey Bee Stamps, Specialty Holiday Card Pack, pattern Paper, Flat, Frameless,See Through panel, acetate, Christmas Cards,mass produce,Card Making, Stamping, Die Cutting, handmade card, ilovedoingallthingscrafty, Stamps, how to,

Below is what the cards looked like and as you can see, they still have plenty of space to write a message.

Clear Bag Shaker Cards,  Honey Bee Stamps, Specialty Holiday Card Pack, pattern Paper, Flat, Frameless,See Through panel, acetate, Christmas Cards,mass produce,Card Making, Stamping, Die Cutting, handmade card, ilovedoingallthingscrafty, Stamps, how to,

Clear Bag Shaker Cards,  Honey Bee Stamps, Specialty Holiday Card Pack, pattern Paper, Flat, Frameless,See Through panel, acetate, Christmas Cards,mass produce,Card Making, Stamping, Die Cutting, handmade card, ilovedoingallthingscrafty, Stamps, how to,

Clear Bag Shaker Cards,  Honey Bee Stamps, Specialty Holiday Card Pack, pattern Paper, Flat, Frameless,See Through panel, acetate, Christmas Cards,mass produce,Card Making, Stamping, Die Cutting, handmade card, ilovedoingallthingscrafty, Stamps, how to,

Clear Bag Shaker Cards,  Honey Bee Stamps, Specialty Holiday Card Pack, pattern Paper, Flat, Frameless,See Through panel, acetate, Christmas Cards,mass produce,Card Making, Stamping, Die Cutting, handmade card, ilovedoingallthingscrafty, Stamps, how to,

Version Three | Tri-fold See-Through Shaker Cards

The final two cards I am sharing today, are examples of Tri-fold See-Through Shaker Cards. If you have seen my previous See Through Flat Shakers they require a large sentiment panel on the front to hide the message written inside. This tri-fold design solves that and leaves you with plenty of room to write a message on the inside. 

Clear Bag Shaker Cards,  Honey Bee Stamps, Specialty Holiday Card Pack, pattern Paper, Flat, Frameless,See Through panel, acetate, Christmas Cards,mass produce,Card Making, Stamping, Die Cutting, handmade card, ilovedoingallthingscrafty, Stamps, how to,

The front panel on this card is completely clear using only acetate and the sequins and can be displayed as shown below or completely opened up as you will see in the next card example.

Clear Bag Shaker Cards,  Honey Bee Stamps, Specialty Holiday Card Pack, pattern Paper, Flat, Frameless,See Through panel, acetate, Christmas Cards,mass produce,Card Making, Stamping, Die Cutting, handmade card, ilovedoingallthingscrafty, Stamps, how to,

Once the card is completely open, it reveals space for a long written message for the recipient. You could also add a stopper for the front panel to rest on or add a gift cardholder to the bottom panel for an added element of surprise. You could also add die-cut images to the front clear panel to dress up the front. I kept these as simple as possible for mass production.

Clear Bag Shaker Cards,  Honey Bee Stamps, Specialty Holiday Card Pack, pattern Paper, Flat, Frameless,See Through panel, acetate, Christmas Cards,mass produce,Card Making, Stamping, Die Cutting, handmade card, ilovedoingallthingscrafty, Stamps, how to,

Here is another example of a Tri-fold Shaker Card. This time it isn't See-Through though. 

Clear Bag Shaker Cards,  Honey Bee Stamps, Specialty Holiday Card Pack, pattern Paper, Flat, Frameless,See Through panel, acetate, Christmas Cards,mass produce,Card Making, Stamping, Die Cutting, handmade card, ilovedoingallthingscrafty, Stamps, how to,

For Tri-fold Shakers follow the same first few steps as the first card examples.
  • Cut a small sliver from the bottom of the front of the card base panel. This will make it easier for the card to close once it is all assembled.
  • Flip the card base upside down so that the fold is on the bottom and the opening is on the top. Like a “V”. Face the panel that is shorter towards you (see the previous step).
  • Place the filled clear bag in front of the upside-down card base and align the sides and the bottoms together. 
  • Fold the overhang of the bag (1 Inch) over the top of the upside-down card base and crease the Cello Bag fold with your fingernails. This will create the flap that you will glue to the back of the card base.
  • Cut the corners of the bag above the crease mark.
  • To the back of the upside-down card, base add 2 strips of double-sided tape. One just under the edge of the card base and one ½’ below that one. Remove the protective piece from the double-sided tape.
  • Center and align the bag in front of the upside-down card base and press the cello flap down onto the double-sided tape.
  • Lay the card flat so that you can still access the opening of the shaker pocket. 
  • Slide a piece along the entire width of the card using double-sided tape. Place the tape strip just above the creased edge of the cello bag flap. 
  • Remove the protective layer and press the bag shut. This will seal the shaker pocket and keep glitter and shaker bits from flowing into the top opening. 
  • Add an extra piece of clear tape along the edge of the cello flap for extra insurance.
  • To finish the back of the card base, glue an A2 panel cut to the same size as the card base. This covers up the bag's flap and becomes the backside of the middle panel of the tri-fold.
Clear Bag Shaker Cards,  Honey Bee Stamps, Specialty Holiday Card Pack, pattern Paper, Flat, Frameless,See Through panel, acetate, Christmas Cards,mass produce,Card Making, Stamping, Die Cutting, handmade card, ilovedoingallthingscrafty, Stamps, how to,

These eleven cards were completed in less than a few hours, but I was filming some of the process which took longer. I'm sure I could have done way more in that time otherwise. This was an easy and simple way to mass-produce some really fun and unique Christmas Cards. The cool thing is that they are pretty flat as you can see from the image below and shouldn't require extra postage. Just remember less is more when adding sequins and shaker bits! By the way, all of my shaker bit mixes were custom mixed to coordinate with each card and come from the Honey Bee Shop


Clear Bag Shaker Cards,  Honey Bee Stamps, Specialty Holiday Card Pack, pattern Paper, Flat, Frameless,See Through panel, acetate, Christmas Cards,mass produce,Card Making, Stamping, Die Cutting, handmade card, ilovedoingallthingscrafty, Stamps, how to,


I hope you have been inspired to make some Clear Bag Shakers. If you have any questions feel free to message me or leave me a comment below. I will do my best to help you out. I can't promise that you won't get addicted to making these just like my other flat frameless shaker card designs that everyone is doing now!

Thanks so much for stopping by and until next time, happy crafting.
Ilda 😊

SUPPLIES
Free Item with $75 Purchase
Shop at:
HBS
Slimline Cello Bags
Slimline Cello Bags
Shop at:
HBS
A7+ Cello Bags
A7+ Cello Bags
Shop at:
HBS
Bee Creative Glue
Bee Creative Glue
Shop at:
SSS | SB | HBS
Gemini Jr. Die-Cutter
Shop at:
SSS | SB
Acetate Sheets
Acetate Sheets
Shop at:
HBS
Honey Bee Embellishements
Honey Bee Embellishments
Shop at:
HBS
Neenah  80 LB SOLAR WHITE
Neenah 80 LB SOLAR WHITE
Shop at:
SSS | AMZ
Tim Holtz 8.5 Inch Trimmer
Shop at:
SSS | SB | HA
Scor-Pal Mini Scor-Buddy
Shop at:
SSS | HBS
Scor-Pal Tape
Scor-Pal Tape
Shop at:
SSS | AMZ | HBS
TRIANGLE TRAY - BLACK
Shop at:
SSS | SK
To make supplies easy for you to find, I have linked them above. If something is no longer available I will link to a similar product. Affiliate links may be used depending on the product linked. Please help support my blog by using these links while shopping at no additional cost to you. For more information about the affiliates I use, please visit my disclaimer here. Thanks so much for all your support!

Saturday, August 21, 2021

Autumn Splendor Thank You See Through Card | Honey Bee Stamps Day 2 Autumn Splendor Sneak Peek

Thanks,Honey Bee Stamps,Fall,Autumn Splendor cover plate,Karin Brush Marker Pro,Sneak Peek,See Through Window panel,Card,Card Making, Stamping, Die Cutting, handmade card, ilovedoingallthingscrafty, Stamps, how to,

Happy Saturday!

Welcome back to Day 2 Sneak Peaks for the Autumn Splendor release from Honey Bee Stamps.

I told you yesterday, Fall was my favorite season and the colors of this card are why I do so much. The warm colors are just so pretty, especially in nature.


This Fall card features the Autumn Splendor Cover Plate Die coming soon that I decided to watercolor. There are so many ways to use this background and I can't wait to see what everyone does with it.

Make sure you stop by the Honey Bee Stamps Blog for more inspiration from the Design Team featuring more day 2 product reveals! Please note that some links will not be active until the Release goes live on August 16th, 2021 @ 9pm CST.


How pretty is this background. Once the panel was colored, I sandwiched acetate in between another layer to cover up the backside of the background and make the front panel stronger. 

Thanks,Honey Bee Stamps,Fall,Autumn Splendor cover plate,Karin Brush Marker Pro,Sneak Peek,See Through Window panel,Card,Card Making, Stamping, Die Cutting, handmade card, ilovedoingallthingscrafty, Stamps, how to,

To the top, I finished off the card with two rectangle frames. As you can see the sentiment is visible through the card. Keep reading to see what you can do to keep the sentiment a surprise.

Thanks,Honey Bee Stamps,Fall,Autumn Splendor cover plate,Karin Brush Marker Pro,Sneak Peek,See Through Window panel,Card,Card Making, Stamping, Die Cutting, handmade card, ilovedoingallthingscrafty, Stamps, how to,

I used this sentiment from the Inside: Thankful Sentiments Stamp Set. To hide the sentiment from the recipient as the card is see-through, simply add a piece of copy paper. 

Thanks,Honey Bee Stamps,Fall,Autumn Splendor cover plate,Karin Brush Marker Pro,Sneak Peek,See Through Window panel,Card,Card Making, Stamping, Die Cutting, handmade card, ilovedoingallthingscrafty, Stamps, how to,

Thank you for stopping by and I will see you back here tomorrow for day 3 sneak peeks... Happy Crafting!

Ilda πŸ’–