Showing posts with label Copic Markers. Show all posts

Monday, November 23, 2020

A Sparkly and Bright Merry Christmas Slimline Card | Studio Katia

Sparkly, Bright, Merry Christmas, Slimline Card, Studio Katia, Snowman,Copic Markers, rainbow, Distress Oxide blending,Card Making, Stamping, Die Cutting, handmade card, ilovedoingallthingscrafty, Stamps, how to,

Happy Monday Friends.

How fun would it be if the snow was all the colors of the rainbow? What a magical place it would be. A rainbow lover's dream for sure!

Anywho, let's get on with how this pretty Sparkly card came together. 

CARD DETAILS

To begin, I die cut the background panel using the larger frame from the DOTTED SLIMLINE - SET 1. I then used the INK BLENDER BRUSHES to blend out the rainbow colors using the CONFETTI STENCIL and Distress Oxide Inks. It's difficult to see from the pictures but I also stamped out a large SNOWFLAKE on the panel that I heat embossed in white.

Sparkly, Bright, Merry Christmas, Slimline Card, Studio Katia, Snowman,Copic Markers, rainbow, Distress Oxide blending,Card Making, Stamping, Die Cutting, handmade card, ilovedoingallthingscrafty, Stamps, how to,

The cute snowman comes from the HAPPY SNOWMEN that was colored using Copics and then die cut with the coordinating HAPPY SNOWMEN DIES. The Trees in the scene come from the WINTER KOBI set that I also colored with Copics and die cut with the coordinating WINTER KOBI DIES.

Sparkly, Bright, Merry Christmas, Slimline Card, Studio Katia, Snowman,Copic Markers, rainbow, Distress Oxide blending,Card Making, Stamping, Die Cutting, handmade card, ilovedoingallthingscrafty, Stamps, how to,

To create the sparkly hills, I used the TRIMMINGS BORDERS CREATIVE DIES and just extended the wave by lining up the end of the cut with the die again to fit the slimline format. I then die cut the hill piece with the DOTTED SLIMLINE - SET 1 to create the same finished edge along the bottom of the panel. To add the sparkly detail, I used an old paintbrush and loaded it with STUDIO KATIA GLUE and then painted the hills with it. I then poured the CHUNKY SPARKLE GLITTER over the wet glue and pressed it in place with a piece of scrap paper. Once it was dry I glued it onto the background panel.

Sparkly, Bright, Merry Christmas, Slimline Card, Studio Katia, Snowman,Copic Markers, rainbow, Distress Oxide blending,Card Making, Stamping, Die Cutting, handmade card, ilovedoingallthingscrafty, Stamps, how to,

For the sentiment, I stamped the Merry from the POINSETTIA BORDER on the top right-hand side of the panel and then stamped the Christmas in white onto black cardstock. I then used a small banner die from the PEONY TRIMMINGS DIES to layer on to the Merry.

Sparkly, Bright, Merry Christmas, Slimline Card, Studio Katia, Snowman,Copic Markers, rainbow, Distress Oxide blending,Card Making, Stamping, Die Cutting, handmade card, ilovedoingallthingscrafty, Stamps, how to,

For a finishing touch of more sparkle, I added some IRIDESCENT STARS to the rainbow sky.

I hope this Sparkly and Bright Christmas Card inspired you today. Thank you for stopping by and until next time... Happy Crafting!

SUPPLIES
HAPPY SNOWMEN
HAPPY SNOWMEN
Shop at:
SSS | SK
HAPPY SNOWMEN DIES
HAPPY SNOWMEN DIES
Shop at:
SSS | SK
WINTER KOBI
WINTER KOBI
Shop at:
SK
WINTER KOBI DIES
WINTER KOBI DIES
Shop at:
SK
SNOWFLAKES
SNOWFLAKES
Shop at:
SSS | SK
POINSETTIA BORDER
POINSETTIA BORDER
Shop at:
SSS | SK
CONFETTI STENCIL
CONFETTI STENCIL
Shop at:
SSS | SK
DOTTED SLIMLINE - SET 1
Shop at:
SSS | SK
TRIMMINGS BORDERS CREATIVE DIES
Shop at:
SSS | SK
PEONY TRIMMINGS DIES
Shop at:
SSS | SK
INK BLENDER BRUSHES
INK BLENDER BRUSHES
Shop at:
SSS | SK
CHUNKY SPARKLE GLITTER
Shop at:
SK
IRIDESCENT STARS
IRIDESCENT STARS
Shop at:
SSS | SK
EMBELLISHMENT WAND
EMBELLISHMENT WAND
Shop at:
SSS | SK
STUDIO KATIA GLUE
STUDIO KATIA GLUE
Shop at:
SSS | SK
TRIANGLE TRAY
TRIANGLE TRAY
Shop at:
SSS | SK
FOAM TAPE - WHITE
FOAM TAPE - WHITE
Shop at:
SSS | SK
NEENAH SOLAR WHITE 110
Shop at:
SSS | AMZ | HBS
BLACKOUT INK
BLACKOUT INK
Shop at:
SSS | HBS | IO3
ORIGINAL MISTI
ORIGINAL MISTI
Shop at:
SSS | AMZ | SB | HBS
COPIC SKETCH
COPIC SKETCH
Shop at:
AMZ
GEMINI JR. DIE CUTTER
Shop at:
SSS | AMZ | SB
Oxide Ink Pad PICKED RASPBERRY
Shop at:
SSS | SB | HBS
RIPE PERSIMMON DISTRESS OXIDE
Shop at:
SSS | SB | HBS
Oxide Ink Pad FOSSILIZED AMBER
Shop at:
SSS | SB | HBS
Oxide Ink Pad MOWED LAWN
Shop at:
SSS | SB | HBS
Oxide Ink Pad SALTY OCEAN
Shop at:
SSS | AMZ | HBS
Oxide Ink Pad WILTED VIOLET
Shop at:
SSS | SB | HBS
VersaFine ONYX BLACK Ink
Shop at:
SSS | AMZ | SB | HBS
ATELIER SHARK TOOTH
ATELIER SHARK TOOTH
Shop at:
SSS | IO3
ARCTIC WHITE POWDER
ARCTIC WHITE POWDER
Shop at:
SSS | IO3
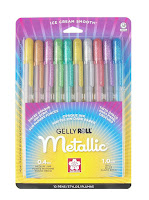
Gelly Roll Metallic Gel Ink Pen Set
Shop at:
AMZ
To make supplies easy for you to find, I have linked them above. If something is no longer available I will link to a similar product. Affiliate links may be used depending on the product linked. Please help support my blog by using these links while shopping at no additional cost to you. For more information about the affiliates I use, please visit my disclaimer here. Thanks so much for all your support!

Wednesday, July 8, 2020

A Flourishing Note Hello Friendship Card | Studio Katia


card making, Copic Markers, Die cutting, Floral Friendship Card, Flourishing Note, handmade card, hearts, Hello, how to, ilovedoingallthingscrafty, stamping, Stamps, Studio Katia,

Hey everyone!

Today I am sending you all a Flourishing Hello. Love this new FLOURISHING NOTE stamp from Studio Katia, it is so pretty and it makes for such a beautiful friendship card 😍

CARD DETAILS

To begin this beauty, I stamped out the image from the FLOURISHING NOTE and colored it in using Copic markers. I then used the coordinating FLOURISHING NOTE DIES to cut out the image as well as the Hello die 3 times from black cardstock that I will use later on.

card making, Copic Markers, Die cutting, Floral Friendship Card, Flourishing Note, handmade card, hearts, Hello, how to, ilovedoingallthingscrafty, stamping, Stamps, Studio Katia,

For the background, I first used the inside of the SCALLOP HEARTS COVER to die cut the hearts from the white panel. I then used the largest scallop frame from the DOTTED PATTERNS SET 4 to finish off the card panel.

Behind the heart openings, I glued a piece of pale pink cardstock to add another layer of color. I then die cut another layer of blue hearts using the SCALLOP HEARTS COVER to add a blue edge to the white hearts, I then popped the hearts back in place with foam tape and glued the Flourishing Card Stamp in place.

TIP: I also used the same blue cardstock piece that I die cut the blue heart edges from to glue onto the card base as the center of the panel gets covered up and won't be seen.

card making, Copic Markers, Die cutting, Floral Friendship Card, Flourishing Note, handmade card, hearts, Hello, how to, ilovedoingallthingscrafty, stamping, Stamps, Studio Katia,

For finishing touches, I added some new BLUEBELL PEARLS and then added the hello that I had stacked and glued together from the FLOURISHING NOTE DIES and then added Glossy Accents to.

Wishing you all a wonderful day! Thank you for stopping by and until next time... Happy Crafting 👋


SUPPLIES
FLOURISHING NOTE
FLOURISHING NOTE
Shop at:
SSS | SK
FLOURISHING NOTE DIES
Shop at:
SSS | SK
SCALLOP HEARTS COVER
Shop at:
SSS | SK
DOTTED PATTERNS SET 4
Shop at:
SSS | SK
EMBELLISHMENT WAND
EMBELLISHMENT WAND
Shop at:
SSS | SK
BLUEBELL PEARLS
BLUEBELL PEARLS
Shop at:
SSS | SK
STUDIO KATIA GLUE
STUDIO KATIA GLUE
Shop at:
SSS | SK
FOAM TAPE - WHITE
FOAM TAPE - WHITE
Shop at:
SSS | SK
NEENAH SOLAR WHITE 110
Shop at:
SSS | AMZ | HBS
ORIGINAL MISTI
ORIGINAL MISTI
Shop at:
SSS | AMZ | SBC | HBS
BLACKOUT INK
BLACKOUT INK
Shop at:
SSS | IO3
COPIC SKETCH
COPIC SKETCH
Shop at:
AMZ
GEMINI JR. DIE CUTTER
Shop at:
SSS | AMZ | SBC
GLOSSY ACCENTS
GLOSSY ACCENTS
Shop at:
SSS | AMZ | SBC | HBS
Uni-Ball Impact Gel Pen
Shop at:
SSS | AMZ | SBC
To make supplies easy for you to find, I have linked them above. If something is no longer available I will link to a similar product. Affiliate links may be used depending on the product linked. Please help support my blog by using these links while shopping at no additional cost to you. For more information about the affiliates I use, please visit my disclaimer here. Thanks so much for all your support!

Friday, June 12, 2020

Superheros Wear Scrubs Thank You Cards and DIY Nurse Key Chains | Erin Lee Creative


Superheros Wear Scrubs Thank You Cards and DIY Key Chains | Erin Lee Creative

Happy Friday my friends!

Here in Edmonton, we are starting phase 2 of the COVID Relaunch. Personally, I think it may be too soon and I fear that the numbers of cases will start to spike. I hope I'm wrong. Thankfully our city has had really low numbers, but that could change really fast.

Anyways, the point of this post today is to share some fabulous cards that I made for my colleagues at work featuring the Superhero Scrubs Stamp Set from Erin Lee Creative. Erin kindly sent me this set when she found out I was a nurse and I now want to thank all the awesome Oncology Nurses I work with as they really are superheroes!

CARD DETAILS

As mentioned above I used the Superhero Scrubs Stamp Set to stamp out all the images using Blackout Ink and then colored them in using Copic markers. For the images that are popped up I fussy cut them out. Each card was done the same way using different sentiments and designs. I then just finished them with some Iridescent Crystals from Studio Katia. The scallop frame I used comes from Honey Bee Stamps.

I also created 3 keychains to go along with each card. To create the key chain I stamped the image onto shrink plastic and then colored the opposite side that was stamped using Copic markers. I then punched a hole above the image and then fussy cut the plastic and used my heat gun to Shrink it. I will have a video on Instagram to show you how that was done.

LOVE how these turned out. Scroll through to see the differences in each card.

Superheros Wear Scrubs Thank You Cards and DIY Key Chains | Erin Lee Creative

Superheros Wear Scrubs Thank You Cards and DIY Key Chains | Erin Lee Creative

Superheros Wear Scrubs Thank You Cards and DIY Key Chains | Erin Lee Creative

Superheros Wear Scrubs Thank You Cards and DIY Key Chains | Erin Lee Creative

Superheros Wear Scrubs Thank You Cards and DIY Key Chains | Erin Lee Creative

Superheros Wear Scrubs Thank You Cards and DIY Key Chains | Erin Lee Creative

Superheros Wear Scrubs Thank You Cards and DIY Key Chains | Erin Lee Creative


I hope you were inspired by these Superheros Wear Scrubs Thank You Cards and DIY Key Chains.

Have a wonderful day!

Thank you for stopping by 😊
Until next time... Happy Crafting 👋