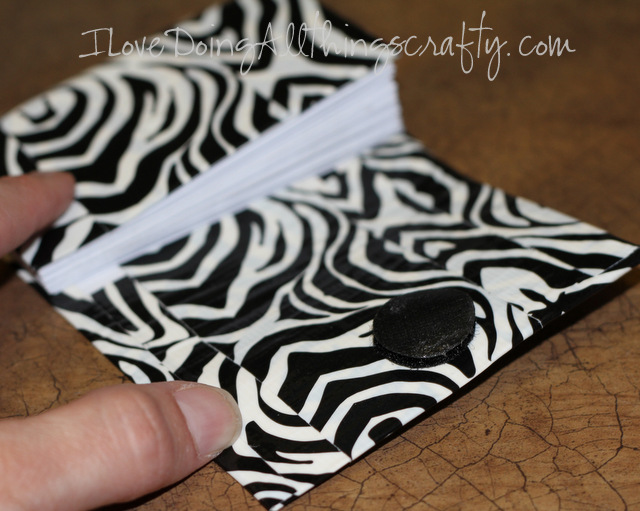
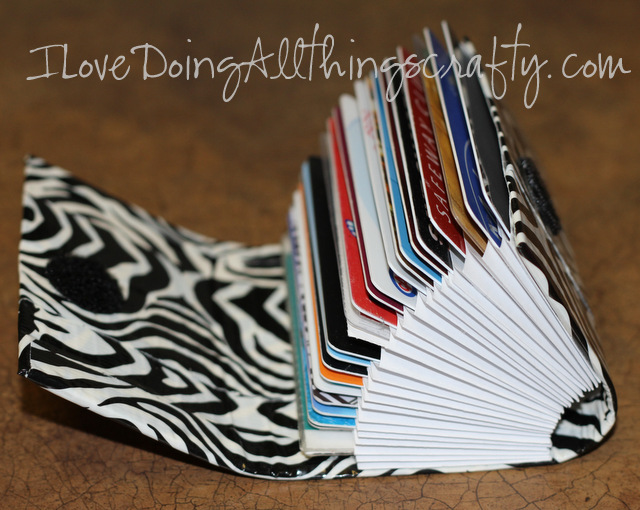
This one is for all the shoppers out there!!! I think your just going to love this idea!
If you are anything like me you have a ton of cards taking up precious space in your already crowded wallet! NOT anymore!!!!
About 2 years ago now I had an idea to make a credit card wallet after working on some pockets that I had created for a mini album. I actually sold them on Etsy, but since I closed the shop down I thought I would share the idea with everybody!
Here is my original card wallet... was getting pretty worn out! Even though it was made out of paper, I'm surprised it lasted this long! You would not believe how many compliments and inquiries I've had on it!!!
While I was shopping at Home Depot on the weekend with my DH, I saw decorative duct tape... I had seen it many times before but it wasn't until then that I had my light bulb moment! Why not line my card stock with duct tape! Brilliant... It would now last forever! Or until I get sick of the pattern, lol!
So here is how to make your own...
Supplies:
- double-sided tape
- duct tape (I guess if your a guy you might like the regular kind, hehe)
- envelopes (I bought mine at the dollar store, but you could probably use recycled ones)
- a piece of scrap card stock
- First I cut my envelope ends to 4.5 x 9.2 cm or for my US friends, 1 3/4 x 3 5/8 inches ( I used 25 pockets for this wallet)
- I then applied my double-sided tape around the outer edges of the pocket (make sure to go as close to the top and bottom edge as possible, but not the sides... come in about 3mm or 1/8 of an inch from the outer edge)
- Line it up with the next pocket and adhere them together, ensure it is all lined up and that the opening of the pockets is in the same direction!
Repeat until all pockets are glued together.
Next, take the scrap card stock, and cut it to 20 x 9.5 cm or 8 x 3 3/4 inches, then place the edge of the paper or the sticky side of the duct tape.
Next cut a little slit on the duct tape where the paper ends and fold the duct over on to itself.
Then take that same piece of duct tape and adhere it to the paper. Bend over the edge of the duct tape that remains and this will create a nice clean outer edge... (Confused yet??? I would be! lol! Hopefully, the pics are self-explanatory!)
Repeat the last step for the other side.
Continue by cover the remaining paper down the middle (ensure you cut a piece long enough to cover the other side as well)
Next glue the pockets to the inside bottom of the duct tape layer, making sure to align the top edges.
Then wrap the duct layer all the way around the pockets until it overlaps on the front of the wallet leave enough room for the wallet to expand and for the credit cards to stick out at the top. Then adhere the back of the pockets to the inside of the duct tape layer.
To secure it closed I used a Velcro dot. The easiest way to ensure that the dots line up is to take both top and bottom pieces of Velcro and center it on the inner lid of the wallet, then fold it closed.
Once you open it the dot will be left on the other side of the wallet! EASY right?!
Finally, fill with all your plastic! (I use this for the cards I don't use every day, the important ones are kept in my main wallet!)
There you go... just pull it out when you need to!
Fits perfectly in a side pocket of my purse ;)
I hope you like this tutorial and if you make one I would love to see it!
Happy crafting!
UPDATE
February 10, 2017
Check out VERSION 3 of the DIY Credit/Loyalty Card Duct Tape Wallet
or watch me make it on YouTube!


ADORABLE ! LOVE IT
ReplyDeleteThanks! ;)
DeleteI guarantee you love it more once you make your own! I love mine!!! Thanks for stopping by!
ReplyDeleteWhat size envelope did you use for this?
ReplyDeleteHi Kristin, I believe it's a standard envelope size, the ones I used measured 3 5/8 inches in width. The length doesn't really matter because you only need the ends of the envelop. Hope that helps!
DeleteThis is sooo fun Ilda!! Love it!
ReplyDeleteThanks so much for sharing this at The DIY Dreamer.. From Dream To Reality! Don't forget to swing by this evening.. I can't wait to see what you link up! :)
Thanks Christine!
DeleteAhh! Genius! I love this idea! Thank for sharing!
ReplyDeleteThanks Chrissy!
DeleteI love it! Thanks for linking up this fab DIY project at Craft Junkie Too this week-end -- I have it featured over at my facebook fan page so check that out here --http://www.facebook.com/pages/Craft-Junkie-Too/162946417058976
ReplyDeleteAlso, you can stop back by my blog and grab the featured me button for your blog if you'd like. Thanks again for sharing. :)
Tracy
Thanks Tracy! Always fun to join the party!
DeleteOH!MY!!!I just saw this on FB because Tracy had it featured!!!OMG!!!I have never,ever, seened something soooooooo ADORABLE!!!This is AMAZING!!!!TFS
ReplyDeleteNew Follower!
Craftingwithcreativem.blogspot.com
Thank you and welcome! I hope you get the chance to make your own! ;)
DeleteFeaturing you tomorrow! Stop by and link up again!
ReplyDeleteKim@Madeinaday
Thanks Kim!!! Love partying with you ;)
DeleteThis is an incredibly cool idea! I pinned it so that I can give it a try! So neat!
ReplyDeleteThanks Jess! I hope you get a chance to make your own, they are awesome. Just today I received a compliment from a cashier on mine!
DeleteThis is really cute! In my area (Ohio) it is possible to buy sheets of duct tape that are 8.5"x11" that would really make this easy. Thanks!
ReplyDeleteOh that would make it soooo much easier!!! I wonder if I can find some here? I never knew that even existed! Thanks ;)
DeleteIsn't printed duck tape SO cute! I always stare and it and decide which one I like the best...but haven't bought anything yet because I don't know what I'd do with it :)
ReplyDeleteThis is so cute! I use a coin purse for my "extra" cards - but I love this idea!!! Way cute :) I'm a new follower!!! Love your blog already!
Brie @ Breezy Pink Daisies
Hi Brie!!! Welcome! I hope you get a chance to make one... I promise you will love it, and so will everyone else! I'll for sure stop by your blog! ;)
DeleteLiterally just what I need! You have yourselves a new follower thanks to this posting in its self! haha
ReplyDeleteshall be having a crack at it next week :D
New follower, follow back?
Muchos Smiles,
bb, xoxo
http://ispythroughthekeyhole.blogspot.co.uk/
Hi Beccy! I would love to see your version of the wallet! I promise it will be your next favorite thing! I can't tell you how much I love mine! I did get to check out your blog last night and am your newest follower :) BTW, you are simply beautiful!
DeleteHI!YOUR BLOG WITH YOUR CRAFT IS AMASING !!!!!CAN I HAVE IT THE SVG FILES BECAUSE I WANT MAKE A LOT OF THINGS OF THAT?
ReplyDeleteHi! Not sure what you are asking? The SVG files must be purchased from a company that sells them... like SVG Cuts. http://www.svgcuts.com/ Hope that helps!
DeleteClever!! Thank you for linking up with the Clever Chicks this week; I hope you’ll join us again!
ReplyDeleteCheers,
Kathy Shea Mormino
The Chicken Chick
http://www.The-Chicken-Chick.com
Thanks Kathy! And for sure will link up again :)
DeleteJust found your blog and must say that your are a very talented lady!!! I love this idea and am going to make one as soon as my online class is over!
ReplyDeleteThanks so much for sharing!
~Donna
I've been looking for this very thing!!! Thank you so much for your incredible video tutorial!
ReplyDeletei never know the use of adobe shadow until i saw this post. thank you for this! this is very helpful. Cracking
ReplyDeleteThis comment has been removed by a blog administrator.
ReplyDeleteThis comment has been removed by a blog administrator.
ReplyDeleteThis comment has been removed by a blog administrator.
ReplyDelete