Monday, September 4, 2023

Hello Autumn Blessings Slimline Card | Honey Bee Stamps

Hello, Autumn Blessings, Slimline, Card,Honey Bee Stamps,Fall Card,how to,handmade card,Stamps,ilovedoingallthingscrafty,stamping, diecutting,cardmaking, apple barrel,heartfelt harvest,

Hello, dear friends! 👋

It's astonishing how fast September has arrived! Tomorrow, my kids will resume their school routine, and in the blink of an eye, Autumn will grace us with its presence. Here in western Canada, we anticipate its early arrival, as nature is already beginning to paint our surroundings with vibrant it's colors.

Today's card was all things fall-inspired, featuring some new goodies from the Heartfelt Harvest Release and some timeless favorites from Honey Bee Stamps.

CARD RECIPE


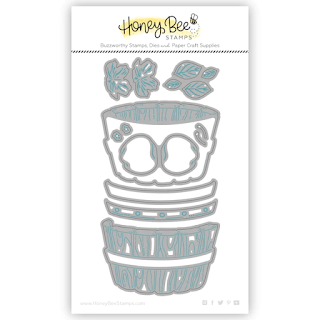
Apple Barrel - Die cut all the pieces for the Lovely Layers: Apple Barrel Dies. I added some distress oxide ink to the edges and gel pen details and then pieced it together. 


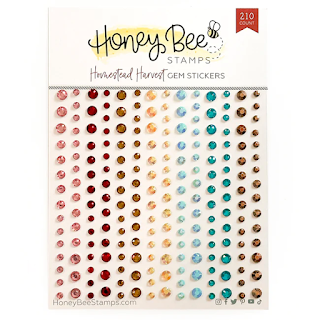
Sunflower  - Die cut the pieces for Lovely Layers: Sunflower Dies. Add ink to the start of the petals near the center. I used a dark brown Copic marker to darken the center. Glue the layers together and finish the center with the copper gems from the Homestead Harvest Gems. To create a stem I just cut a thin piece of the same cardstock color I used for the leaves. 


Sentiment - Comes from the Slimline Sentiments: Eyelet Dies. Cut out the hello 3 times, stack and glue them together. To make it glossy, I added Bee Creative Watermark Ink to ink the top and then used clear embossing powder to melt onto it. 

Hello, Autumn Blessings, Slimline, Card,Honey Bee Stamps,Fall Card,how to,handmade card,Stamps,ilovedoingallthingscrafty,stamping, diecutting,cardmaking, apple barrel,heartfelt harvest,

Background - The Slimline frame I used comes from the Slimline Sentiments: Stitched Dies, to the panel I ink blended Broken China Distress Oxide Ink. I then used the fence, grass, and cloud dies from the Horizon Slimline Borders to finish the background elements.


Hello, Autumn Blessings, Slimline, Card,Honey Bee Stamps,Fall Card,how to,handmade card,Stamps,ilovedoingallthingscrafty,stamping, diecutting,cardmaking, apple barrel,heartfelt harvest,

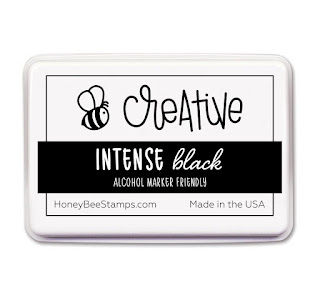
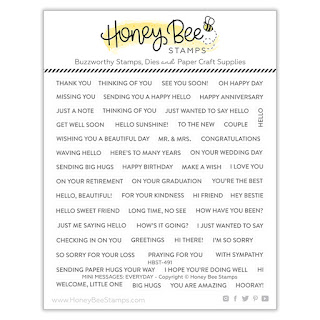
On the inside, I combined a couple of sentiments from the Heartfelt Hello Stamps, using Intense Black Ink and some creative masking. 

Hello, Autumn Blessings, Slimline, Card,Honey Bee Stamps,Fall Card,how to,handmade card,Stamps,ilovedoingallthingscrafty,stamping, diecutting,cardmaking, apple barrel,heartfelt harvest,

I'm not too upset Fall is just around the corner as I do love the Pumpkin Spice Lattes, the freshly baked apple pies, and the beautiful colors of the Fall. I hope this Hello Autumn Blessings Slimline Card also gets you a little excited about it too.

Thank you for stopping by and until next time... Happy Crafting!
Ilda 🍎🌻🍂

SUPPLIES
Lovely Layers: Apple Barrel Dies
Shop at:
SSS | HBS
Heartfelt Hello Stamps
Shop at:
SSS | HBS
Horizon Slimline Borders
Shop at:
SSS | HBS
Lovely Layers: Sunflower Dies
Shop at:
SSS | SB | HBS
Slimline Sentiments: Stitched Dies
Shop at:
SSS | SB | HBS
Slimline Sentiments: Eyelet Dies
Shop at:
SSS | SB | HBS
Intense Black Ink Pad
Shop at:
SSS | SB | HBS
Bee Creative Watermark Ink
Shop at:
HBS
Honey Bee Reverse Tweezers
Shop at:
SSS | HBS
Homestead Harvest Gems
Shop at:
SSS | HBS
Bee Creative Bitty Buzz Cutter
Shop at:
HBS
Detail Blender Brushes
Shop at:
SSS | HBS
Bee Creative Glue
Bee Creative Glue
Shop at:
SSS | SB | HBS
White Foam Dots
White Foam Dots
Shop at:
HBS
Broken China Oxide Ink
Shop at:
SSS | SB | HBS
Oxide Ink Pad Mowed Lawn
Shop at:
SSS | SB | HBS
Oxide Ink Pad VINTAGE PHOTO
Shop at:
SSS | SB | HBS
Finger Sponge Daubers
Shop at:
SSS
Platinum 6 Die Cutting Platform
Shop at:
SSS | SB | SB
New Mini Misti
New Mini Misti
Shop at:
SSS | SB | HBS
Bearly Art Precision Glue
Shop at:
SSS | AMZ
CRYSTAL CLEAR Emb Pwd
Shop at:
SSS | IO3
Heat Gun
Heat Gun
Shop at:
AMZ
White Gelly Roller Pen
Shop at:
SSS | AMZ | SB | HBS

To make supplies easy for you to find, I have linked them above. If something is no longer available I will link to a similar product. Affiliate links may be used depending on the product linked. Please help support my blog by using these links while shopping at no additional cost to you. For more information about the affiliates I use, please visit my disclaimer here. Thanks so much for all your support!

Enjoyed this post? Never miss out on future posts by Following this Blog

Wednesday, August 30, 2023

Wagon Wheel Floral Arrangement Hello Card | Honey Bee Stamps

how to,handmade card,Stamps,ilovedoingallthingscrafty,stamping, diecutting,cardmaking, Wagon Wheel,Floral Arrangement Card, Hello,Fall,Honey Bee Stamps,Ink Blending,distress oxide inks,

Hello again friends! 

Today the Honey Bee Stamps design team is celebrating the Heartfelt Harvest Release with an Instagram Hop. So if you like prizes, I would suggest you hop on over to 👉 Instagram and Hop along as 2 people will win $50 to the Honey Bee Stamps Shop!

Here is the card I am featuring on the Hop. Isn't she pretty!?

how to,handmade card,Stamps,ilovedoingallthingscrafty,stamping, diecutting,cardmaking, Wagon Wheel,Floral Arrangement Card, Hello,Fall,Honey Bee Stamps,Ink Blending,distress oxide inks,

For this card, I die-cut all the pieces and assembled them together. For the wheel, I used colored cardstock and for the flowers, I used white cardstock and ink blended each stem. I then arranged them and snipped a couple of the flowers apart to balance the bouquet. Since the center is the messiest part, I covered that up with a burlap bow. Below is the breakdown of all the pieces.

CARD RECIPE

To make supplies easy for you to find, I have linked them above. If something is no longer available I will link to a similar product. Affiliate links may be used depending on the product linked. Please help support my blog by using these links while shopping at no additional cost to you. For more information about the affiliates I use, please visit my disclaimer here. Thanks so much for all your support!

how to,handmade card,Stamps,ilovedoingallthingscrafty,stamping, diecutting,cardmaking, Wagon Wheel,Floral Arrangement Card, Hello,Fall,Honey Bee Stamps,Ink Blending,distress oxide inks,

Hope you love this Wagon Wheel Floral Arrangement Hello Card as much as I do! Thank you for stopping by and until next time... Hope to see you all over on Instagram. Happy Hopping!
Ilda 🍂

Enjoyed this post? Never miss out on future posts by Following this Blog

Tuesday, August 29, 2023

Rainbow Inspired Pumpkin Harvest Card | Honey Bee Stamps

Colorful, Pumpkin Harvest, Card,Honey Bee Stamps,how to,handmade card,Stamps,ilovedoingallthingscrafty,stamping, diecutting,cardmaking,heartfelt harvest,Ink Blending,Rainbow Inspired,

Hello, my friends!

I am back again today to share some more fabulous Heartfelt Harvest Inspiration from the latest Honey Bee Stamps release. 

I am in love with this card and all the colors. Even Fall cards can have rainbow colors, right?! 

All the die cuts were cut from white cardstock, then ink blended using oxide inks, and then pieced together. 


Colorful, Pumpkin Harvest, Card,Honey Bee Stamps,how to,handmade card,Stamps,ilovedoingallthingscrafty,stamping, diecutting,cardmaking,heartfelt harvest,Ink Blending,Rainbow Inspired,

CARD RECIPE

Background - Burlap 3D Embossing Folder

Pumpkins - Lovely Layers: Fall Bounty Dies

Flowers - Lovely Layers: Apple Barrel Dies

Fence - Lovely Layers: Barn Wood Fence Dies

Grass - Grass Border Die

Sentiment - August FREE BEE Stamps and Die

Embellishments - Harvest Pearl Stickers

Tool - Detail Blender Brushes

Ink - Intense Black Ink Pad


To make supplies easy for you to find, I have linked them above. If something is no longer available I will link to a similar product. Affiliate links may be used depending on the product linked. Please help support my blog by using these links while shopping at no additional cost to you. For more information about the affiliates I use, please visit my disclaimer here. Thanks so much for all your support!


Colorful, Pumpkin Harvest, Card,Honey Bee Stamps,how to,handmade card,Stamps,ilovedoingallthingscrafty,stamping, diecutting,cardmaking,heartfelt harvest,Ink Blending,Rainbow Inspired,

Come back tomorrow for more Heartfelt Harvest Inspiration and for the Instagram Hop where you know there will be prizes to be won!


Hope you enjoyed this Colorful Pumpkin Harvest Card. Thank you for stopping by and until next time... Happy Crafting!

Ilda 🍂

Enjoyed this post? Never miss out on future posts by Following this Blog

Monday, August 28, 2023

Coffee Gift Card/Shaker Card | Honey Bee Stamps

how to,handmade card,Stamps,ilovedoingallthingscrafty,stamping, diecutting,cardmaking, coffee, gift card, shaker card, creative,Honey Bee Stamps,heartfelt harvest,

Is it a shaker card or a gift card? Well, it's actually both!

Hello friends and happy Monday! I am back today with more inspiration for the Heartfelt Harvest Release from Honey Bee Stamps. The gift card holder part was actually an afterthought. I initially was just going to glue the coffee tag to the acetate but then I had the idea to pop it up using foam on each side, the width of a gift card. I then added a floating heart beneath it to act as a stopper for the gift card, and voila... a two-for-one card design was born!

On the inside of the shaker pocket, I used die-cut coffee beans and some gingerbread shaker bits that I had. 

how to,handmade card,Stamps,ilovedoingallthingscrafty,stamping, diecutting,cardmaking, coffee, gift card, shaker card, creative,Honey Bee Stamps,heartfelt harvest,

CARD SUPPLIES
I hope this Coffee Card Shaker inspired you for the next time you are looking for a creative way to include a gift card in your card. 

Thank you for stopping by and until next time... Happy Crafting!
Ilda ⛾

To make supplies easy for you to find, I have linked them above. If something is no longer available I will link to a similar product. Affiliate links may be used depending on the product linked. Please help support my blog by using these links while shopping at no additional cost to you. For more information about the affiliates I use, please visit my disclaimer here. Thanks so much for all your support!

Enjoyed this post? Never miss out on future posts by Following this Blog

Sunday, August 27, 2023

Enjoy the Little Things - Mushroom Card | Honey Bee Stamps

heartfelt harvest,how to,handmade card,Stamps,Diecutting,ilovedoingallthingscrafty,Honey Bee Stamps,stamping,Cardmaking,Lovely layers Mushroom,

Hello, my friends! I hope you are having a wonderful Sunday. 

Today I am sharing this darling card featuring a bunch of new products from Honey Bee Stamps Heartfelt Harvest Release that is available now!

I am in love with these cute little mushrooms! There are so many ways of coloring mushrooms as there are so many varieties out there but I wanted to make mine cute, and whimsical and keep it simple and I think this sentiment complimented them perfectly. 

Besides, die cutting and a little ink blending, this card was pretty simple to put together. 

CARD SUPPLIES

heartfelt harvest,how to,handmade card,Stamps,Diecutting,ilovedoingallthingscrafty,Honey Bee Stamps,stamping,Cardmaking,Lovely layers Mushroom,

I hope you all take some time to enjoy the little things today! I'll be back again tomorrow to share more Heartfelt Harvest Inspiration.

Thanks for stopping by and until next time... Happy Crafting!
Ilda 🍄

To make supplies easy for you to find, I have linked them above. If something is no longer available I will link to a similar product. Affiliate links may be used depending on the product linked. Please help support my blog by using these links while shopping at no additional cost to you. For more information about the affiliates I use, please visit my disclaimer here. Thanks so much for all your support!

Enjoyed this post? Never miss out on future posts by Following this Blog

Monday, August 21, 2023

Sand Castle Retirement Shaker Card | Honey Bee Stamps

Sand Castle, Retirement, Shaker Card, Honey Bee Stamps, how to,handmade card,Stamps,ilovedoingallthingscrafty,stamping, diecutting,cardmaking,Frameless Shaker Card,

Hello Friends. If you have been following me on Instagram you would know that we have just returned from our 6-week long, summer vacation! And, as happy as I am to be home a little part of me wishes I was still on a beach building sandcastles instead of making them from paper. Oh well, it was amazing while it lasted and now it's time for reality. For those of you that want to see more about our travels, I have all the highlights saved in my Stories over on Instagram

So anyways, lately our hospital has witnessed a wave of retirements among people I've known for over 25 years. Although saying farewell fills me with a tinge of sadness, there's an undeniable thrill and perhaps even a twinge of envy, considering the long path that lies ahead before my own retirement years arrive.

Today's post is dedicated to my esteemed nursing colleagues. I am well aware that many of them are eagerly anticipating well-deserved travels and the pursuit of a leisurely life, perhaps lounging on a sun-kissed beach!

CARD RECIPE
 
Now, let's dive into the details of this card.

1. Begin by crafting the backdrop for the shaker pocket. For the background, I used a piece of paper from the Vitamin Sea Paper Pad. To give the card some dimension, I trimmed the sandy part of the paper and set it aside, and then just glued the top part of the paper to an A2 card panel. 
2. Next, I stamped out the sentiment onto the top part of the panel using stamps from the Mini Messages Stamp set. 
3. Wrap the panel to create the shaker pocket. For shaker bits, I used AURORA LIGHTS Confetti Mix, seal the top flap to close the pocket, and attach it to a card base.
4. To the front of the panel, glue the sand layer that was trimmed earlier using foam tape to add some dimension. This will hide the shaker bits until the card is shaken. 
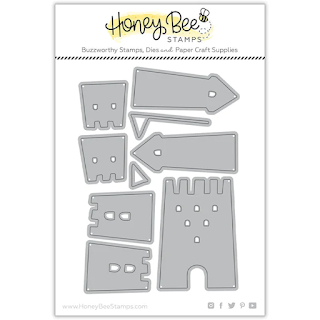
5. Die-cut the Sand Castle using the Sand Castle Builder Dies. I first added some ink splatters then inked up the edges to give it a sand-like texture.
6. Add the castle to the card front using foam to create dimension.
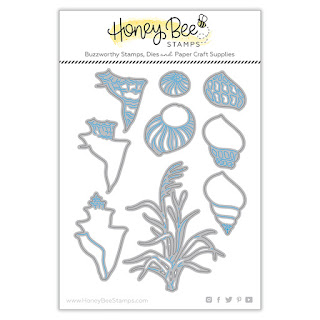
7. For an extra touch of realism, I added some beach grasses from the Lovely Layers: Seashore Dies. For balance, I just cut the grass in half and added it to each side of the scene with a little glue.
8. Finally, for a touch of sparkle I added some red gems to the castle flags.

Here is a photo, of what it looks like when the shaker bits nestled beneath the inviting sand layer.

Sand Castle, Retirement, Shaker Card, Honey Bee Stamps, how to,handmade card,Stamps,ilovedoingallthingscrafty,stamping, diecutting,cardmaking,Frameless Shaker Card,

And here it is again, with the shaker bits in motion. Almost like it comes alive, dancing with the fervor of water bubbles frothing in the mighty ocean.

Sand Castle, Retirement, Shaker Card, Honey Bee Stamps, how to,handmade card,Stamps,ilovedoingallthingscrafty,stamping, diecutting,cardmaking,Frameless Shaker Card,

I hope this fun retirement shaker has inspired you today. Of course, this card could be used for any summer/beach purpose by simply changing the sentiment.


Thank you for stopping by and until next time... Happy Crafting and relaxing!
Ilda 🏖

SUPPLIES
Vitamin Sea Paper Pad
Shop at:
SSS | SB | HBS
Sand Castle Builder Dies
Shop at:
HBS
Lovely Layers: Seashore Dies
Shop at:
SSS | SB | HBS
Mini Messages Stamps
Shop at:
SSS | SB | HBS
Detail Blender Brushes
Shop at:
SSS | HBS
AURORA LIGHTS Confetti Mix
Shop at:
HBS
Tear Tape XL Roll | 1/4
Tear Tape XL Roll | 1/4"
Shop at:
HBS
Bee Creative Glue
Bee Creative Glue
Shop at:
SSS | SB | HBS
Intense Black Ink Pad
Shop at:
SSS | SB | HBS
Black Foam Dots 1/2
Black Foam Dots 1/2"
Shop at:
HBS
Make it Merry Gems
Make it Merry Gems
Shop at:
SSS | SB | HBS
Honey Bee Reverse Tweezers
Shop at:
SSS | HBS
Bee Creative Bitty Buzz Cutter
Shop at:
HBS
Stamping Pressure Tool
Shop at:
HBS
Copic Opaque White Pigment
Shop at:
SSS | AMZ
GATHERED TWIGS Oxide Ink
Shop at:
SSS | SB | HBS
New Mini Misti
New Mini Misti
Shop at:
SSS | SB | HBS
To make supplies easy for you to find, I have linked them above. If something is no longer available I will link to a similar product. Affiliate links may be used depending on the product linked. Please help support my blog by using these links while shopping at no additional cost to you. For more information about the affiliates I use, please visit my disclaimer here. Thanks so much for all your support!

Enjoyed this post? Never miss out on future posts by Following this Blog

Monday, August 7, 2023

Double Stencil Balloon Birthday Cards | Honey Bee Stamps

Double Stencil, Balloon, Birthday Cards,Honey Bee Stamps,Balloon Shaker Card,hidden inlaid die cut, happy, how to,handmade card,Stamps,ilovedoingallthingscrafty,stamping, diecutting,cardmaking

Hello, my friends!

It probably feels like forever since my last post! Right now my family and I should be returning to Portugal after our Mediterranean Cruise and spending a little more time with our family before heading back home. I hope you are all enjoying your Summer and I will be back to regular posts soon. Make sure you are following me on Instagram as I will most likely be sharing photos of our vacation. Now back to the post!

Summertime is the busiest time of year for birthdays. As a majority of our family was born from June to August. So I thought it was the perfect time to share some of the birthday cards I will be sending out this year.

For both of my cards today, I created the backgrounds using a similar Double Stencil Technique. Basically starting off with one stencil and then adding detail to that stencil with another one. 

CARD RECIPE

1. For this hidden inlay card, I began by blending out the background using Layering Balloon Stencils by blending the yellow at the bottom up to the middle of the panel. I then repeated the process this time blending from the top toward the middle, resulting in the orange blend in the center.
2. Leaving the balloon stencil in place, I then laid the smallest dots stencil of the Polka Dot Background Stencils over top and repeated the blending in the same order. Once you remove the stencils you are left with a crisp white background and a fun design on the balloons.
3. Next, I die-cut the panel using the Happy Happy Happy A2 Cover Plate. I then ran the same plate through the die-cut machine a couple more times to create the layers for staking the letters for the hidden inlay design. Once all glued and stacked, glue the letters back into the panel that was glued to the card front.
4. Stamp out the sentiments to the card front using Intense Black Ink with sentiments from the Mini Messages Stamp set. 
5. Foil the birthday greeting for the center using the Birthday Hot Foil Plate done in AURA Glimmer Foil, then die cut using the coordinating die. Die cut a few more layers to stack and then glue in the center of the card panel.
6. Finish the card by adding some sparkle. I used gems from the Rainbow Birthday sticker set. 

Double Stencil, Balloon, Birthday Cards,Honey Bee Stamps,Balloon Shaker Card,hidden inlaid die cut, happy, how to,handmade card,Stamps,ilovedoingallthingscrafty,stamping, diecutting,cardmaking

This next card panel was done the same way except for using the other balloon stencil with a larger dot stencil and using the blue ink pad instead of the pink ink pad for blending. 

Double Stencil, Balloon, Birthday Cards,Honey Bee Stamps,Balloon Shaker Card,hidden inlaid die cut, happy, how to,handmade card,Stamps,ilovedoingallthingscrafty,stamping, diecutting,cardmaking

For this traditional shaker, I first die-cut the opening using a frame from the Sweet Stacks: Rectangles set, then glued acetate to the outer balloon frame, used foam tape to build up the shaker space and then filled the shaker area with AURORA LIGHTS Confetti Mix. The center of the panel was glued to the card base first before attaching the shaker window.

To the front of the card, I stamped out the sentiment from the Big Time Kindness Stamp set using Bee Creative Gold Metallic Ink Pad and then heat set it with gold Emb. pwd. It then was die cut with the coordinating die and glued to the shaker front. 

Double Stencil, Balloon, Birthday Cards,Honey Bee Stamps,Balloon Shaker Card,hidden inlaid die cut, happy, how to,handmade card,Stamps,ilovedoingallthingscrafty,stamping, diecutting,cardmaking

I hope you will give this double stencil technique a try. It is a great way to add a new look to one-layer stencils.


Thank you for stopping by and until next time... Happy Crafting!
Ilda 🎈

SUPPLIES
Layering Balloon Stencils
Shop at:
SSS | SB | HBS
Polka Dot Background Stencils
Shop at:
SSS | SB | HBS
Happy Happy Happy A2 Cover Plate
Shop at:
SSS | SB | HBS
Sweet Stacks: Rectangles
Shop at:
SSS | SB | HBS
Birthday Hot Foil Plate
Shop at:
SSS | SB | HBS
Birthday Wishes Dies
Shop at:
SSS | SB | HBS
Big Time Kindness
Big Time Kindness
Shop at:
SSS | SB | HBS
Big Time Kindness Dies
Shop at:
SSS | SB | HBS
Mini Messages Stamps
Shop at:
SSS | SB | HBS
Detail Blender Brushes
Shop at:
SSS | HBS
Background Blender Brushes
Shop at:
SSS | HBS
Bee Creative Acetate Sheets
Shop at:
HBS
Bee Creative Gold Metallic Ink Pad
Shop at:
SSS | SB | HBS
Intense Black Ink Pad
Shop at:
SSS | SB | HBS
AURORA LIGHTS Confetti Mix
Shop at:
HBS
Rainbow Birthday Gems
Shop at:
SSS | SB | HBS
Honey Bee Reverse Tweezers
Shop at:
SSS | HBS
Bee Creative Glue
Bee Creative Glue
Shop at:
SSS | SB | HBS
Bee Creative Bitty Buzz Cutter
Shop at:
HBS
Stamping Pressure Tool
Shop at:
HBS
Atelier Ink Sweet Petunia
Shop at:
SSS | IO3
Atelier Ink Bee Sting Yellow
Shop at:
SSS | IO3
Atelier Ink Peacock Blue
Shop at:
SSS | IO3
Magic Powder Bag
Magic Powder Bag
Shop at:
SSS
Gold Rush Emb. Pwd.
Gold Rush Emb. Pwd.
Shop at:
SSS | IO3
Glimmer Specialty Card Stock
Shop at:
SB | HBS
AURA Glimmer Foil
AURA Glimmer Foil
Shop at:
SSS | SB | HBS | SB
Hot Foil System
Hot Foil System
Shop at:
SSS | SB | HBS | SB
Platinum 6 Die Cutting Platform
Shop at:
SSS | SB | SB
New Mini Misti
New Mini Misti
Shop at:
SSS | SB | HBS
Double-Sided Foam Tape
Shop at:
SSS | AMZ
To make supplies easy for you to find, I have linked them above. If something is no longer available I will link to a similar product. Affiliate links may be used depending on the product linked. Please help support my blog by using these links while shopping at no additional cost to you. For more information about the affiliates I use, please visit my disclaimer here. Thanks so much for all your support!

Enjoyed this post? Never miss out on future posts by Following this Blog