Monday, February 10, 2020

Love Is In the Air Slimline Valentine's Day Card | Honey Bee Stamps


Love Is In the Air Slimline Valentine's Day Card | Honey Bee Stamps

Hello, my Honey Bee Friends!

Have you ever gone on a Hot Air Balloon ride? It is still on my bucket list of one of the things I would love to do! One of these days...

Since Valentine's Day is just around the corner, I thought I would squeeze in another lovey, dovey card to celebrate the Day. Although I think this card could be used for so many other occasions simply by switching out the sentiment I used.

  CARD DETAILS

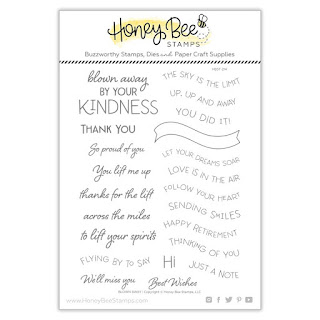
I began this card by cutting out a piece of Bristol Paper to create the Slimline card front to measure 8.5 x 4 inches. I then stamped out the Hot Air Balloon Stamps from the UP, UP AND AWAY set and then covered them up with some masks.

Next, I used the BACKGROUND BLENDER BRUSHES to blend out some colorful clouds using Atelier Inks and the OUTDOOR SCENE BUILDER Stencils.

Love Is In the Air Slimline Valentine's Day Card | Honey Bee Stamps

Once the clouds were done, I removed the masks and colored in the balloons using Copic markers. I should have used Neenah paper for the Copic coloring, but at the time I thought only about the ink blending.  So I went with a Bristol paper which wasn't the best choice for alcohol markers as the paper is much too absorbent, making it more difficult to blend the alcohol inks. Regardless, I made it work, lol!

Love Is In the Air Slimline Valentine's Day Card | Honey Bee Stamps

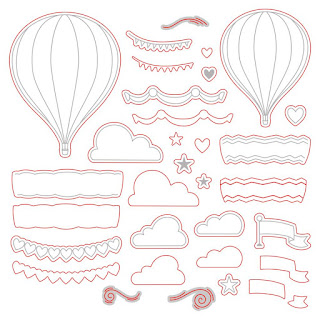
I then stamped out the banners to embellish each hot air balloon from the UP, UP AND AWAY set and then cut them out with the coordinating UP, UP AND AWAY DIES dies.

Next, I stamped out the Love is in The Air sentiment from the BLOWN AWAY set onto the stamped banner and used the coordinating BLOWN AWAY DIES to cut it out and then foam mounted it on to the center of the middle balloon.

Love Is In the Air Slimline Valentine's Day Card | Honey Bee Stamps

To finish off and embellish this colorful card, I used some sticker gem from the OCEAN BREEZE GEM STICKER pack to add some bling to the middle balloon and added a sprinkle of SWEETHEARTS CLAY HEARTS here and there.

It is hard to see from these pictures, but I used a sparkle Gelly Roll pen to add highlights and details to the balloons.

I hope this Love Is In the Air Slimline Valentine's Day Card inspired you today and I wish you all a great Valentine's Day this year.  As for me on Valentine's, you can find our family at a Boston Pizza eating a Heart-shaped Pizza which has become a family tradition that started over 20 years ago when my husband and I first started dating. Yes, we are that romantic and now we even include the kids, lol! Do you have Valentine's Tradition? Let me know in the comment below if you do💖

Thank you for stopping by 😊
Until next time... Happy Crafting 👋


SUPPLIES
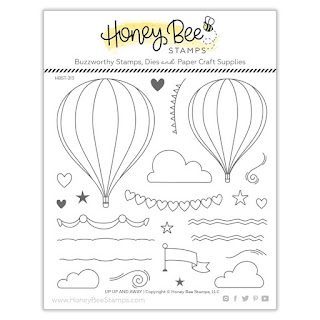
UP, UP AND AWAY
UP, UP AND AWAY
Shop at:
SSS | SBC | HBS
UP, UP AND AWAY DIES
Shop at:
SSS | SBC | HBS
BLOWN AWAY
BLOWN AWAY
Shop at:
SSS | SBC | HBS
BLOWN AWAY DIES
BLOWN AWAY DIES
Shop at:
SSS | SBC | HBS
OUTDOOR SCENE BUILDER STENCILS
Shop at:
SSS | SBC | HBS
BACKGROUND BLENDER BRUSHES
Shop at:
SSS | HBS
OCEAN BREEZE GEM STICKERS
Shop at:
SSS | SBC | HBS
SWEETHEARTS CLAY HEARTS
Shop at:
HBS
BLACKOUT INK
BLACKOUT INK
Shop at:
SSS | IO3
Atelier Marilyn Red
Atelier Marilyn Red
Shop at:
SSS | IO3
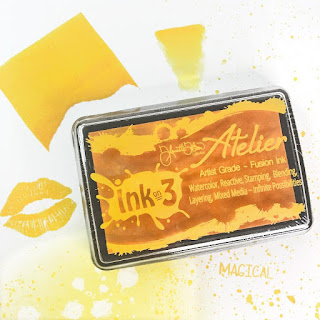
Atelier Marigold Orange
Shop at:
SSS | IO3
Atelier Bee Sting Yellow
Shop at:
SSS | IO3
Atelier Peacock Blue
Shop at:
SSS | IO3
Atelier My Jam Purple
Shop at:
SSS | IO3
GEMINI JR. DIE CUTTER
Shop at:
SSS | AMZ | SBC
MINI MISTI
MINI MISTI
Shop at:
SSS | AMZ | SBC | SK | HBS
Strathmore Bristol Pad
Shop at:
SSS | AMZ
EMBELLISHMENT WAND
EMBELLISHMENT WAND
Shop at:
SSS | SK
STUDIO KATIA GLUE
STUDIO KATIA GLUE
Shop at:
SSS | SK
FOAM TAPE - WHITE
FOAM TAPE - WHITE
Shop at:
SSS | SK
Gelly Roll Stardust Pen
Shop at:
SSS | AMZ | SBC

To make supplies easy for you to find, I have linked them above. If something is no longer available I will link to a similar product. Affiliate links may be used depending on the product linked. 
Please help support my blog by using these links while shopping at no additional cost to you. For more information about the affiliates I use, please visit my disclaimer here. Thanks so much for all your support!

Friday, February 7, 2020

Hey Gorgeous, Colorful Birthday Card | Ink On 3 | Coloring with Atelier Inks


Hey Gorgeous, Colorful Birthday Card | Ink On 3 | Coloring with Atelier Inks

Hello, my friends! 

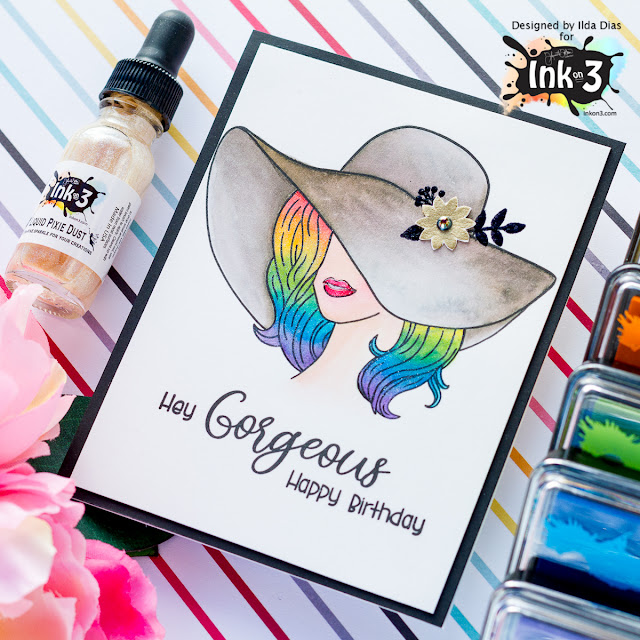
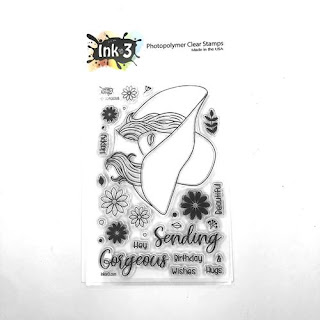
I am back again today with a colorful Gorgeous Birthday Card featuring the new HEY GORGEOUS stamp set recently released from Ink On 3. I love the size of this large stamp image! Plus, it comes with a bunch of little flower accessories and great sentiments to create some great girlfriend cards.

If you know me I love all things rainbow, so of course rather then just painting one plain old hair color I had to use all of them, lol!

CARD DETAILS

For this card, I began by stamping out the image from the HEY GORGEOUS set using BLACKOUT INK onto Bristol paper.

Hey Gorgeous, Colorful Birthday Card | Ink On 3 | Coloring with Atelier Inks

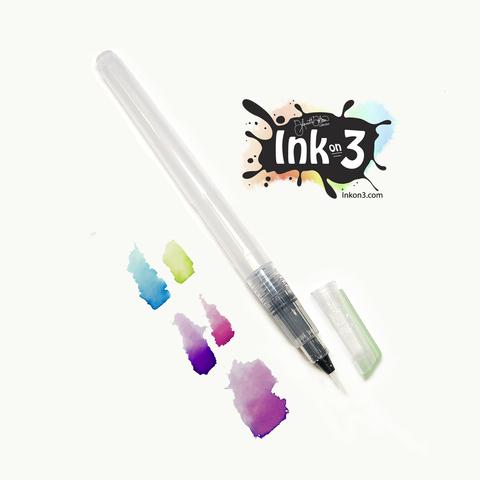
I then began by water coloring her skin using a small tip water brush pen. To create the skin color I used a blend of Atelier Twiggy Brown, Bee Sting Yellow, Marilyn Red, and Marigold Orange.  To her cheeks, I added a touch of Marilyn Red color.

Next, I colored her hair in rainbow order starting with Atelier Marilyn Red, Marigold Orange, Bee Sting Yellow, Goddess Green, Peacock Blue, and My Jam Purple.

For her hat, I watercolored it using Atelier Twiggy Brown, I love the shade you get with the brown as it resulted in a leathery kinda look.

To finish off her lips I used the ink from the Re-inker Marilyn Red because I wanted a deeper shade of red on her lips.

Hey Gorgeous, Colorful Birthday Card | Ink On 3 | Coloring with Atelier Inks

Once the image was dry, I stamped out the black florals on the hat using JUICY INK and heat set it using the BLACK AS NIGHT EP. For the Gold Flower, I used GOLD RUSH EP and fussy cut it out to add to the hat.

I then finished off the card by stamping out the sentiments from the HEY GORGEOUS set and then used LIQUID PIXIE DUST to add sparkle to her lips and hair. If you are on Instagram watch my feed as I will try posting a clip of the sparkle this card has as pictures can never do it justice.

For more finishing touches, I added a pearl to the flower and glossy accents to her lips for additional shine!

I hope you found this Hey Gorgeous Colorful Birthday Card inspiring. For more Ink On 3 inspiration click HERE. Wishing you all a bright and colorful day!

Thank you for stopping by 😊
Until next time... Happy Crafting 👋


SUPPLIES


HEY GORGEOUS
HEY GORGEOUS
Shop at:
IO3
BLACKOUT INK
BLACKOUT INK
Shop at:
SSS | IO3
SMALL TIP WATER BRUSH PEN
Shop at:
SSS | IO3
Re-inker Marilyn Red
Re-inker 
Marilyn Red
Shop at:
IO3
Atelier Marilyn Red
Atelier Marilyn Red
Shop at:
SSS | IO3
Atelier Marigold Orange
Shop at:
SSS | IO3
Atelier Bee Sting Yellow
Shop at:
SSS | IO3
Atelier Goddess Green
Shop at:
SSS | IO3
Atelier Peacock Blue
Shop at:
SSS | IO3
Atelier My Jam Purple
Shop at:
SSS | IO3
Atelier Twiggy Brown
Shop at:
SSS | IO3
JUICY INK
JUICY INK
Shop at:
SSS | IO3
Gold Rush Embossing Powder
Shop at:
SSS | IO3
Black As Night Embossing Powder
Black As Night EP
Shop at:
SSS | IO3
LIQUID PIXIE DUST
LIQUID PIXIE DUST
Shop at:
SSS | IO3
Strathmore Bristol Pad
Shop at:
SSS | AMZ
MINI MISTI
MINI MISTI
Shop at:
SSS | AMZ | SBC | SK | HBS
EMBELLISHMENT WAND
Embellishment WAND
Shop at:
SSS | SK
EXOTIC ONYX PEARLS
EXOTIC ONYX 
PEARLS
Shop at:
SSS | SK
STUDIO KATIA GLUE
STUDIO KATIA GLUE
Shop at:
SSS | SK

To make supplies easy for you to find, I have linked them above. If something is no longer available I will link to a similar product. Affiliate links may be used depending on the product linked. 
Please help support my blog by using these links while shopping at no additional cost to you. For more information about the affiliates I use, please visit my disclaimer here. Thanks so much for all your support!

Friday, January 31, 2020

Crafty Rainbow Birthday Wishes Card | Artsy Trimmings | Studio Katia


Crafty Rainbow Birthday Wishes Card | Artsy Trimmings | Studio Katia by ilovedoingallthingscrafty.com

Hello Friends and Happy Friday!

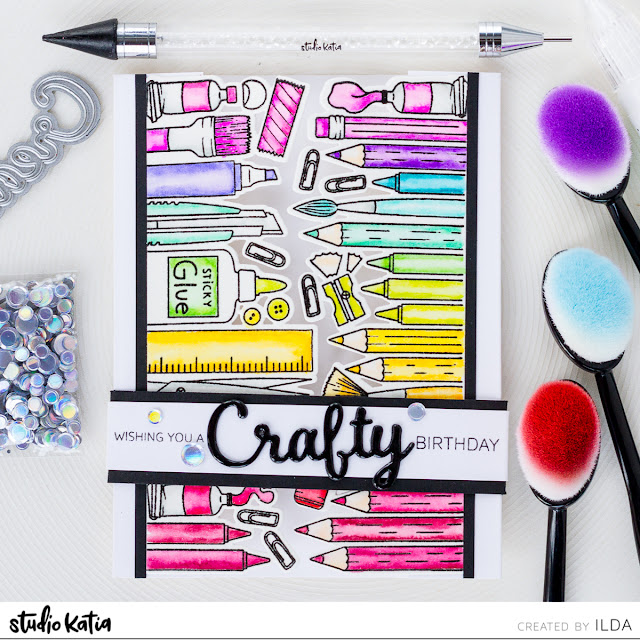
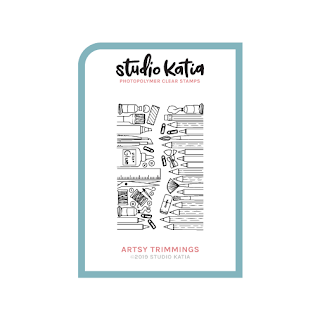
Hopefully, by now you all know how much I love all things crafty, well I love all things rainbow too! So for today's card, I combined my two loves to create this Crafty Birthday Wishes Card using the new ARSTY TRIMMINGS stamp set and the coordinating ARTSY TRIMMINGS die set from the latest Studio Katia Release.

  CARD DETAILS

To begin I stamped out the crafty images from the ARSTY TRIMMINGS set using VersaFine Onyx ink and heat set it with clear embossing powder. I then colored in the crafty images in using Arteza Brush Pens in Rainbow order. Once the paper was dry, I die cut the pieces out using the coordinating ARTSY TRIMMINGS DIES. I then attached each piece to the sides of a Gatefold Card base that I had trimmed the top flaps to allow for the cut details to peek through. I then cut a thin black strip to finish off the edge of the die-cut pieces.

Crafty Rainbow Birthday Wishes Card | Artsy Trimmings | Studio Katia by ilovedoingallthingscrafty.com

The next thing I did was die cut the Crafty out 3 times (which comes included in the ARTSY TRIMMINGS DIES set), stacked and glued them together. I then cut a strip of white paper about 1- inch in diameter and long enough to wrap around the card to create the belly band. I then wrapped the paper around the card front to figure out where to create the scorelines. I left a bit of a wiggle room on the sides because I will attach the white strip to a wider black strip of paper later on.

Crafty Rainbow Birthday Wishes Card | Artsy Trimmings | Studio Katia by ilovedoingallthingscrafty.com

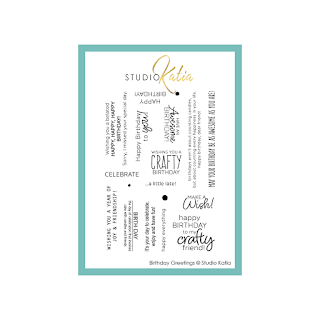
Once the band was measured and scored and before I glued the top white strip to the bottom strip I stamped out the sentiments on to the front of what will be the belly band. I used a stamp from the BIRTHDAY GREETINGS set and masked out the crafty while stamping out the sentiment, ensuring I left enough room for the crafty word die that I then glued in place and topped off with Glossy Accents.

Crafty Rainbow Birthday Wishes Card | Artsy Trimmings | Studio Katia by ilovedoingallthingscrafty.com

To finish off this card I glued down a few of the SILVER FEVER CONFETTI using my favorite new tool the EMBELLISHMENT WAND! Oh, BTW, I didn't use the blending brushes on the card, they were just crafty props for the photos this time 😁

I hope you think of this Crafty Rainbow Birthday Wishes Card the next time you need to mail out a  crafty friends' birthday card this year ✀🌈🎂

Thank you for stopping by 😊
Until next time... Happy Crafting 👋


SUPPLIES
ARSTY TRIMMINGS
ARSTY TRIMMINGS
Shop at:
SSS | SK
ARTSY TRIMMINGS DIES
Shop at:
SSS | SK
BIRTHDAY GREETINGS
BIRTHDAY GREETINGS
Shop at:
SSS | SK
EMBELLISHMENT WAND
EMBELLISHMENT WAND
Shop at:
SSS | SK
SILVER FEVER CONFETTI
Shop at:
SSS | SK
STUDIO KATIA GLUE
STUDIO KATIA GLUE
Shop at:
SSS | SK
Strathmore 400 Series Watercolor Pad
Shop at:
AMZ
MINI MISTI
MINI MISTI
Shop at:
SSS | AMZ | SBC | SK | HBS
VersaFine ONYX BLACK Ink
Shop at:
SSS | AMZ | SBC | HBS
CRYSTAL CLEAR Emb Pwd
Shop at:
SSS | IO3
ARTEZA BRUSH PENS
ARTEZA BRUSH PENS
Shop at:
AMZ
GEMINI JR. DIE CUTTER
Shop at:
SSS | AMZ | SBC
GLOSSY ACCENTS
GLOSSY ACCENTS
Shop at:
SSS | AMZ | SBC | HBS

To make supplies easy for you to find, I have linked them above. If something is no longer available I will link to a similar product. Affiliate links may be used depending on the product linked. 
Please help support my blog by using these links while shopping at no additional cost to you. For more information about the affiliates I use, please visit my disclaimer here. Thanks so much for all your support!