Wednesday, September 5, 2012

3D Apple Treat Box | Back to School Gift For Teacher | SVGCuts

HELLO! I'm finally back from our European travels! Yay! The trip was amazing, but I am glad to be home :) I know you all must have been going through a bit of withdrawal from my blog, lol! No worries I already have the crafting itch... so I've already started crafting away! Yes, it's back to REALITY... and as you might have already noticed I have made some changes to the appearance of the blog... I guess that will always be changing and under construction! But what do you think so far...better right?

So yesterday was the first day of school for the kids... Their school actually started last week, but we were still away. I don't think they minded at all missing a few days! So here they are just before leaving for school. Maia is in grade 1 and Tomas is in grade 3. I can't believe that they are this big already! Time just keeps flying!


So here are the treats I made for the teachers this year. What teacher doesn't like apples? Especially when they're filled with chocolates?! I hope they like them... I love how they turned out!

teacher gifts,3D apple,treat box,Silhouette Cameo,Cricut, ilovedoingallthingscrafty,SVGCuts,Back to School,

Here is a closer look, aren't they adorable?!

teacher gifts,3D apple,treat box,Silhouette Cameo,Cricut, ilovedoingallthingscrafty,SVGCuts,Back to School,

The files for the 3D Apple come from SVG Cuts MISS BAKER'S CLASSROOM SVG KIT. I can't say enough good things about their files. Mary is amazing at what she does! The paper I used is from Fancy Pants Designs, their Off to School collection.

I hope you liked them too!
Happy crafting :)


Monday, August 27, 2012

Maia's Room Make Over - Room Reveal!

It's all finally come together! My daughter's room is all done... she now has a little girly room, no longer "baby" room!

Here is the "before" picture of her room...

And here is the now...

Maia's Room Make Over - Room Reveal!

I had some room over her closet that was pretty bare so I thought I would cut out her name and do some vinyl lettering. The "M" I found at Micheal's and just painted it white.

Maia's Room Make Over - Room Reveal!


Maia's Room Make Over - Room Reveal!

I hope you have enjoyed these last posts on my daughter's room makeover! Hopefully, it will be a few years until she gets tired of this room, lol!

Happy crafting and redecorating :)

Tuesday, August 21, 2012

Maia's Room Make Over - Lamp Shade - Part 6


I bought this boring lamp at IKEA for my daughter. So I thought I would pretty it up a little... the fastest project ever!


I tied some bows using some wired ribbon.


Then using a pin I placed it through the ribbon and attached it to the lampshade.

Maia's Room Make Over - Lamp Shade - Part 6

Simple, pretty and girly now!

Happy crafting :)
Friday, August 17, 2012

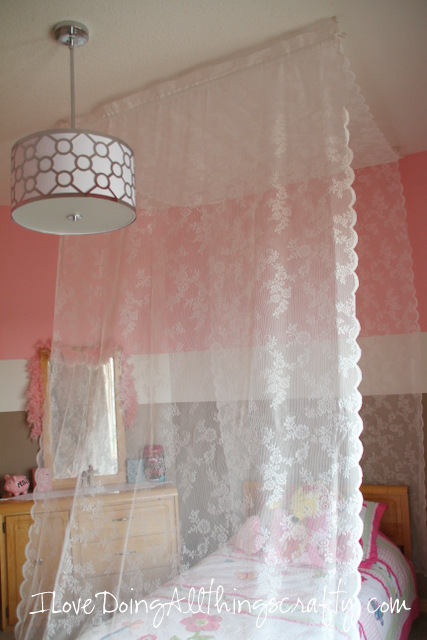
Maia's Room Make Over - DIY Canopy Bed - Part 5

My daughter Maia has always wanted a canopy bed, as I think all little girls like. So I thought I could make one for her, as I wasn't about to buy a whole new set of furniture for her. We will wait until she outgrows her bed for now!

Here is what I did...


TIP: To help me find the right measurements before I drilled holes into the ceiling I used thumbtacks to pin elastic bands to the ceiling so I could see exactly where to hang up my curtain rod!


Here is a closer look! I bought these rods at IKEA for $1.99 on sale, woohoo!


I had gone to the fabric store to look for some shear-type material, but for the amount, I needed it was going to cost me a fortune! So good ol' IKEA had the perfect curtains. All I needed was 3 panels so I had to buy 2 packages.


All I did then was sew the panels to each other, leaving pockets for where the curtain rods would be placed through. 


Since I didn't like the ends that the rods came with, I used my own round crystal beads and just hot glued them in place.

Maia's Room Make Over - DIY Canopy Bed - Part 5

And Voila! Super quick and easy canopy bed! 

I hope you liked this tutorial and maybe even make one for your little princess!

Happy crafting :)

Monday, August 13, 2012

Maia's Room Make Over - DIY Desk Station - Part 4

Today I'm going to share with you a project I made for my daughter's room. Above her desk, all there was, was a bare wall. You all know what happens when there is a bare wall behind a desk? Yes, you guessed it... scratches, dents, crayons, holes in the wall. Well, that was my fear of having a 6-year-old next to a freshly painted wall, lol! 

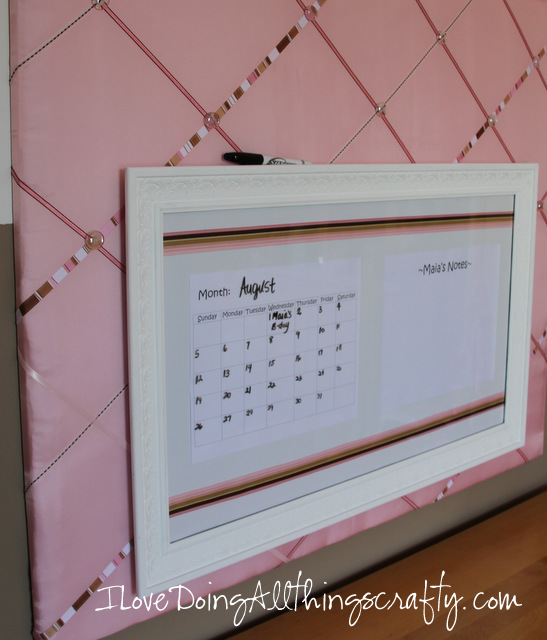
At first, I thought I would just hang up an eraser or corkboard up, but then I thought I would like to see something a bit prettier than I could coordinate with her room.  So this is what I created!  Pretty, right? The best thing is that it's so functional!

Maia's Room Make Over - DIY Desk Station - Part 4

Here is how I did it!


Supplies I used - Art canvas, picture frame (bought a while ago in Micheal's clearance bin, knew it would come in handy one day!), acrylic paint, hot glue, batting, fabric, glass beads, and ribbon.


I moved the hooks from the frame to where I needed them to be.


I needed to hang this picture frame on the wood pieces of the canvas so I had to figure out how to center it on the canvas.


Pretty easy to feel where the wood was through the canvas so I found my center and placed nails on each side, for where the picture frame would hang.


It would have been way easier if I had just spray painted my frame, but I didn't have any on hand so acrylic paint it was! It took 3 coats. Thank goodness it was a hot day, so it dried up pretty fast!


Then I laid the batting down on the canvas and just cut around it.


Did the same with the pink fabric.


I used hot glue to secured the edges to the frame. My staple gun just broke, this worked just as well!


Poke the nails through the fabric, so I knew where to hang my frame.


Put the picture frame back together, I used some ribbon to embellish it and just printed out a basic calendar and another piece of paper that read Maia's Notes. The glass from picture frames makes perfect dry-erase boards!


Decorated the canvas with crisscrossing some ribbon, and then added some glass beads as buttons where the ribbon intersected. They look so cute!

Maia's Room Make Over - DIY Desk Station - Part 4

And here it is again! My daughter loves this idea! She is always drawing on it and soon it will be filled up with her pictures and artwork! 

Hope you liked this post! 
Happy crafting :)

Thursday, August 9, 2012

Maia's Room Make Over - Lighting - Part 3

Not sure why had chosen this light fixture originally. My guess is that at the time we built our house (about 9 years ago), this kind of lighting was the "in" thing! Well, it isn't any longer, time to come down! Not feminine at all!

Maia's Room Make Over - Lighting - Part 3

So here is what we replaced it with. I found this fixture at Costco! 

Maia's Room Make Over - Lighting - Part 3

Perfect look, great price, and Maia loved it!


Monday, August 6, 2012

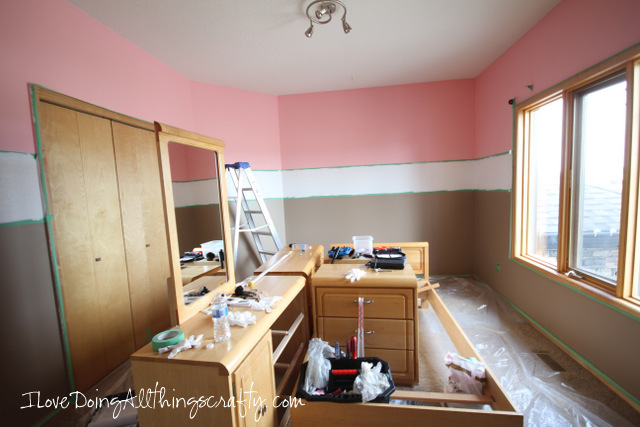
Maia's Room Make Over - Sneak Peak - Part 2

As you know we have been working on updating my daughter's room. She wasn't a "baby" anymore, so it was time for a room makeover!

Maia's Room Make Over - Sneak Peak - Part 2

Here is Maia, excited for what was about to happen to her room! Although after the first few hours she kept asking when it was all going to be done, lol!

Maia's Room Make Over - Sneak Peak - Part 2

And here is a  peak of the colors we chose, kinda reminds me of Neapolitan Ice cream, doesn't it?!
It was a lot of work covering up the permanent black marker, but it was actually easier than what I had anticipated. Thanks to the Kilz Clean start primer


Then to do the 3 colors was also challenging. The pink was the first color painted, then the brown. Once they were both dry then we painted the white stripe along the middle.  The funniest part was pulling off the tape, only a few spots needed touching up because of bleeding under the tape. Overall, I was happy with my first ever paint job!

Happy crafting "painting" everyone :)


Wednesday, August 1, 2012

Maia's Room Make Over - The Before - Part 1


Today I thought I would start sharing with you all my daughter Mais's room makeover! This post will focus on the room as it was before.

When I was pregnant with my son (over 8 years ago), I had painted this mural of Winnie the Pooh in this bedroom (at the time his nursery). Then when my daughter came along she moved into the nursery which is now her room. Well, she turns 6 next week and tells me all the time that she is no longer a baby. So I guess it was time that my beautiful work of art came down :(

Maia's Room Make Over - The Before - Part 1

For those of you that want to know how I did this on the walls, it was pretty simple actually. First I drew out a picture of what I wanted. Since I had a really tall wall I wanted it to look like Pooh was using all his friends help to get to the honeycomb. I used pics from a coloring book and combined pictures of Eeyore, Tigger, and Pooh so they were all stacked on each other.

Maia's Room Make Over - The Before - Part 1

I then took the picture I drew out and projected it on the wall. Using a pencil with light pressure I traced it all out. Then I painted everything with acrylic paints. 

Maia's Room Make Over - The Before - Part 1


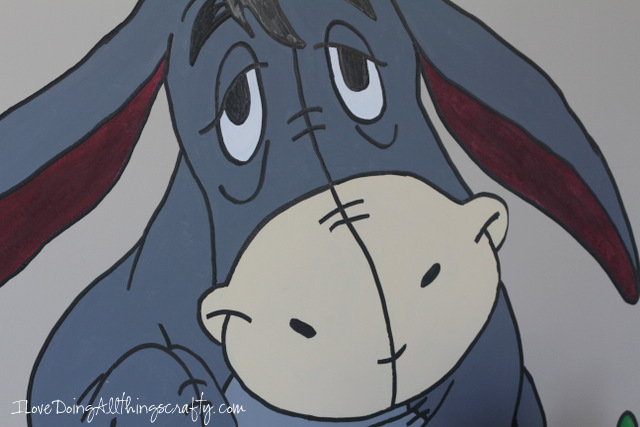
Poor Eeyore looks so sad!

Maia's Room Make Over - The Before - Part 1

Maia's Room Make Over - The Before - Part 1

Maia's Room Make Over - The Before - Part 1

Piglet and Roo, watching from afar! 
I miss seeing these cute characters in her room already... it's hard when you realize you don't have babies anymore! :(

Next post painting the room!
Happy crafting :)