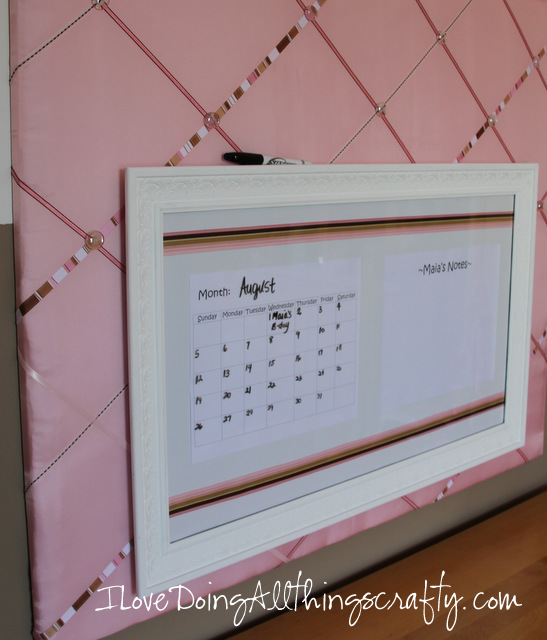
Today I'm going to share with you a project I made for my daughter's room. Above her desk, all there was, was a bare wall. You all know what happens when there is a bare wall behind a desk? Yes, you guessed it... scratches, dents, crayons, holes in the wall. Well, that was my fear of having a 6-year-old next to a freshly painted wall, lol!
At first, I thought I would just hang up an eraser or corkboard up, but then I thought I would like to see something a bit prettier than I could coordinate with her room. So this is what I created! Pretty, right? The best thing is that it's so functional!
Here is how I did it!
Supplies I used - Art canvas, picture frame (bought a while ago in Micheal's clearance bin, knew it would come in handy one day!), acrylic paint, hot glue, batting, fabric, glass beads, and ribbon.
I moved the hooks from the frame to where I needed them to be.
I needed to hang this picture frame on the wood pieces of the canvas so I had to figure out how to center it on the canvas.
Pretty easy to feel where the wood was through the canvas so I found my center and placed nails on each side, for where the picture frame would hang.
It would have been way easier if I had just spray painted my frame, but I didn't have any on hand so acrylic paint it was! It took 3 coats. Thank goodness it was a hot day, so it dried up pretty fast!
Then I laid the batting down on the canvas and just cut around it.
Did the same with the pink fabric.
I used hot glue to secured the edges to the frame. My staple gun just broke, this worked just as well!
Poke the nails through the fabric, so I knew where to hang my frame.
Put the picture frame back together, I used some ribbon to embellish it and just printed out a basic calendar and another piece of paper that read Maia's Notes. The glass from picture frames makes perfect dry-erase boards!
Decorated the canvas with crisscrossing some ribbon, and then added some glass beads as buttons where the ribbon intersected. They look so cute!
And here it is again! My daughter loves this idea! She is always drawing on it and soon it will be filled up with her pictures and artwork!
Hope you liked this post!
Happy crafting :)


I absolutely LOVE all your crafty DIYS!
ReplyDeleteI've nominated you for the liebster award.
Hope it help gets you some more followers :)
Muchos Smiles,
bb, xoxo
www.ispythroughthekeyhole.blogspot.co.uk
Thanks so much bb!
DeleteWhat a beautiful room you've created!
ReplyDeleteThanks!
DeleteThis is great! You are so creative! I love how it turned out!
ReplyDeleteThanks for sharing with my Super Link Party! :-)
Kids sure do love dry erase boards. Super cute!
ReplyDelete